Ever wonder how Quiznos and Pizza Hut cook their food perfectly every time? It’s due to automation. You too can develop this type of automation on your own home grill with a simple conveyor system! Here’s how.

What will the next generation of Make: look like? We’re inviting you to shape the future by investing in Make:. By becoming an investor, you help decide what’s next. The future of Make: is in your hands. Learn More.

Project Steps

Assemble all necessary parts.

Additional parts are needed other than the three pictures shown on the left. To review the complete list of parts needed, please review the “Tools & Parts” section.

Cut four 2” sections and two 5” sections of the multipurpose 1”x3”x1/8” aluminum angle. The four 2” sections will comprise the upright supports for the bearings while the 5” sections will make the bases on each end.

I chose to use 1″x3″x1/8″ angle. Alternative angle dimensions can also be used. For example, a 2″x2″ angle is shown in the picture.

I found that with softer varieties of aluminum, a basic hacksaw is sufficient for cutting purposes.

Alternate materials may be used for this purpose. However, alternate materials must be sufficient to handle the heat associated with the grilling application.
Drill holes for the bearing mounting hardware in the four 2″ sections of the aluminum angle that you just cut, and holes to mount the uprights to the base (the two 5″ sections of the aliminum angle).

I chose to use #10-24 machine screws for this step. They fit the bearings and I had the hardware available.

I also chose to use self-aligning bearings sized for a 1/2″ shaft. The bearings are fairly inexpensive and the 1/2″ shaft diameter is sturdy enough to keep the wire mesh (conveyor material) taught.

Insert the shaft while simultaneously securing the uprights to the base angles.

Use the #10-24 machine bolts and the #10-24 machine nuts for this purpose.

There will be two different shafts needed for this task; one shaft will be plain (non-threaded) while one shaft will have a threaded end.

The shaft with the threaded end will be used to mount the pulley on.

Once the two separate supports have been assembled, determine the desired location for mounting the supports on the grill of choice.

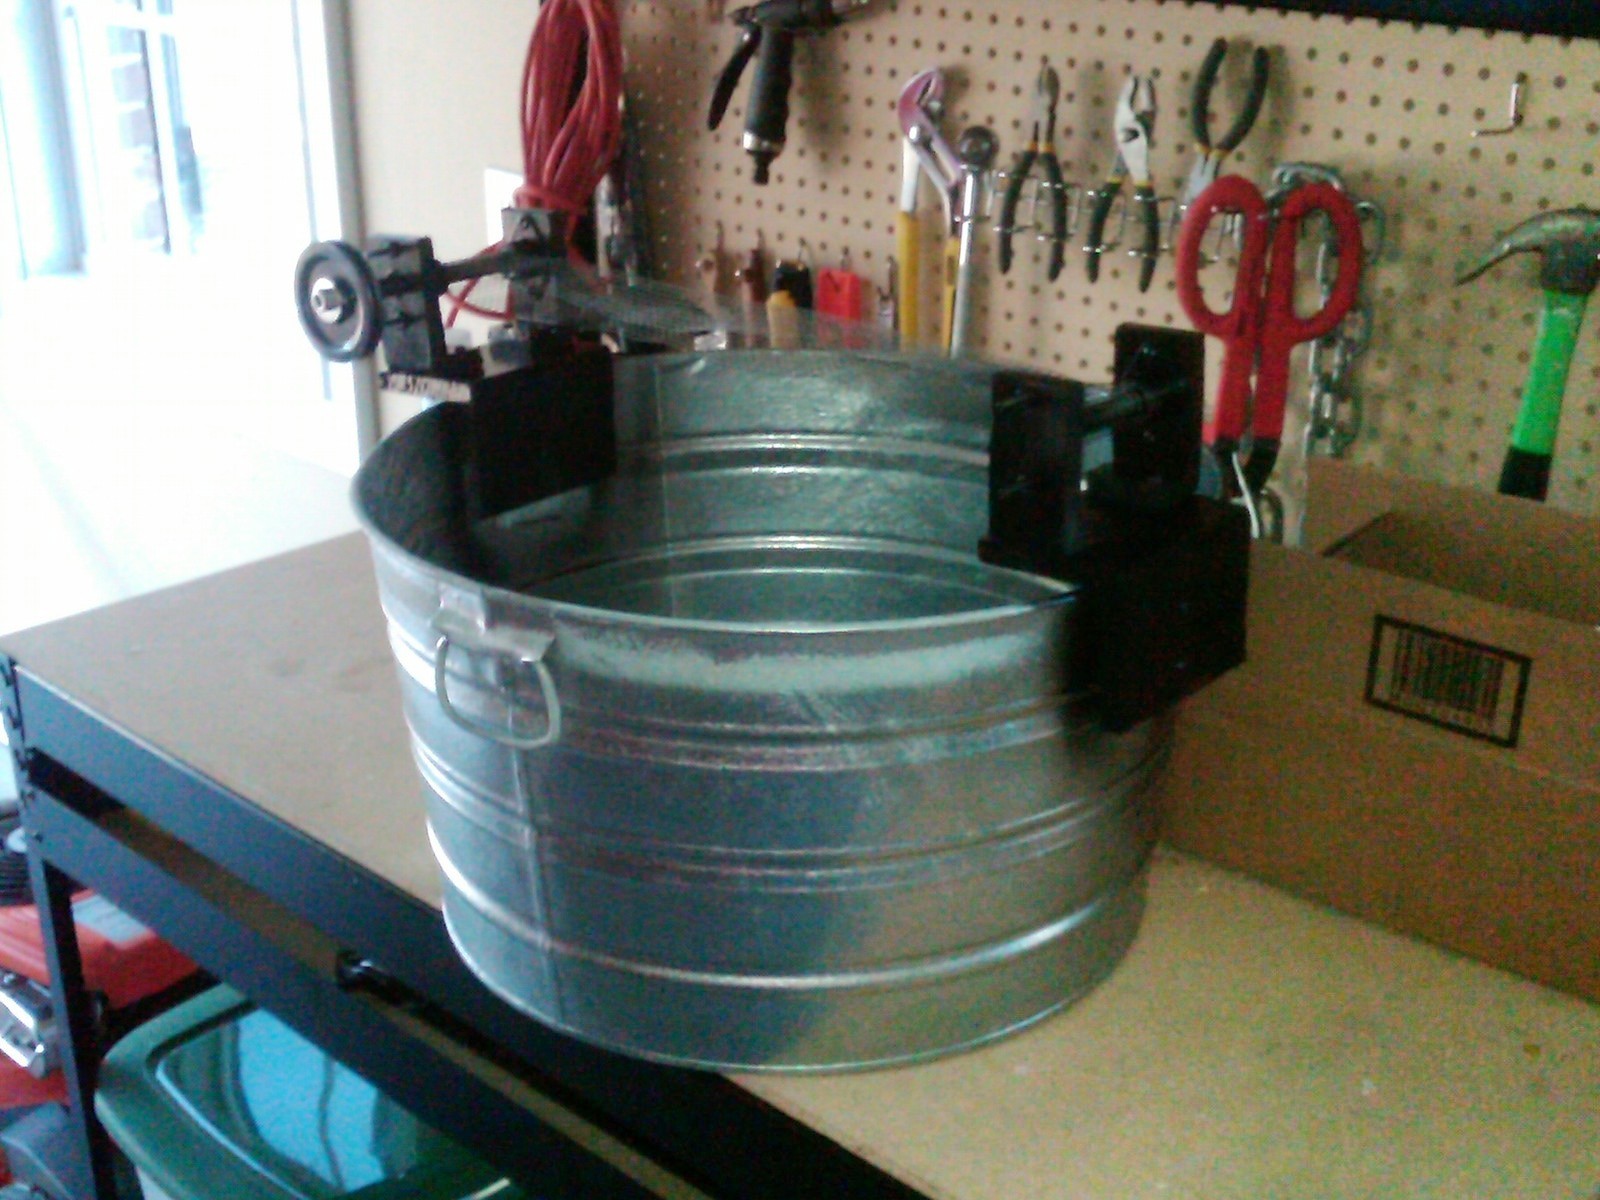
For the purpose of this build instructions, I have used a simple basin tub to describe the process.

It is important that the supports are located directly accross from each other on the grill or tub.

Ensuring that the supports are parallel to each other will help avoid any alignment issues with the conveyor that will be installed in the following steps.

Once the desired location is achieved, drill holes in the grill (tub, in this case) to be used for mounting the two shaft support structures.

Secure the supports to the grill using the #10-24 machine bolts and #10-24 machine nuts.

Take extra care to ensure that the two supports are parallel to each other when the hardware is installed.

This will avoid the aforementioned conveyor alignment issues.

This next step is the most difficult and critical step to the operation of the conveyor system. It took me a couple of attempts to master.

Size the stainless steel woven cloth to be used for the conveyor material based on the distance between the supports.

The conveyor material needs to remain taut for the system to function as designed.

Once the desired length of woven cloth is determined, cut the desired length.

Insert the woven cloth around the two shafts as shown.

The two ends of the woven cloth (conveyor material) can be secured together with simple wires.

This is a critical step for two reasons. First, the woven clother needs to remain taut for adequate operation. Secondly, the two ends of the woven cloth need to be stitched together as seamlessly as possible. This will ensure that the converyor material travels smoothly when the shafts are rotated.

Insert the pulley on the shaft with the threaded end.

I used a heavy-duty nylon pulley for wire rope (3/16″ rope diameter, 3″ O.D.).

I used a shaft with a 5/16 thread on one end. This appeared to be the common size of thread for the 1/2″ diameter shaft that I used.

Secure the pulley to the shaft using a 5/16″ machine nut.

Install the general-purpose plain steel wire rope (6×19 class, fiber core, 3/16″ diameter).

Different wire diameters may be used for this purpose. However, the diameter of the rope used must match the size capability of the pulley used.

For my situation, 3/16″ diameter wire rope was available.

The project is complete.

Happy Grilling!