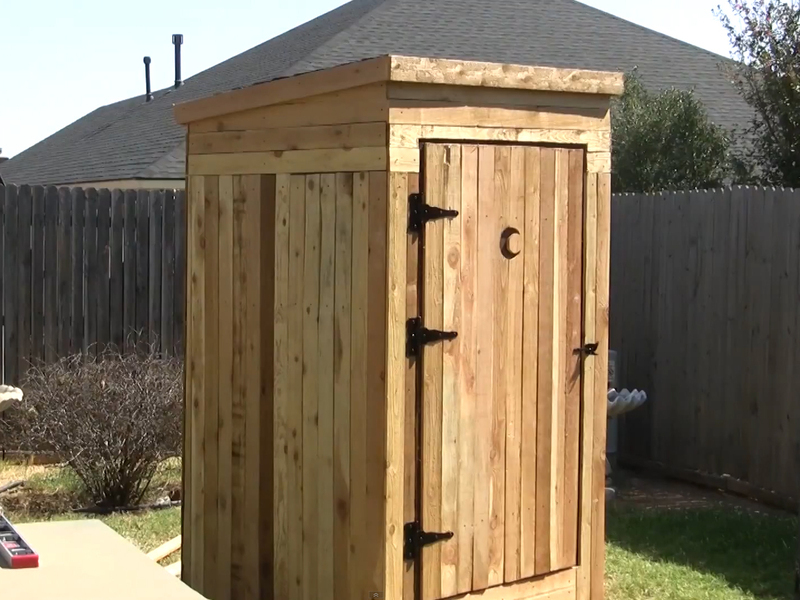
In this guide, I will talk briefly about all the steps I went through to build this project. There’s a lot that goes into this, from woodwork, to electronic work, to video and sound editing, so let’s get started! Progress videos of this project can be seen here.

YouTube player
YouTube player

What will the next generation of Make: look like? We’re inviting you to shape the future by investing in Make:. By becoming an investor, you help decide what’s next. The future of Make: is in your hands. Learn More.

Project Steps

The first step is to build a strong base for the outhouse. I used 2×4’s and screws to put it together and then some super-heavy-duty solid wheels were added so as to be able to move the time machine to storage after Halloween.

The next step is to start your framing. I first put down a sheet of plywood to act as the flooring. Next you build your walls one at a time on a solid, flat surface. After all your walls are built, lift them up one at a time and screw them down to your base. Then screw the wall sections to each other. You can see in this photo I’ve added supports into the walls for the left and right LCD screens to be attached to.

The next step is to cover your frame. I used a very thin 1/4″ wood painted black on the outside as the first skin of the time machine to make sure there would be no slits of light showing in between the slats. This also helps with weatherproofing it a little better. The wood slats I used were just dog-eared fence pickets with the dog-ear cut flat. I added 2×4 supports to the inside so I could screw the fence pickets down, since they wouldn’t be very sturdy being screwed to just the 1/4″ thick wood.

Next up you should build a frame for the bench seat. I left the frame wide in the middle so I can add a door so that underneath I can have a subwoofer and powerstrips to power the ride equipment. I later skinned this with MDF wood and put a back on it made of MDF as well.

Next up you need to build a door. Fairly simple if you’re just using this type of hinge. Just make a square out of 2x4s and add a couple of support pieces on the inside to hold the center LCD screen in place. Time to add a roof now as well. Put down tar paper using a staple gun and start laying your shingles onto the roof with roofing nails. Start at the bottom of the roof and work your way up in lines going left to right. Alternate the rows by cutting the first one so that the ends of the shingles don’t all line up.

Next up is making the new wood look old. To make it look weathered I first put on a coat of Rustoleum Wood Stain in the Sunbleached color. This made the wood all a uniform light grey, which looked good, but kinda flat. To add the real weathered look, I then took some black latex paint and watered it down a whole bunch with water ’til it was super thin. I then brushed that all over the time machine, which allowed it to soak in randomly in the pits of the wood. Looking good!

Next up I made an instrument panel to go on the door above where I will mount the LCD screen. It’s just a box made of wood that’s deep enough for the servo motors to sit inside. The servo motors act as the dials and are just mounted to a piece of plexiglass that’s been spray painted black on the backside. I then made some stickers that looked like dial readouts and stuck those to the plexi. The chrome plastic pieces I found on eBay for a couple of bucks apiece. The servos are all attached to a Pololu USB servo controller board.

The seats I don’t really have a super good pic of, but they were just massage chair seat cushions that had an on/off switch. I left the switch in the on position and cut the line on the positive power side and attached it to the board seen here. This is a relay that can be activated by servo position commands. It’s made by Basic Micro and is very sexy. So, my software just thinks a servo is hooked up. When I tell it to move the servo from the home position, it activates the relay, which in turn activates the vibrating seats.

Next I made a cheapo light dimmer by attaching a servo motor to a dimmer switch. Using JB Weld, I glued a circle servo attachment head to the dial on the dimmer switch. When it dried I just plugged the servo in and held them all in place with some wood. Works great!

Next up is editing together all the footage. The footage was shot using a custom tripod which was basically a light stand with a piece of MDF as a place to put the cameras on. I marked the MDF as to where to position the three cameras so that each place we filmed the cameras were in the same positions. I then used Blender to render out the dinosaur and After Effects to build a 3D dungeon set. I then added green-screen footage of the characters into the dungeon, placed the dinosaur into the outdoor footage, etc. Then I did the audio work in Premiere.

Next up is to program the ride servos using the software which will control the ride. The software I used, Visual Show Automation (or VSA for short), is made by a company called Brookshire. It’s a great piece of software. Each servo gets its own line on the timeline. You place your video and audio tracks and tell VSA which monitors need to display which video. You can then hook up a joystick to the computer, hit play in VSA, and move one of the servos in realtime using the joystick as the video plays. After you do this for each servo, you’re done and ready to go!