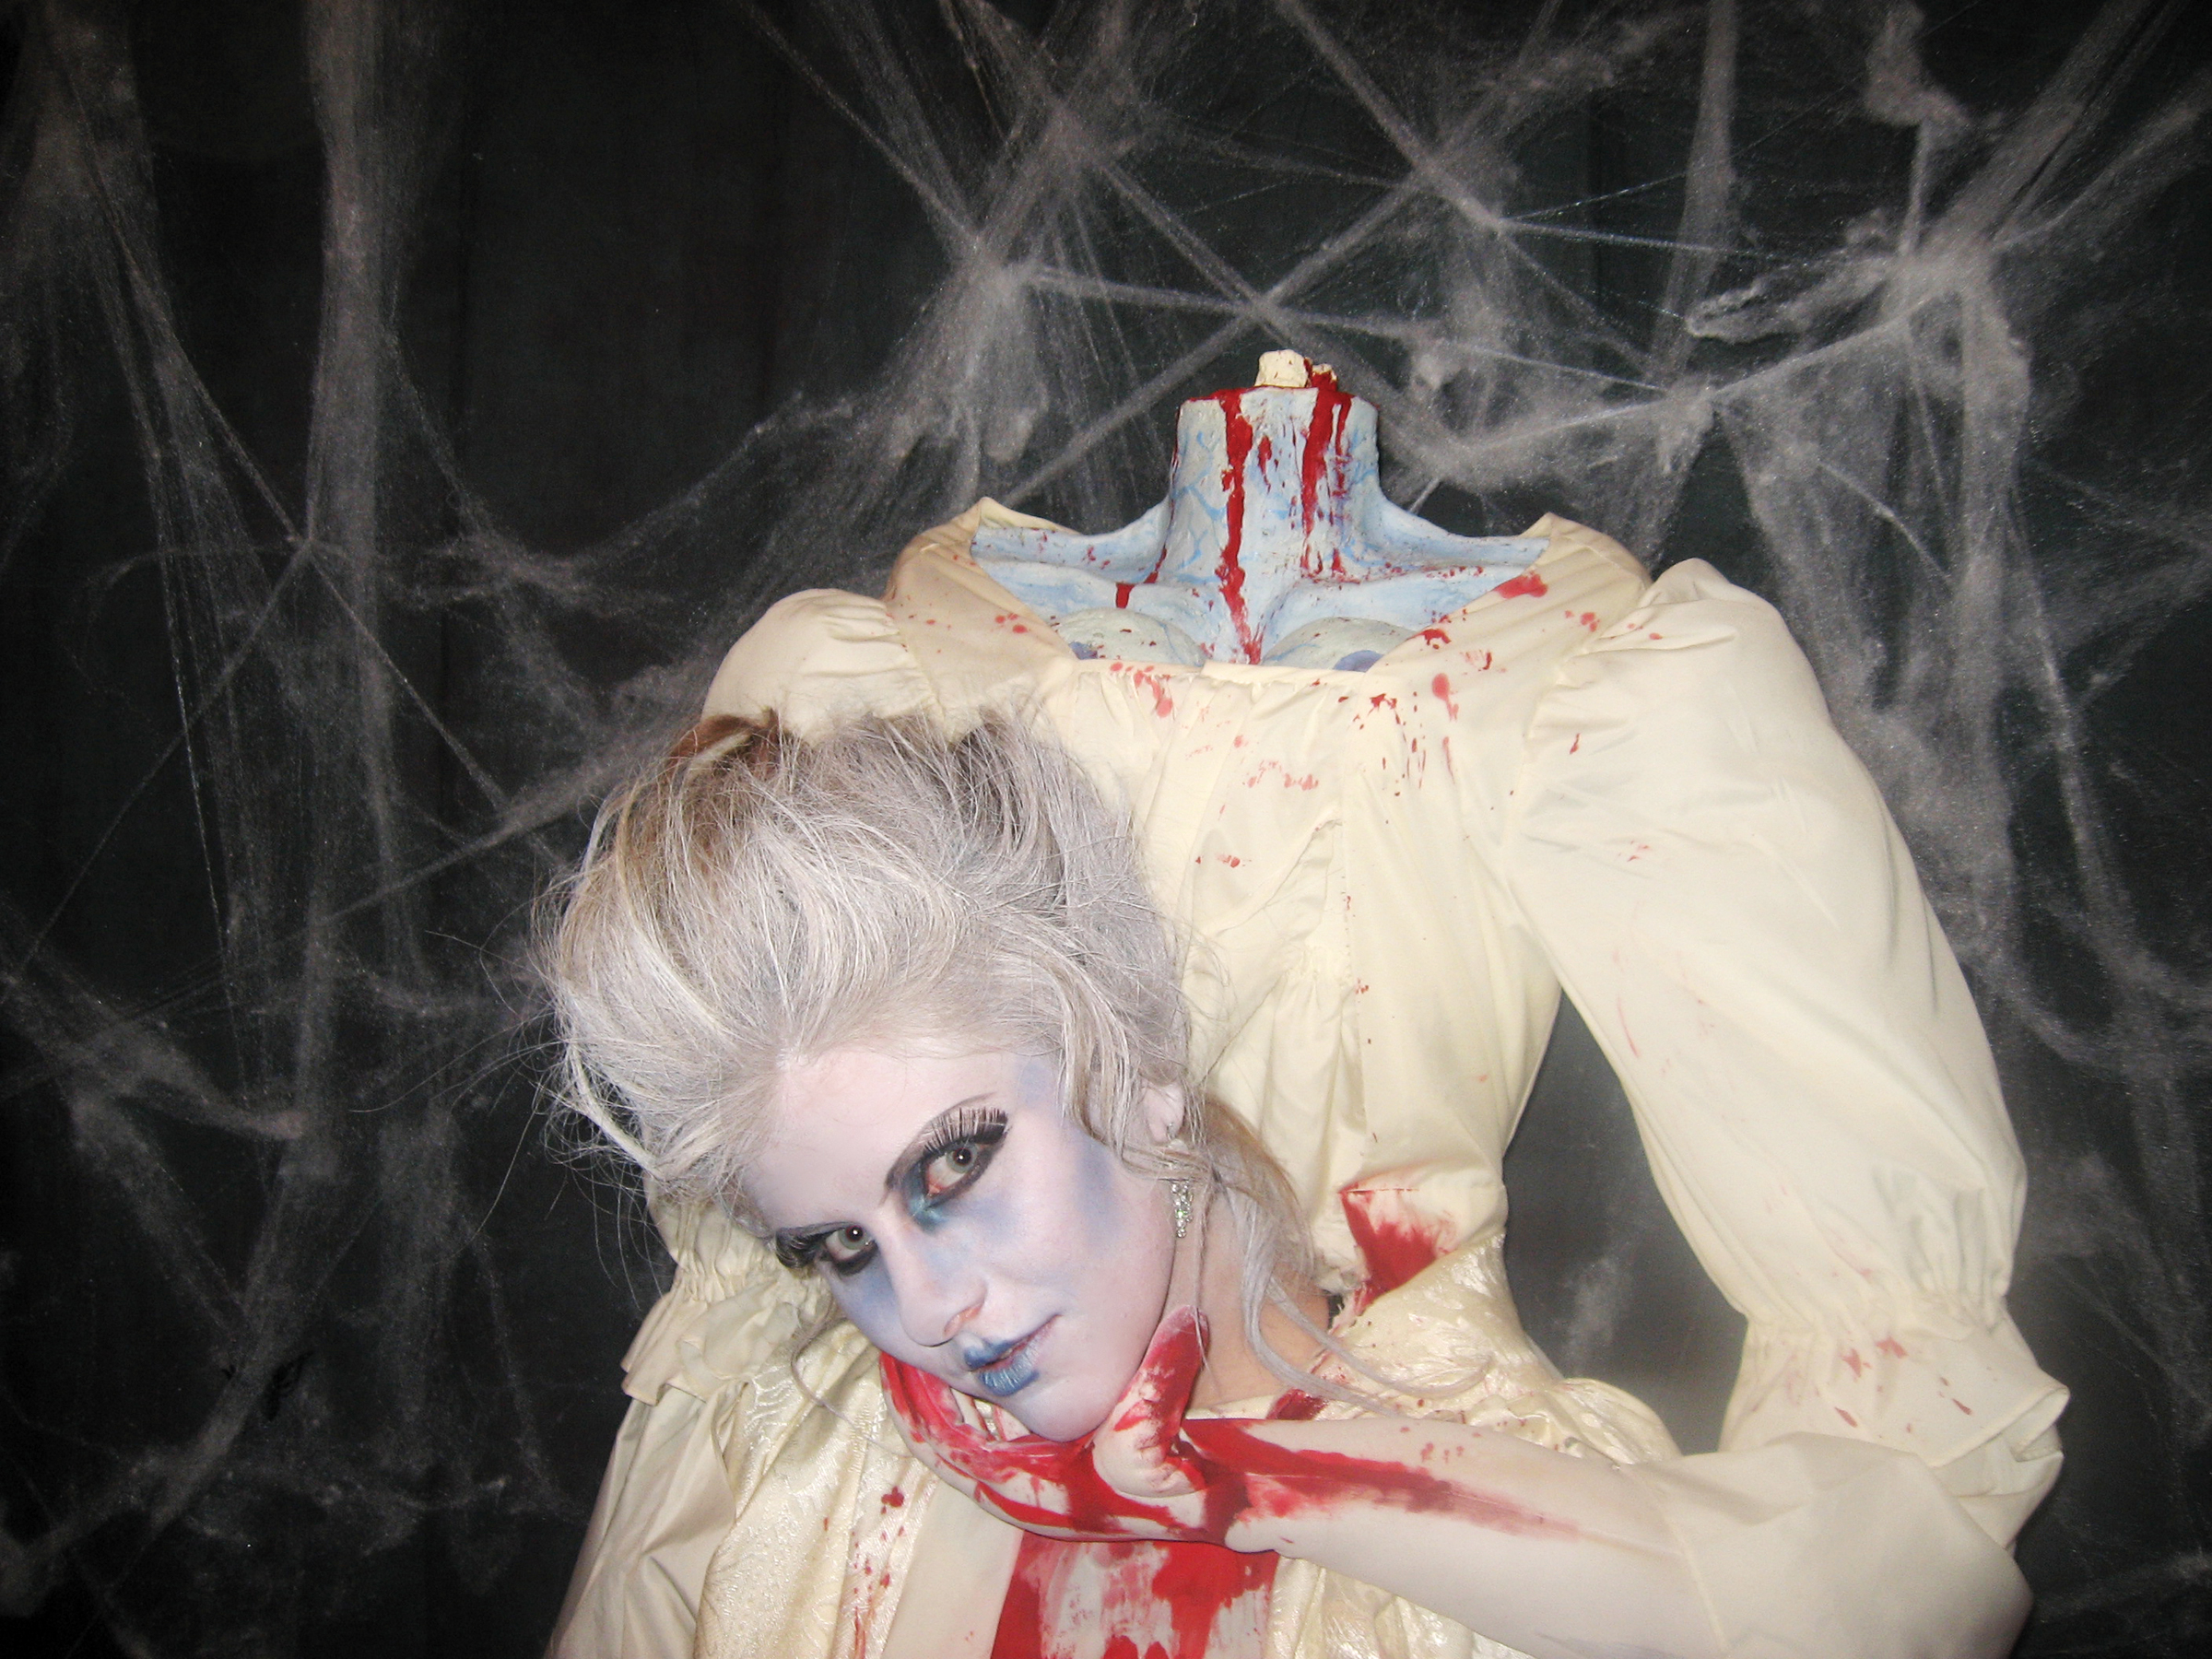
Everyone knows Halloween is a great opportunity to scare the crap out of your friends and look good doing it. My costume idea was inspired by the Marie Antoinette movie that came out last year. I found a bunch of great “headless” costumes online that used the basic technique I wanted. Being a fan of zombie flicks, I took this inspiration to the next level, aiming for gory realism.
Projects from Make: Magazine
Headless Marie Antoinette Costume
Create the illusion of holding your owndecapitated head.
Sculpt the bust with clay.
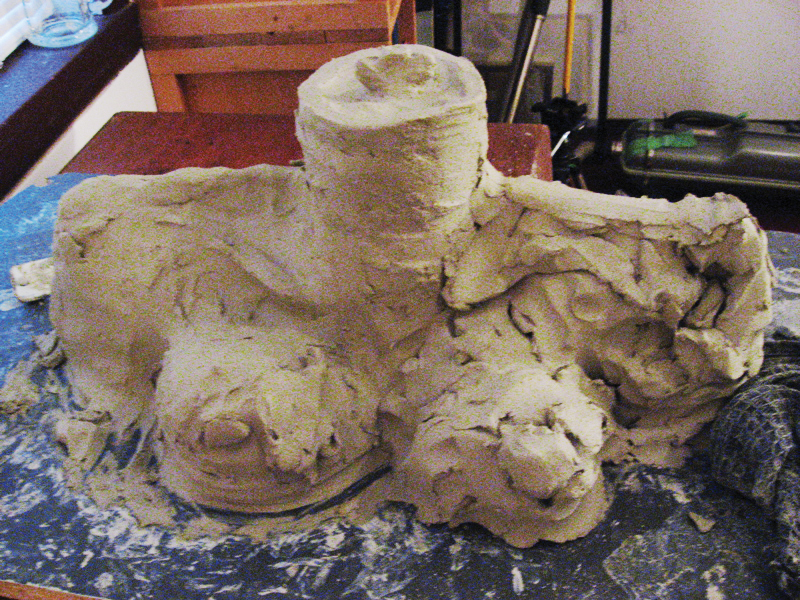
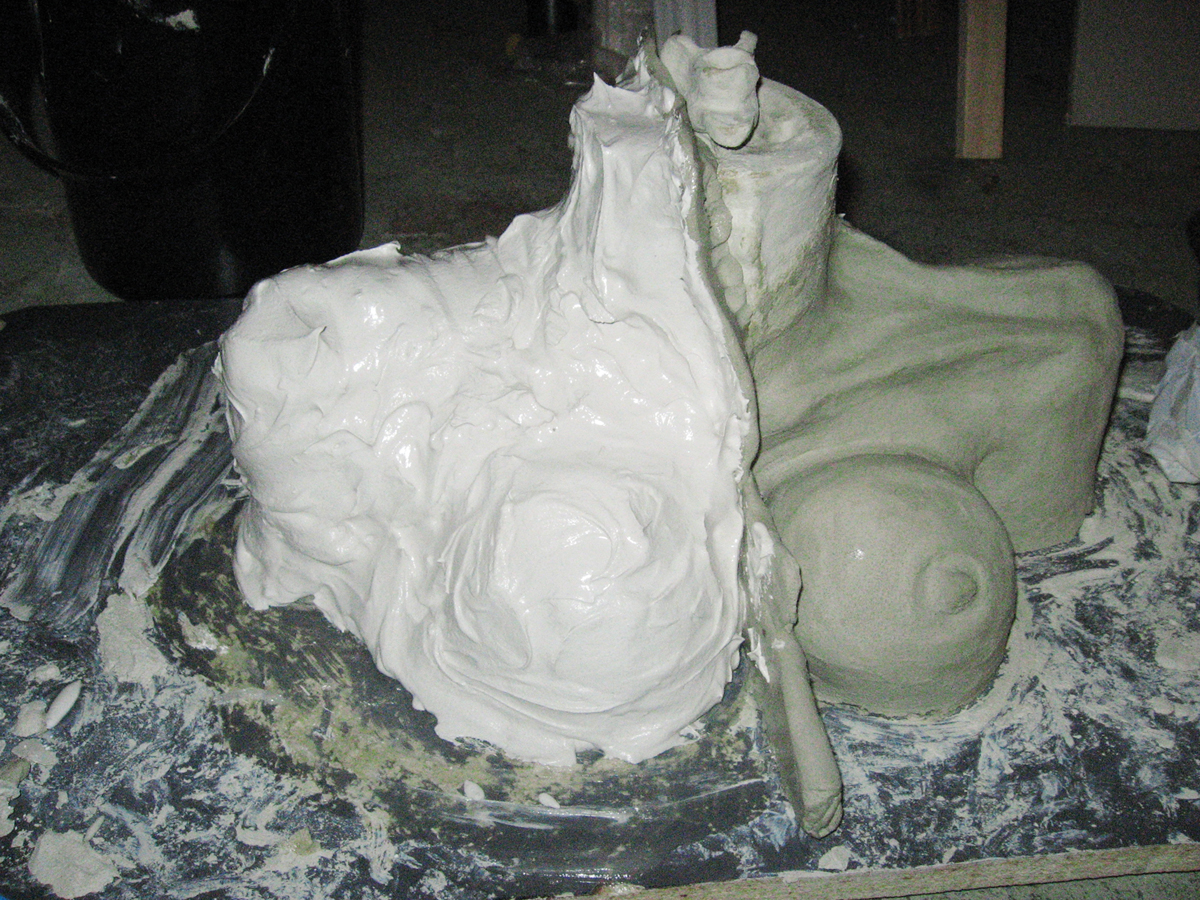
I decided to make the bust first, and to create the rest of the costume around it. A hunk of clay and several hours were spent sculpting a creepy, skinny torso with super-fake-looking boobs.
Turn the bust into foam.
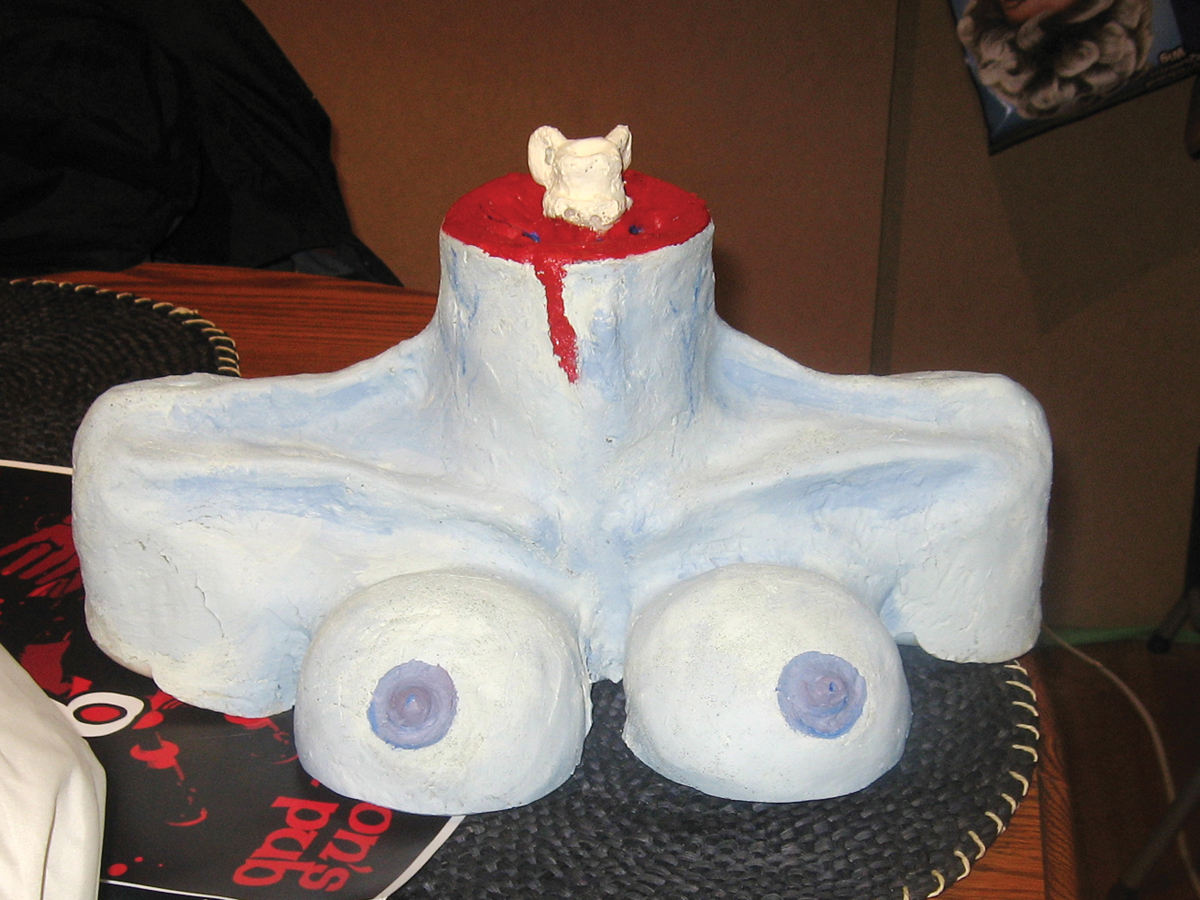
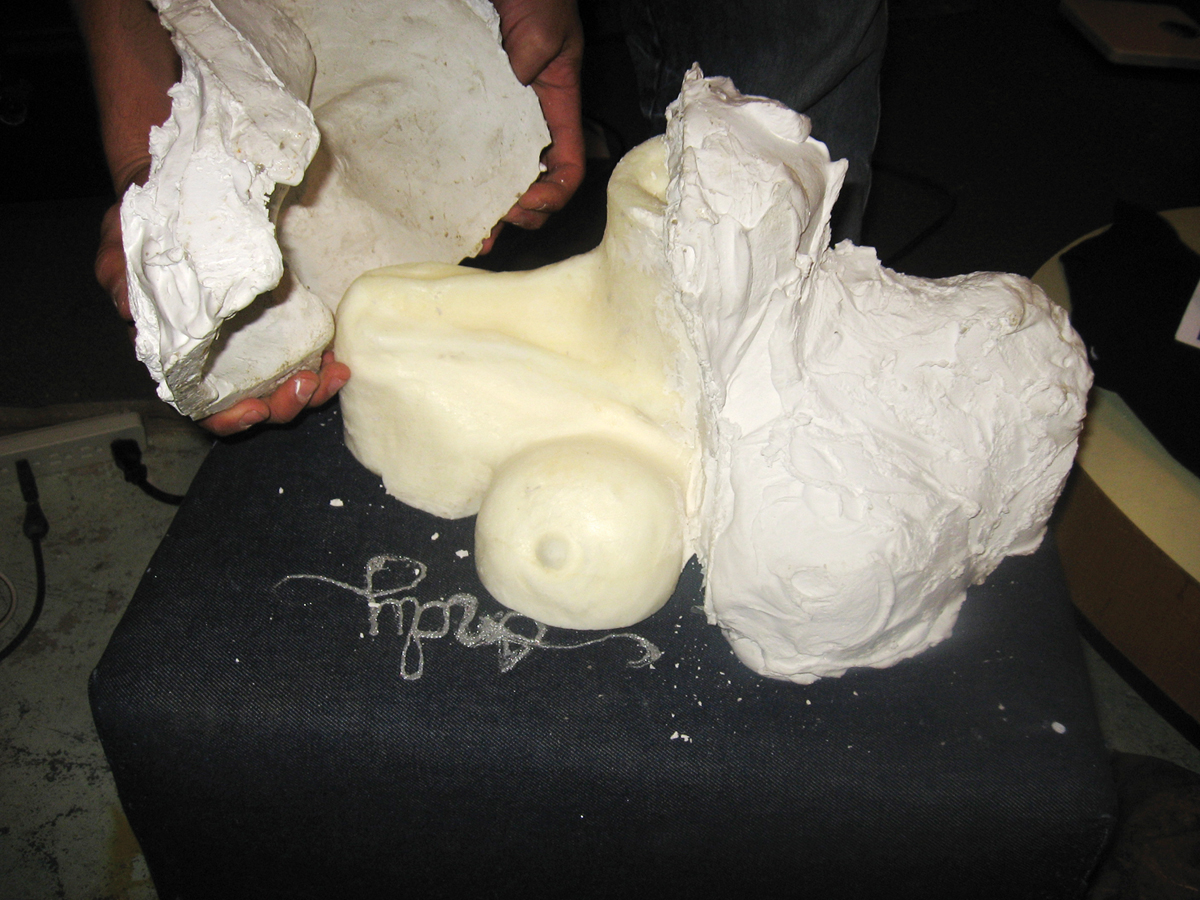
Next, I poured a 2-part plaster mold over the clay bust. Once the mold was removed, I coated the interior with a sealer and release agent, and poured in liquid urethane foam. Once the foam cured, I removed the plaster and was rewarded with a Nerf-like copy of the bust. (Instead of sculpting and casting, you can also carve the bust directly into plain blue sheet insulation foam.) To add a dead skin effect, use acrylic paints, because aerosols won’t set.
Raise the bust.
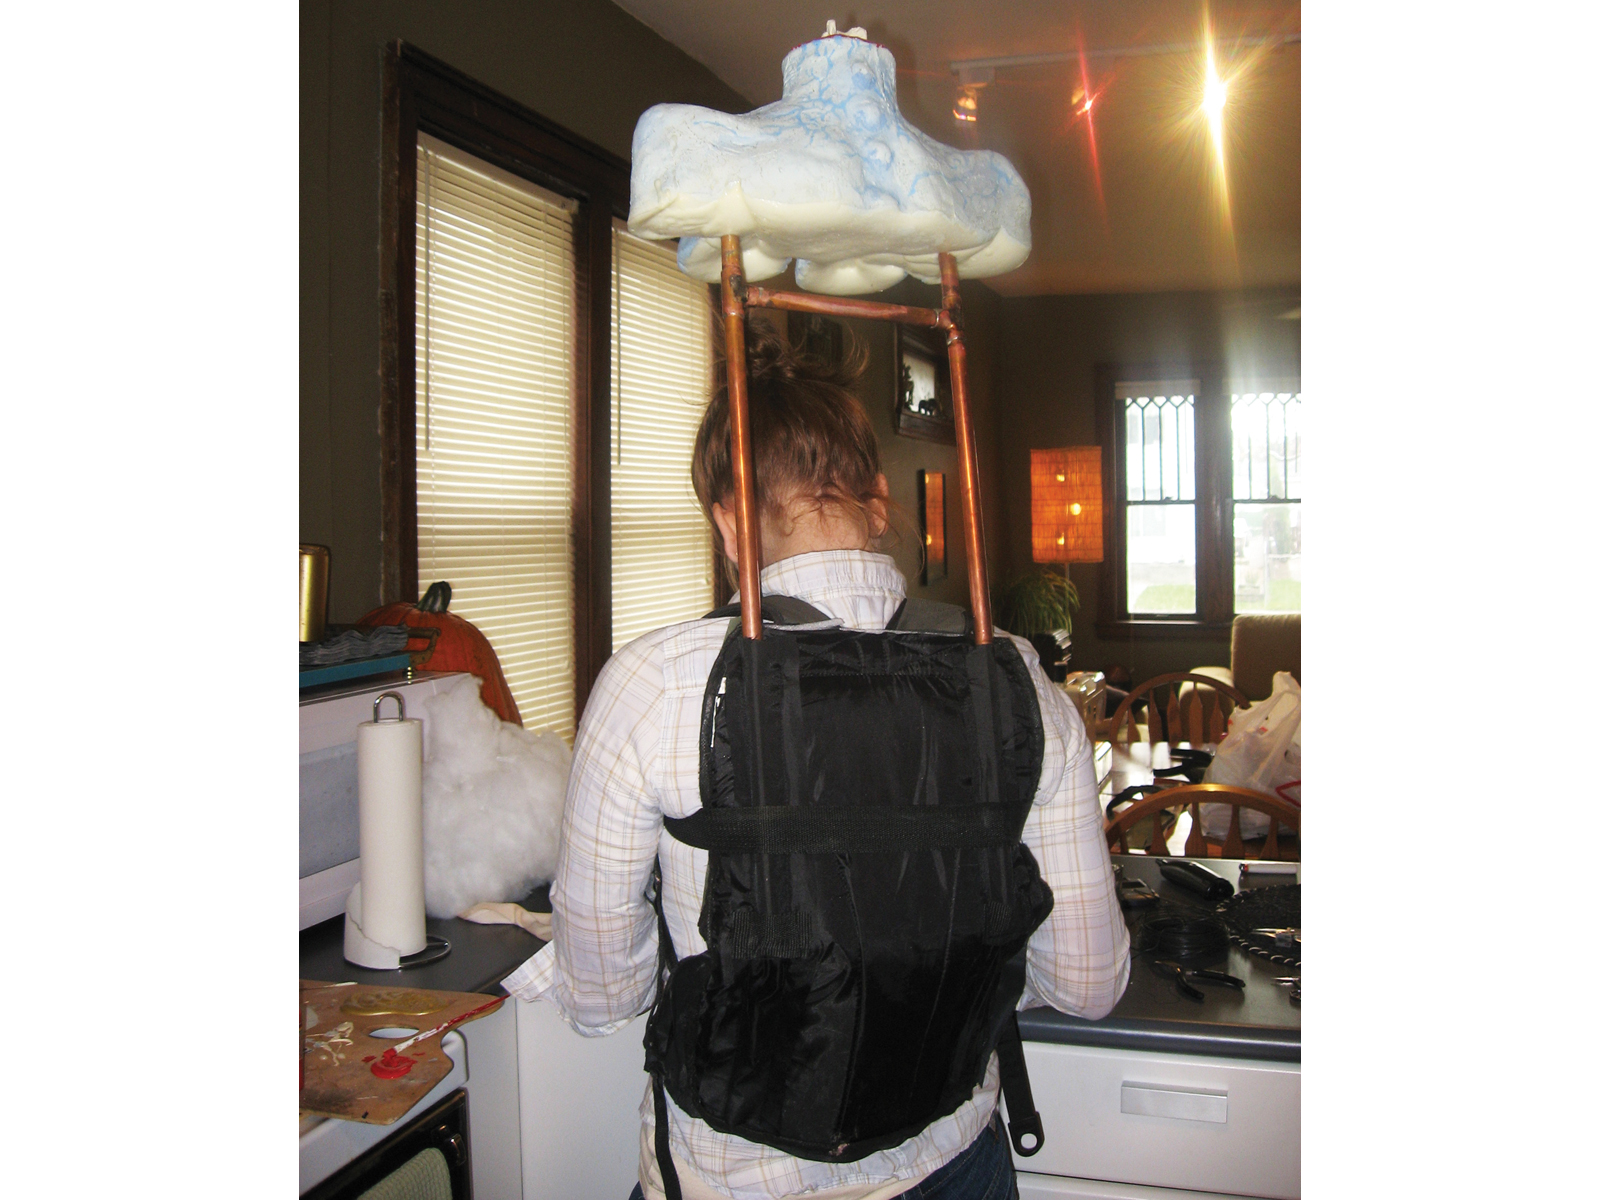
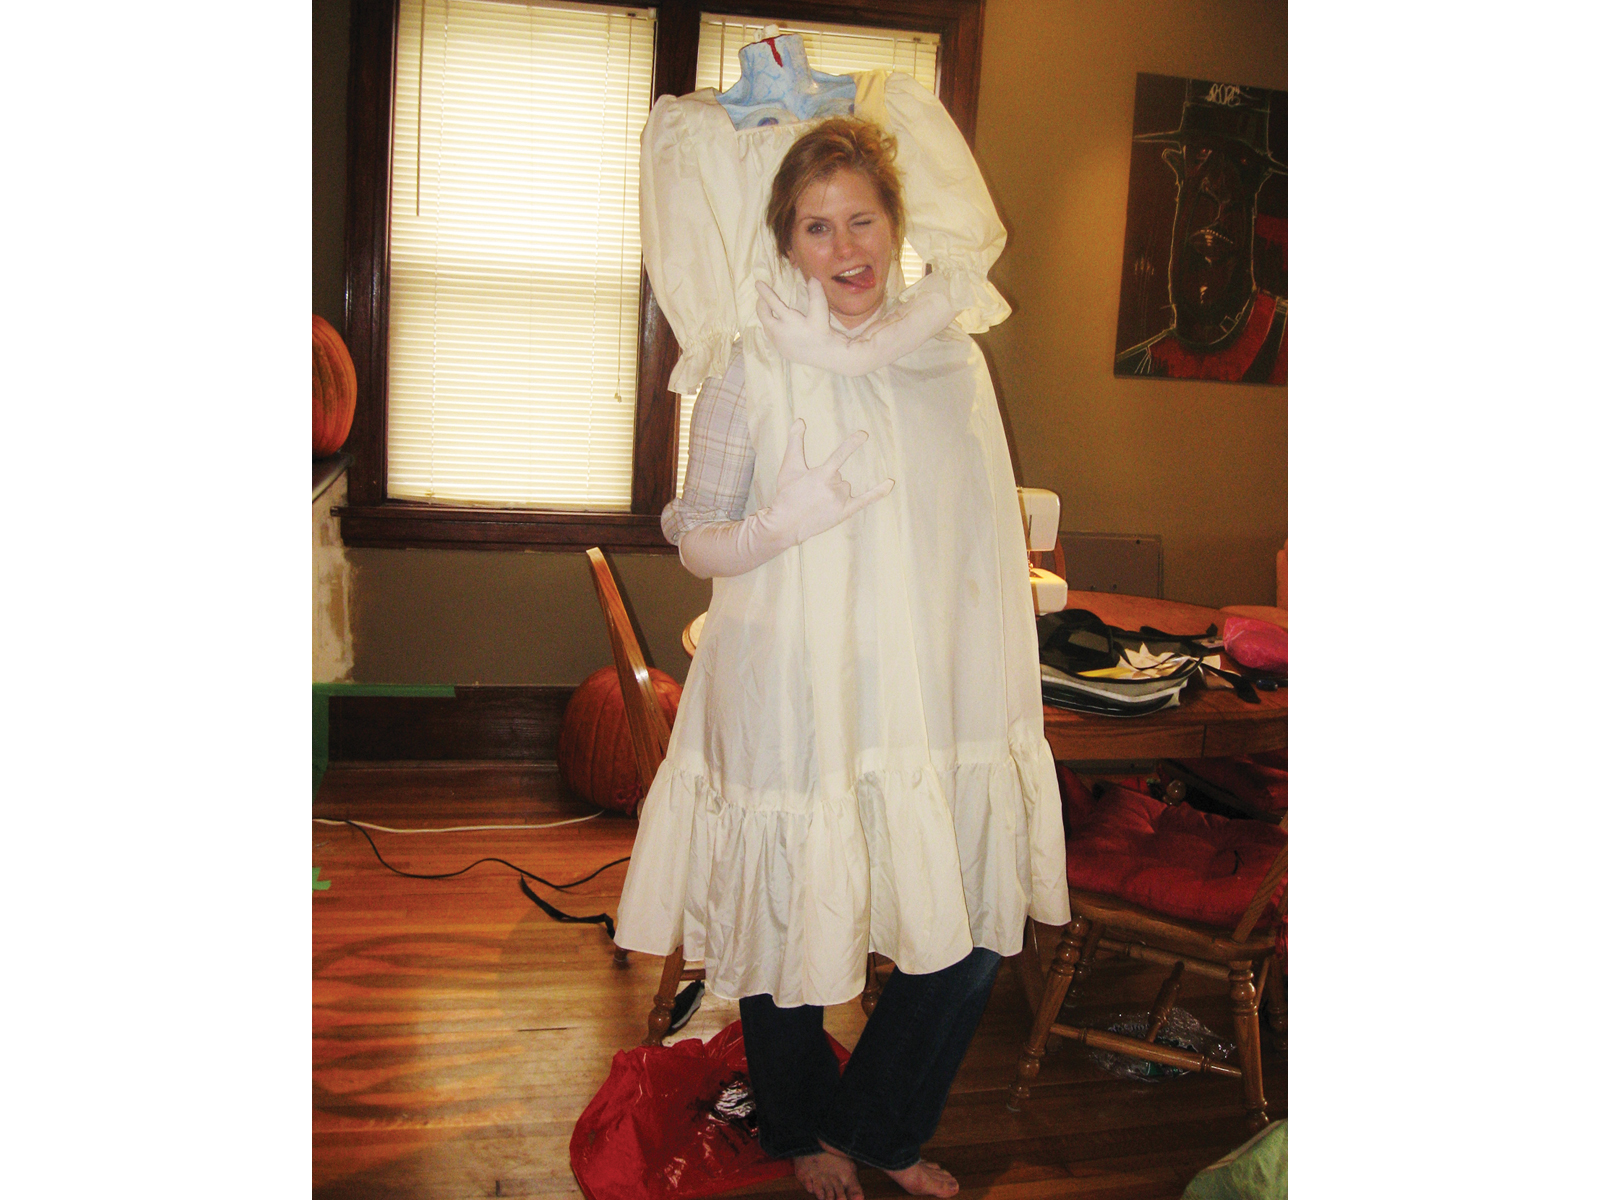
With my boyfriend Andy’s help, I welded a rig to hold the bust above my head. But I suggest using wooden dowels, as they are lighter and cheaper. We used copper pipes because we already had them, and because welding is fun.
Measure the dowels to start at the lower back and extend to just above the head. If it’s too high, it will ruin the illusion because the arms will look too long — the key to this costume is proportion. We then put a stabilizer at the top — notice mine is slightly too low. I drilled a couple of holes in the foam, inserted the pipes, and poured in leftover foam for sturdiness.
I used backpack straps to hold my rig in place. I cut everything off the backpack except for the straps and the back panel. Then I attached long, narrow pockets down the length of the backpack for the pipes to fit into. We salvaged straps with clips from the backpack and used them across the chest to pull the rig tight and vertical. Without that strapping, the whole rig would be completely unstable. I suggest adding a strap across the stomach as well.
Dress up Marie.
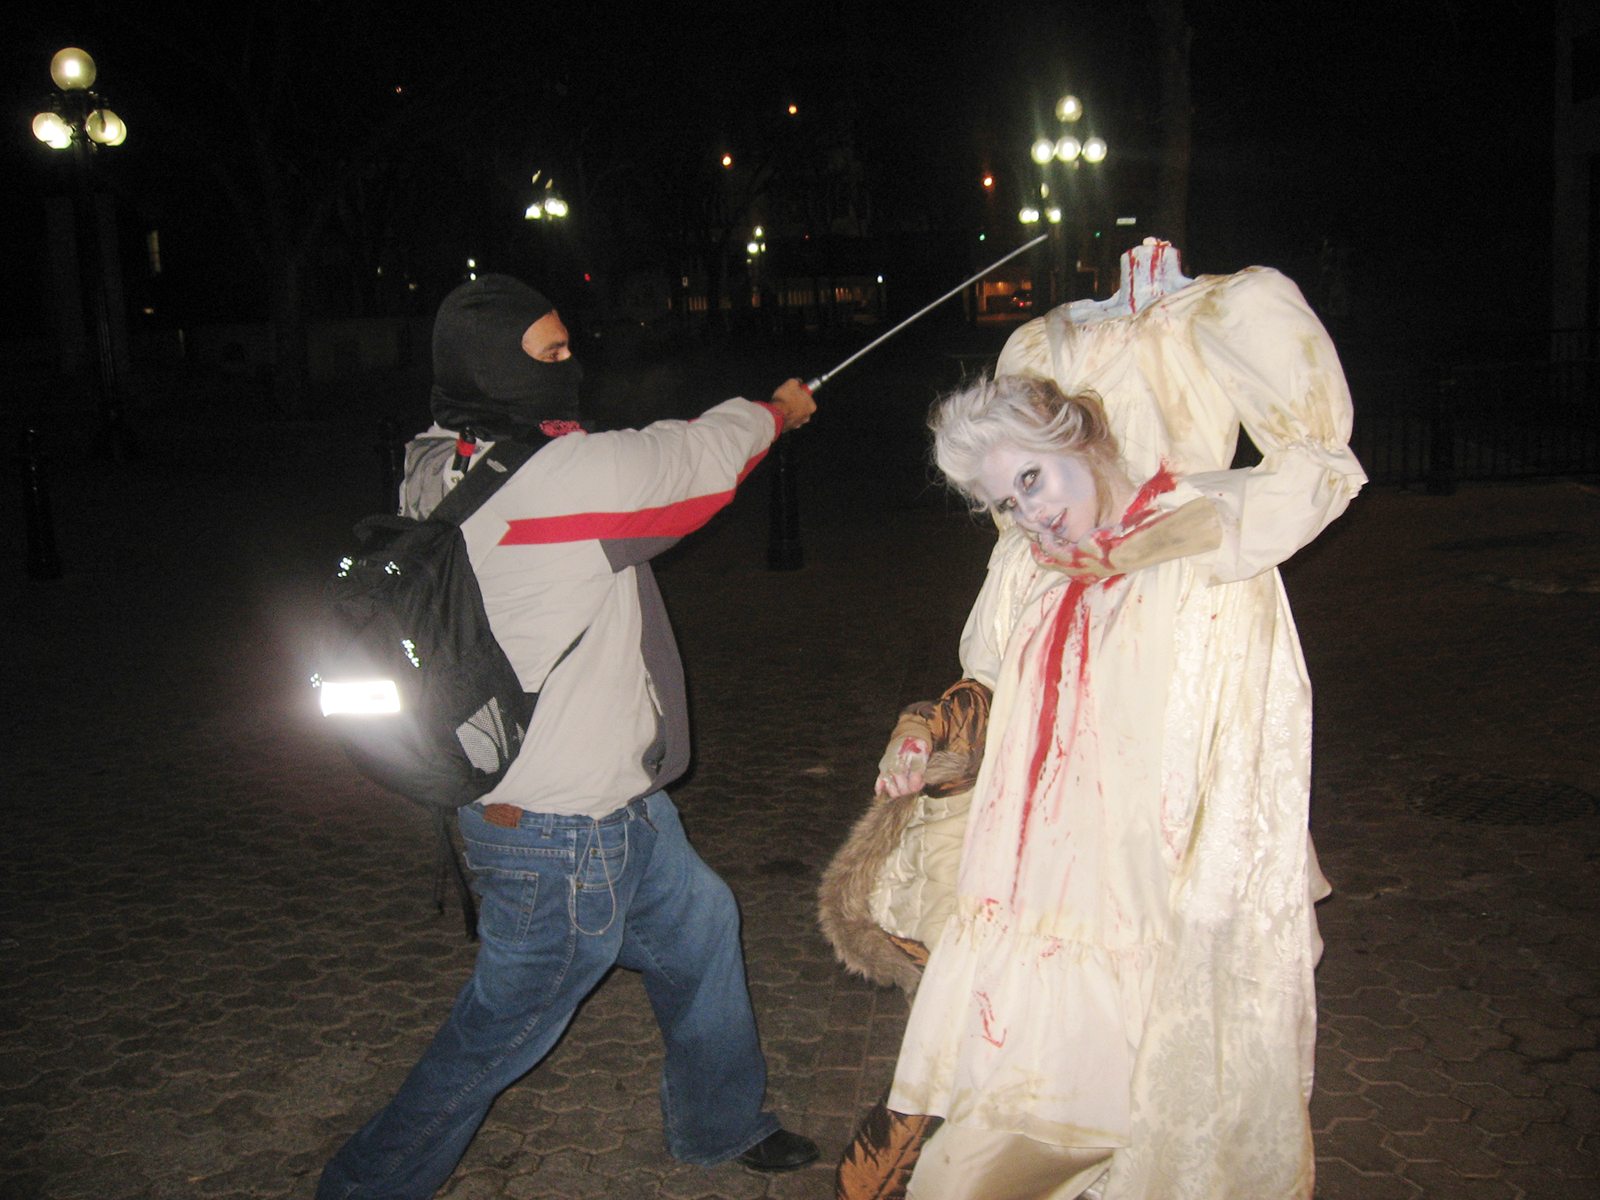
My friend Temperance McDonald helped me with the sewing. I lucked out and got the main dress at the thrift store for $3. I put on the backpack and bust, and then we put the dress over it. We now knew where to cut out holes for my head and arms.
Next, we made the top skirt out of a large scrap of fabric for $15 — this created the illusion of the waist (really my neck). It’s basically a cape, with a hole through the right side for my arm, which connects through to the lower half of the right sleeve. With my left arm hidden underneath the top skirt, and my right hand in plain view in a bloodied glove, I was free to use both hands whenever I needed.
The left arm was a fake — a wire skeleton wrapped in cotton batting, stuffed into a long glove sewn closed to the end of the sleeve. It was completely posable and was tacked into place once the costume was on. The shoulders and arm were stuffed with cotton to fill them out. Makeup, hair, and blood-red paint helped to finish the effect.
Although this costume may appear uncomfortable, I had excellent mobility. I could move my head, dance around, get into cars (headfirst), and have a great time. Variations on this costume could include The Corpse Bride in a wedding outfit or Lumberjack Who Cut Off His Head with a Chainsaw. Keep in mind that the shorter you are, the better this illusion will work — I’m 5’8″, so the entire costume was over 6′ high for me. I really enjoyed making this costume; it took about 3 weekends and cost about $70.
Conclusion
This project first appeared in Make: Halloween, page 42.


