scanotron3K_turntable_v2

This is the turntable that I use in my Scan-O-Tron 3000. It’s pretty simple: Cut and drill the plywood parts, bolt them to a car wheel hub, and mount a high-torque rotisserie motor. 3D print the drive pulley, then hook up a belt made from an old bike inner tube. It works great.

Project Steps

Build the heavy duty turntable.

Using a router or jigsaw, cut from a sheet of 3/4″ plywood:

  • 2 — 28″ plywood circles (turntable top plates)
  • 1 — 12″ plywood circle (inner part of pulley)
  • 1 — 14″ plywood circle (outer part of pulley)
  • 1 — 28″ plywood square (lower base)
  • 1 — 10″ plywood square (upper base)

Mark the centers of both squares and the 12″ and 14″ circles, then cut circular center holes to create a recess for your hub so it can be bolted flush to the base and the pulley. My hub needed about a 4″ diameter recess.

Mark the hub’s mounting holes on the 10″ square and drill 1/2″ holes. Then use these holes to mark the 28″ square and drill matching holes.

Bolt the hub assembly to the base using hex bolts, with small washers on the heads and fender washers on the nuts.

Glue and screw 2×4 blocks to the corners of the base as feet.

Test-fit the hub. Mark and drill the 14″ circle to accept the hub’s 5 stud-bolts. The 14″ circle will form the bottom lip of the turntable’s pulley.

Bolt the 14″ circle to the hub, using fender washers and nuts.

Center the 12″ circle on the 14″ circle, then mark and drill the 12″ circle to create clearance holes for the studs and nuts. A 1″ hole saw is handy for this. Now test-fit the 12″ circle with a 28″ circle on top. Depending on your hub, you may need to cut out the center of this 28″ circle for clearance as well.

Glue and and screw the 28″ circles together with 1-1/4″ screws. Then screw the 12″ circle to the bottom circle.

Mark six 3/8″ holes on the 12″ circle, evenly spaced and about 1-1/2″ in from the edge, and drill them through the entire stacked turntable assembly.

Place the turntable assembly on top of the 14″ circle, then mark and drill matching 3/8″ holes through the 14″ circle.

Insert 3-1/2″ carriage bolts from the top down through all 4 plywood circles. Add washers and nuts beneath, and tighten.
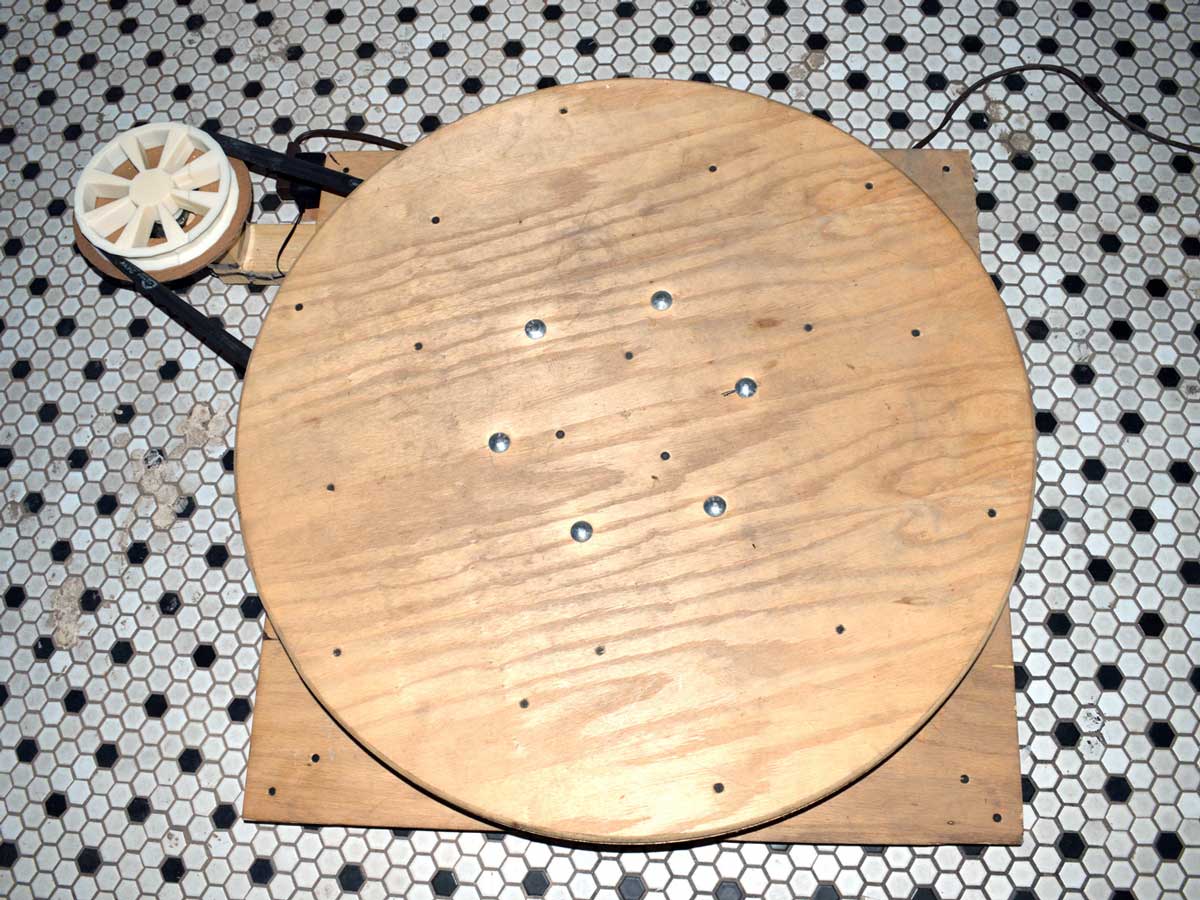
3D-print the pulley for the motor (Use my version at http://thingiverse.com/thing:28454, or try Make Lab’s test build files), 100% solid with rectilinear fill. Glue the 2 pieces together, clamp, and let dry.

Drill out the setscrew hole, press a nut into the nut hole, and screw the bolt in so it presses against the flat of the rotisserie motor shaft. I used a 25mm M5 bolt.

Solder leads from the 12V DC power supply to the motor.

Use hose clamps to mount your rotisserie motor on an L-shaped arm made of scrap 2×4, sized so that the pulleys line up. Put the bike tube around the turntable pulley and stretch it around the motor pulley. Extend the 2×4 arm so that the belt is stretched tight, and attach the arm to the base using 2″ wood screws. Plug the motor’s power adapter into the foot pedal and you’re ready to spin!

CAUTION: Be sure to brace the turntable as your subjects climb on and off. I’m working on a brake lever next; watch my Thingiverse project page, thingiverse.com/thing:28454.

You can start scanning now if you want to hold the Kinect by hand, but if you want really good results, try building the Scan-O-Tron 3000 as well.