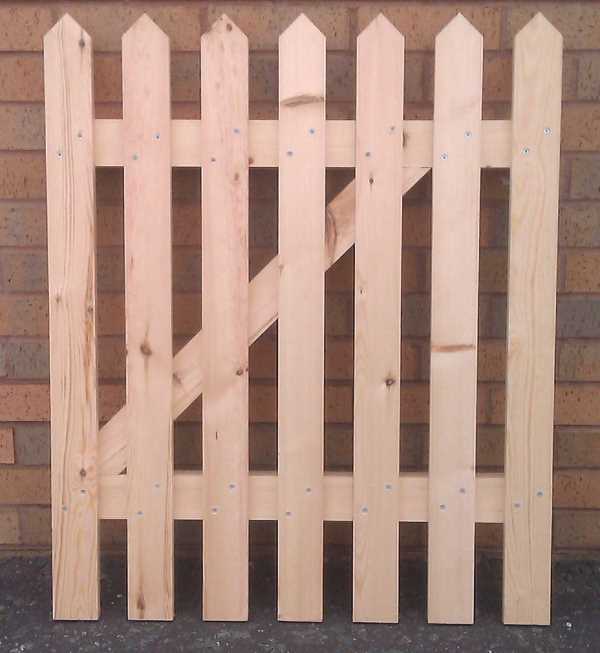
I’m going to show you how to make a simple timber picket gate in 30 minutes or so. Gate-wise, unless you include hanging a sheet of plywood as a gate, this is the simplest gate you could possibly make as it’s just a legged and braced gate – there are no awkward joints to cut!
Cutting list
The gate I’m making is 3ft high x 2ft 6 wide in old money (or 915mm high x 762mm wide), so if you need something a bit bigger or bit smaller, you’ll have to adjust both the cutting list and any other sizes mentioned below accordingly.
All lengths below are the finished sizes required; if you do pop into your local builder’s merchants or sawmill, add 2″/50mm onto all sizes.
Imperial
Ledges (horizontal rails) – 2 at 3″ x 2″ x 30″ long planed all round (Planed all round referred to as PAR from here on in)
Uprights or pickets – 7 at 3″ x 1″ x 36″ PAR
Diagonal brace – 1 at 3″ x 1″ x 35″ PAR
Metric
Ledges (horizontal rails) – 2 @ 75mm x 50mm x 762mm (PAR)
Uprights (or pickets) – 7@ 75mm x 25mm x 915mm (PAR)
Diagonal brace – 1 @ 75mm x 25mm x (PAR)
* A quick note on PAR, you can usually buy this in softwood from stock at larger builder’s merchants or a local, however if you’re wondering why your 3 inch x 2 inch is not quite 3 inches by 2 inches then that’s because it’s the pre-planed all round sizes (the sawn sizes) that are referred to – usually 3 inches by 2 inches will finish at 2 3/4 inches by 1 3/4 inches
Project Steps
Getting Started
There is a bit of timber cutting to do, but as with most projects you’ll tackle in timber, it’s unavoidable. You can either make use of a mitre saw, if you’re lucky enough to have one, or just go old school and use a handsaw.
Cutting The Pickets
That was simple enough and now we’ll move on to cutting the pickets of the gate.
Finishing Cutting The Pickets
Next, we’ll get the pickets cut with two 45 degree angles on the top to give them the traditional picket-gate type look.
Putting The Picket Gate Together
To put the gate together we’re going to need a couple of additional tools and bits and bobs -we’ll need the following tools:
- cordless screwdriver with screwdriver bit (I’m using a Pozidrive) and 4mm
- drill bit
- tape measure/rule
- square
- D4 timber glue
- 1 3/4″ screws
Positioning The Ledges
We’ll need to mark these lines on the edges of the two pickets; so do this now.
Positioning The Pickets
Now, before we start attaching the rest of the pickets, we need to work out the gaps between each picket.
A Temporary Fix
To save marking each and every picket we’re going to fix into the gate we’ll do a little cheat; get a straight piece of timber and fix it to the bottom of the two pickets that are fixed to the ledges, just one screw in each will do for now as this is a temporary ‘fix’ and will be removed once the gate is finished.
Adding The Diagonal Brace
Lastly, we’ll just add the diagonal brace on the back of the gate; this wants to sit at around 45 degrees. It can be less than 45 degrees, but no flatter than 45 degrees as it won’t be doing anything to support the gate. It should also point down to where bottom hinge will be.
We've Finished!
This may not be the most robust gate in the world, but it’s quick solution if you need a simple gate in a hurry for your garden or allotment and you don’t fancy the thought of complicated woodworking joints.