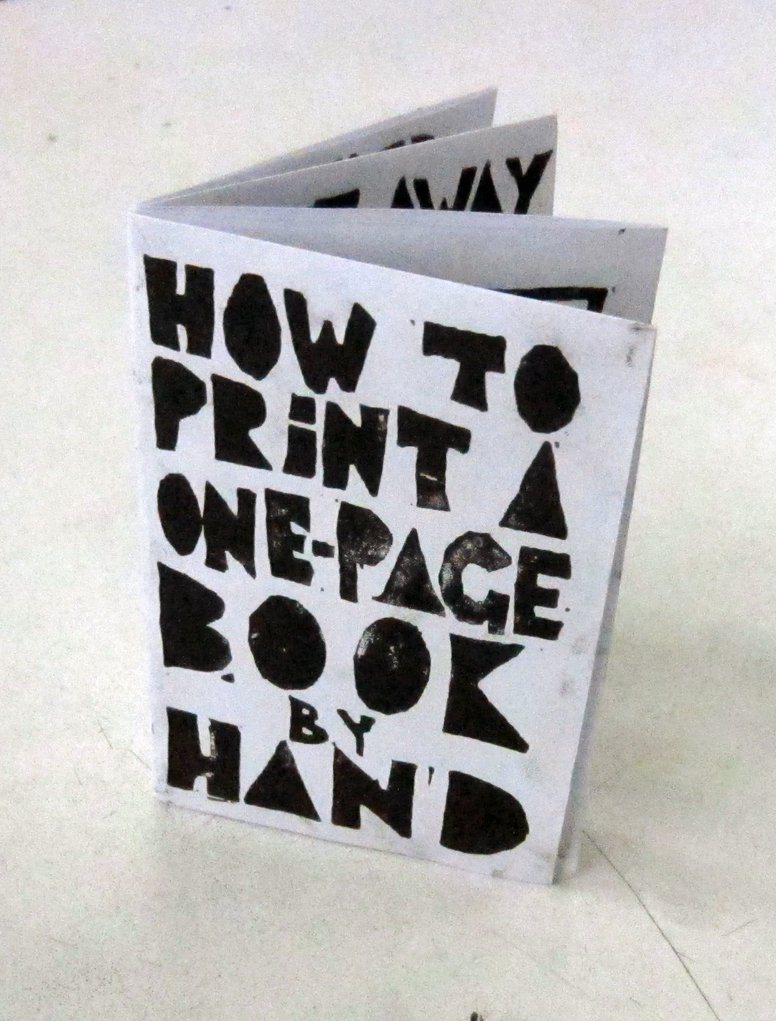
linocut-zine-cover

One-page books, which often feature DIY projects, are typically made from photocopies, and relief printing is one of the earliest forms of mechanical reproduction, so here is a way to combine a DIY project with a handmade process to turn your tutorial into a work of art.

Note: This project features the use of a linoleum block in the relief printing process because linoleum tends to be easier to cut than wood. If you are comfortable carving wood, then you might prefer to use a wood block, you can also try using power tools, like a dremel, to carve it out.

Project Steps

Design Your One-Page Book Layout

Make a mock-up of your book and draw your design onto it in pencil.

To make the book, fold the paper in half hamburger-style. Unfold the paper and fold each half into the middle to make 4 equal segments. Now fold the paper in half hotdog-style so that the paper is divided into 8 equal segments.

Fold the paper in half hamburger-style and cut a slit slit halfway down the center of the paper.

Fold the paper in half hotdog-style and push out the pages where you cut the slit so that you can fold the paper over to make the book.

Draw your design onto all 8 pages of the book, pressing firmly with a pencil to make dark marks. Keep in mind that your design will have to be carved out of the block, so only make marks that you are comfortable carving around.

Transfer Your Design To The Linoleum Block

Before transferring your design, make sure that your linoleum (or wood) block is the right size and that the corners are square so that they will line up with the copy paper. I recommend using a block that is larger than your paper.

Lay your design face down on the linoleum block and tape it into place. If the block is larger than the copy paper, then line up the paper with one corner of the block.

Transfer your design onto the block by going over the back of the paper with a pencil.

Once the design is transferred, it will appear in reverse, this is so that it will appear properly when it is printed. I recommend going over the design with a marker to make it clear and ensure that the lines are thick enough to be cut around with carving tools.

Cut Your Block

Using wood carving tools, or even just a utility knife, carefully carve around your design and cut away everything that you don’t want to show up in your print.

I recommend tracing around the paper when you transfer your design to the block. If you can, leave one corner of your block uncut and use it as a guide to line up your paper when you lay it over the block to be printed.

Print Your Block

On a glassy surface, ink your brayer with block printing ink and roll it onto your block. Only ink parts of your block that you want to print. Be careful not to use too much ink or your print will lose some of it’s detail.

Lay the copy paper on the block by carefully lining it up with the corner that you left uncut.

Rub the back of your paper with a wooden spoon applying equal pressure to the entire block.

Make Your Edition

Make as many prints as you like and leave them to thoroughly dry. You may want to sign and number them as a limited edition.

Fold Your Book

Fold and cut your prints the same way that you made your mock-up book. Consider putting a secret message for your recipient on the inside of the book.

Enjoy!

Distribute your hand-printed one-page book for others to enjoy!