You’ll be Wi-Fi enabling your Raspberry Pi 2 which allows you to use the internet without an Ethernet cable. The easiest way to configure your Raspberry Pi for Wi-Fi is through Raspberry Pi’s graphical user interface.
Projects from Make: Magazine
How To: Wi-Fi Enable Your Raspberry Pi via GUI
Plug In Your WiFi Adapter

Plug in your WiFi adapter into the Raspberry Pi USB port and boot your Raspberry Pi.
Find Your Wireless Network
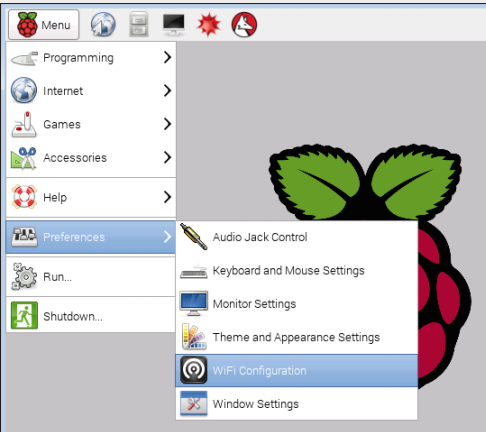
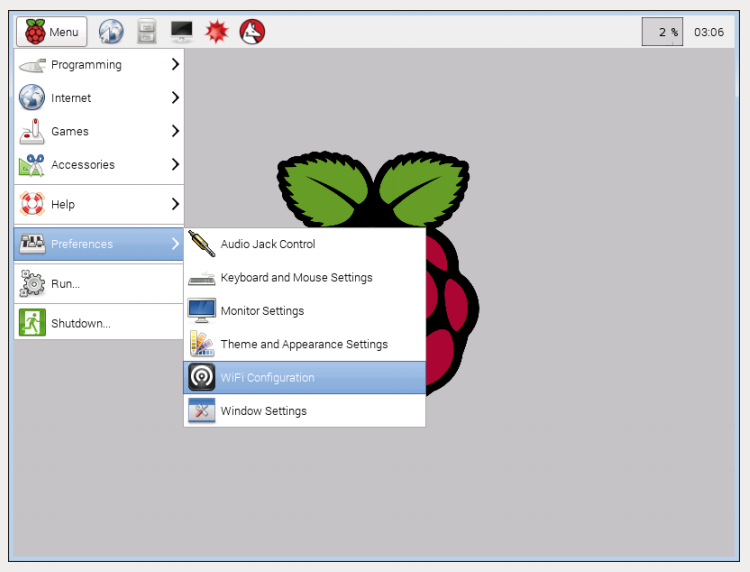
Select Menu→ Preferences → Wi-Fi Configuration.
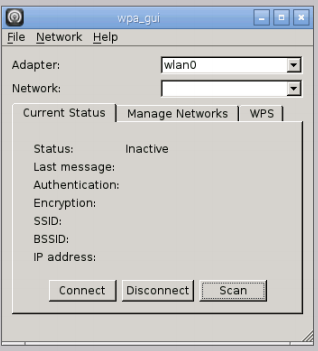
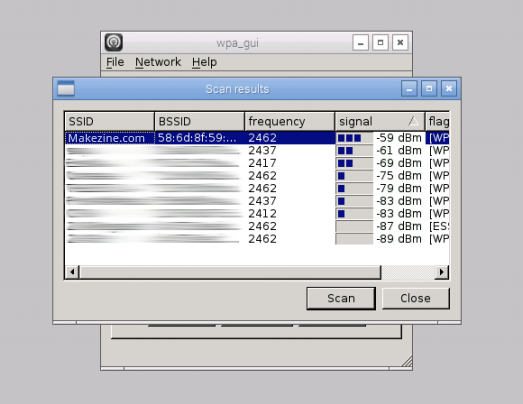
You’ll see an Adapter window. Click the Scan button and a new window will open.
Find your desired network and double click it. If you need to update the list of wireless networks to find yours, click the Scan button.
Enable Your Wireless Network
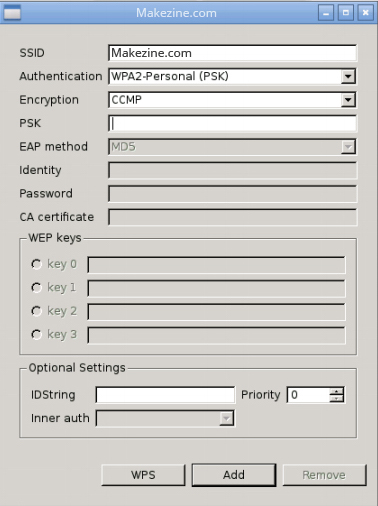
A new window will open that will allow you to enter your network settings. If your network requires a password, enter your wireless network password in the PSK field, then click the Add button.
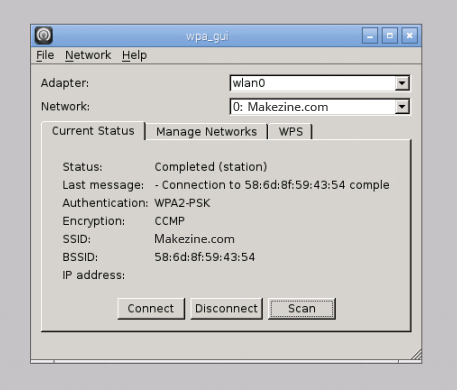
Click the Close button to close the Scan results window. Once you do this you should see that you are connected to your selected wireless network.


