Over the past decade or so, I’ve been building a new RC airplane every month or so. Some are big, some are small, but all of them are unique. Building is my favorite part of the hobby. We live at a time where the electronics and components that go into these builds are small, cheap, and capable enough that projects that would have been suited for a DARPA program a few years ago, can be built in your garage over a weekend.
Last year, I struck model airplane gold with my Star Wars speeder bike builds, and this has kicked off a series of follow up projects, where I’ve tried to make pretty much every ship on Wookieepedia fly in real life. Most recently, I’ve gone back to making proper flying machines, where the wings do the lifting (A-Wing, X-wing, Y-Wing, and Snow Speeder builds) but some projects need rotors to stay aloft.
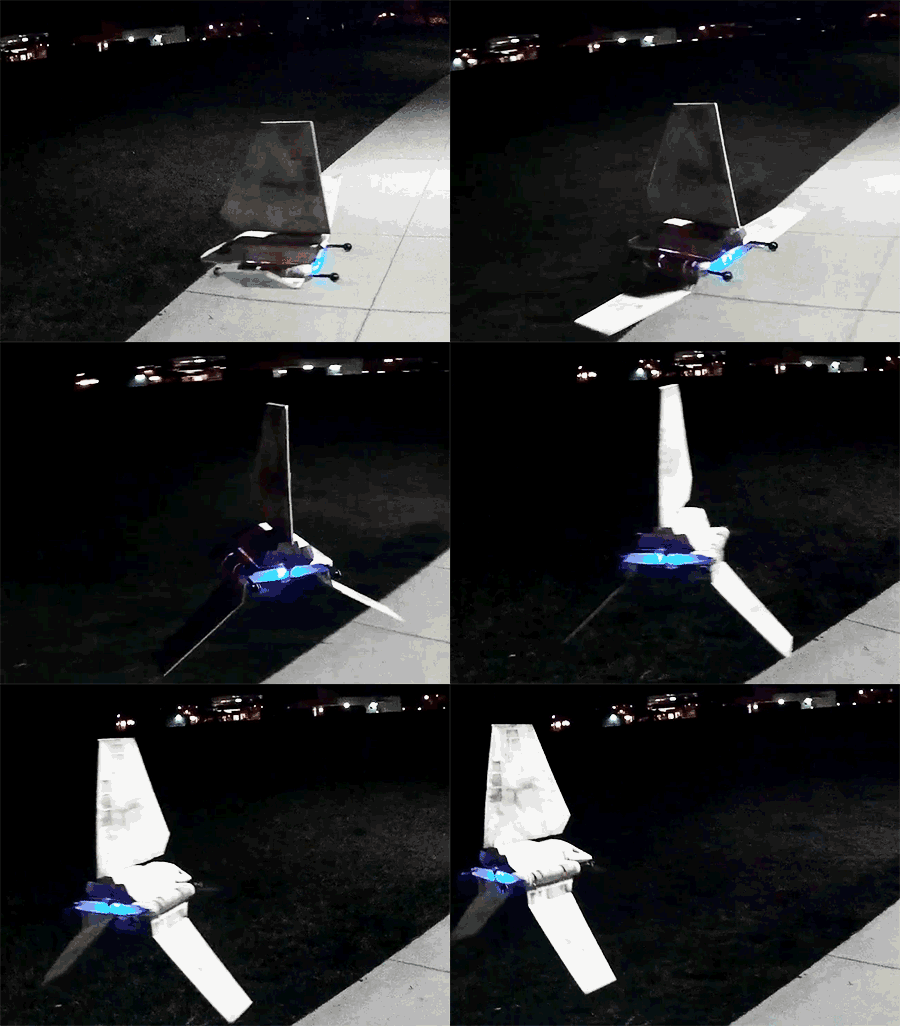
The Lambda class shuttle (more commonly known as the Imperial shuttle or as the infamous Shuttle Tydirium) has always been one of my favorite ships. I knew it would be another awesomely cool thing to bring to life, with those iconic folding wings and glowing blue engines.
The main challenge in even starting this project was finding suitable hull to build around. A 2D profile ship simply wouldn’t do this build justice, and all of the plastic versions of it were either too small (Micro Machines Action Fleet and Revell Snap Tite versions,) or too heavy (both the original and re-released Hasbro versions). I was stuck looking at the prospect of a rather lengthy scratch build, that at the end of the day (and with my painting skills) would leave me wanting more. Luckily paper models are a thing… a very popular thing.
In the micro RC world, it’s pretty common to use papercraft airplane plans printed directly onto thin foam, to build flying versions of otherwise static models (Fiddlers Green is a very popular source). After much searching, I found a set of plans for the Imperial shuttle, that were both simple enough to build using reasonably thick foam (3mm and 6mm Depron) and good enough resolution, that I could enlarge them to a size big enough to fit all the electronics in it. The plans were printed out, then attached to the building materials with 3M77 spray adhesive (6mm foam for the main structure and poster board for the skins).
I started the build in early October and had the ship framed up in a couple afternoons of work. Then I hit a wall. The folding wings — so critical to the coolness — were proving to be a bear to figure out. The surfaces are quite large and heavy. They have to rotate almost 180 degrees, they have to do it in sync, and the mechanism has to be internal to the hinge to preserve the look of the spacecraft. I tried gears (too heavy), pushrods (insufficient travel), and pulleys (hard to actuate in both directions).
After hours of fiddling, I finally got a line driven system working with an over center pivot arm, and it worked great going up, but relied on gravity to go back down, and I couldn’t retract the wings to their full landing configuration and have it work repeatedly. I shelved the project. It sat on the bench as a full Rebel fighter fleet came to life, and the year came to an end.
Then, while walking by it one afternoon 4 months after I had started, I decided to finish it. With a fresh perspective, I re-worked the line system, and installed a few simple leaf springs (made of carbon sticks) that were only loaded in the fully retracted wing position, giving the wings just enough oomph to get over center and let gravity do the rest. Once I had that sorted, the rest of the build took a few hours to complete, and I was left with a surprisingly airworthy creation.
The first time I cycled those wings in flight, I knew it was worth it. I just couldn’t stop smiling. As for how it handles, in the words of Han Solo, “uh…I don’t know…fly casual.”


