Inductive chargers are becoming more popular for phones, watches, headphones, and other devices — they’re everywhere! I look forward to imagining a completely wireless future, where power moves through the air like Wi-Fi and radio. But for now, I’ll show you how to use induction to make some fashionable wireless accessories!
HOW DOES IT WORK?
At its core, wireless charging uses the magnetic field created by every electrical wire to transfer power between coils. This is possible because of Faraday’s law of electromagnetic induction, which tells us that an electrical force is produced across an electrical conductor (a wire) in a changing magnetic field. Faraday’s theory is also responsible for important things like transformers, electric motors, and generators.

Every wire with an electrical force produces a magnetic field with a north and south pole, which can be further described with Lenz’s law, which tells us how we can find the magnetic polarity of every electrical field. As shown to the left, you can predict the flow of the magnetic field by pointing your right thumb in the direction of the current; your fingers will then follow the flow of the magnetic field! It sounds wild, but I literally mean that every wire with electricity in it produces a magnetic field, which can be used to make things like motors, solenoids, and loads of other tech.
Because every individual wire’s field is very small, adding many wires in a coil multiplies the strength of the force. The shape of the coil, as we’ll explore, affects the shape of the field. Below shows a spring coil, but they can be flat, circular, helical, and many other shapes.


There are two coils called inductors in our wireless power circuit, one in the transmitter (the device providing power) and the other in the receiver (the device being powered). When a current passes through a coil in the transmitter — the charging station, for example — the moving electric charge creates a magnetic field, which passes through the opposite coil in the receiver, inducing a current in the receiver coil which in turn passes through a rectifier and goes on to charge your battery or power your device.
Inductors are typically made of enamel-coated copper wire, aka magnet wire, because copper has low resistance and the enamel insulation ensures the current passes through the entire spiral in the coil, and doesn’t short-circuit across it.
COUPLING INDUCTORS
There are a few factors that govern how far you can hold your transmitter coil from your receiver coil, as well as the power capacity for your coil. Inductors transfer power by coupling, meaning the two electromagnetic fields mesh together. Playing with the parameters below can help you achieve this more efficiently. Electromagnetics and inductive circuitry are a whole field of study, so I’ll just give you the basics here that can help you get started.

• Inductor size and shape have a direct impact on coupling. For the best results, as many lines of the magnetic field produced by the transmitter coil must intersect directly with the receiver coil. Pairing coils of the same shape will ensure the best coupling (right).
• Distance is also an important factor in power transfer. As the coils move apart, the inductive coupling is rapidly reduced; efficiency of 90% or more can only be achieved if the distance-to-coil-diameter ratio is less than about 0.1, otherwise the efficiency falls rapidly. However, this can produce some interesting effects if you want your lights to fade!

• LC circuits, named for their components — an inductor marked L, and a capacitor marked C — can be used to create a more efficient coupling circuit (Left ). Tuning the frequency of an LC circuit can create a resonance frequency between the two inductors, increasing efficiency.
I encourage an exploratory approach to learning about inductive power. Most components are cheap and easy to set up. While the math is pretty complex, the ideas can be observed clearly with some simple LED circuits that I’ll show you now.
YOUR FIRST INDUCTIVE BLINK
The first thing I like to share with people is the easiest way to make your own inductive blink, using just a piece of wire, an LED, and your phone! Because your phone has an inductor inside for NFC (Near Field Communication) for Apple Pay, Google Pay, or similar services, you can create a very basic inductive circuit.
CHECK COMPATIBILITY
Make sure you have a smartphone that not only has NFC, but also can run NFC in the background. Starting with the iPhone 7, iOS 14, you will have an Enable NFC option. For most Android phones you can enable NFC by going into Settings Connected DevicesNFC and making sure it’s switched on.
MAKE A COIL

Make a simple coil by wrapping your wire around a large marker. I’d recommend between 10–20 turns, depending on the gauge of your wire. Make sure to leave both ends of the wire accessible.
SOLDER YOUR LED
Solder each lead of your LED to one end of your coil. Polarity is not important here, so don’t worry about the positive and negative leads.
LIGHT IT UP!


With the NFC setting on, place your phone over your LED coil. You should see the LED start to blink! You might have to move your coil around, depending on your phone. You can also try flipping the coil backward to get it to couple.
EXPLORING INDUCTIVE POWER

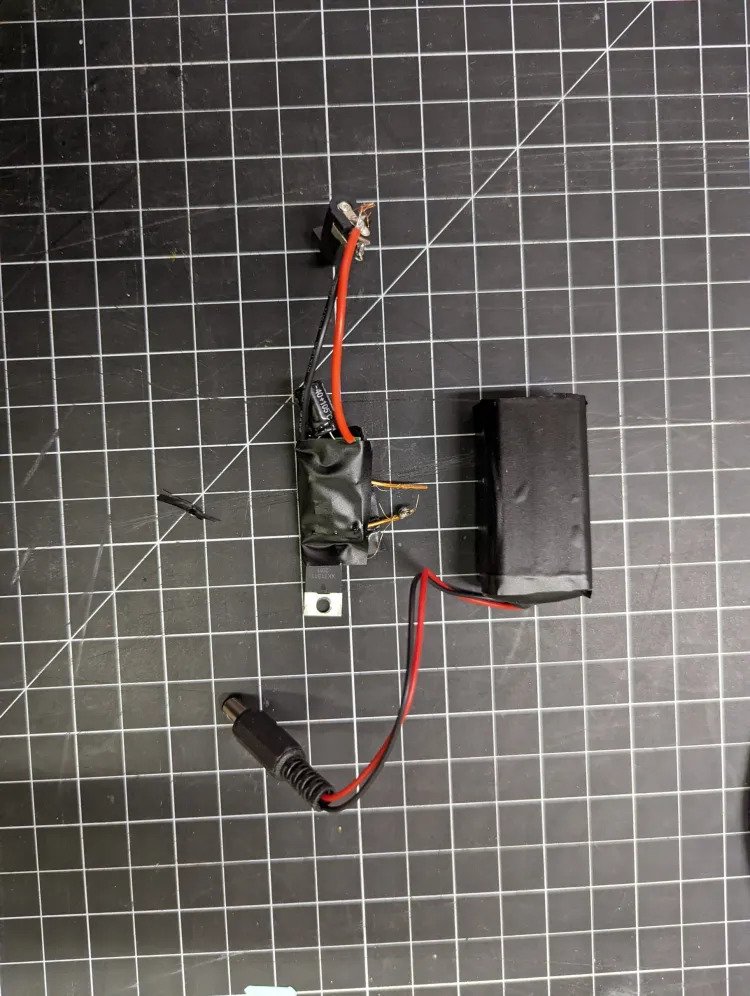
If you’re looking to get up and going with inductive LEDs quickly, I’d recommend getting Adafruit’s Small Inductive Coil and 10 Wireless LED Kit (above). You’ll also need a 5V power supply: either a USB battery, a battery pack of AA batteries, or a bench power supply. (The bench supply is great for learning, but you’ll need to figure out another option if you want to take your creations wireless.) Adafruit also sells a Large Inductive Coil wireless LED set, and a paired Inductive Charging Set in 3.3V or 5V (below ), which you can use to power anything by connecting the receiver output coil to whatever you want. Once you’re comfortable with these out-of-the-box solutions, you can start experimenting a bit more.

My go-to for this type of exploration is always AliExpress, where you can find a wide variety of transmitters and receivers at different voltages and sizes. I recommend experimenting with both transmitter and receiver coil shapes; you’ll find they all react differently.

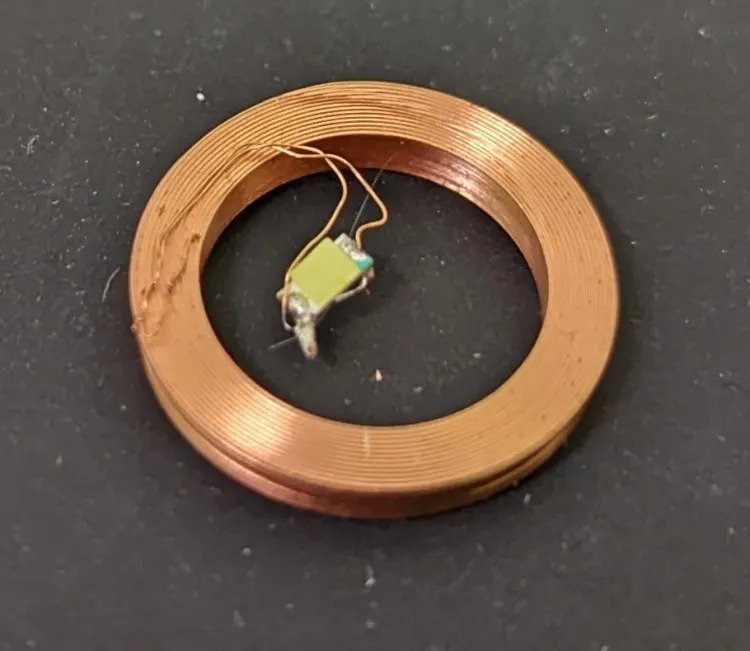
• Receivers — As we’ve seen, you can make your own coils but premade coils have much more even and consistent winding. I’ve tried several winding jigs and can safely say there’s nothing like a professionally machine-wound coil. These coils come in SMD, through-hole, and individually wound formats with a variety of sizes and shapes. They’re pretty affordable, so I recommend buying a few and playing.

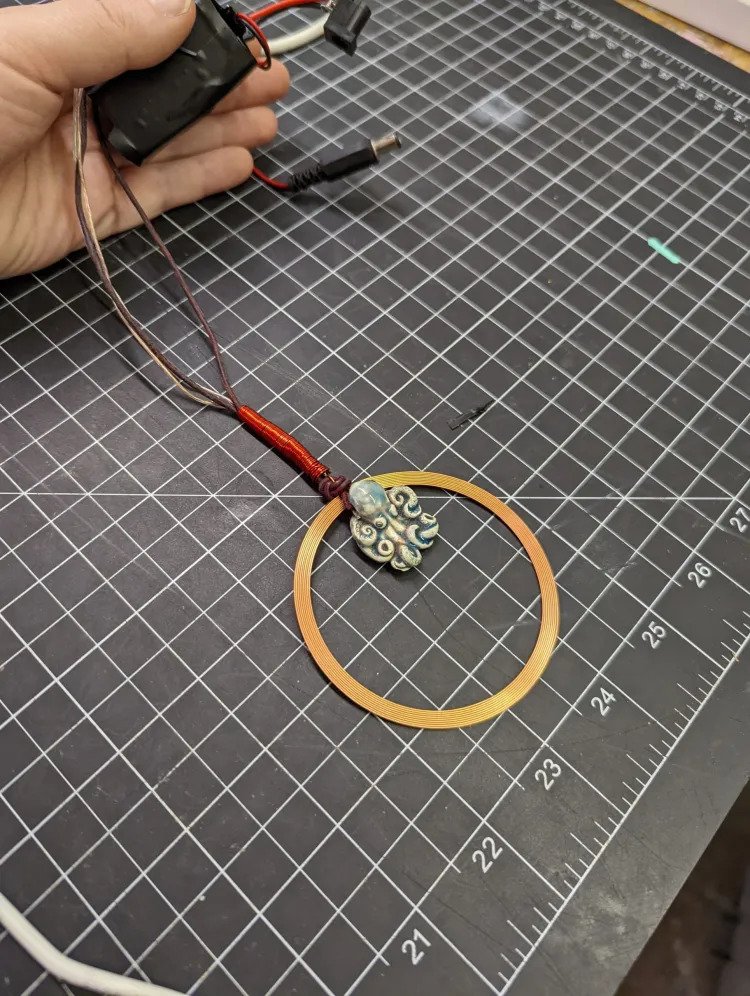
Anything you want to power, you can solder to your receiver coil: an LED, a motor, even a small circuit board. Rather than using large 5mm or even 3mm LEDs, I use 1206-size surface mount LEDs that provide a much smaller point of light. One of my favorite techniques for DIY coils is to embroider the coil onto a textile, like these from Kobakant (above ). Simply solder an LED to the ends of the coil as you did in the previous example.
• Transmitters — These are a bit more limited. I’ve had some luck with experimenting by cutting off and reattaching larger coils. It’s important to keep an eye on the voltage rating for your transmitter. Larger coils might require more power to get the results you’re looking for.

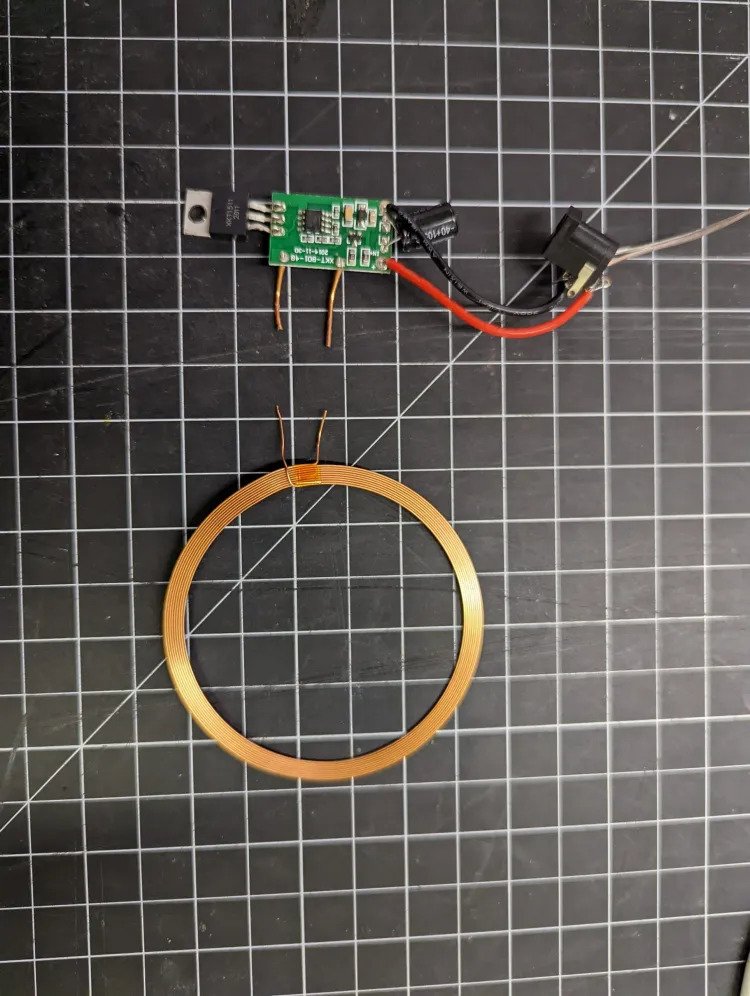
I’ve had best results with these AN-100 radio loops made for AM radios, soldered to a 12V, long distance transmitter. I think they’re great for inductive adornments because these coils are beautiful and can fit over your head!
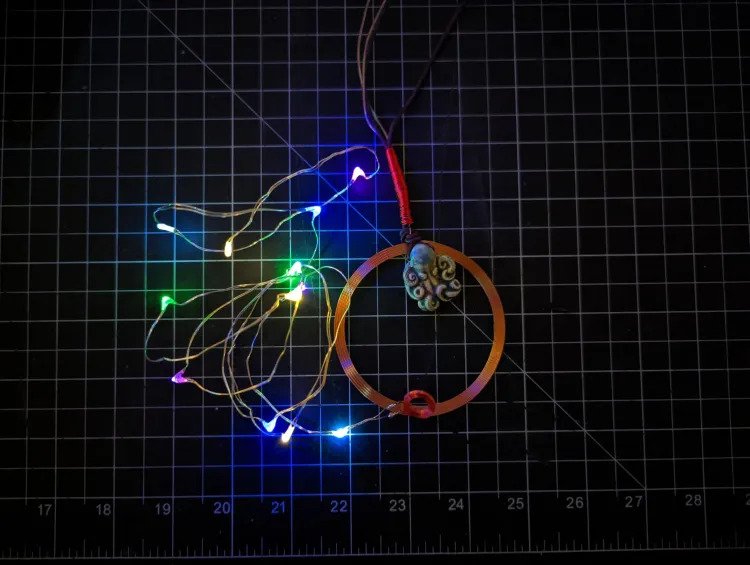
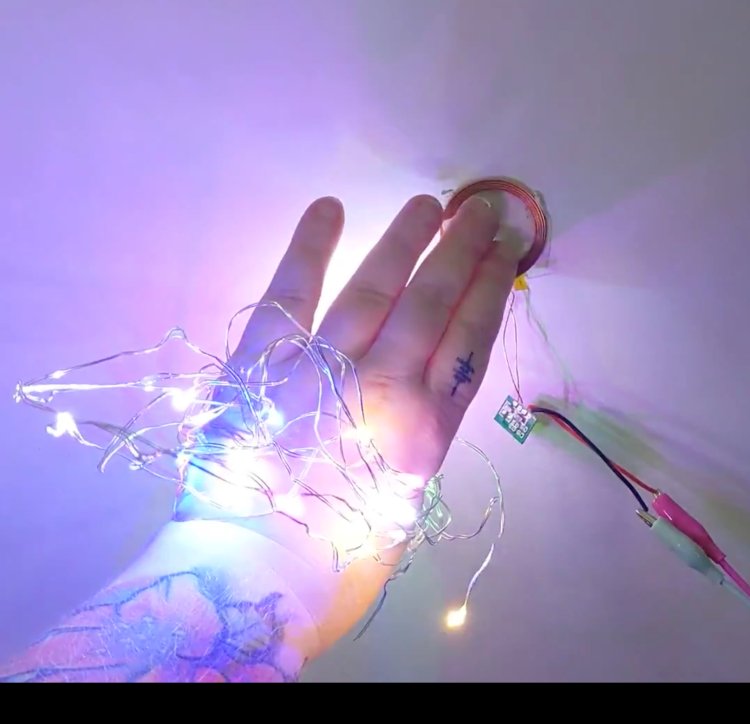
Make Your Inductive Adornments

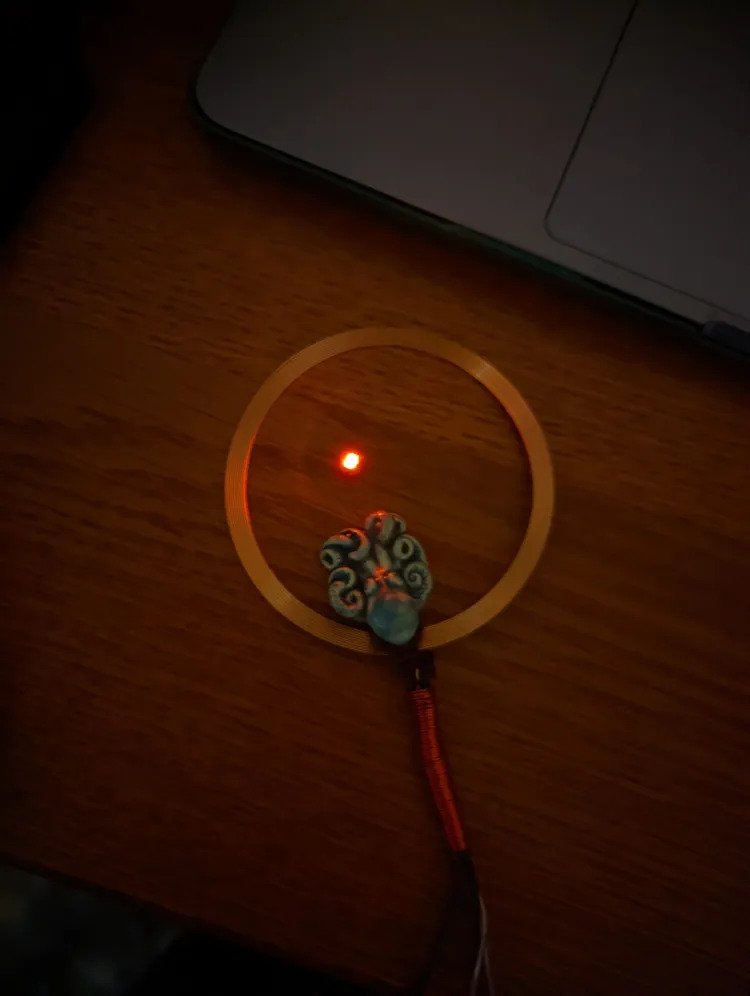
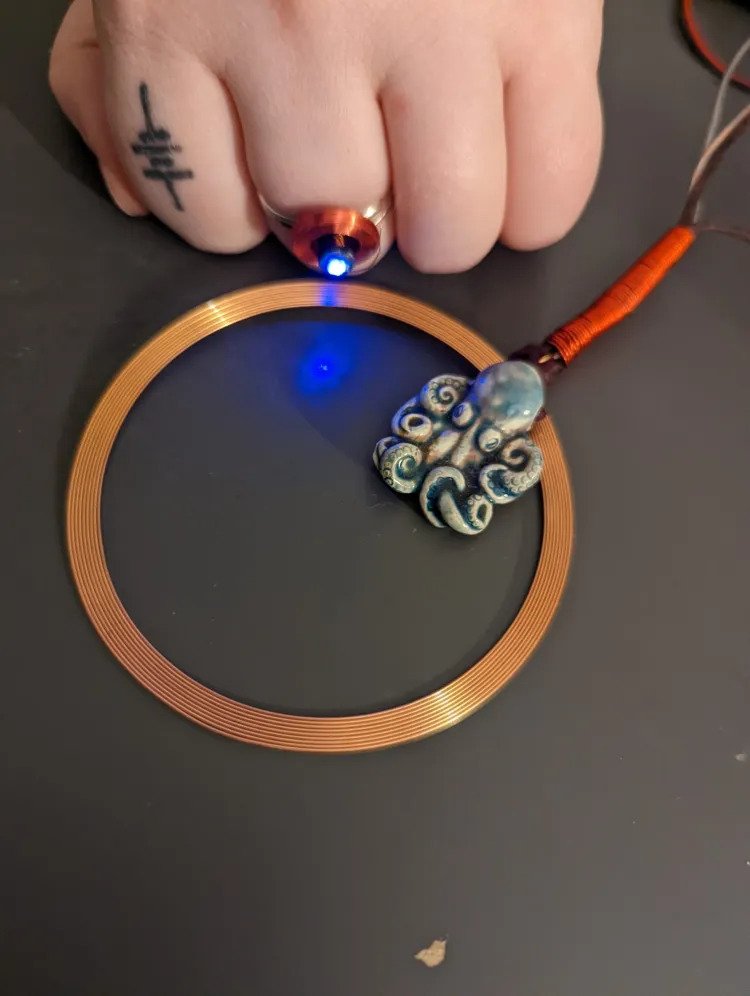
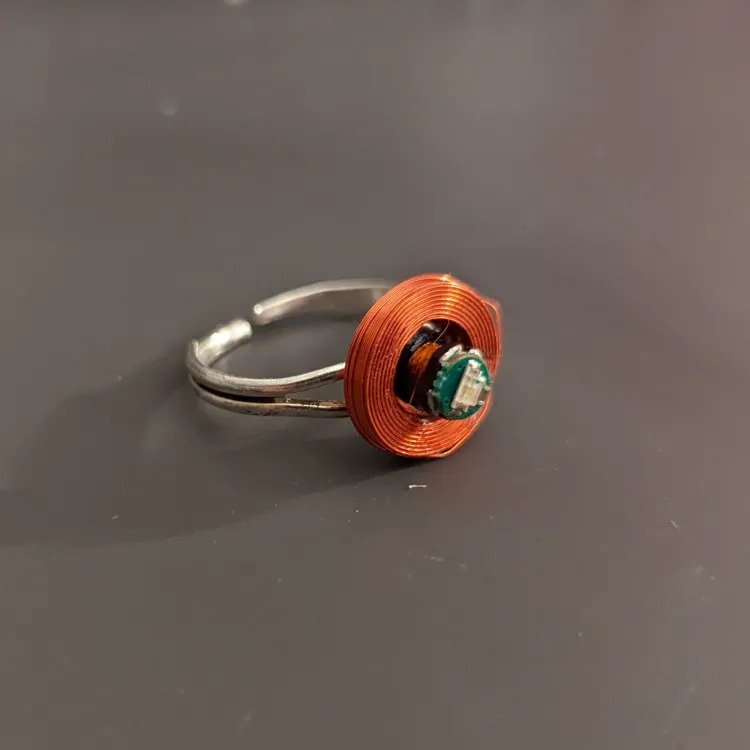
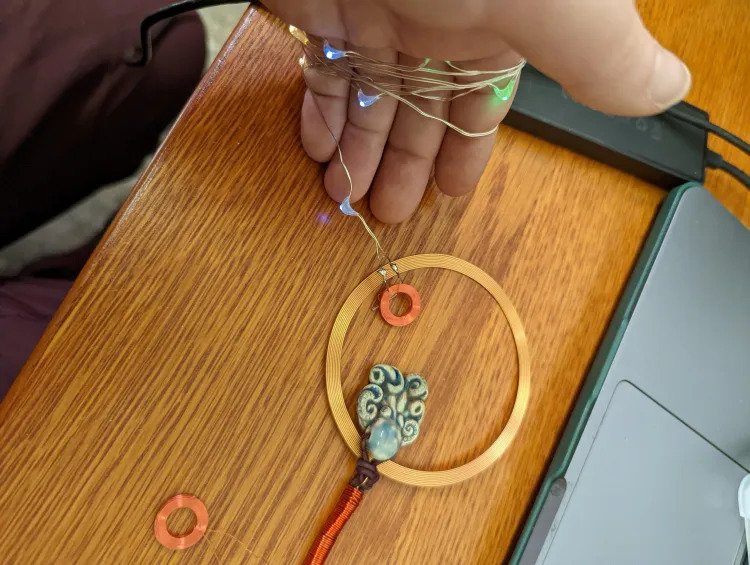
Now that we have the basics down, how can we make this into some cool interactive adornments? In this project we’ll make an inductive LED ring, then use the same technique to make fairy light sleeves. These will light up as your finger or hand passes over the necklace transmitter coil, so you can be illuminated as you dance! You can use this technique to make all kinds of inductive adornments.