YouTube player

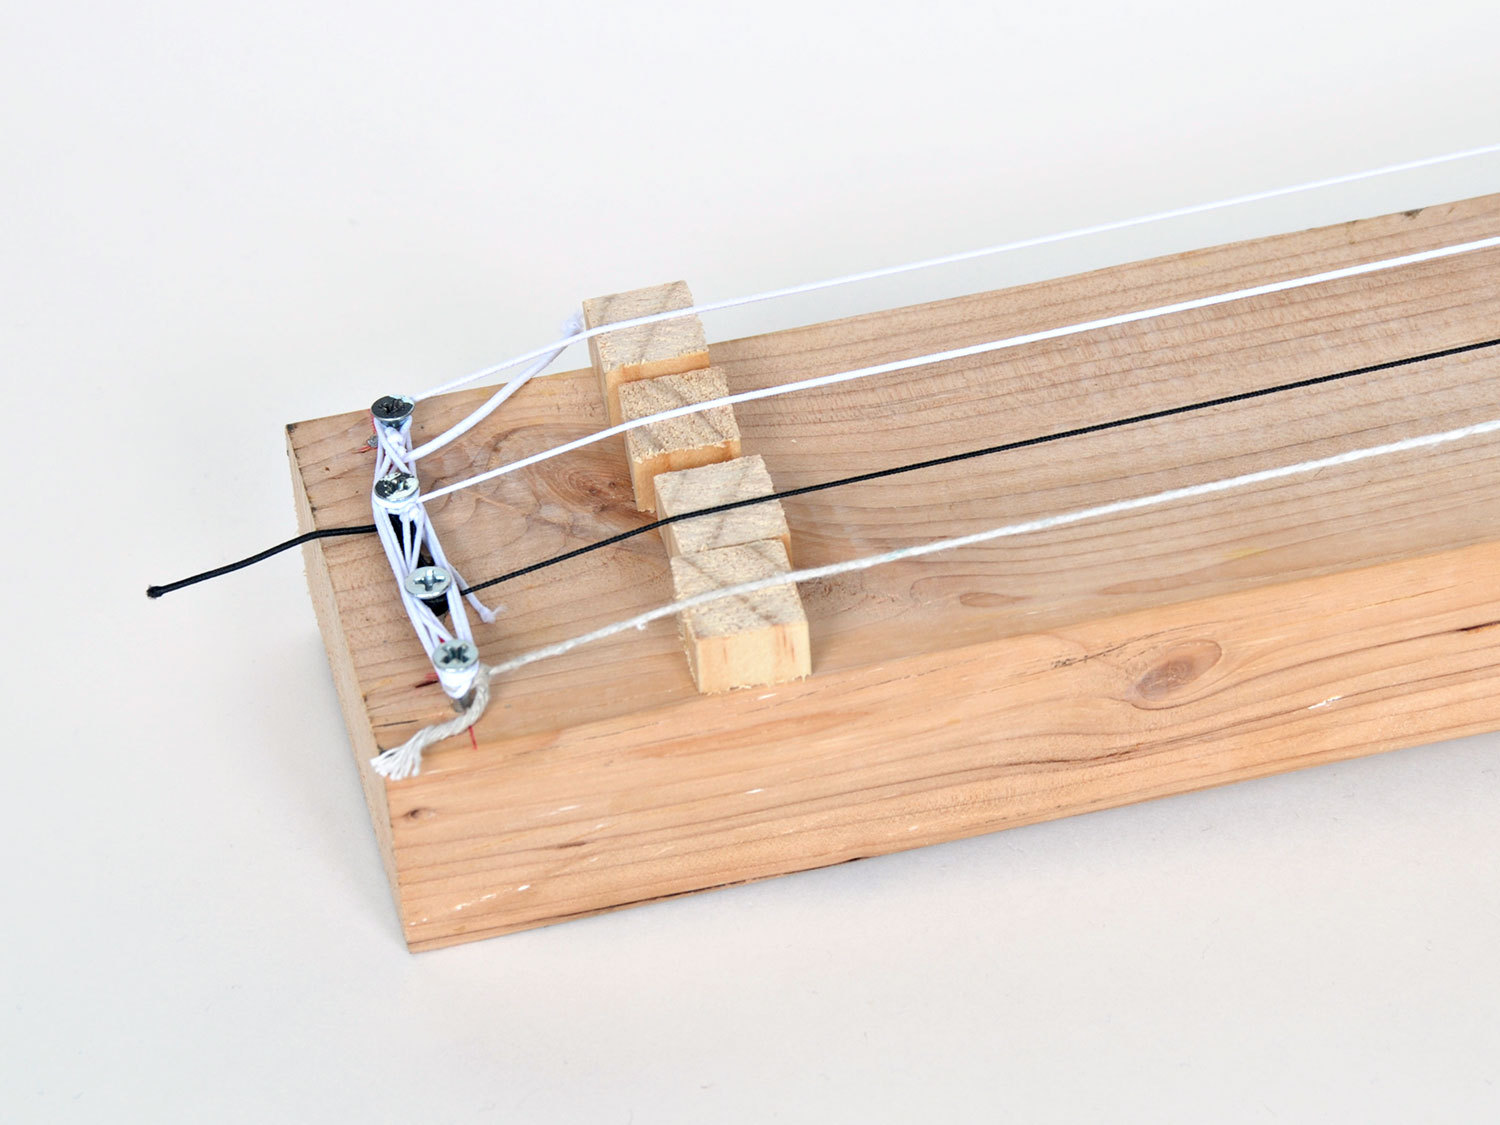
In this project we’re going to take inspiration from Len Keeler’s original Elastic String Bass. We’ll pick it up (no pun intended) and run with it, adding multiple strings for different tonal qualities, etch our own printed circuit board (PCB), and of course, demonstrate the instrument.

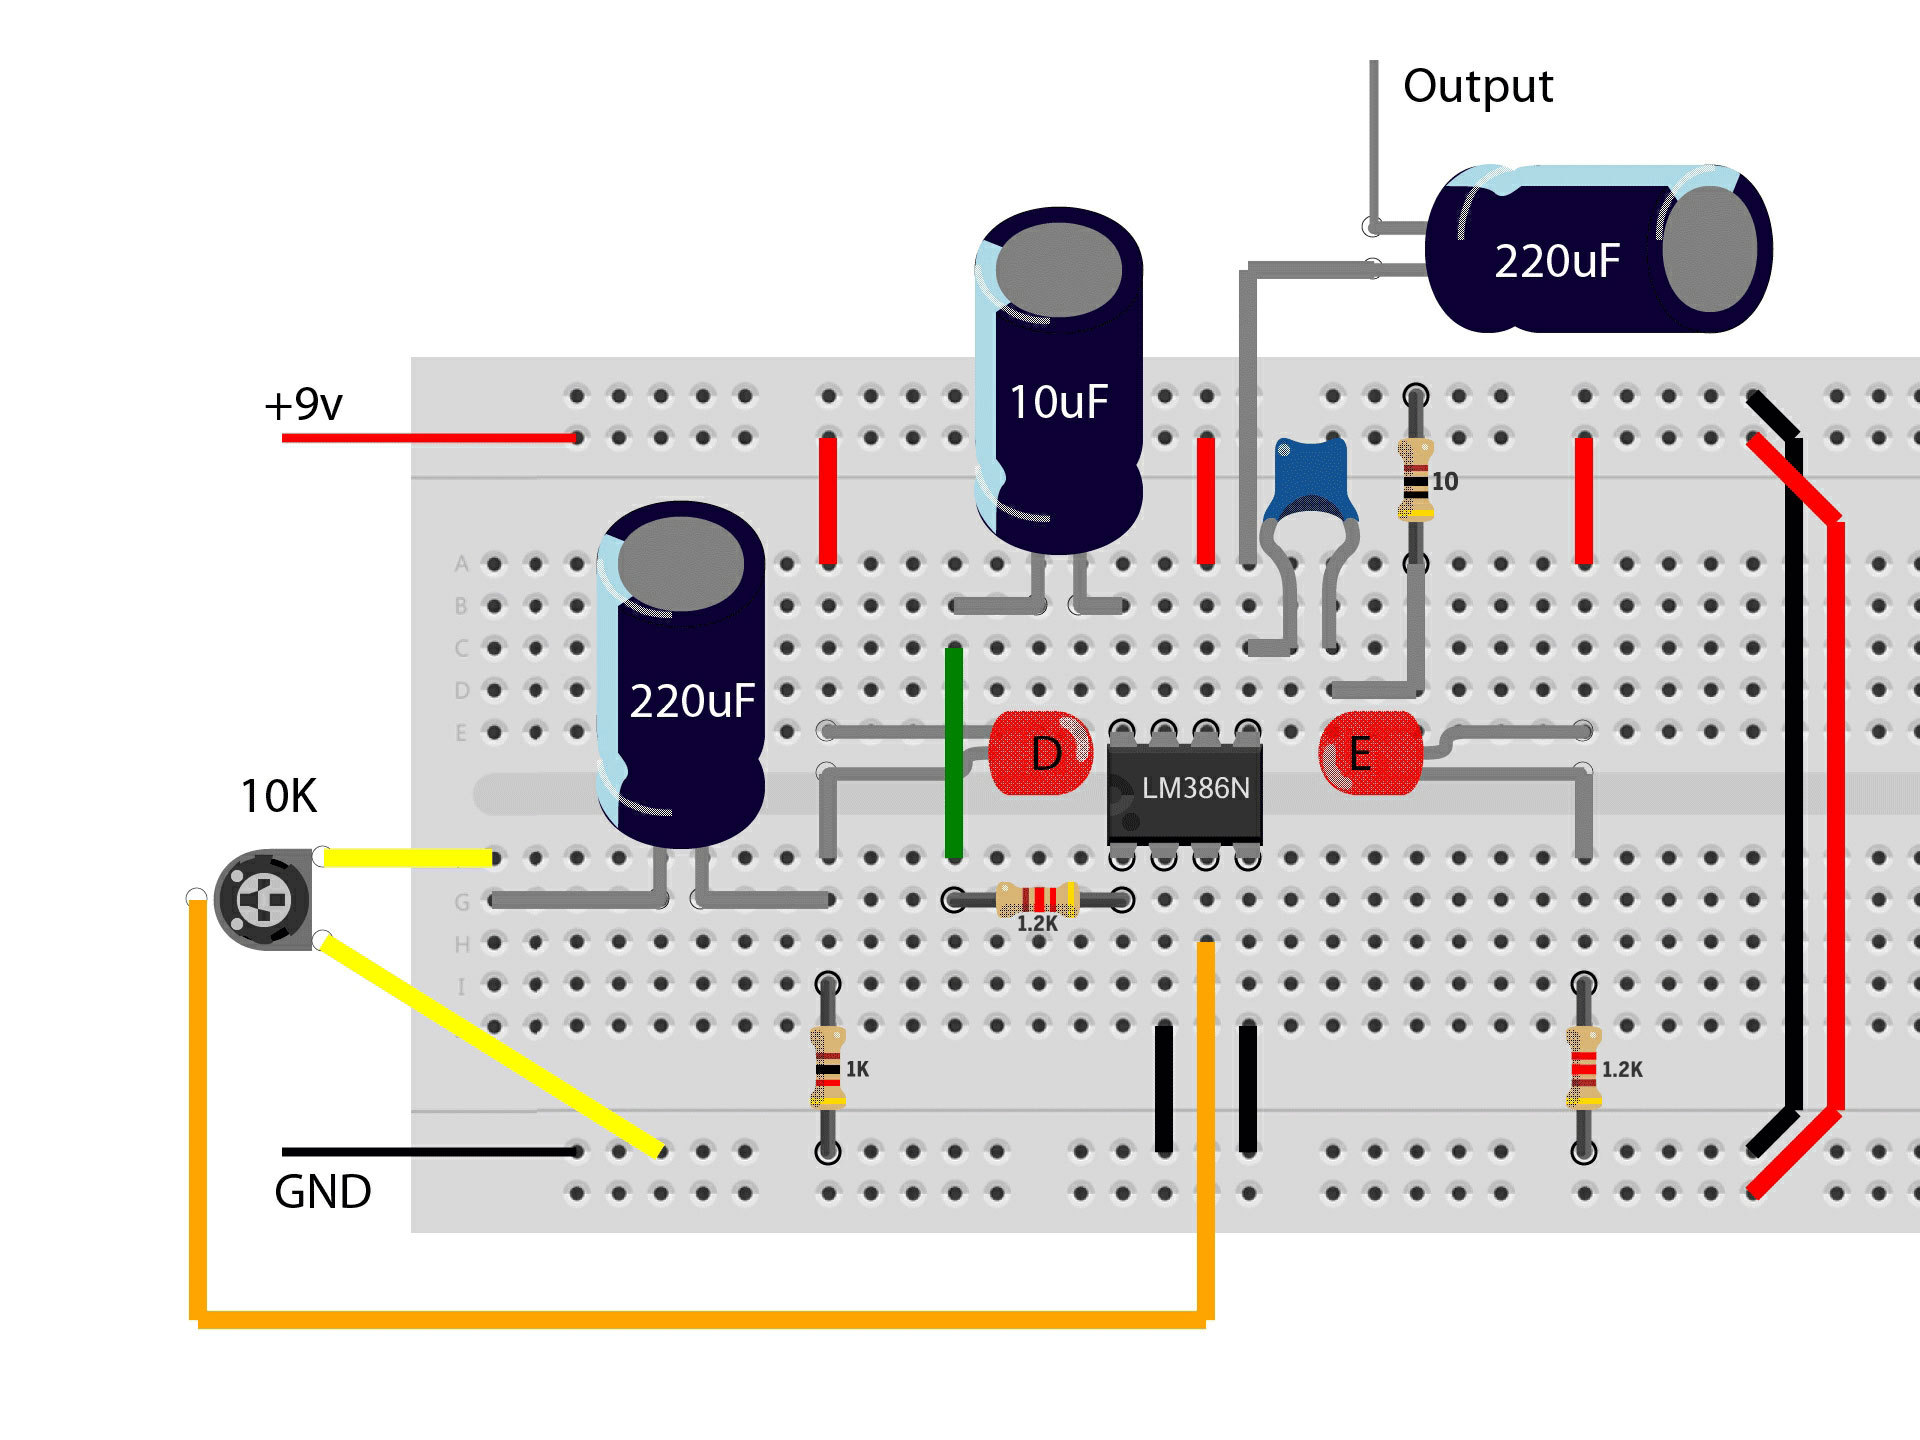
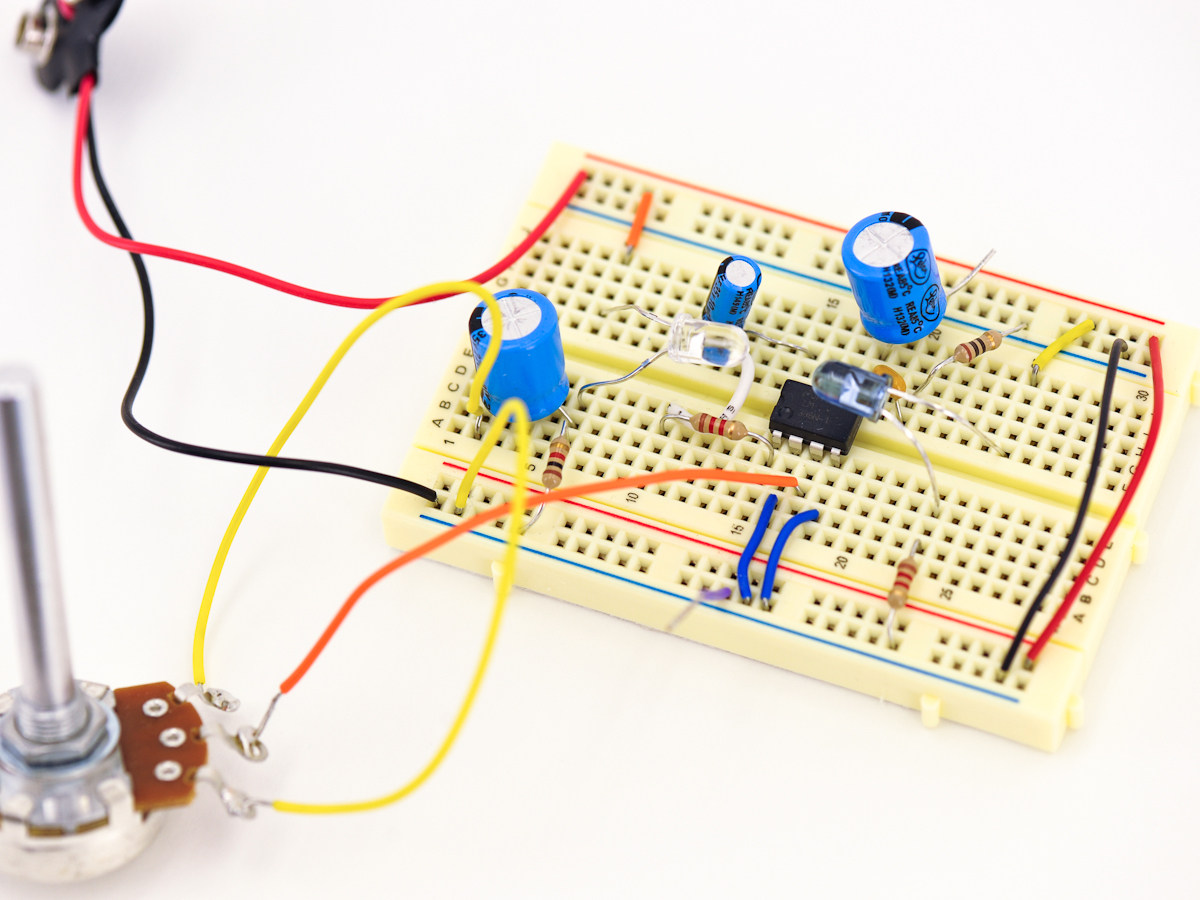
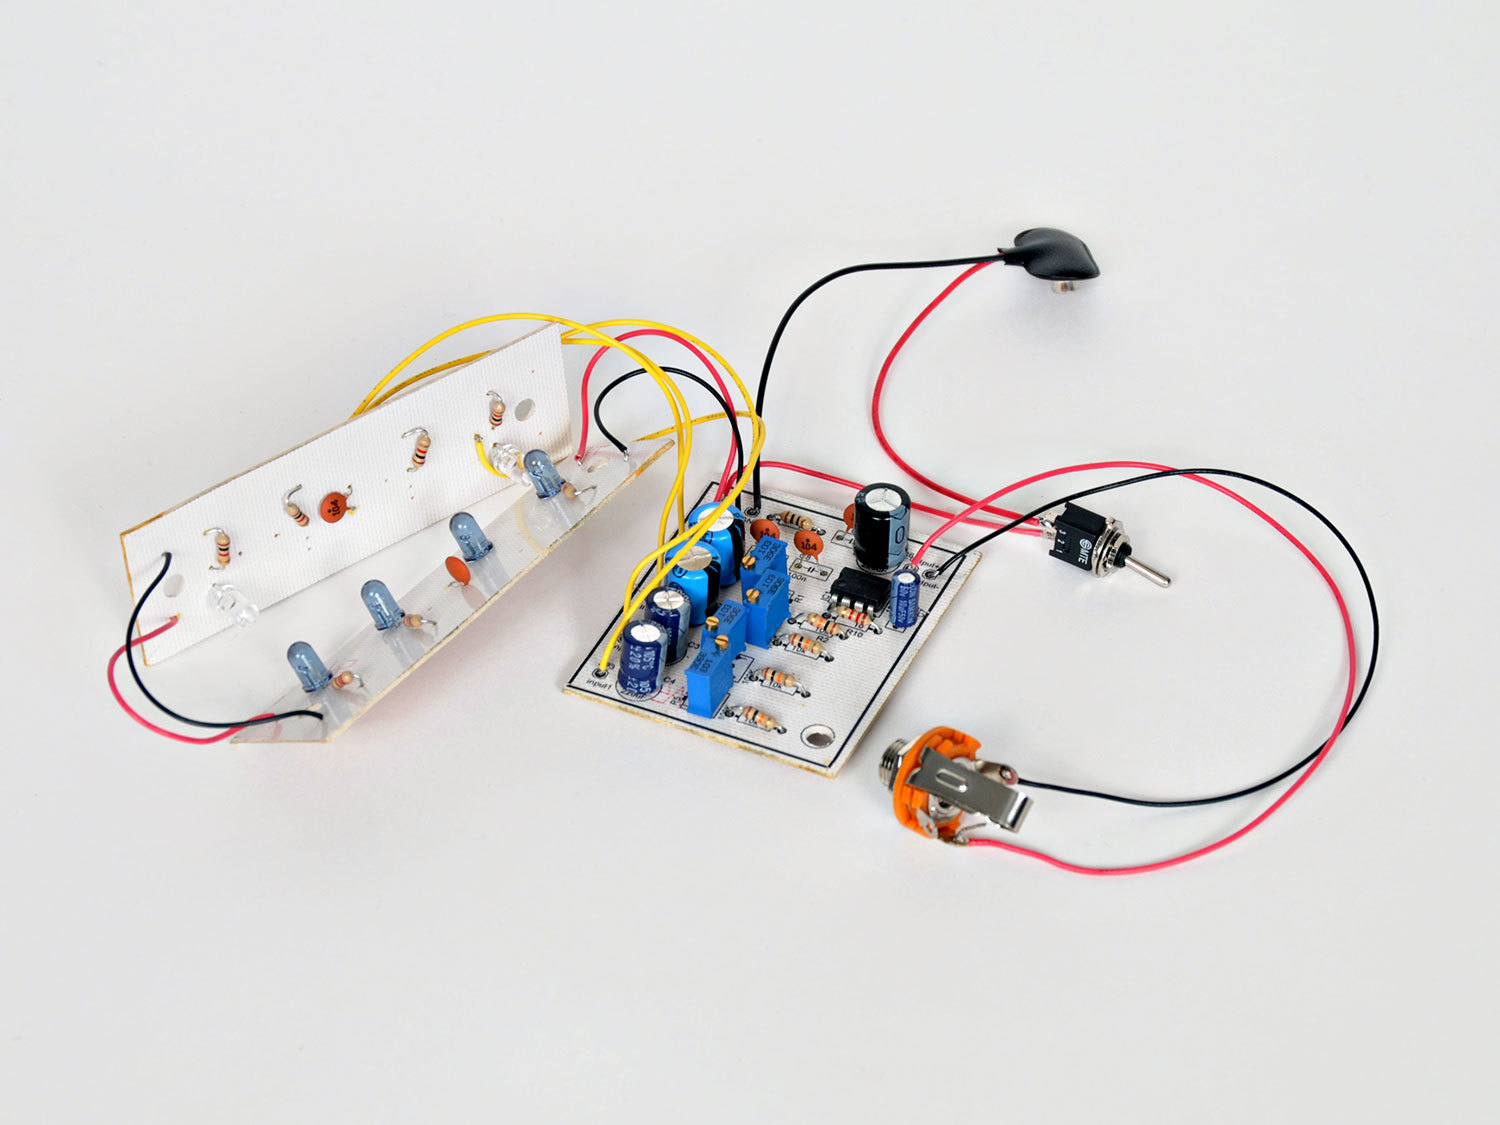
First we will breadboard the basic version of this circuit, which will introduce you to the LM386 audio amp, as well as show you how the IR emitter and detector “talk” to each other, turning interrupted infrared (IR) into audio.

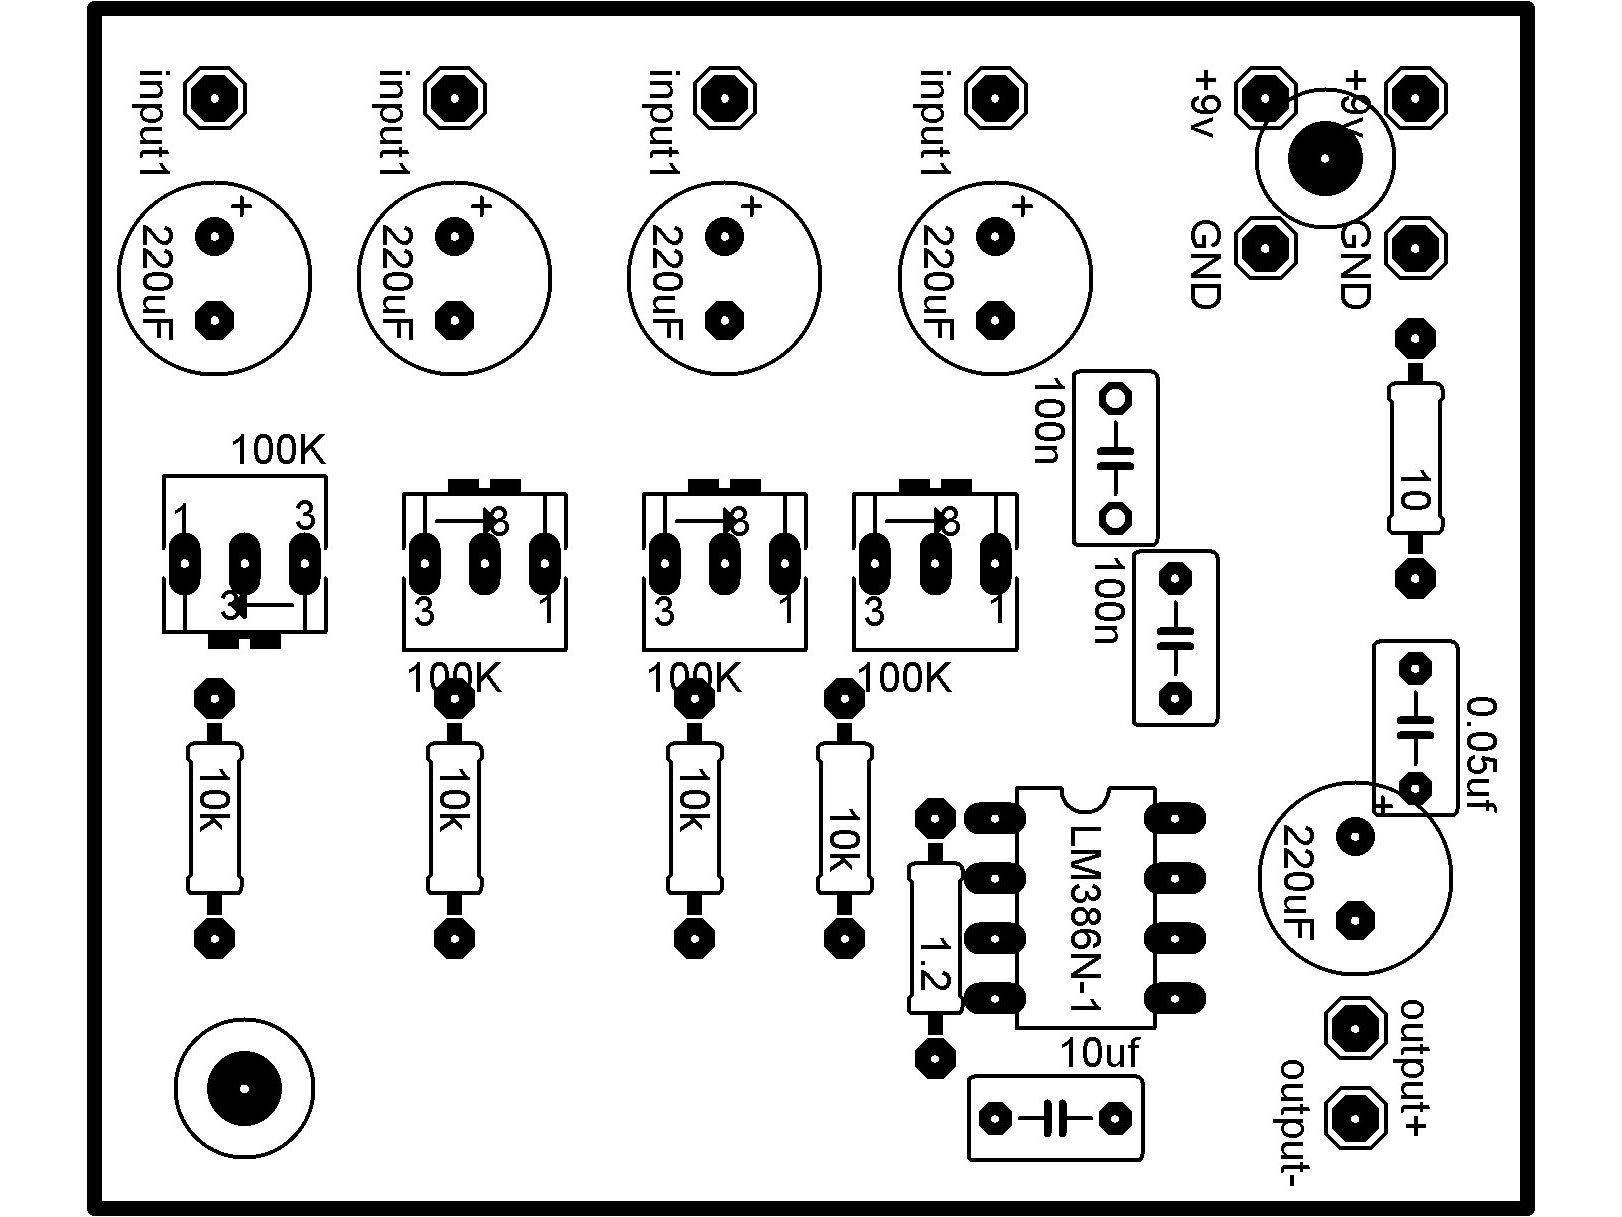
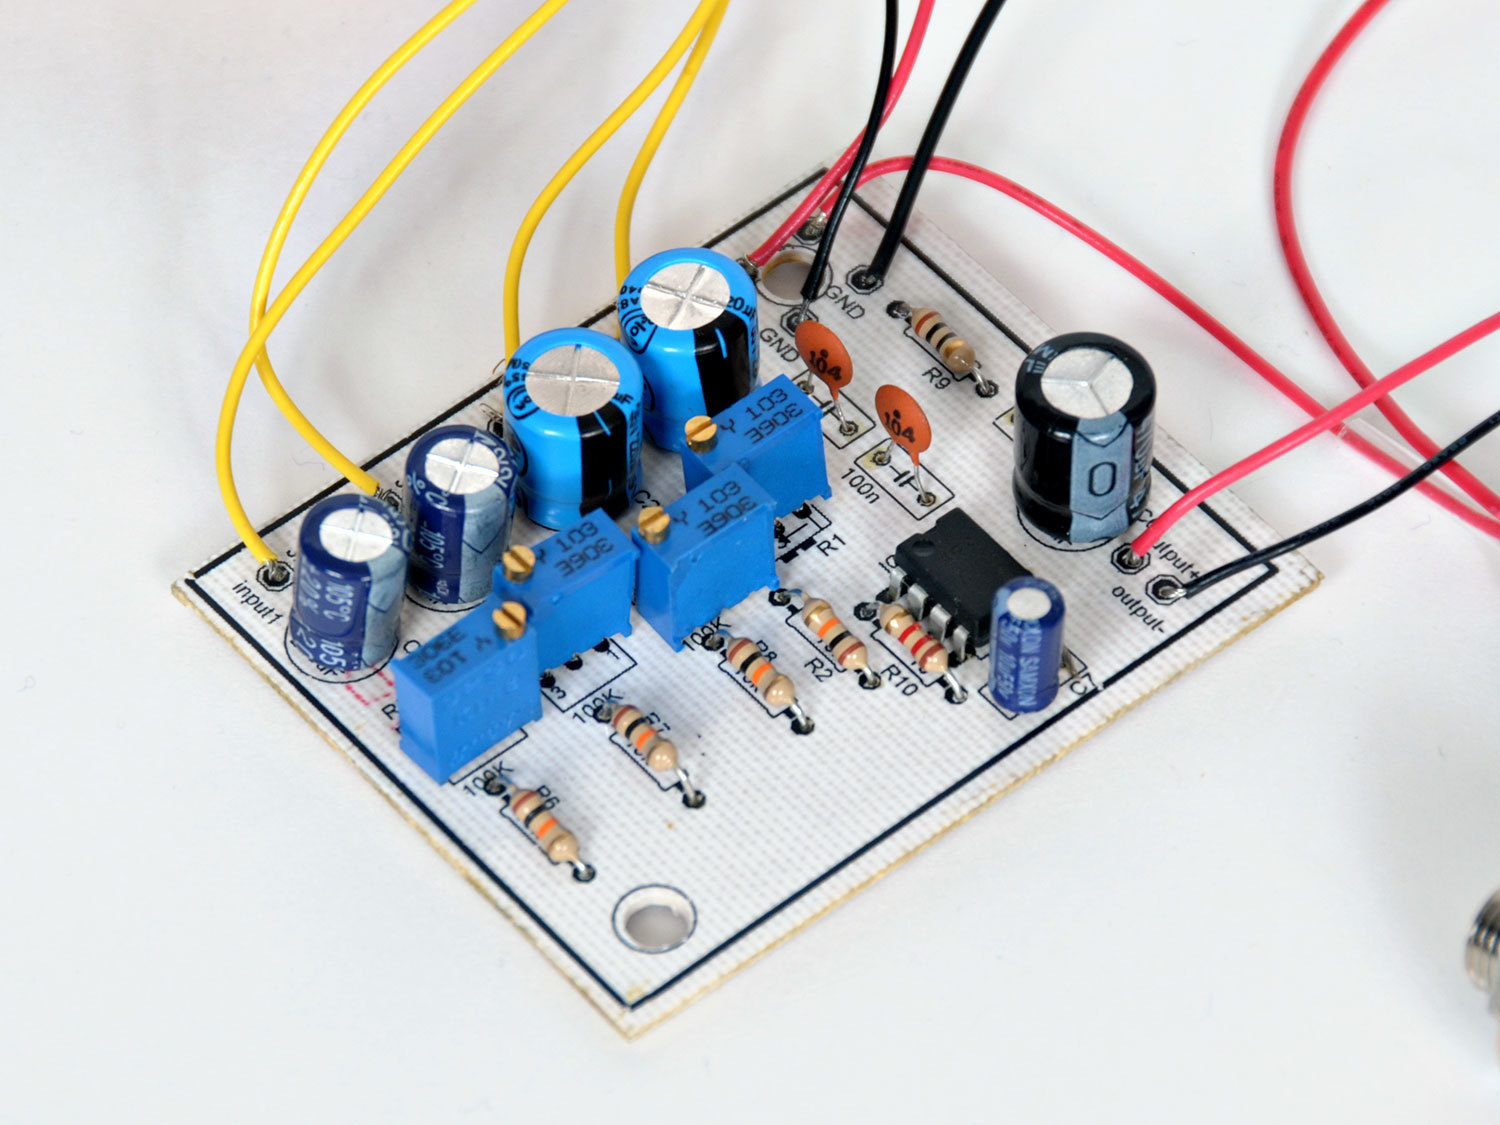
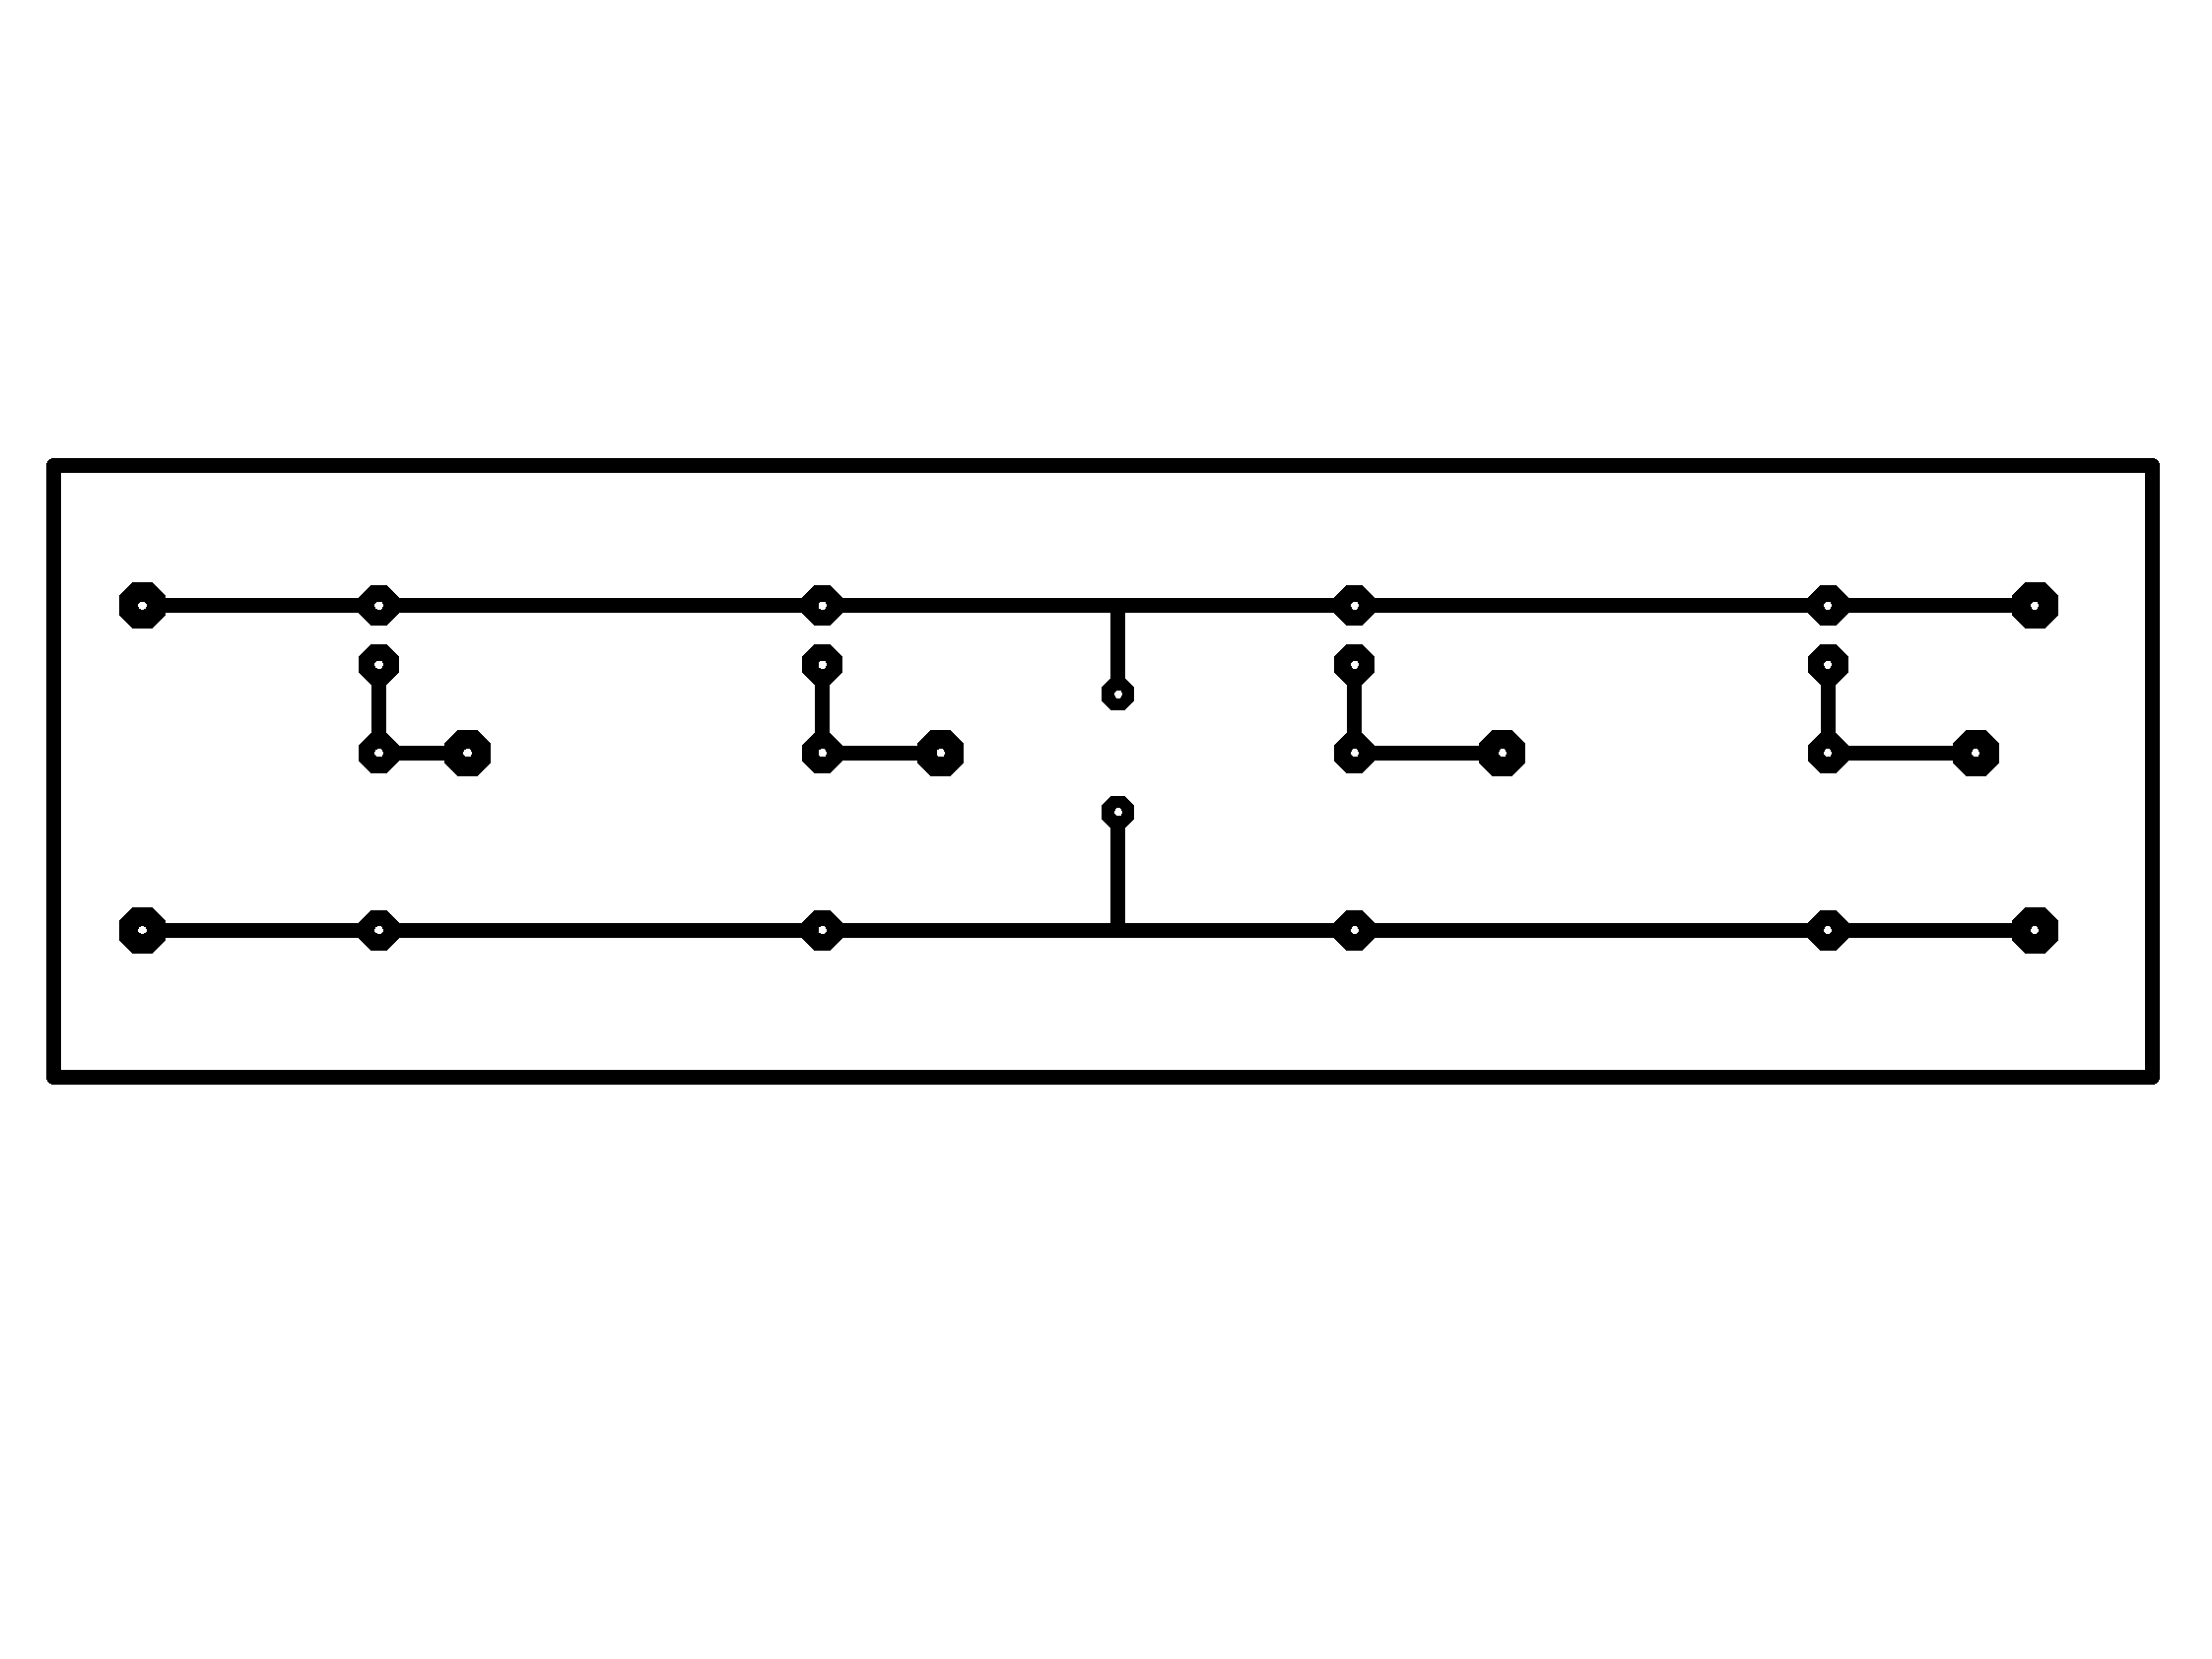
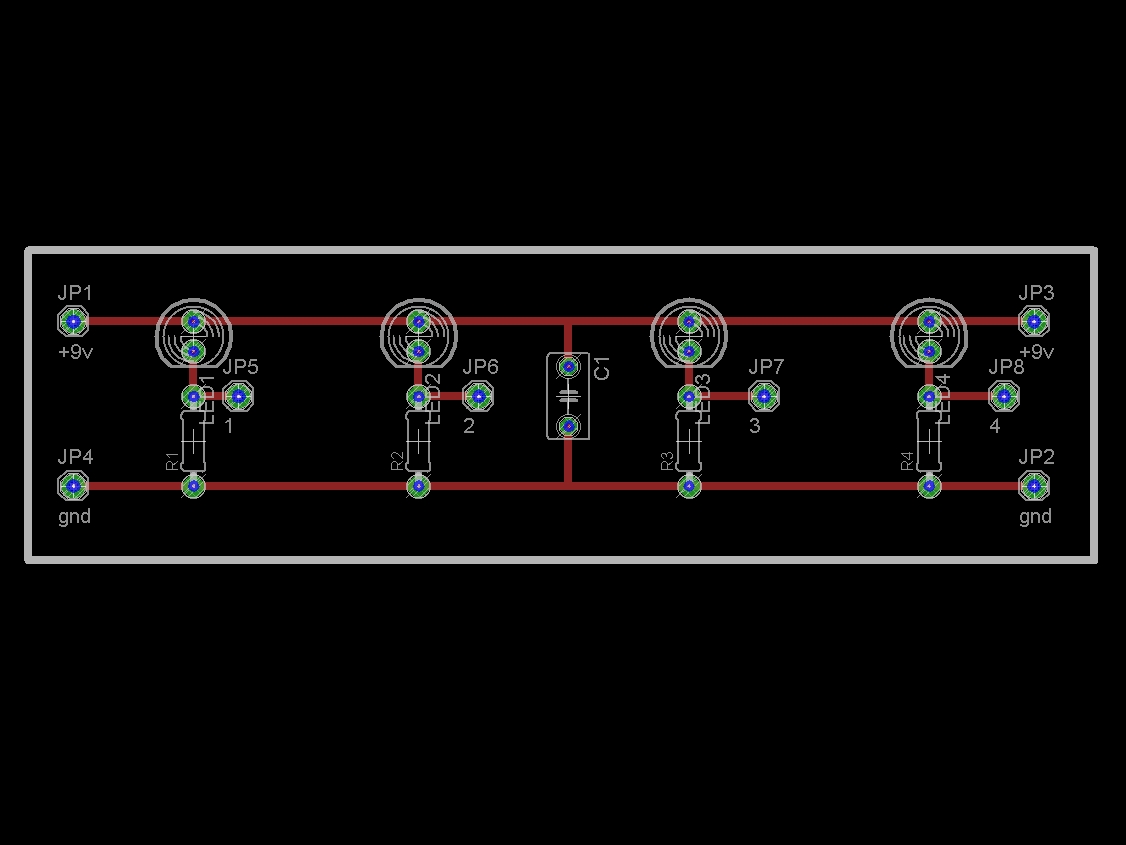
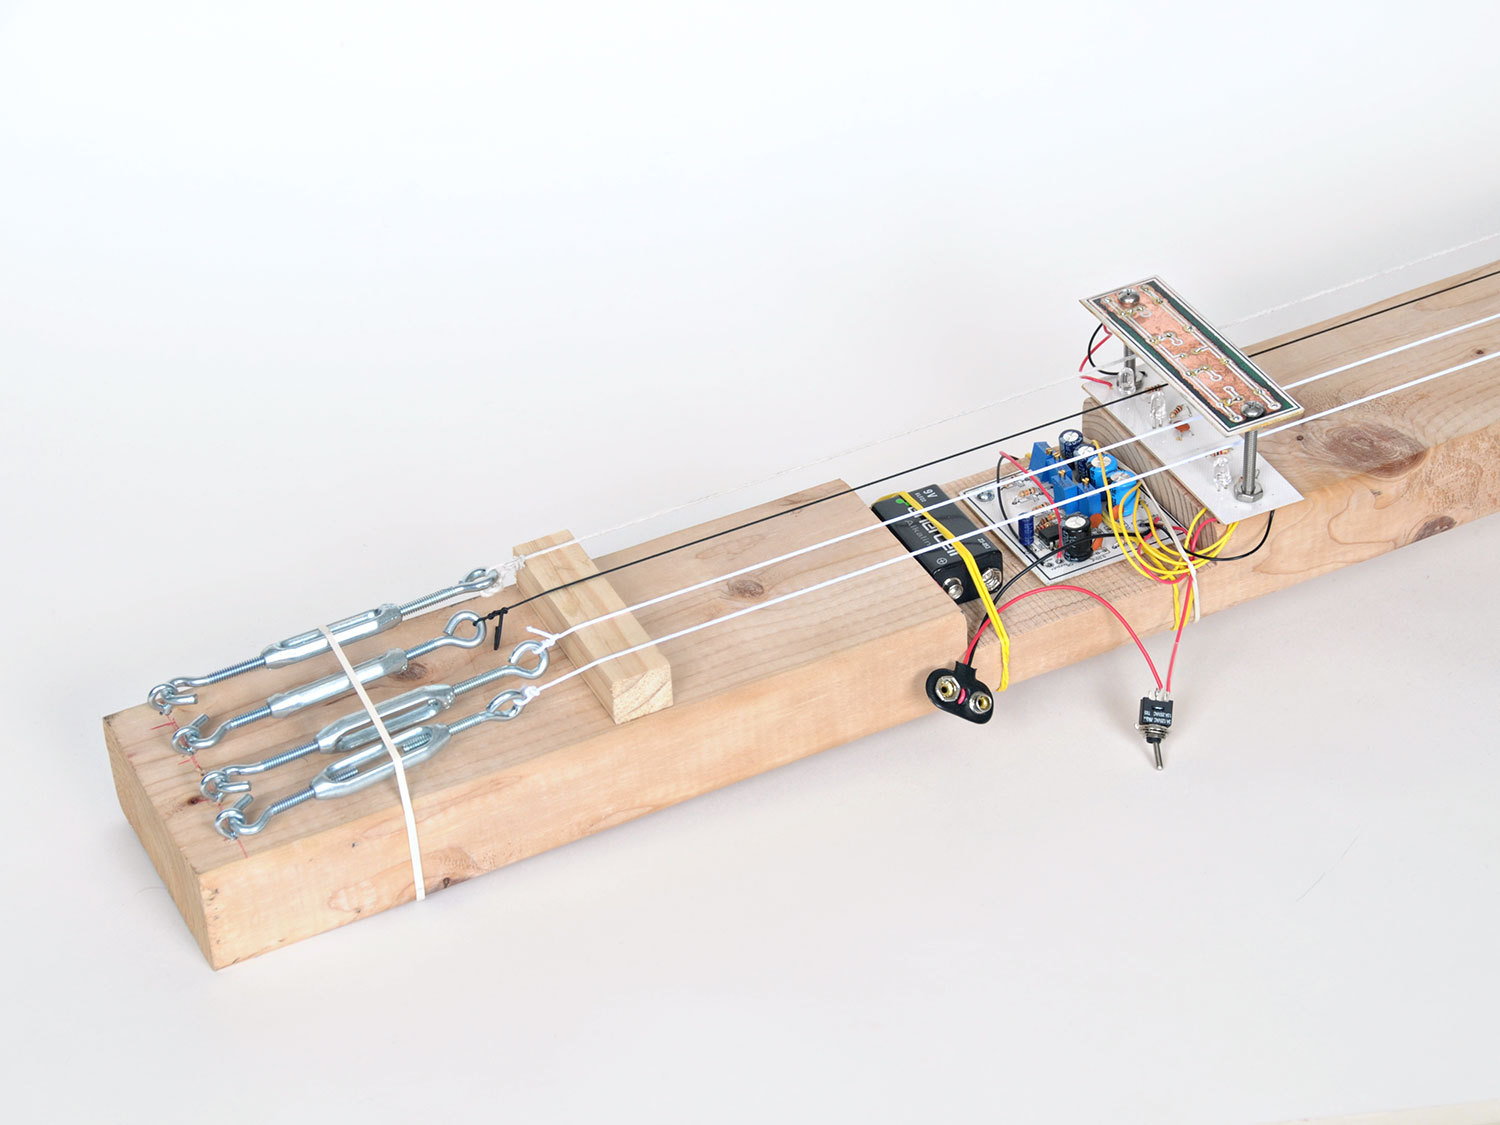
Then we’ll etch our own PCBs, including one for the main circuit, and a pair for the LED holders (acting as the guitar’s pickups).

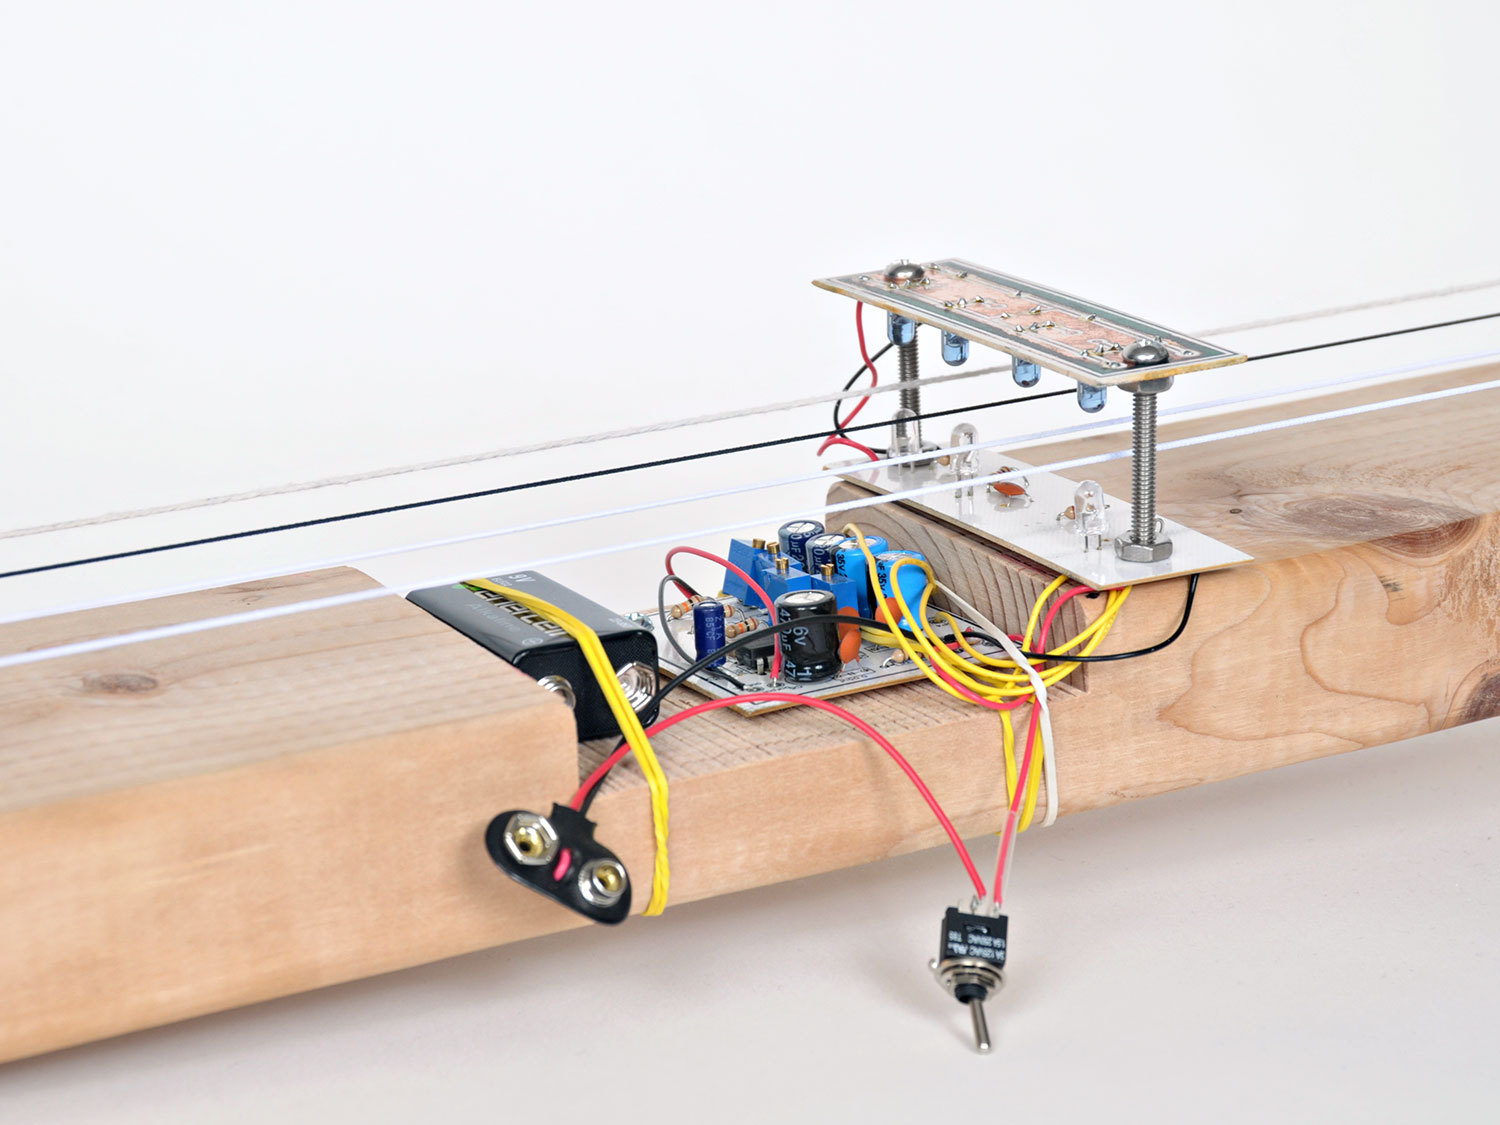
And finally, we will build a wooden body to mount everything on. I’ve used a piece of lumber, but you should feel free to modify the design with the materials you have available. Remember, unlike a traditional guitar, this circuit is sensing interrupted IR, not reverberating through the wooden body of the guitar.

Project Steps

The Basic Audio Circuit

At the end of this step, we will test our breadboard circuit using an oscilloscope. If you don’t have one, or access to one (befriend your local hackerspace!), simply read these points to follow along and understand how the circuit works.

Instead of the 741 OpAmp used in the original design, we’re going to use the LM386N audio amplifier. This gives us the advantage of only requiring a single 9V battery.

We’re going to use the basic circuit hookup from the LM386N datasheet and combine the IR emitter and detector driver circuits from the original Elastic String Bass project.

Refer to the illustration and populate your breadboard with the necessary components. Note that “E” is the Emitter diode (the darker LED) and “D” is the Detector diode.

Note : Dismiss the orientation of the “dog leg” on both LEDs in the illustration – both LEDs should have their anode (the longer leg) on top, connecting to the 9V rail. Also note the small blue capacitor in the illustration is 0.05μF.

Bend the emitter and detector over so that they are facing each other, and hook up the 9V battery. To test this circuit with an oscilloscope, connect your probe to the cathode lead of the 220μF capacitor connected to pin 5 of the op amp, and your scope’s ground clip to a piece of wire connected to the breadboard’s outer rail.

Using a rubberband stretched between the diodes, give it a good pluck. You should see a waveform generated on your scope’s screen. IR light traveling from E to D is interrupted by the vibration of the rubberband, generating this waveform. If everything looks good, it’s time to “up our game” & create an etched PCB to hold our circuits.

Multiplying the Circuit by Four

This step involves creating four pairs of emitter/detector diodes (one for each “string”) and wiring these into our amplifier circuit.

To make this design more robust, we’re going to create a Printed Circuit Board (PCB) layout and mount the circuit we created in step one. There are many guides on how to create printed circuit boards, I like to use this cheap, friendly and precise PCB etching technique.

Download the “original” size mask images in this step, and resize them to 600dpi for their true 1:1 printing size. Or, you can download the BRD and SCH files for this circuit here on GitHub.

Note the 220μF capacitors all look slightly different, but they are all 220μF. Also note the orientation of the 100K resistor-trimmers – their orientation should not matter but in our tests they worked best in this configuration.

Solder your 1/4″ mono audio jack to the +/- output on the amp board. With your 9V battery clip, solder the black cable to ground on the amp board, and solder the red cable to the middle pole on your SPDT switch. Solder another piece of wire from pole 1 of the SPDT to +9V on the amp board.

Next we need to make a couple of LED holders.

Making the LED Holders

Make up two of the masks as shown and put the IR LEDs in one (and appropriate resistors) and the detectors in the other.

The mask images shown here are for the detector board. This board is nearly identical to the emitter board, except that it contains an extra thru-hole for the input hookup wires. You can use this mask for both, or, download the ZIP file above for all the individual BRD and SCH files.

I wired +9V across the top, and ground across the bottom. A 100nF ceramic capacitor goes in the middle to help suppress line noise.

Position your LED holders adjacent to your amp board so they appear like image 3. The boards should be ‘mirroring’ each other, with LEDs on one side, and resistors on the other. Wire the two holders’ outer 9V and ground rails to each other. Then wire those rails to 9V and GND on the amp board.

IMPORTANT BIT: The emitters and detectors are polarized – this means that they work in only one orientation. The IR emitters (LEDs) have the anode (+) connected to the upper +9V rail, while the detectors (phototransistors) go the opposite way around.

Wire four output lines from the detector board to the four inputs on the amplifier. You can adjust the individual levels with the trimmer potentiometers.

Your amp and LED holder circuits are now complete. Time to install your circuits on your guitar!

Building the Guitar Body

Next thing to do is create some kind of guitar body. Here I used a 2×4 piece of lumber and turnbuckles to tighten the strings. I’ll show you how!

First I cut the lumber to length, so my guitar is approximately 44″ long. Then, using a table saw, I cut out a “notch” to hold the amplifier and battery. The notch begins 10″ from the end of the lumber, and is approximately 3.75″ long, and 3/4″ deep. The wood cut out of the notch was then used to adjust the heights of the strings (see images).

I mounted the LED holders on the “neck” end of the guitar, and used a combination of #6 bolts and hex nuts to install the holders in place (image 2). The space between the LEDs measures approximately 1/2″.

Using two pan-head screws I anchored the amp board into place, and a rubberband to hold the 9V battery. Since I only intend on playing my guitar flat, like a slide guitar, this works fine. But you can experiment and be sophisticated with installing the loose components!

Anchor your eye bolts about 1″ from the end of the guitar. Anchor 4 wood screws at the neck end of the guitar, leaving some length of screw to tie off to. Hook your turnbuckles through the eye bolts, and open them up about 80% (remember, turnbuckles will “tighten” the strings when they’re closed).

The original design used elastic for strings – this is a good choice as you can tune all four strings over a wide acoustic range. I’ve also used actual string, which has a pretty good tone. Feel free to experiment here. Once all your hardware is installed, you can change out your strings quite easily and quickly.

Again, use some pieces of scrap wood – from the notch or elsewhere – to vary the heights of your elastic and string, so they rest in the middle between your LEDs. And the observant among you will notice that one detector of the detector board is not shown in image #2 – yours should have all four detectors!

Putting it All Together

Here’s the finished Infrared String Bass, a four-string optical instrument! The bare wood finish is OK but there’s nothing to stop you from painting it, staining it, or creating a much more elaborate design.

You could even make it even longer and create an upright bass!

You can also add some frets. The easiest way to do this is to download a tuning application and use the software to locate the position of each fret.

Alternatively there are fret position calculators available online – this is a much more scientific approach. You can trim down and glue some nails to act as fret wire.

If you build your own version of this project, be sure to upload your images online and leave a comment in the notes below!

Conclusion

In this project we've taken a simple optical circuit and put it to an alternate use: detecting the "twang" in an elastic string. By marking fret positions and using the LM386 audio amp, we've reduced the battery count down to one, and made it easier to find the right notes.

What I find truly fascinating about this project is that we are directly converting an optical signal into an audio one. So not only does the type of material used to make the string affect the sound, but the color of the string does too.