
Read articles from the magazine right here on Make:. Don’t have a subscription yet? Get one today.
With my anniversary looming, I needed an amazing present and, being me, I needed to make it myself. I got ahold of a friend to finish our quick fork of a star chart generator script we had started a while back. A few days later, I had made the best present for my wife that I’ve come up with yet: a glowing LED model of the sky from the night we got married. Here’s how to make one too.
Design the Star Map
For the map, I used d3-celestials’ interactive webform, centering the sky at a specific date and time with a custom Python script to generate the star map and export an SVG. If you’re feeling adventurous and have a decent know-how of Python, try making your own script to get a date-and-location-specific star array. Otherwise, use my file of the northern hemisphere sky.
Process the SVG
The SVG that comes out of our export script (Figure A) does not render well when opened in Inkscape (Figure B), which is needed for many laser cutters. The different objects are broken into groups rather than layers, so we need to add them. Layers will help make different processes in the laser’s software. I used four layers, named Grid, Stars, Constellations, and Milky Way.
- Figure A
- Figure B
Build the Back Sheet and Frame
First, cut a piece of ¼” ply to the final dimensions of your project for your back sheet. I made my frame 30″×22″ — I wanted the map to be as large as possible so even the smallest star would get light though.
Cut the Spacer
I used my CNC router to cut ¾” MDF into a spacer, to give the LEDs some distance to diffuse and be the right thickness to accommodate the LED controller. Any solid material will work, such as 3 sheets of laser ply laid up with wood glue. Be sure to allow slots for any wiring or IR receivers for the LEDs if yours has a remote.
NOTE: Make the inner diameter of the spacer slightly smaller than the outer diameter of the star circle (Figure C). This will give support to glue the stars down and keep light from leaking out of the border.

Figure C
Determine LED Placement
Lay out your LED strips to go as close to full length as the cut lines will allow. Mine were spaced about 3″ apart (Figure D) and the lighting was extremely even and plenty bright. Experiment with your LEDs before gluing. Once you get them placed the way you want, mark them and solder jumpers to connect the strips — 3″–5″ wires seemed to work well in mine.

Figure D
Cut Background Sheet
Find the nicest piece of your ply and cut it to the final size of your project. Then laser cut a circle the same size as your star map. Very lightly sand and spray paint (Figure E) the background board and the edge trim. I like to prime everything that is bare wood, using 1–2 coats of sand-able primer from the same company that makes whatever base I’m using — that way I know the solvents will likely play nice together. Finish with 2–3 coats of clear.

Figure E
More Lasersssssss
I like to cover my project with blue painter’s tape to keep smoke off of the light surface of the birch plywood. For my map, I ran each layer like this:
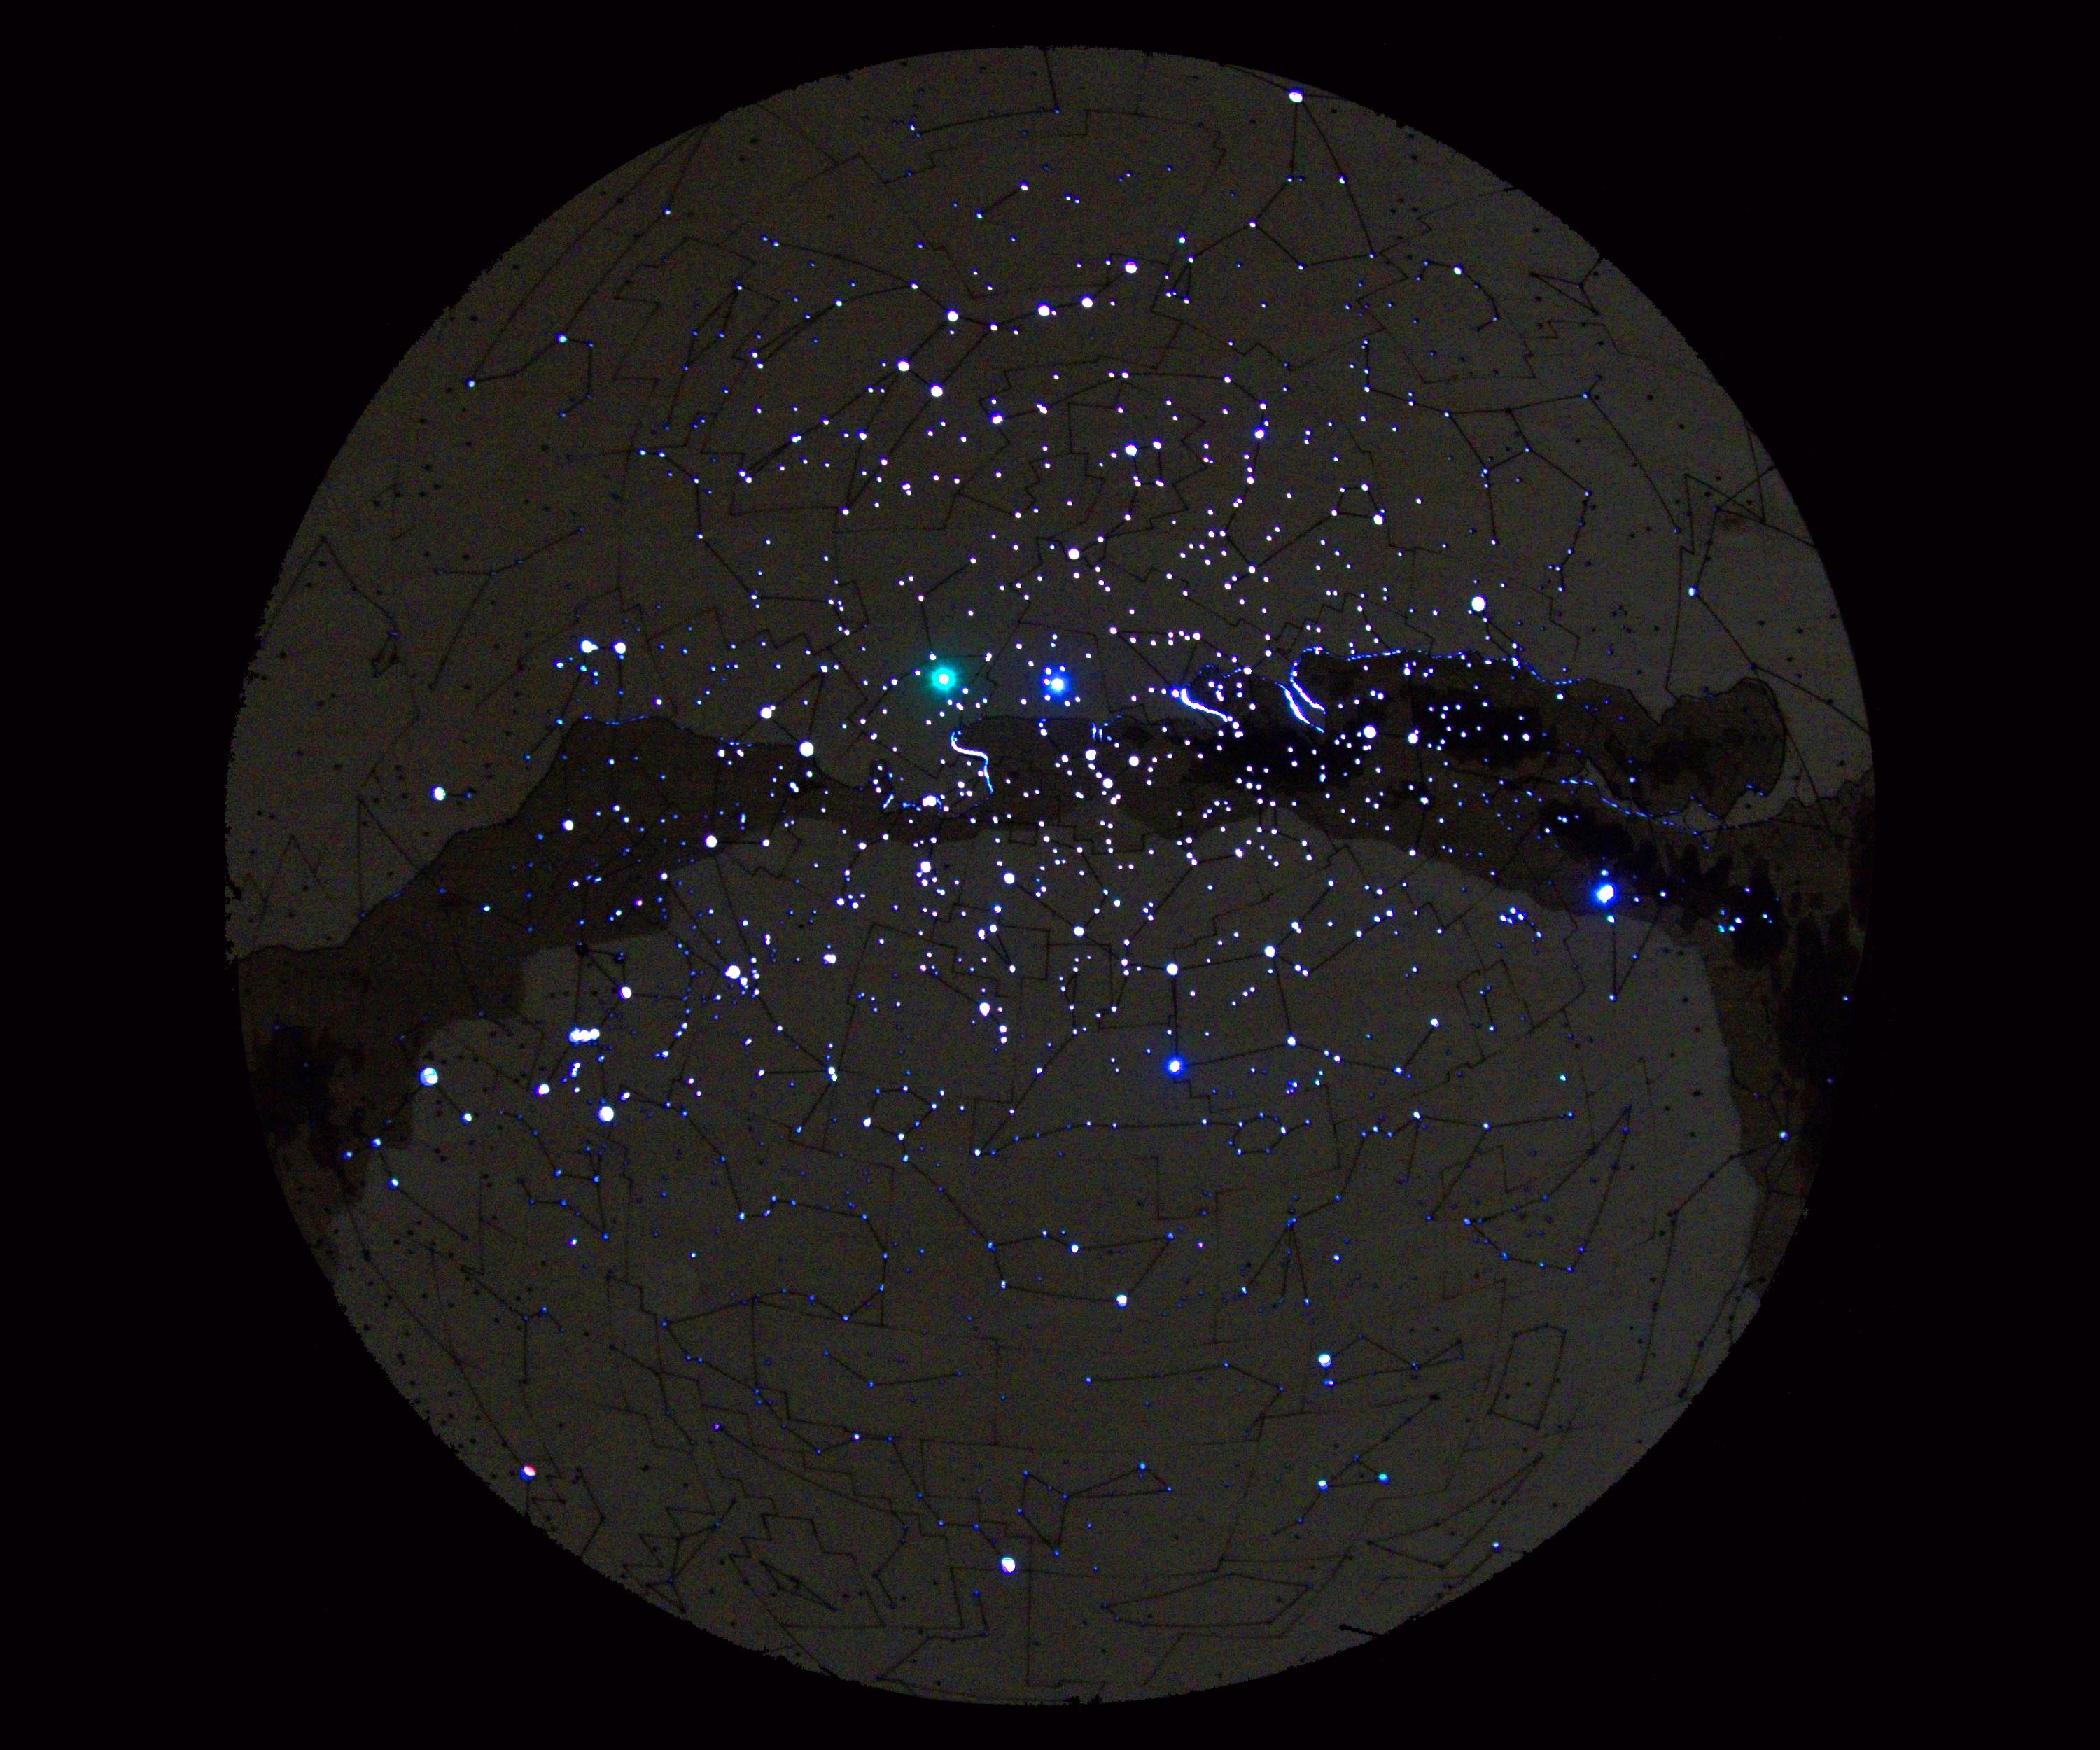
a. Cut Stars
b. Lightly vector-etch the astronomical grid
c. Slightly darker, etch the constellations
d. Milky Way — I broke this into 5 layers and power settings and raster etched each layer starting with the lightest layer and moving to the darkest.
I had to cut my map in 2 pieces because I wasn’t able to find laserable birch ply with good inner plies in large enough sheets to fit the full map, so I split it along the upper line of the Milky Way (Figure F). Once cut (Figure G), clean the tape off the project and clean any remaining bits off with a lint-free cloth and some isopropyl alcohol. Then take the clear coat you used on your background and put 2 coats on the map to seal it from moisture.
- Figure F
- Figure G
Assemble
Lay out the LEDs and route wires according to your marks on the back board. Screw them down with clips (I laser-cut thin tabs with screw holes for mine). Make sure to not tighten them down fully and pinch the strip — power them up and test before going forward. Put glue on the back of the inner brace and lay it down, again being careful to not pinch wires (Figure H). Place the LED controller (and IR receiver if using).

Figure H
Put glue on the top of the inner brace and gently lay the background on the top. Shift it into position making sure the circle for the map is centered and the ledge for the map to rest on is even. Put a soft cloth on the dry, painted surfaces and add some weight to make sure everything is flat and compressed while the glue dries overnight.
Cut the trim to fit the edges of the frame. I used a few drops of glue and brads to hold the trim on. Once the trim is on look for any spots that need touch up on the paint. If your frame is thicker than your trim, lightly hit any exposed frame with base coat.
Glue in the Map
Put a small amount of glue on the rim of the brace. Gently place the map into the background and press it into the glue. Once it’s set put another coat of clear over the whole project and let it dry (Figure I).

Figure I
It’s DONE!
Hang your map near a power outlet so you can light your LEDs easily. Be aware that this thing is probably pretty heavy so plan accordingly for hanging it.
Can you share your python script? I pulled down the map generator, but it seems to only drop me PNG’s which have a terrible resolution. Any help would be welcome!
See the download on “Otherwise, use my file of the northern hemisphere sky.”
That’s just the resulting SVG files, not the script. I’m looking for the script, too.
It was based off of the d3-celestial, and I converted the canvas calls to svg calls.
I would recommend blowing up the d3-celestial png and using that.
You can see an example of how to increase the size here.
http://ofrohn.github.io/celestial-demo/wallmap.html
Is there any way you could share your code modifications to d3-celestial that outputs an SVG? This article/project loses a lot of value with only PNGs (that aren’t great for laser cutters), and the attached pre-generated SVGs don’t allow us to generate the time/place based star map that makes this so personal.
Thanks!
if it helps point anyone in the right direction, I was able to get SVG output by running a local instance of d3 celestial and then using an older version of it (0.4 in dist folder) that actually used SVG. I then extracted it with the “svg crowbar” browser bookmarklet. Not ideal, but it’s something.
Nice! Im working on an alternative workflow that doesnt rely on sam’s script and hopefully less post work on the svg. Part of the reason hes not releasing it was how much work it took to fix the resulting SVG to make it work.
How do you set the location and date/time in the 0.4 version?
Joe, nice step-by-step. do you have color filters over some of the holes to red or blue shift?
What was the time, date, location of your wedding? Or, in other words, what data was the script written for?
ConfigureACCEPT
Privacy Overview
Necessary cookies are absolutely essential for the website to function properly. This category only includes cookies that ensures basic functionalities and security features of the website. These cookies do not store any personal information.
Any cookies that may not be particularly necessary for the website to function and is used specifically to collect user personal data via analytics, ads, other embedded contents are termed as non-necessary cookies. It is mandatory to procure user consent prior to running these cookies on your website.