For three years I lived in a house with an outdoor composter. Then my family moved to an apartment in San Francisco where there was neither composter nor green box pickup! What was I going to do with all my kitchen scraps? I didn’t have the heart to put them in the landfill garbage or down the garb-o-rator.

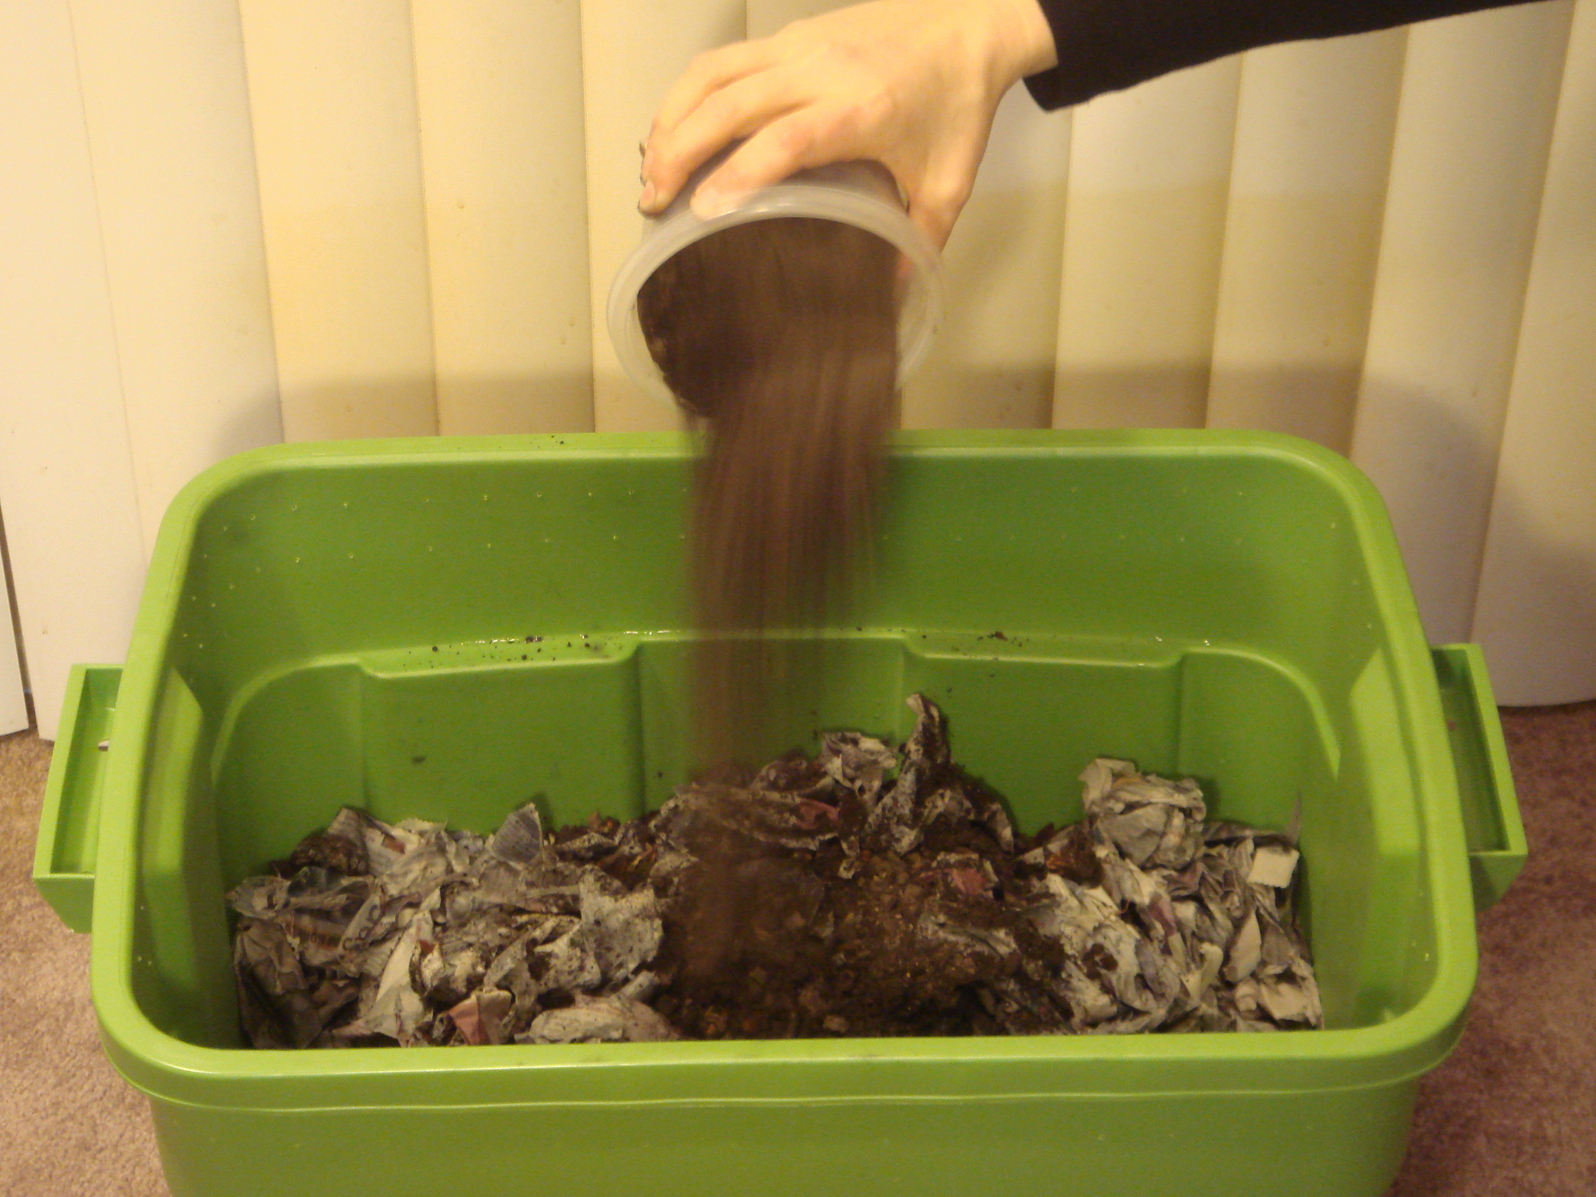
According to the EPA, in 2007 organic-based materials continued to be the largest component of municipal garbage in America: 33% was paper and cardboard, and 25% was yard trimmings and food scraps. I could put my paper and cardboard in the recycling bin, but without a yard, how could I recycle my apple cores, cabbage trimmings, and eggshells? Then I remembered worms.

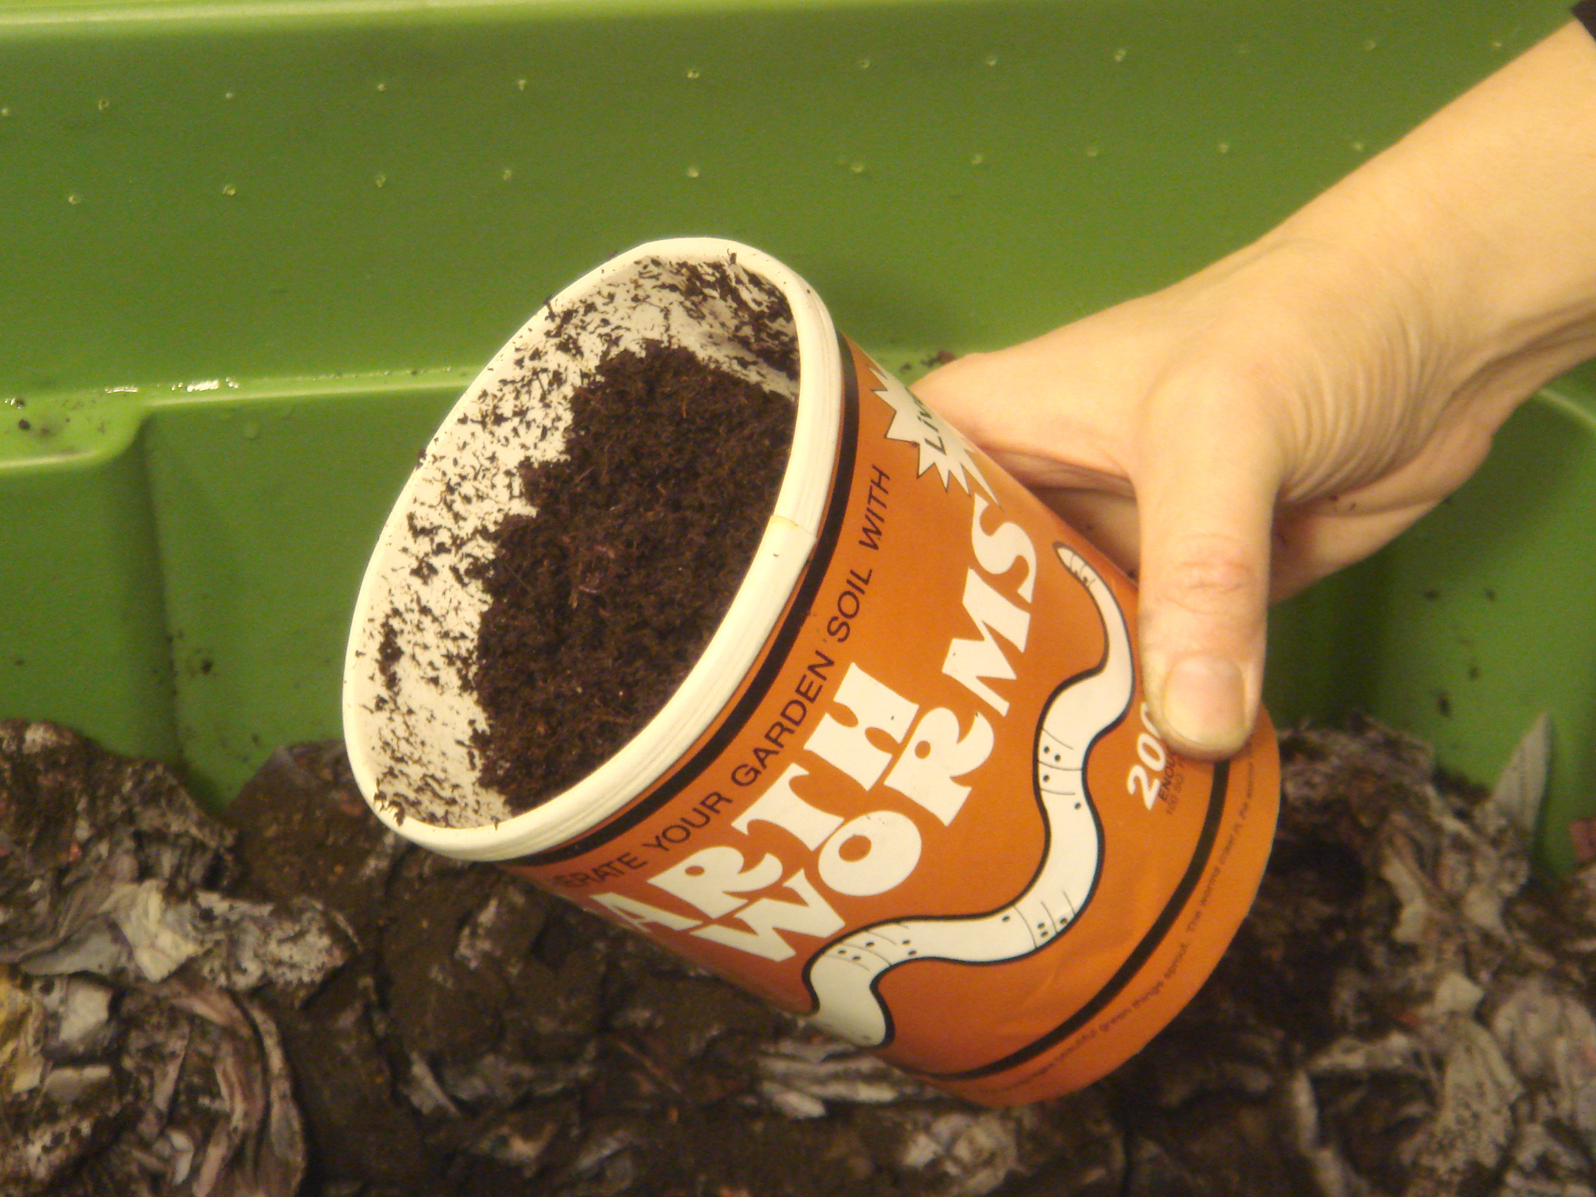
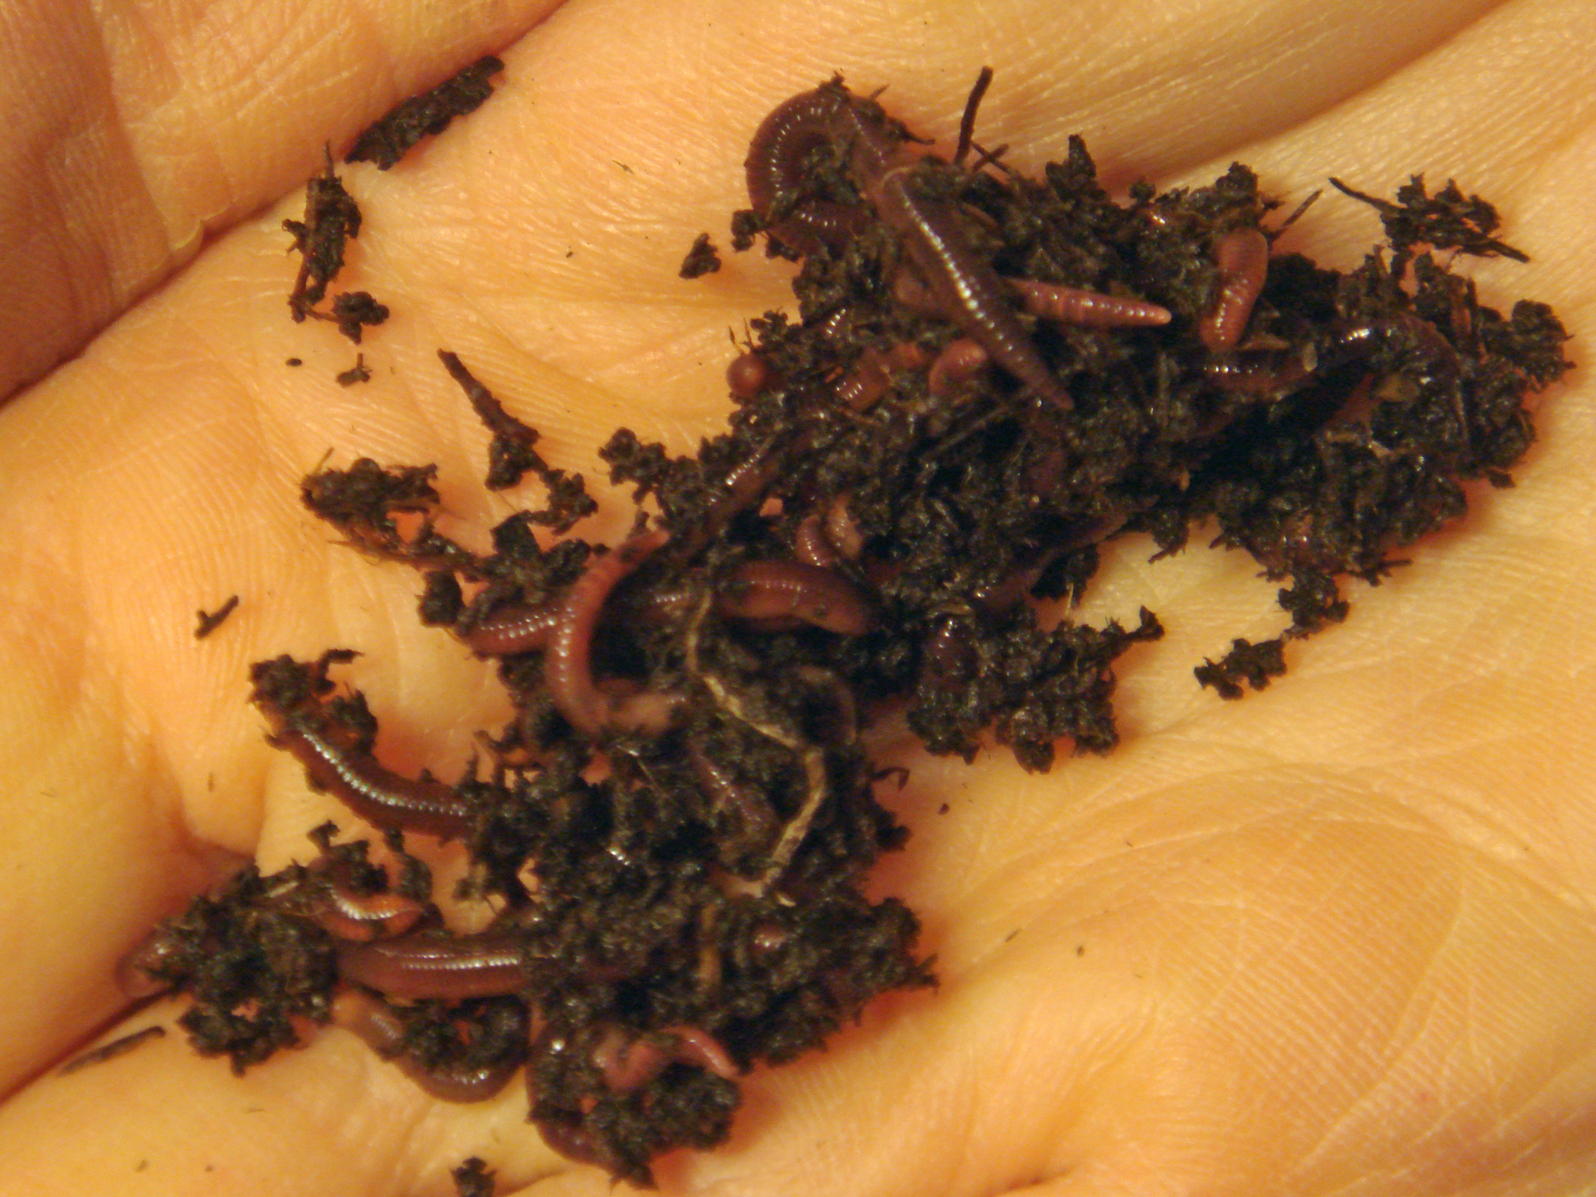
Worm composters are great for apartments. No matter the climate or the size of your home, vermicomposting is good for you. Well, good for your plants. If you have children, there’s the added advantage that most kids love worms (it’s genetic), despite the fact that they’re not very cuddly or furry.

My 4-year-old son is fascinated by worms: from our outdoor composter he’d already learned that worms turn kitchen scraps into soil as if by magic.

Soil is extraordinary stuff, and despite the fact that it’s as vital as water, it’s still not fully understood by scientists. But we do know that we’re losing soil to erosion and runoff, and that composting can help restore soil, save landfill space, and reduce greenhouse gas emissions.

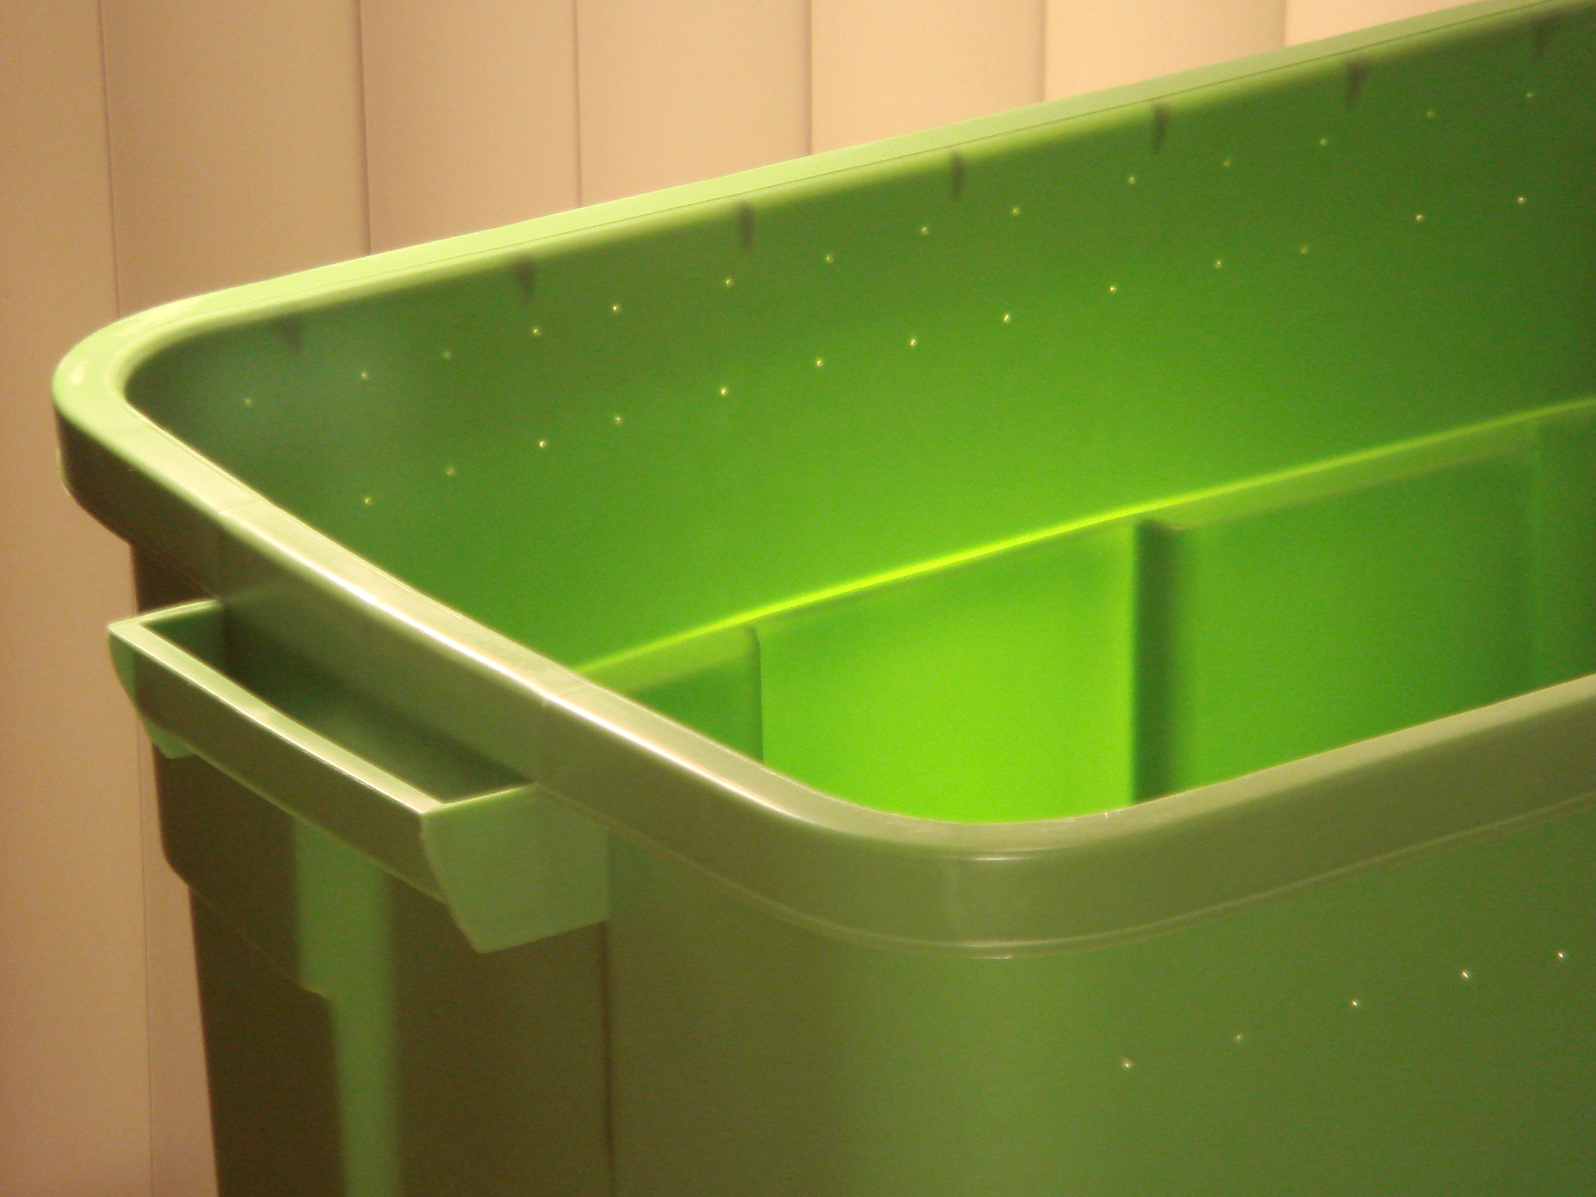
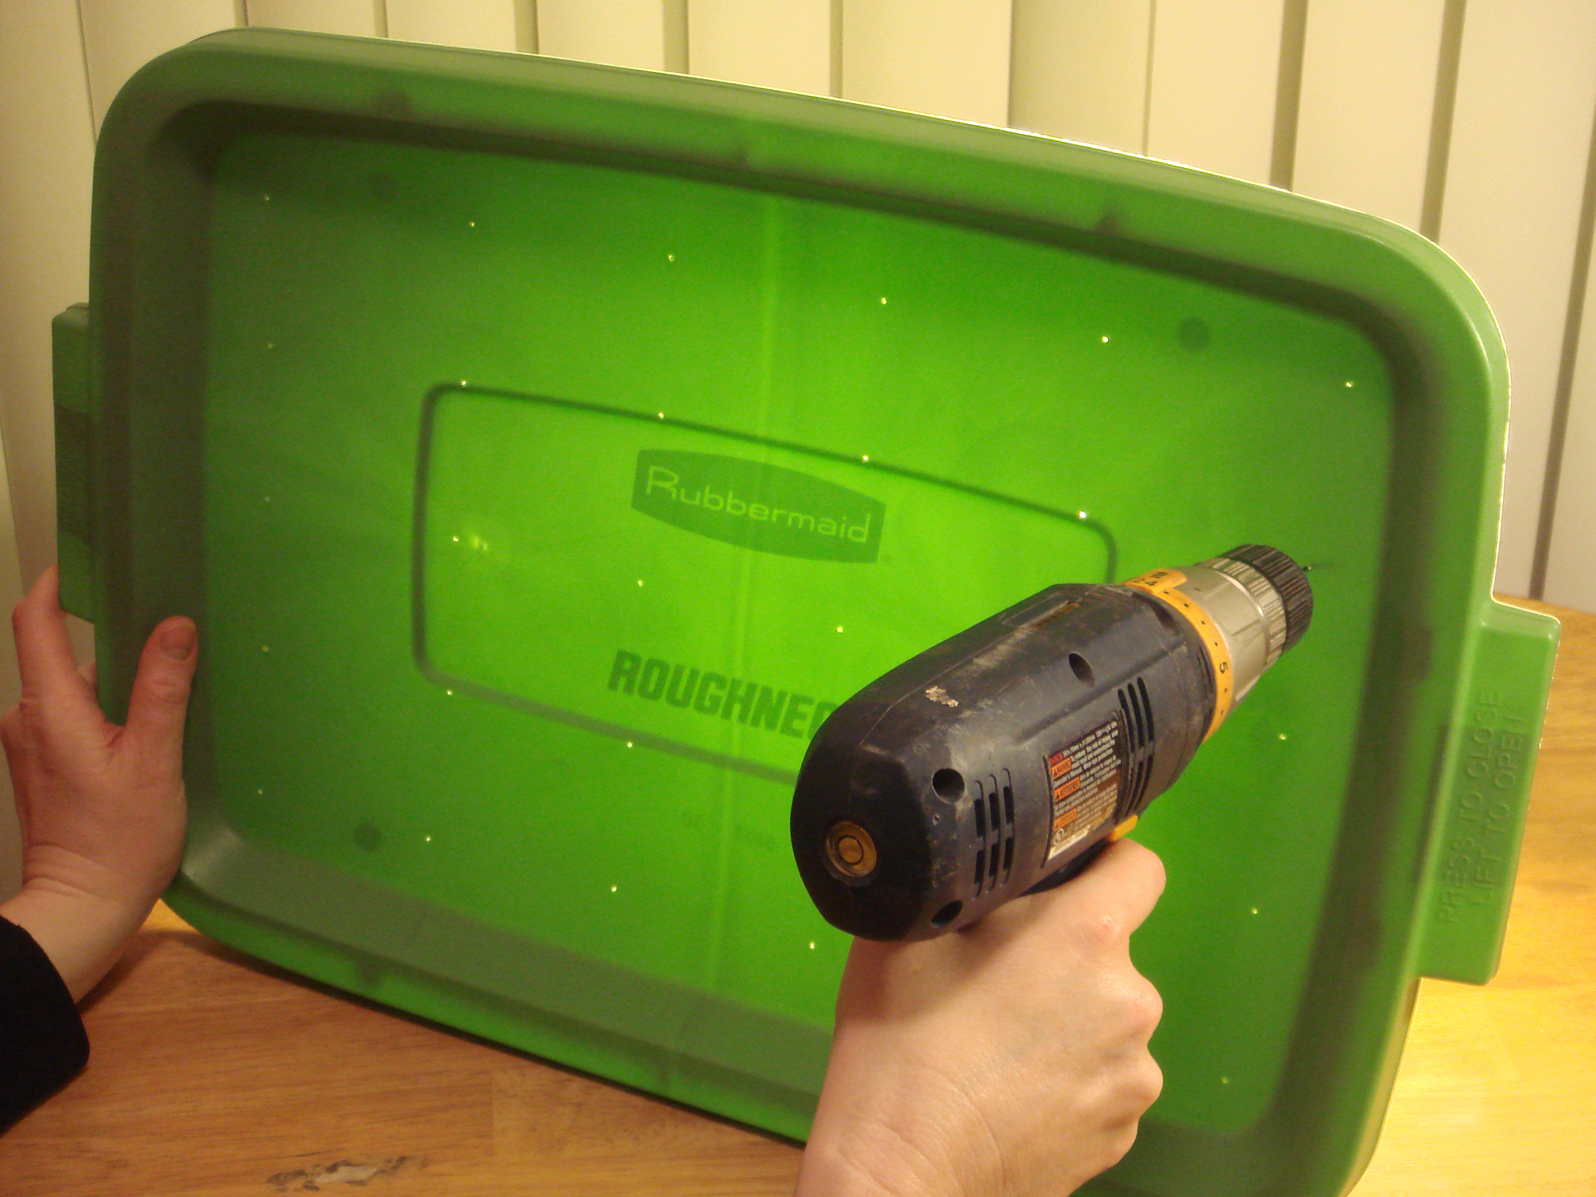
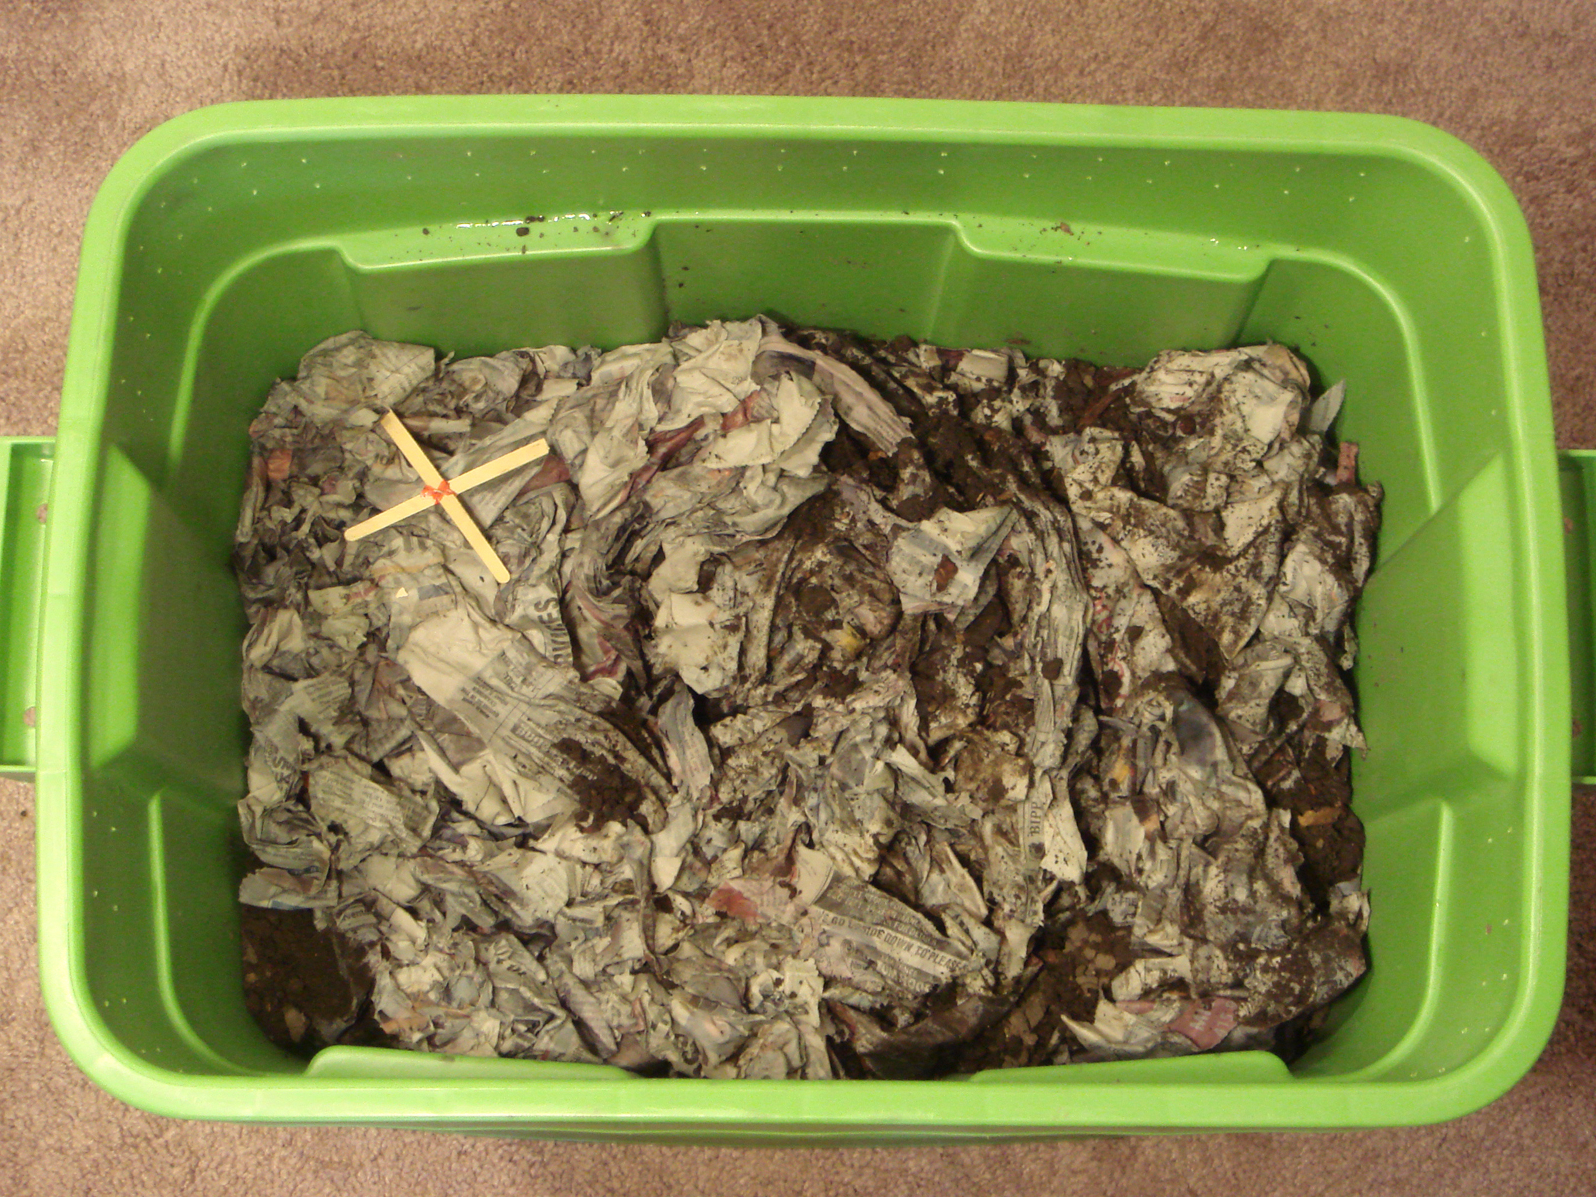
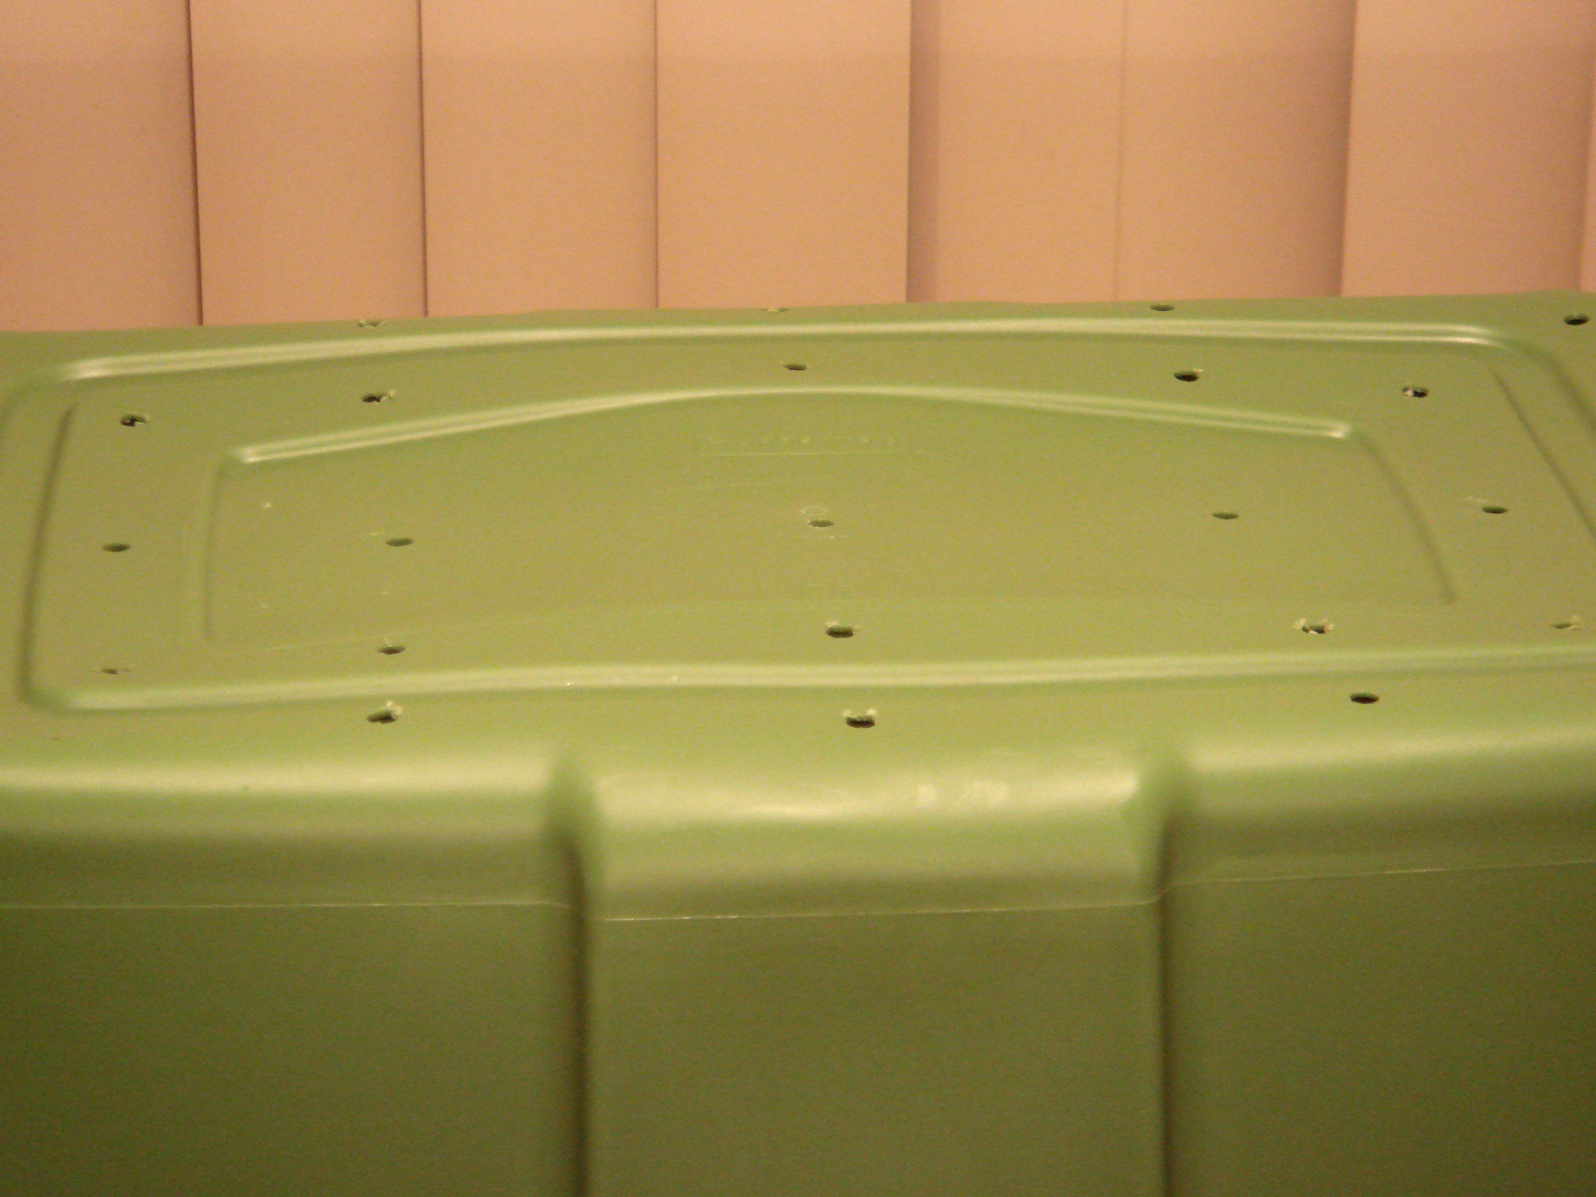
Worm composters are simple to build and easy to manage. Your worms can convert 5–6 pounds of food scraps a week into 10–15 gallons of compost a year.

Worm compost and worm tea (the drippings that collect in a tray at the bottom of the composter) can be used to fertilize both indoor and garden plants. Worm compost is higher in nutrient value than regular garden compost.

I’m looking forward to happy plants and less waste in my garbage cans, and so can you!

Project Steps

Make drainage holes.

In the bottom of the plastic box, drill about 20–25 evenly spaced ¼” holes.

Provide ventillation.

Near the top of the box, drill 2 rows of 1/16″ holes. In the lid, drill 30 or so evenly spaced 1/16″ holes.

Prepare the bedding.

Shred newspaper or office paper. Use a paper shredder if you can, or cut the newspaper into roughly 1″ strips with scissors.

Moisten the shredded paper with water and let it soak in for a few minutes. This can be done in a separate bucket to reduce the mess. The paper should be damp but not soggy; squeeze out any excess water and then put it in the plastic box. Fluff it up so that there is air between the paper, and fill the plastic box about ⅔ full.

Add the soil to the plastic box.

Add worms.

With the trowel (or your hand), dig halfway through the bedding in the middle of the box. Tuck your red wigglers into their nice, moist bed and then cover them with the bedding.

Feed your worms.

Use tape and popsicle sticks to make an X-shaped marker, or find some other object to use as a marker. You’ll put it on the bedding over the scraps, so you can identify where you placed the food most recently.

Dig a hole in the bedding material in a corner of the plastic box. Place a small amount of kitchen scraps in the hole, cover it with bedding, and then place the marker on top. Worms like any fruit, vegetable, or grain/bread. They also like coffee grounds and filters, tea bags, crushed eggshells — stuff you usually put down the garbage disposal.

Treat your worms like they’re vegan — don’t give them meat, fish, or dairy. They can eat these foods, but the bin will get smelly and attract pests. Also avoid oils, salt, and animal poop, and go easy on the citrus as it contains limonene, a compound toxic to worms.

It takes a while for the worms to get going, so don’t be too impatient. As they multiply, they’ll consume your kitchen scraps faster.

After a few days, check the bin. If the kitchen scraps are mostly gone, put another batch of scraps in. Put them to the right of the first batch, and then move your marker over to cover the new spot. Continue like this clockwise around your new compost box.

Situate your composter.

Your new worm composter can live in many places in your home: under the sink, in the laundry or storage room, even on the balcony. Your chosen spot should have good ventilation, easy access to collect the compost tea, and a suitable temperature. The best temperature for worms is between 55°–77°F year round, so make sure they won’t freeze or fry.

Place the second lid under your new worm bin to collect the drips that will become compost tea.

Monitor your composter.

Moisture: If the contents seem too dry, add a little water. If too wet, add shredded newspaper.

Smell: The worm composter can become anaerobic (deprived of oxygen) if there is more food than the worms can eat quickly. If that happens, don’t add scraps for a week or so. Give the worms a chance to catch up.

Also add more bedding (damp, shredded papers). Make sure there are enough ventilation holes in the container, and fresh air around the container. Fluff the bedding. If you leave it alone awhile, the situation should correct itself.

Fruit flies: Make sure that food is buried and covered with bedding to avoid fruit flies arriving.

Worms dying or escaping: Check the moisture content of the bin: if it’s too wet, add bedding; if too dry, add water. If the contents look brown all over, then it’s time to harvest your new soil.

Tea tray: If the tray has a lot of brown sludge in it, scoop it into your watering can. Fill the can with water and let it steep for a day, stirring occasionally. Then water your plants with this highly nutritious compost tea fertilizer.

Harvest time: When all the bedding is gone and your composter smells like a fresh forest (usually after 3–5 months) it’s time to harvest. It’s better to harvest too early than too late, which can kill your worms. Any bits of food left over can be put back into the next worm composter iteration.

Harvest your soil.

Quick and messy method: To separate the worms from the compost, empty the contents of the worm composter onto a tarp or old plastic tablecloth. Worms hate light and will wiggle into the pile. Wait a few minutes.

Then with your trowel or your hands, remove the top layer of the compost pile until you see worms. Then wait again, be patient, and continue removing the compost. Repeat until there are lots of worms in a small pile. All the worms can go into the next iteration of the compost box, or half can start another compost box.

Slow and neat method: Make a second, identical compost bin by repeating Steps 1, 2, and 3. Take the lid off your first, full composter, and place the second bin directly on the compost surface of the first. Then repeat Step 5, putting kitchen scraps in the second box, and put the lid on the second box. In 1–2 months, most of the worms will have moved upstairs to find the food there. The first (bottom) compost box will contain mostly vermicompost.

Red wigglers are not native to North America. They are an invasive species in many areas, so don’t dump worm-containing compost in natural areas; this could end up displacing the native worms.

Conclusion

Worm Facts

  • The best worms for vermiculture (worm composting) are Eisenia fetida (striped) or their cousins Eisenia andrei (not so striped), aka redworms, red wigglers, tiger worms, or manure worms.
  • Worms need grit for their gizzards to grind up and digest food, because they have no teeth.
  • Worms need a moist environment because they breathe through their skin, which must be moist in order to breathe.
  • Worms can eat about half their weight every day. Therefore, if you produce ½lb of kitchen scraps a day you’ll need 1lb of worms. There are about 500 worms in a pound.
  • Worms hate the light.
  • Ideally worms like the temperature to be between 55°–77°F (13°–25°C). However, they can tolerate 40°–80° F. If they get too hot or cold, their activity slows down. Try not to kill your worms! Protect them from overheating (above 85°F in their box) or freezing.
  • Worms need oxygen to live and they produce carbon dioxide. Your composter needs to be in a well-ventilated area.
  • Worm castings (worm poop) are toxic to your worms. That’s why it’s important to regularly harvest your compost.
  • Worms are great barometers. Before and during any low-pressure system such as a thunderstorm, worms like to crawl up and around the lid of the worm composter.

The Redworm Life Cycle

Worms can live less than a year if their environment is not ideal. However, Eisenia fetida (striped worms) can live as long as 4 years.

Worms are hermaphroditic but mating is still necessary. Worms mate anywhere in the box and at any time of year if moisture and temperature conditions are right.

Before mating, a part of the worm called the clitellum, located about of ⅓ the way down the body, will swell to form a cocoon filled with eggs. A worm’s sex organs are very close to the clitellum.

Worms mate by lying side-by-side with their heads in opposite directions, so that the sex organs line up with the clitellum. Sperm from each worm moves down a groove into the receiving pouches of the other worm.

After the worms have separated, the clitellum secretes a substance called albumin. This material forms the cocoon in which the eggs are fertilized and baby worms hatch.

Redworm cocoons are small and round. They change color during their development: white, then yellow, then brown, then finally, when new worms are ready to emerge, red.

Incubation in the cocoon is between 32 and 73 days. Temperature and other conditions affect the development of the hatchlings. Although a cocoon might hold as many as 20 eggs, usually only 3 or 4 worms will emerge.

The young hatchlings are whitish with a pink tinge, which shows their blood vessels.

In about 8–10 weeks the baby worms will be mature and can begin reproducing. If conditions are good, a mature worm can make 2–3 cocoons per week for 6–12 months.

More information about vermiculture can be found at http://ciwmb.ca.gov/organics/worms.

This project first appeared in MAKE Volume 18, page 78.