Skip to content
POPULAR SEARCHES:
  • Arduino
  • CNC
  • Raspberry Pi
  • Woodworking
  • 3D Printing
  • IOT
  • Robot
  • Maker Faire
Check Out Maker Campus
Learning for Makers From Makers
  • Maker Faire
  • Shop
  • Make: Projects
  • Magazine
  • Maker Campus
  • Partner With Us
Make: Community brand logo Make: brand logo
  • LOG IN
    avatar
    avatar
    Log Out
More
  • All Stories
  • Magazine Projects
  • Make:
  • Board Guide
  • Maker Spotlights
    Get the Full Issue -
    SUBSCRIBE Today
    Get Make: Magazine Issue 76
    Subscribe Today to Make: Magazine
Make: brand logo We are all makers
Make: Community Nav close icon
  • Make: Community
  • Why join Make: Community?
  • Video Playlists
  • Make: Magazine Collection
  • Live Learning
  • Make: Community Login
  • Make: Community Home
  • Partner With Us
Make: Magazine Nav close icon
  • Make: Magazine Home
  • All Stories
  • Projects From Make:
  • Guide to Boards
  • Maker Spotlights
  • Subscribe
  • Gift Subscription
  • Manage Subscription
  • Back Issues
Maker Faire Nav close icon
  • Maker Faire Home
  • Global Faires
  • Faires Around the World
  • Start a Maker Faire
  • What is a Maker Faire?
  • FAQs & Support
Maker Shed Nav close icon
  • Maker Shed Home
  • Best Sellers
  • Hands-on Kits
  • Digital Books
  • Maker Faire Swag
  • What's New
  • Returns
  • Become an Affiliate
Maker Camp Nav close icon
  • Maker Camp Home
  • Get Started
  • Project Library
  • Playbook
  • Upcoming Events
  • About Maker Camp
  • #maketogether

Projects from Make: Magazine

Making a DIY Vacuum Former Cheap in One Day

Here's a quick demo on how to build your own DIY vacuum forming machine with basic items and very little money or experience.
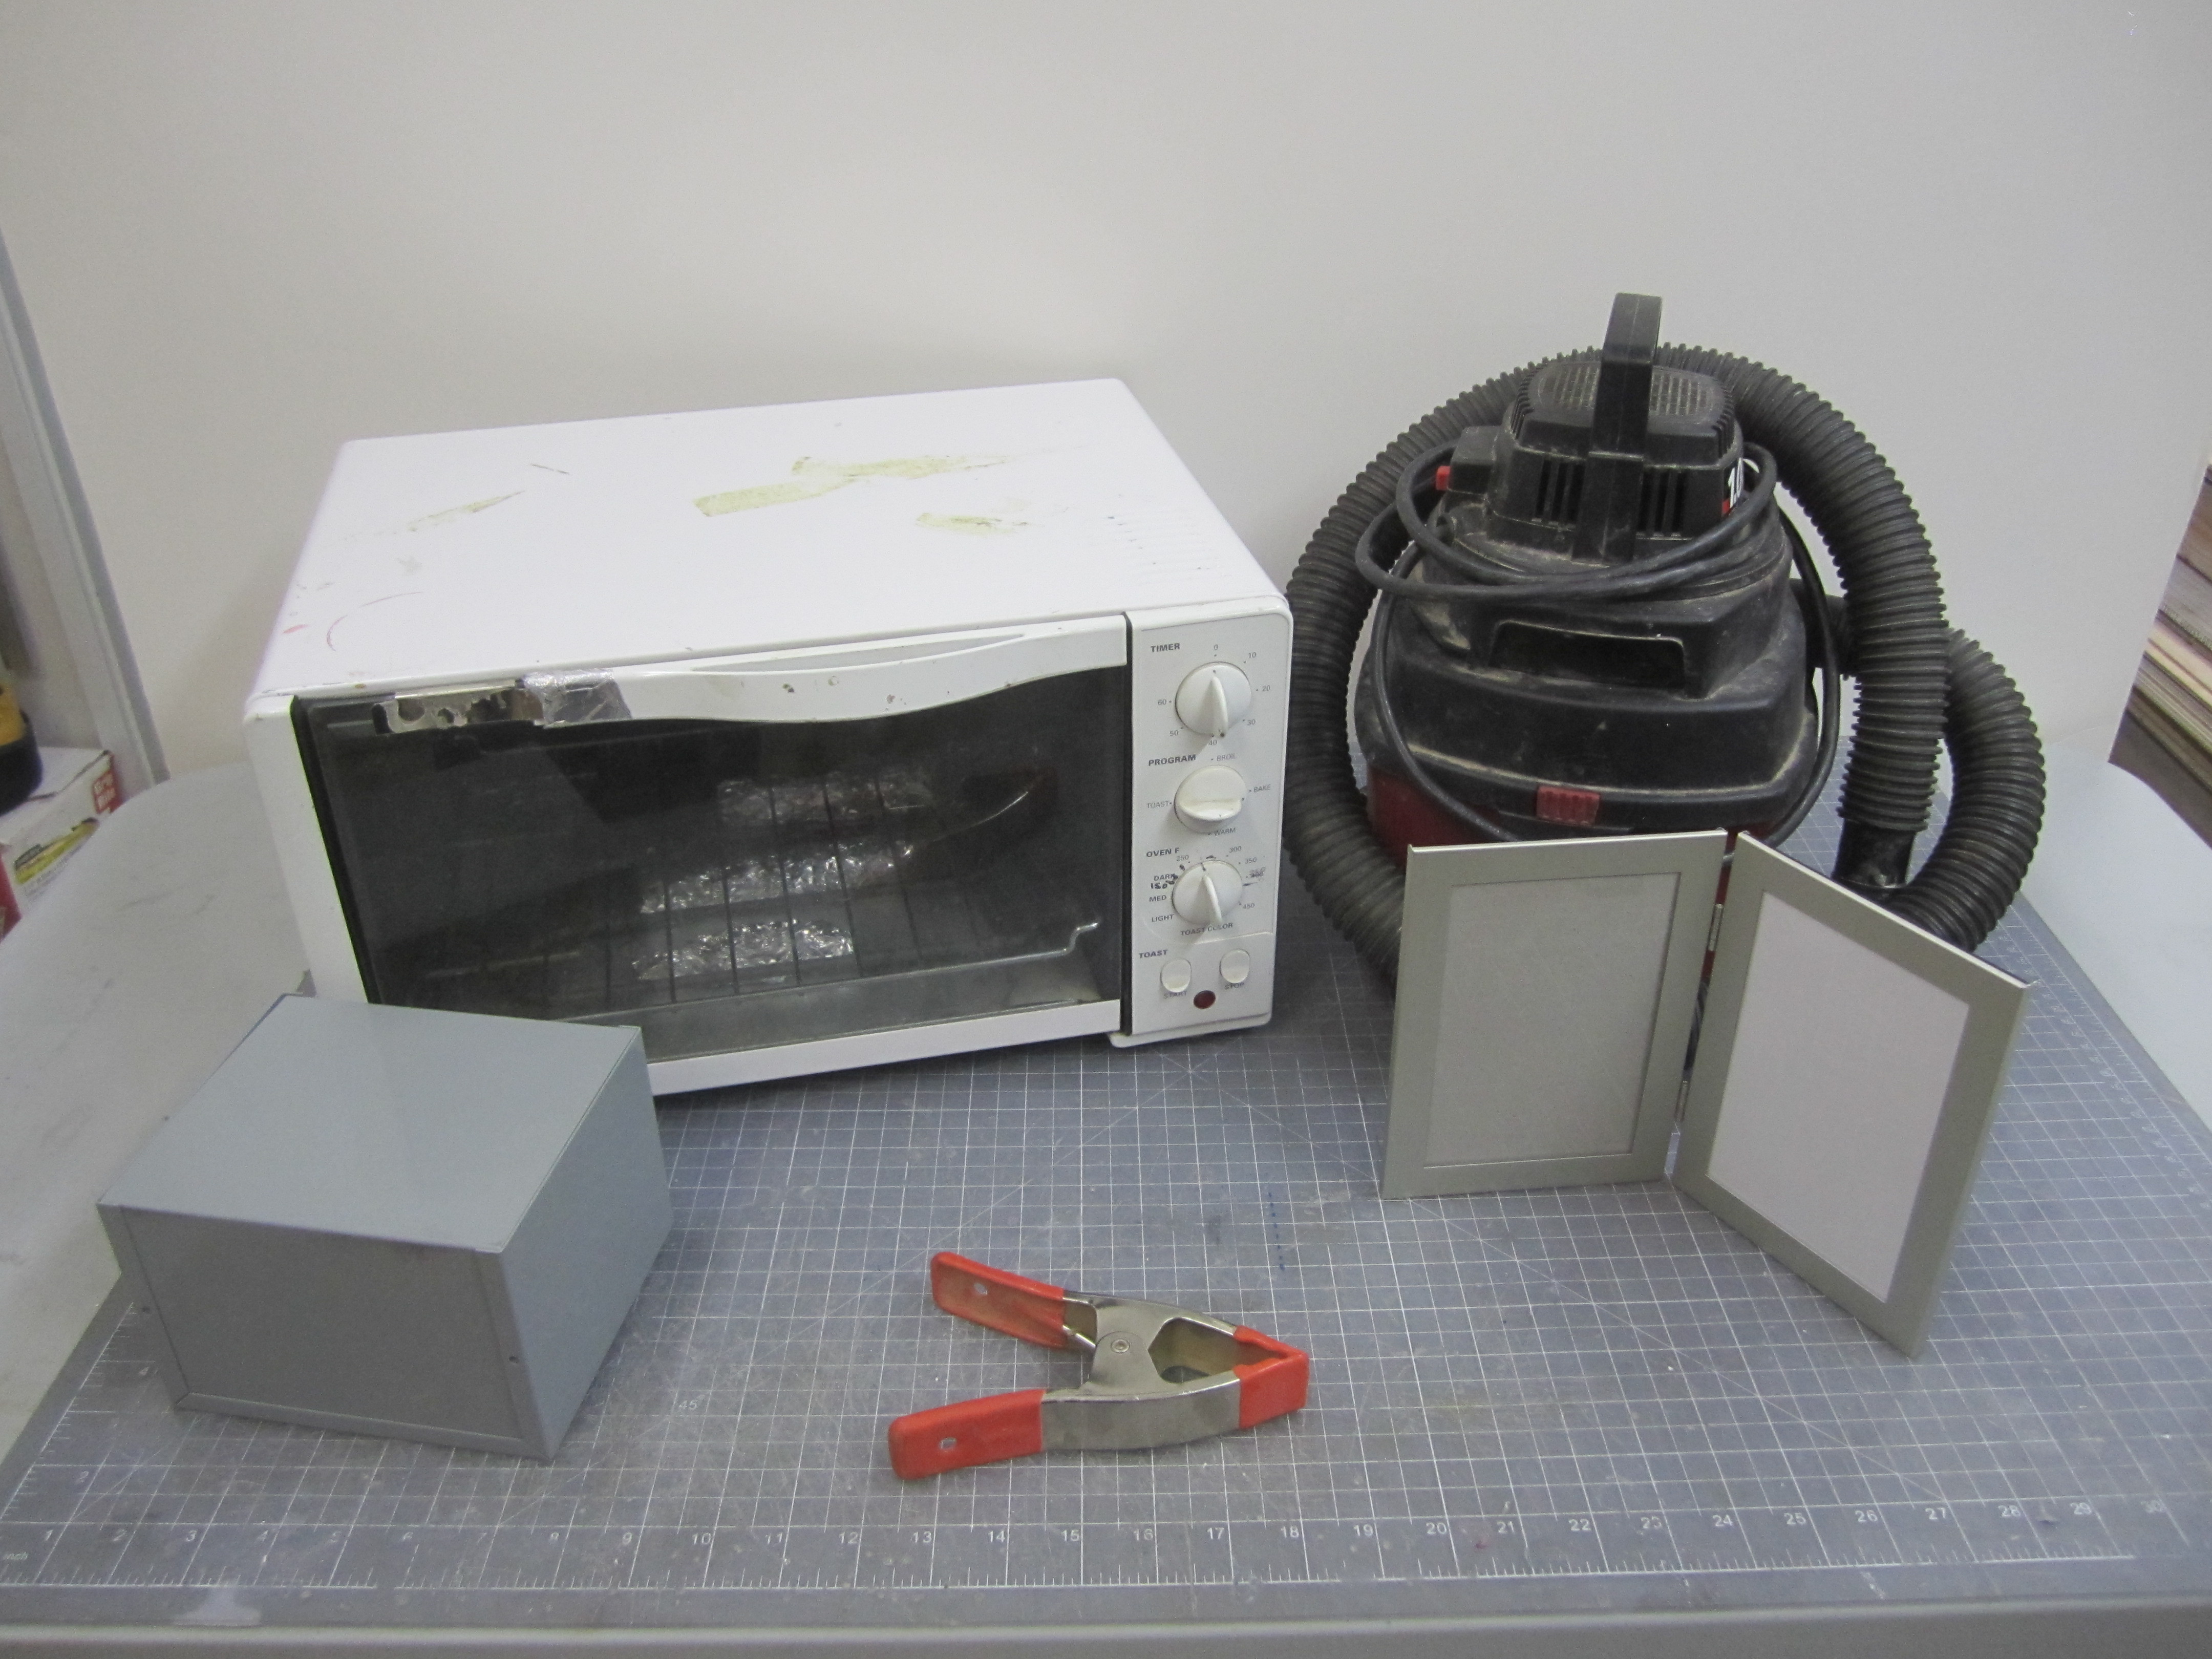
  • By Fon Davis
  • Time Required: 2 hours
  • Print this Project
Share via
  • Facebook
  • Like
  • Twitter
  • Pinterest
  • LinkedIn
  • Digg
  • Del
  • Tumblr
  • VKontakte
  • Print
  • Email
  • Flattr
  • Reddit
  • Buffer
  • Love This
  • Weibo
  • Pocket
  • Xing
  • Odnoklassniki
  • WhatsApp
  • Meneame
  • Blogger
  • Amazon
  • Yahoo Mail
  • Gmail
  • AOL
  • Newsvine
  • HackerNews
  • Evernote
  • MySpace
  • Mail.ru
  • Viadeo
  • Line
  • Flipboard
  • Comments
  • Yummly
  • SMS
  • Viber
  • Telegram
  • Subscribe
  • Skype
  • Facebook Messenger
  • Kakao
  • LiveJournal
  • Yammer
  • Edgar
  • Fintel
  • Mix
  • Instapaper
  • Copy Link
Making a DIY Vacuum Former Cheap in One Day
December 18, 2012, 11:00 pm PST
  • Tools

Tools

  • 1/16" drill bit
  • Clamps
  • Drill gun
  • Duct tape
  • Electronics project box Must be metal
  • Large step drill
  • Screw gun
  • Spring clamp
  • Spring punch
  • Toaster oven
  • Vacuum cleaner
  • weather seal

Advertisement

Hot Topics

  • Learn Electronics with Make: Kits and Books
  • Fix Our Planet

Advertisement

Steps

  • Project Steps View All
  • 1. A - You will need:...
  • 2. D - Assemble your project...
  • 3. G - Remove the glass...
  • 4. J - insert the plastic...
  • 5. M - You can make...
  • 6. P - Preheat your toaster...

Advertisement

Step #1:

NextPrev
Making a DIY Vacuum Former Cheap in One DayMaking a DIY Vacuum Former Cheap in One DayMaking a DIY Vacuum Former Cheap in One DayMaking a DIY Vacuum Former Cheap in One Day
  • A - You will need: a vacuum, a toaster oven, a metal project box, a hinged two-picture frame and a metal spring clip.
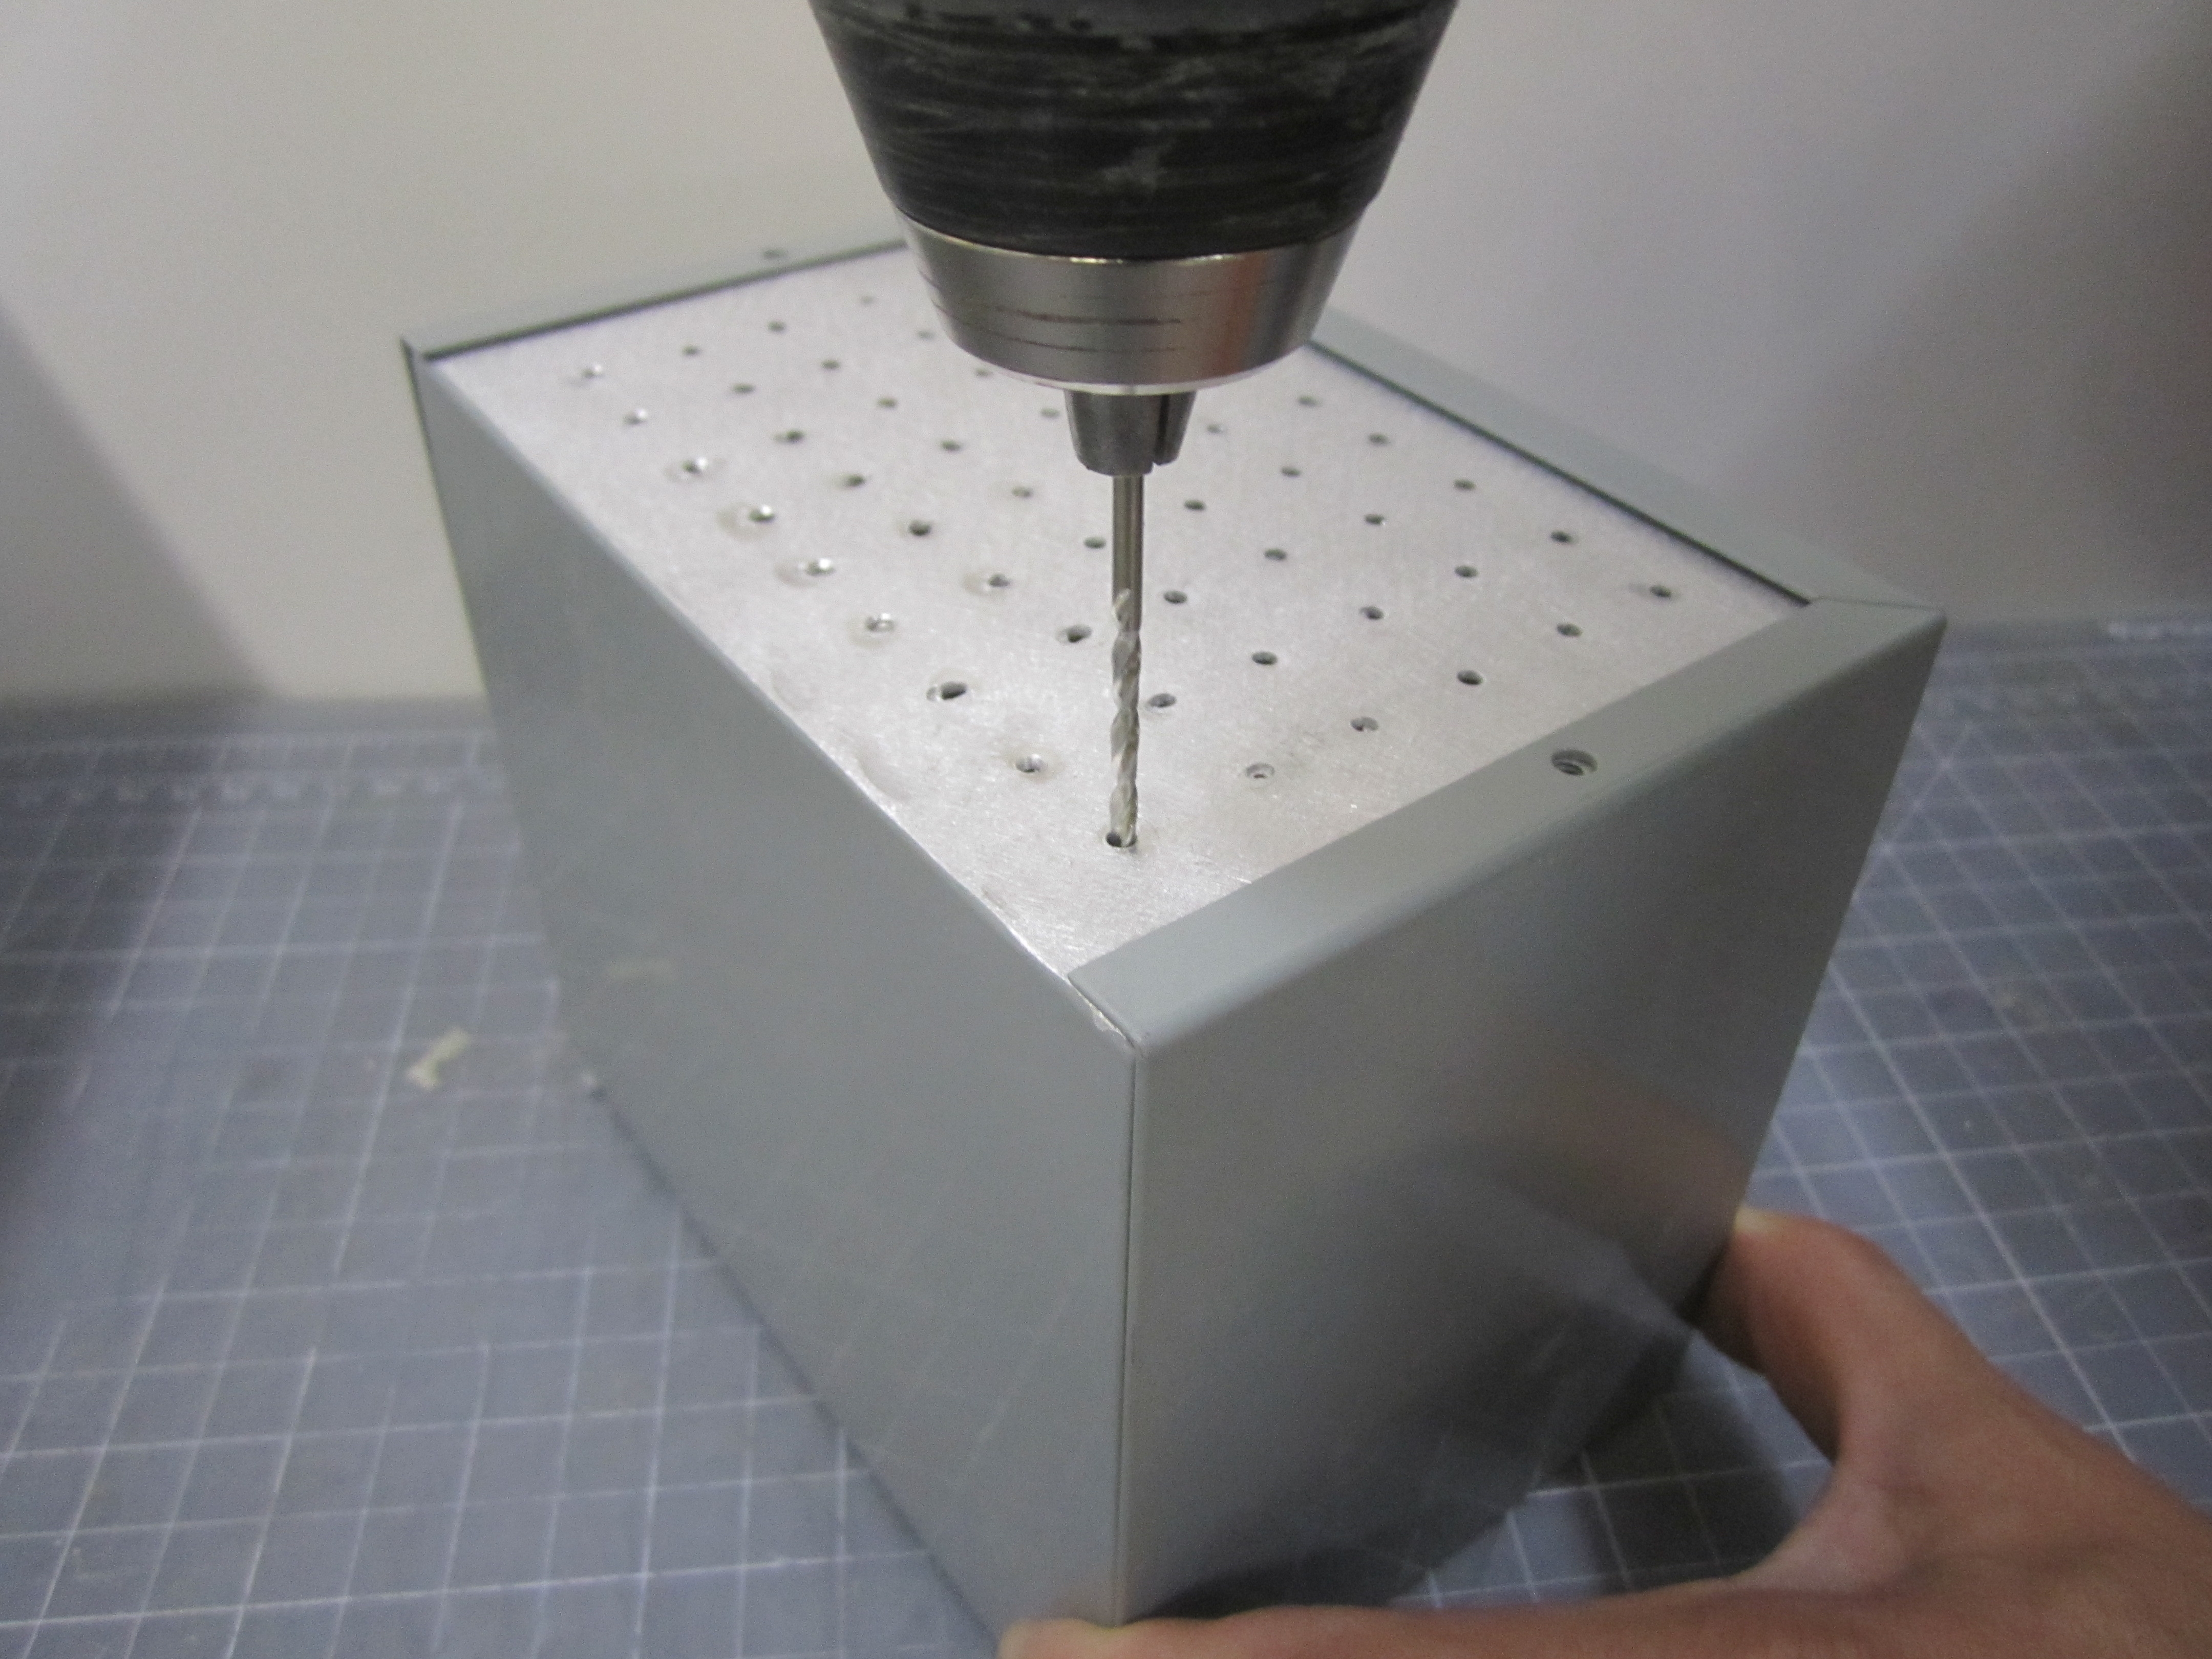
  • B - Drill loads of holes in the top of the metal project box.
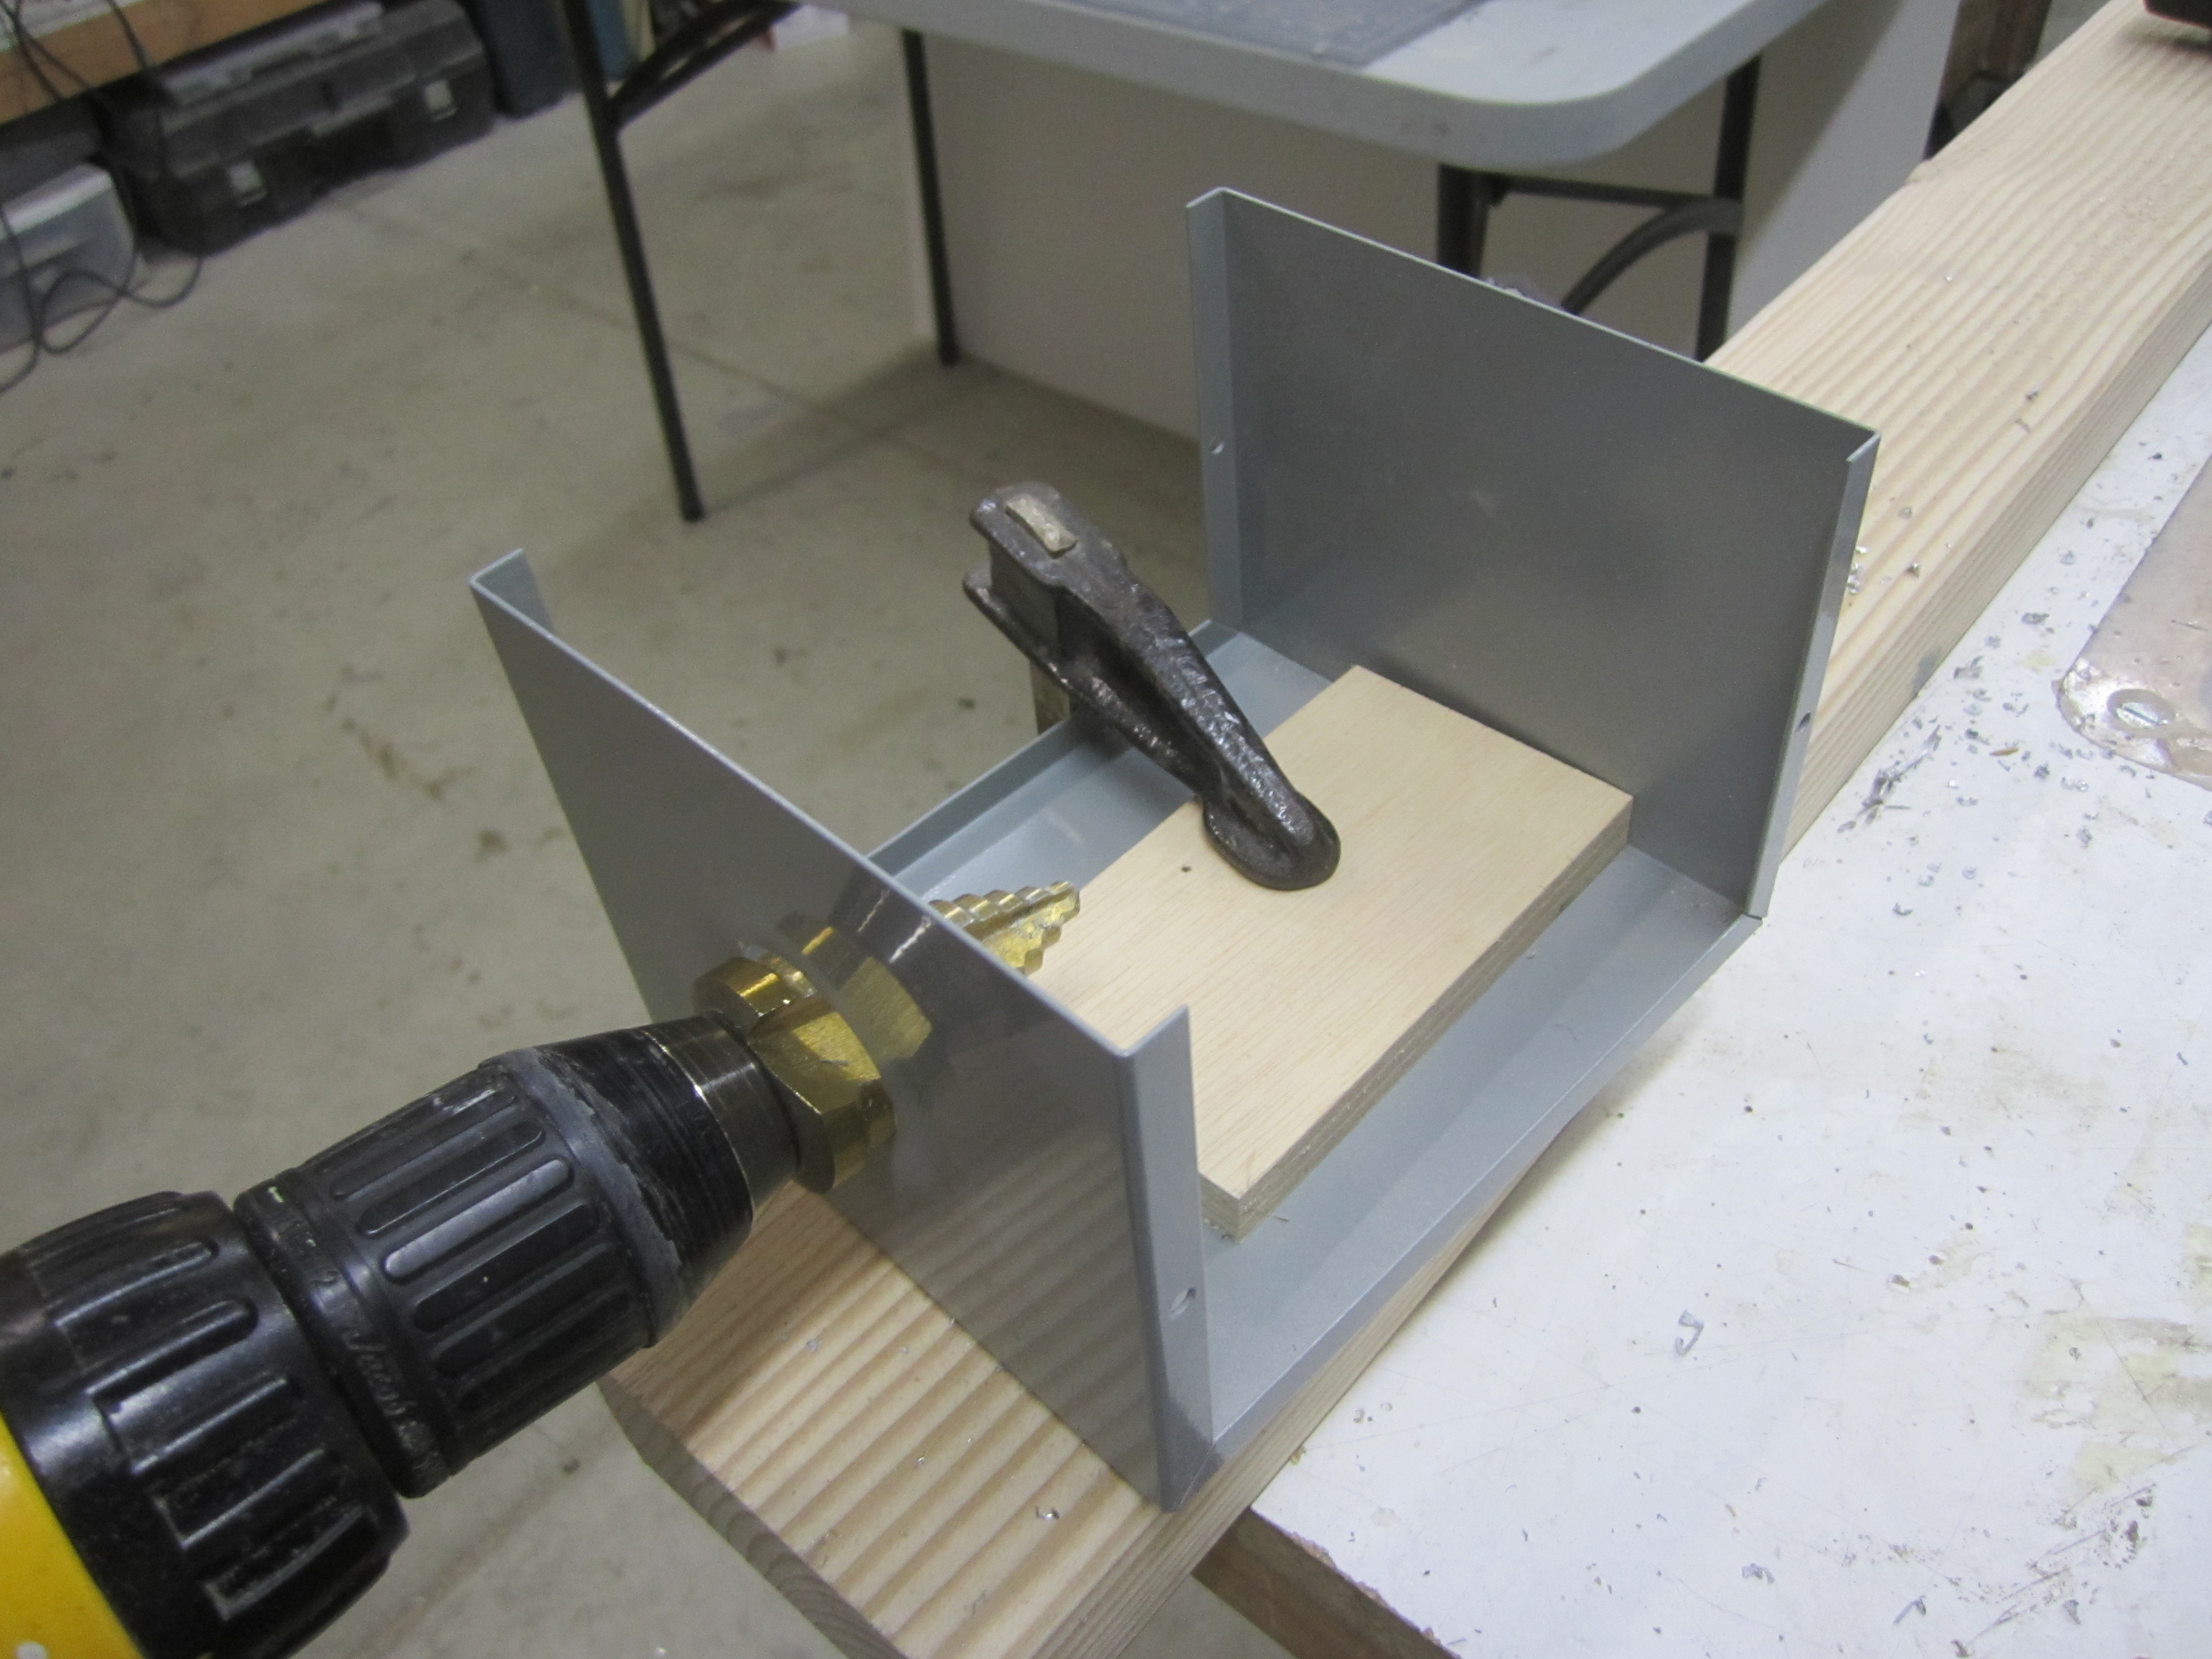
  • C - Drill a large hole in the side of the project box that is the same diameter as your vacuum hose. I recommend clamping down the box section and using a step drill.
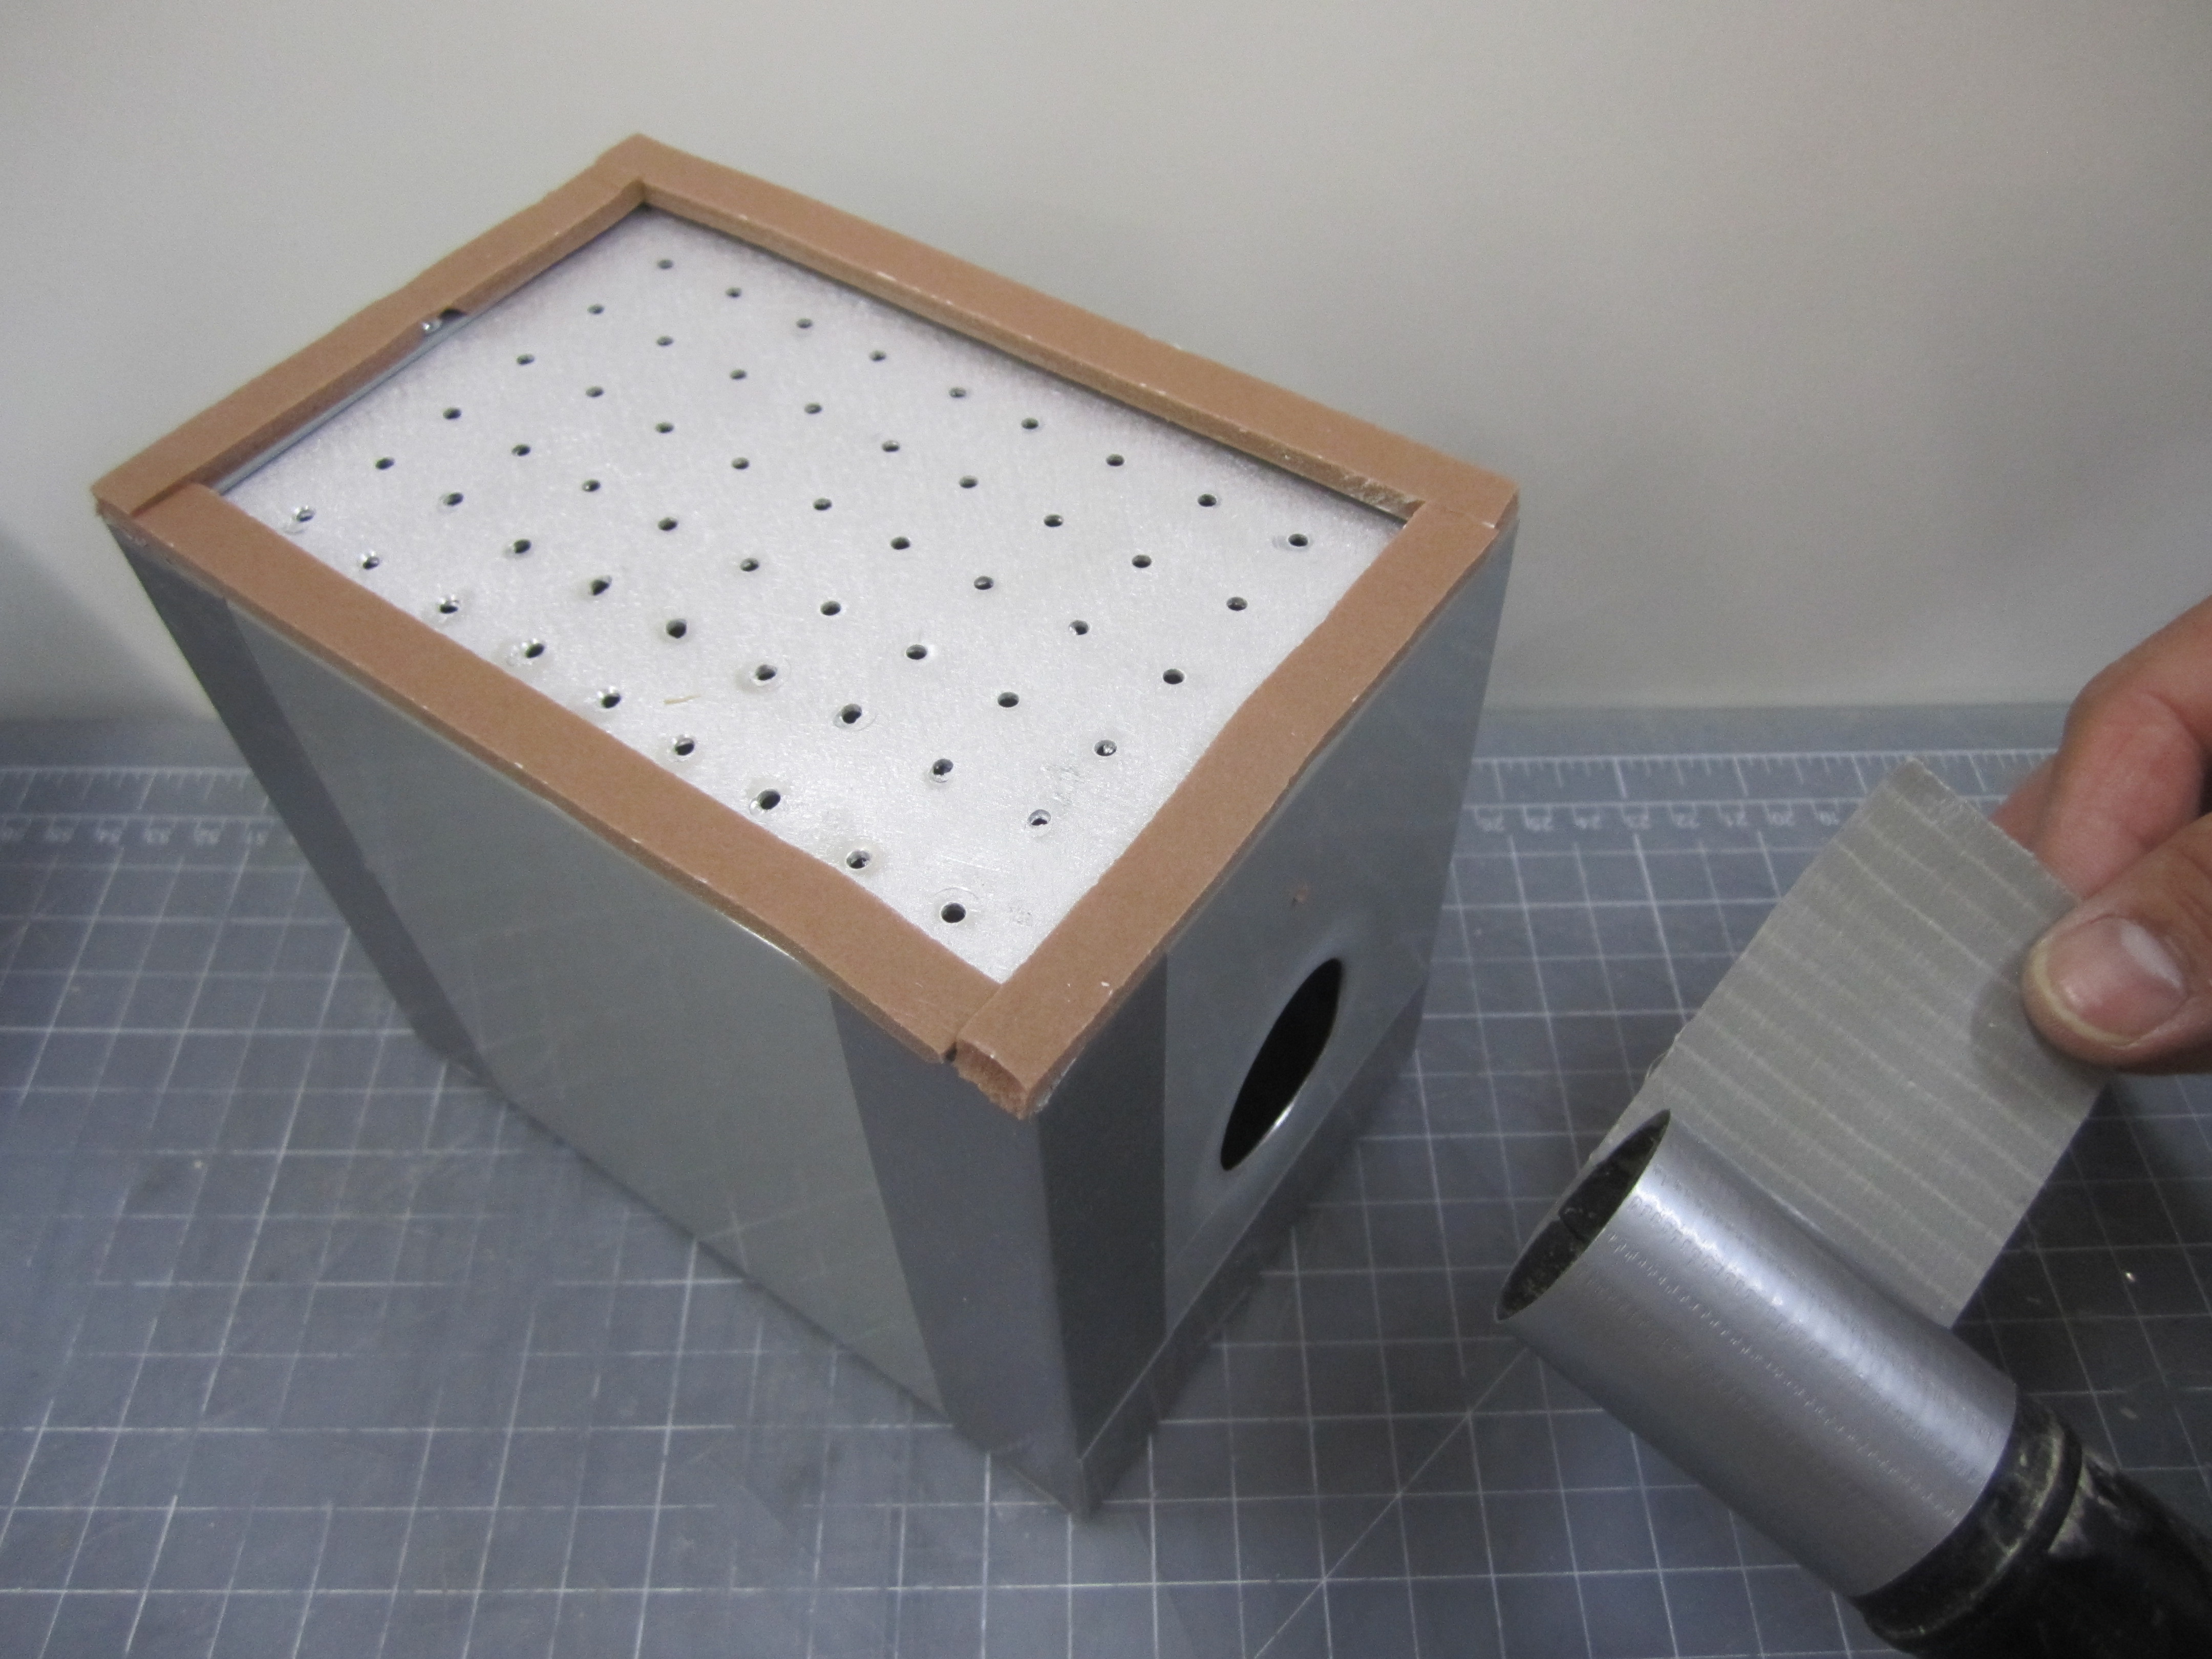
Step #2:

NextPrev
Making a DIY Vacuum Former Cheap in One DayMaking a DIY Vacuum Former Cheap in One DayMaking a DIY Vacuum Former Cheap in One DayMaking a DIY Vacuum Former Cheap in One Day
  • D - Assemble your project box and seal the seams with duct tape.
  • E- Apply a weather strip to the top perimeter of the box.
  • F - Wrap the vacuum hose with duct tape until it fits in the project box with a good seal.
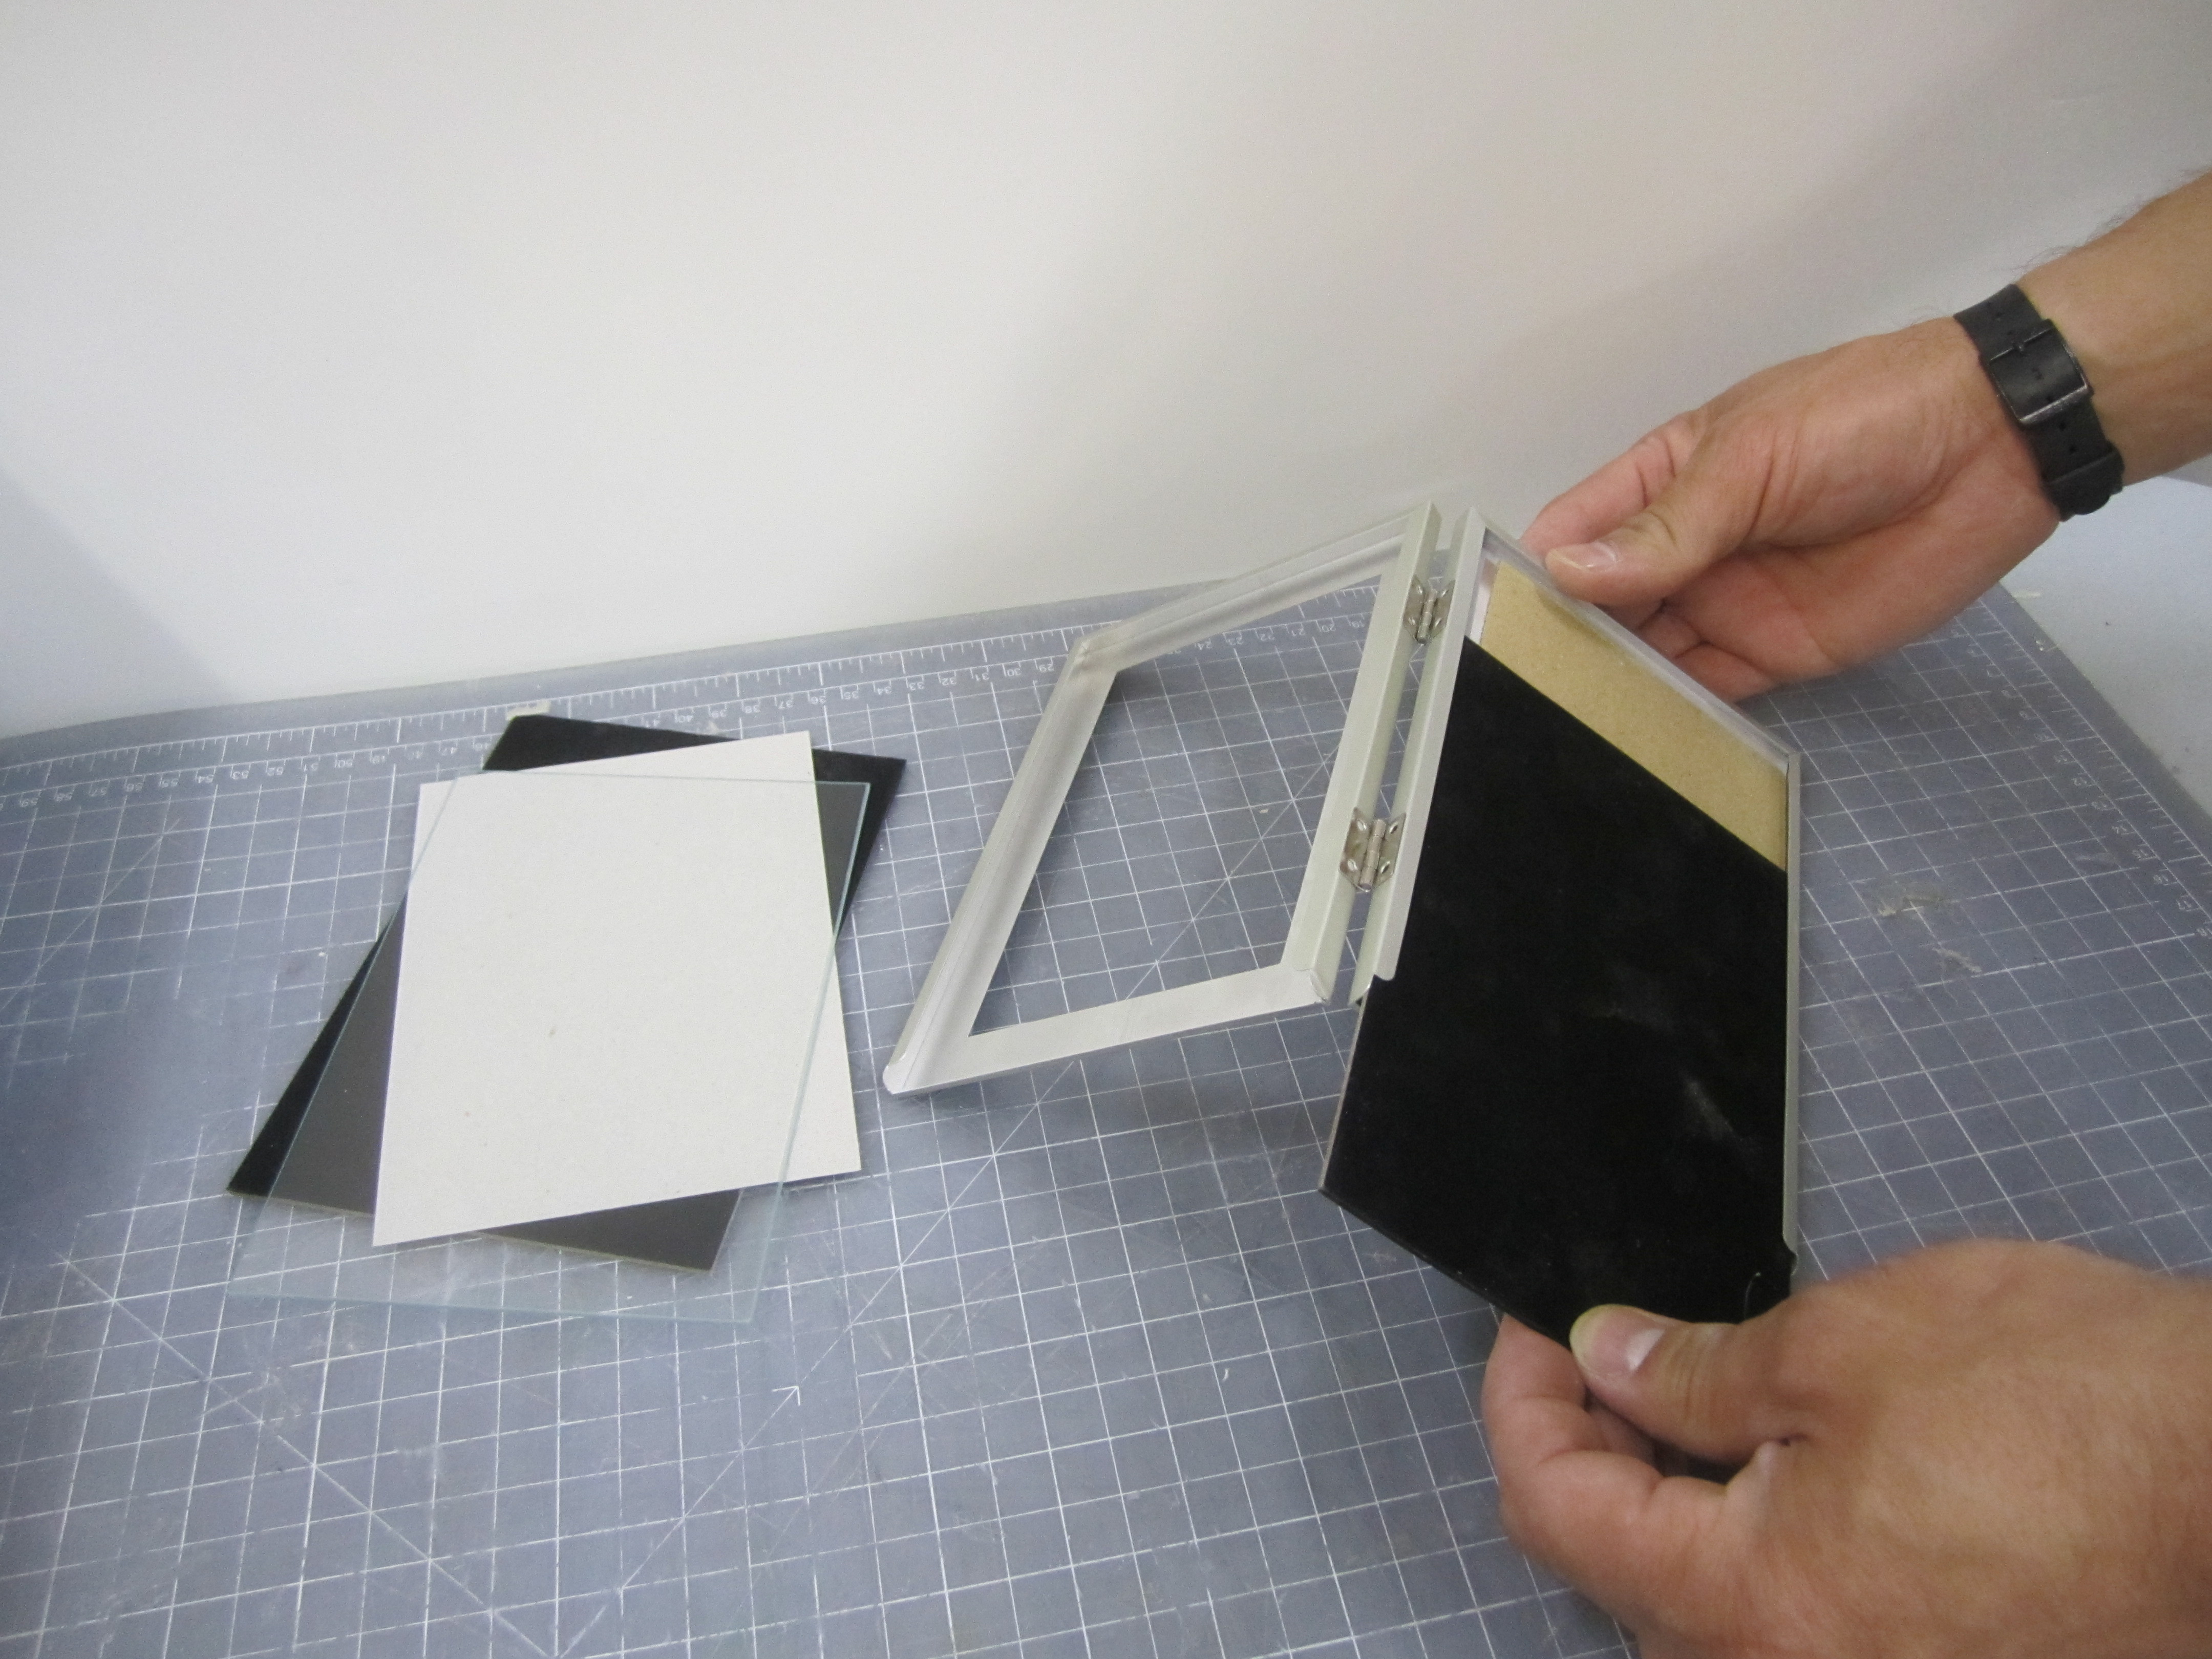
Step #3:

NextPrev
Making a DIY Vacuum Former Cheap in One DayMaking a DIY Vacuum Former Cheap in One DayMaking a DIY Vacuum Former Cheap in One DayMaking a DIY Vacuum Former Cheap in One Day
  • G - Remove the glass and backing from the picture frames. Save one backing piece.
  • H - Add some wood strips to the frame on the non-hinge side to keep the spring clip from crushing the frame.
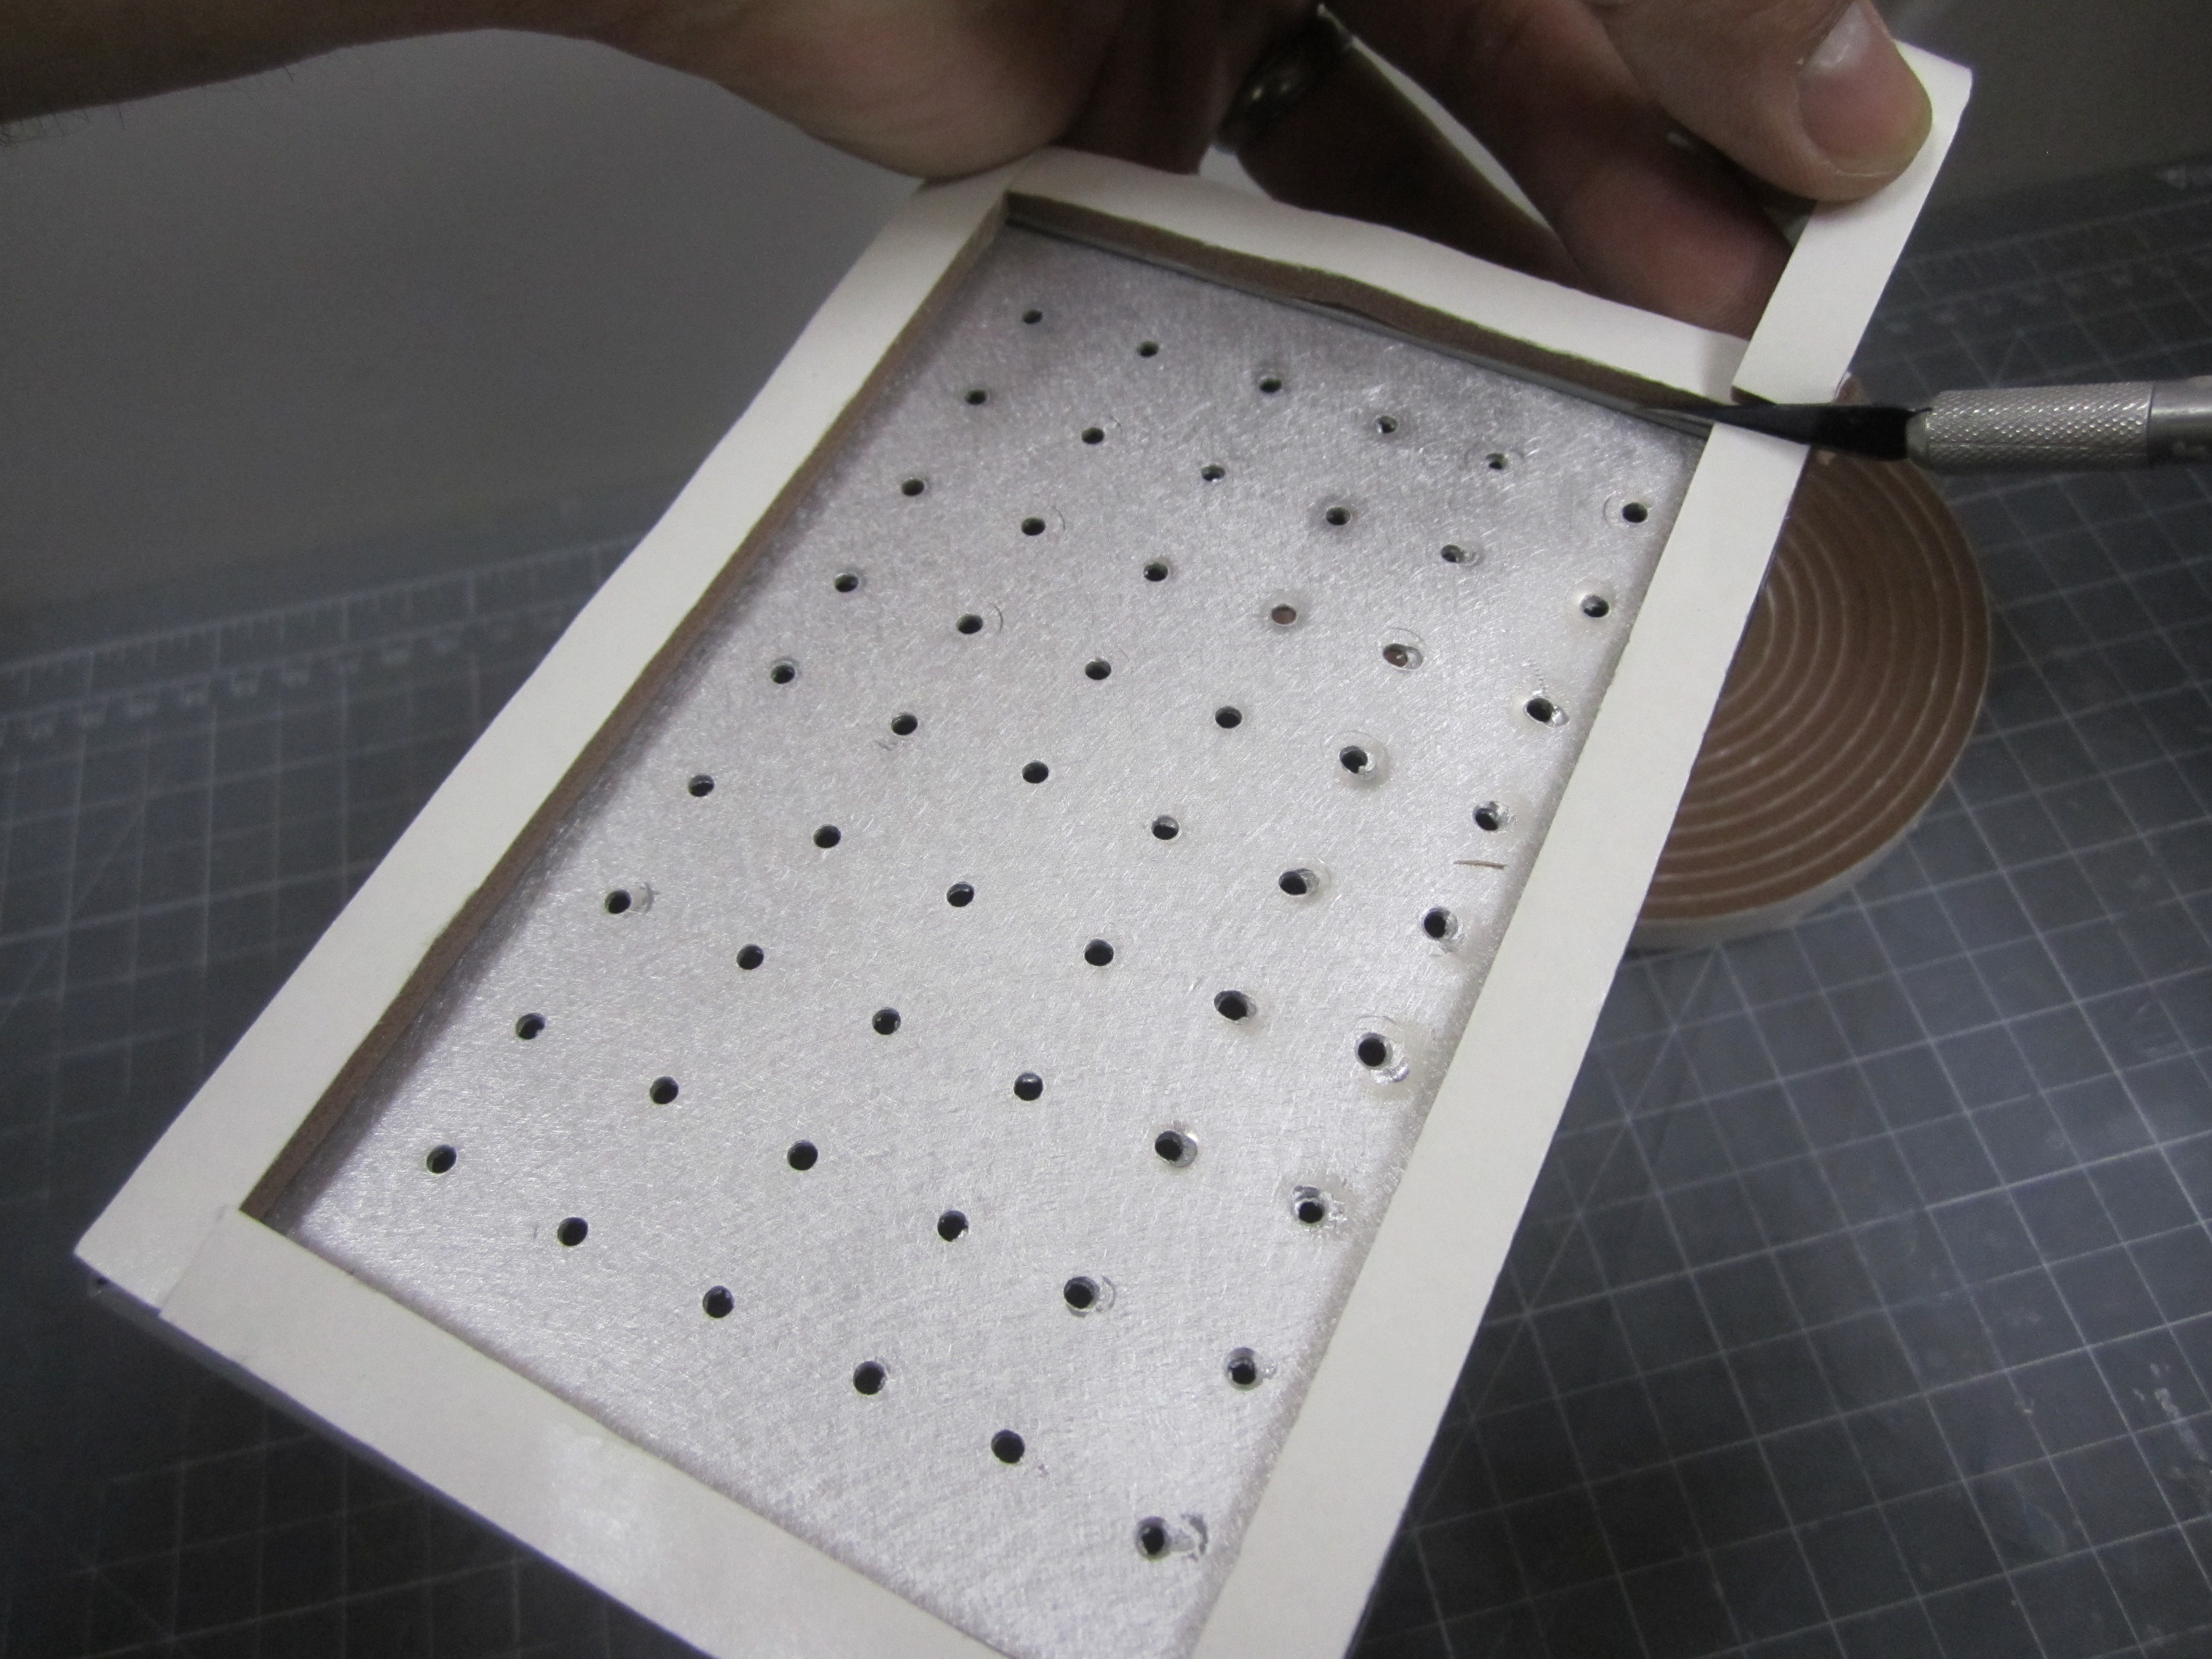
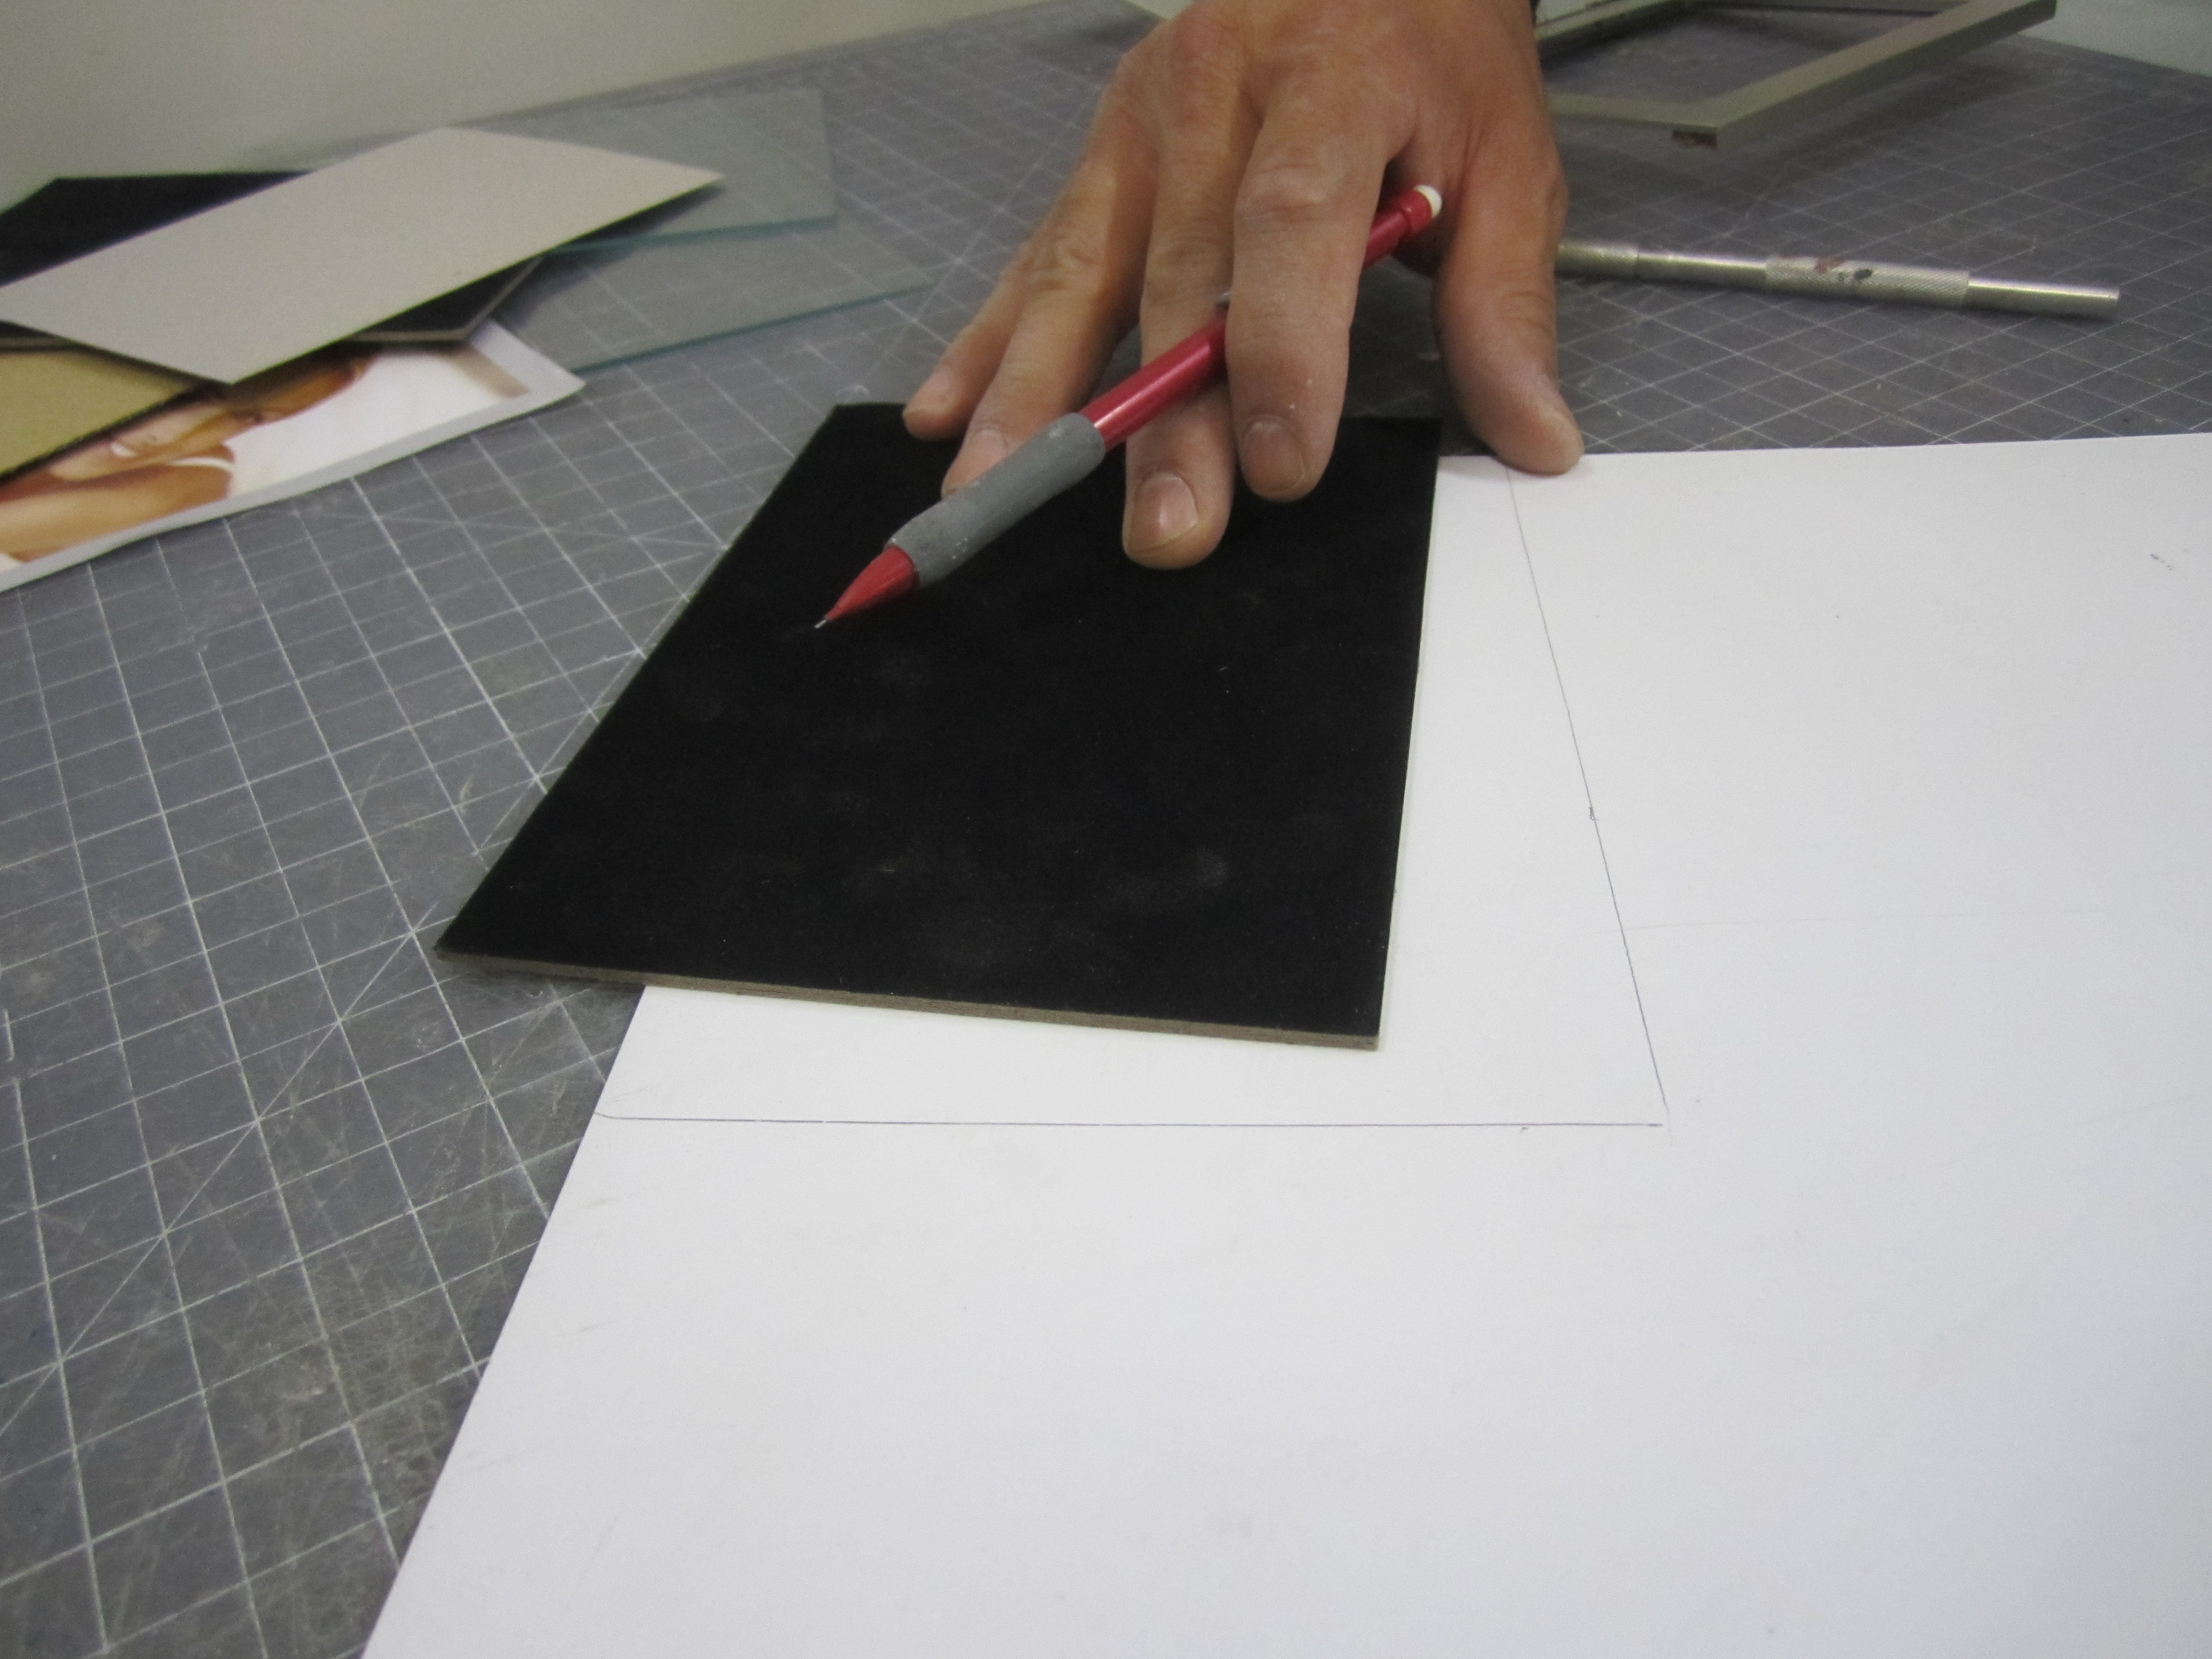
  • I - Use the saved backing piece to mark your plastic sheet. Shown here is standard .02" thick polystyrene sheet. You can also use the more durable ABS and clear PETG, but it takes a little experimentation to get the timing correct. Always buy extra material!
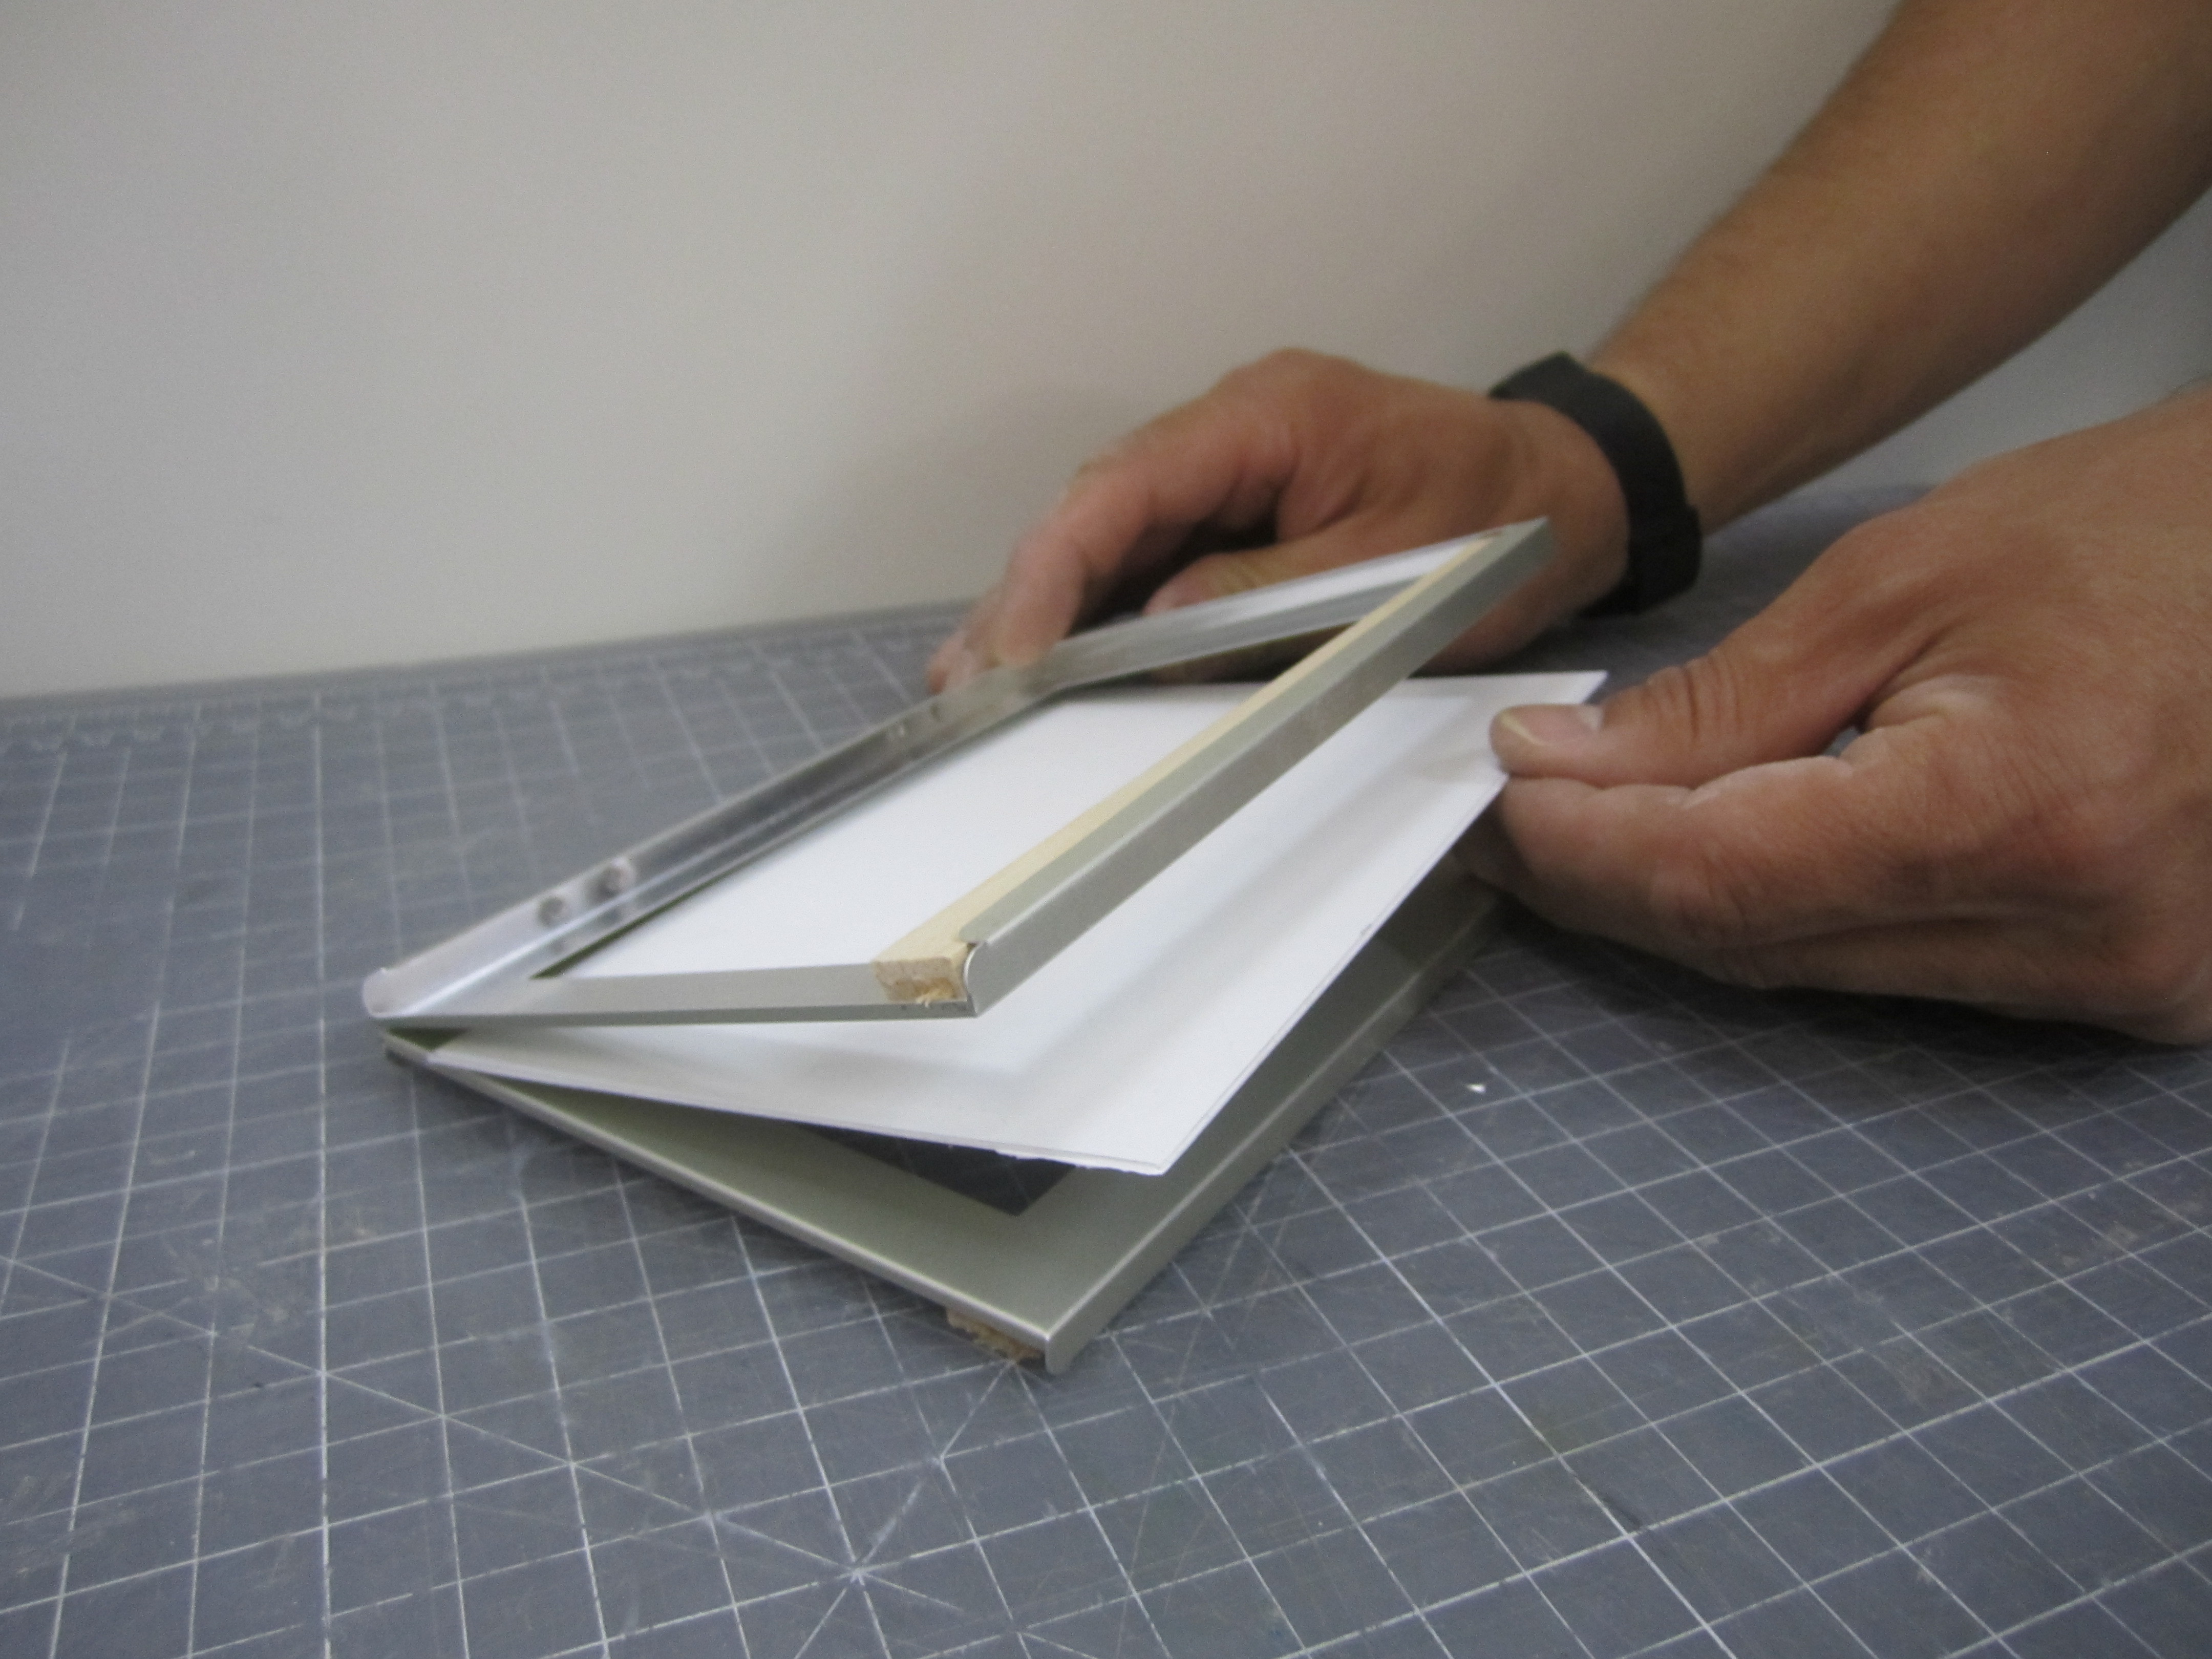
Step #4:

NextPrev
Making a DIY Vacuum Former Cheap in One DayMaking a DIY Vacuum Former Cheap in One DayMaking a DIY Vacuum Former Cheap in One DayMaking a DIY Vacuum Former Cheap in One Day
  • J - insert the plastic sheet into your frame, being sure it seats against the hinges.
  • K- Close the open end of the frame with the spring clip. (Not shown: Remove the plastic guards from your clip before heating.)
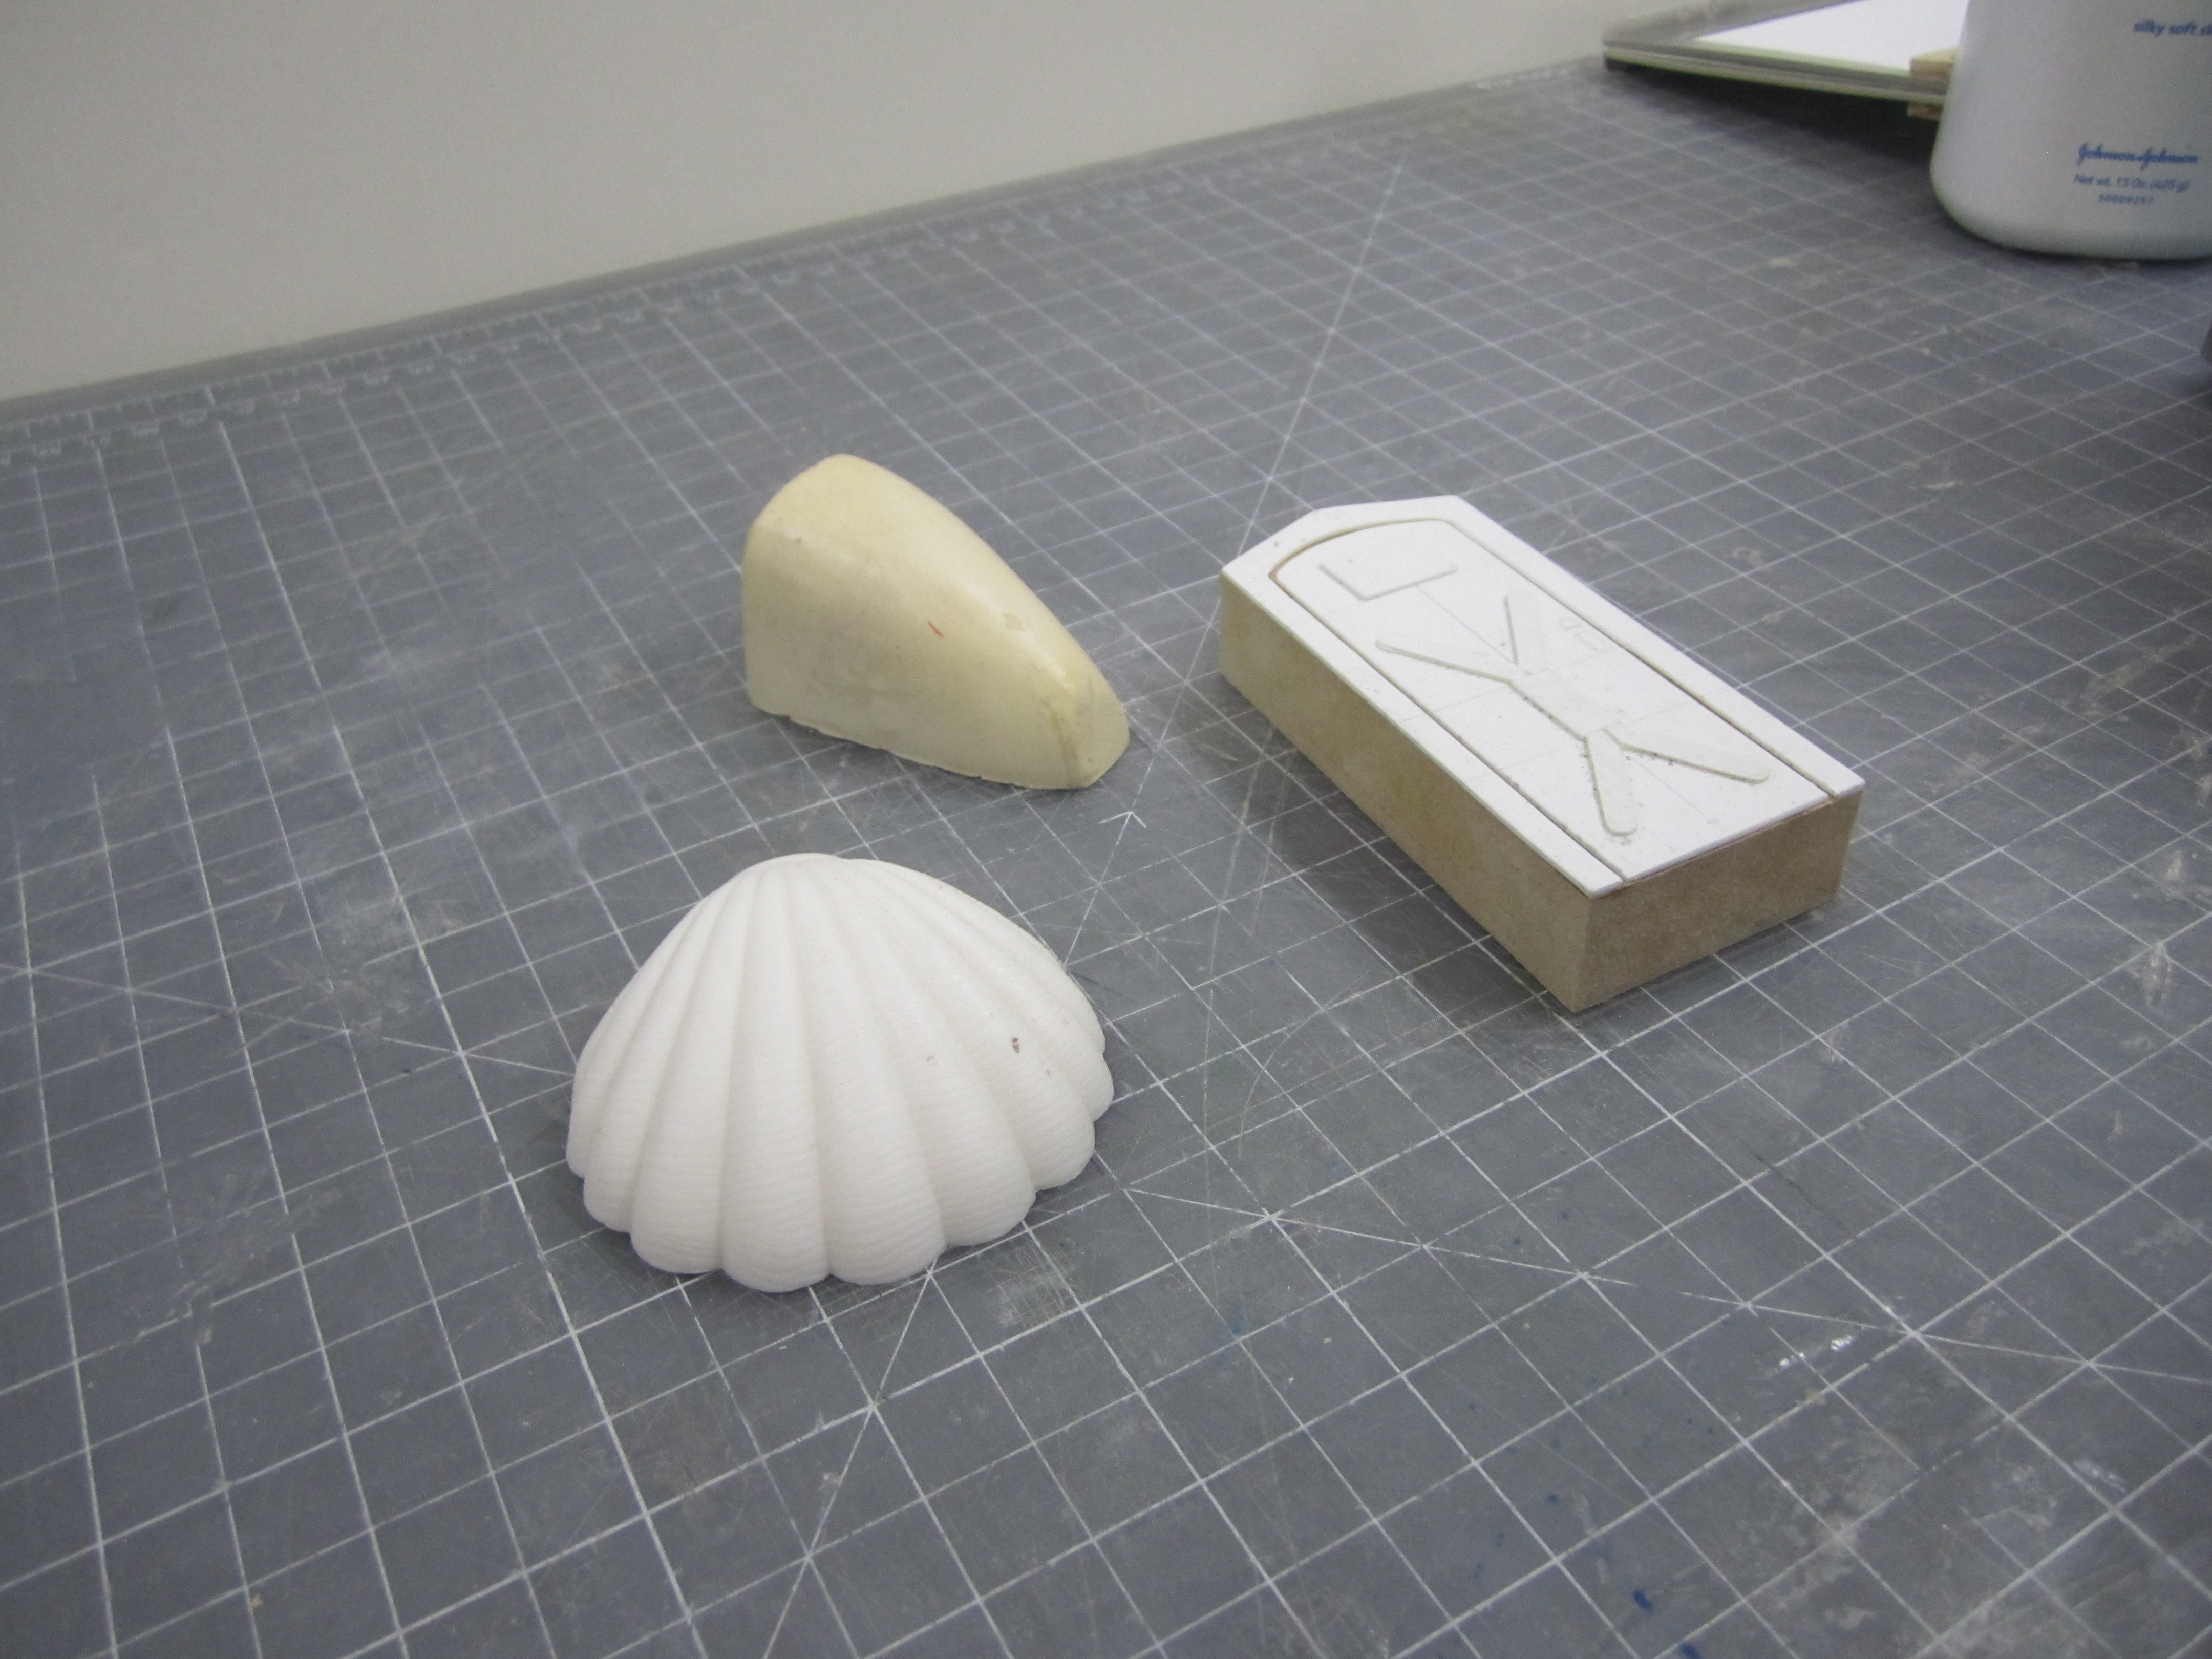
  • L - You can make vacuum form patterns out of any material that won't collapse or get damaged from the heated plastic. I recommend plaster of Paris. It is inexpensive, easy to carve and sands nicely.
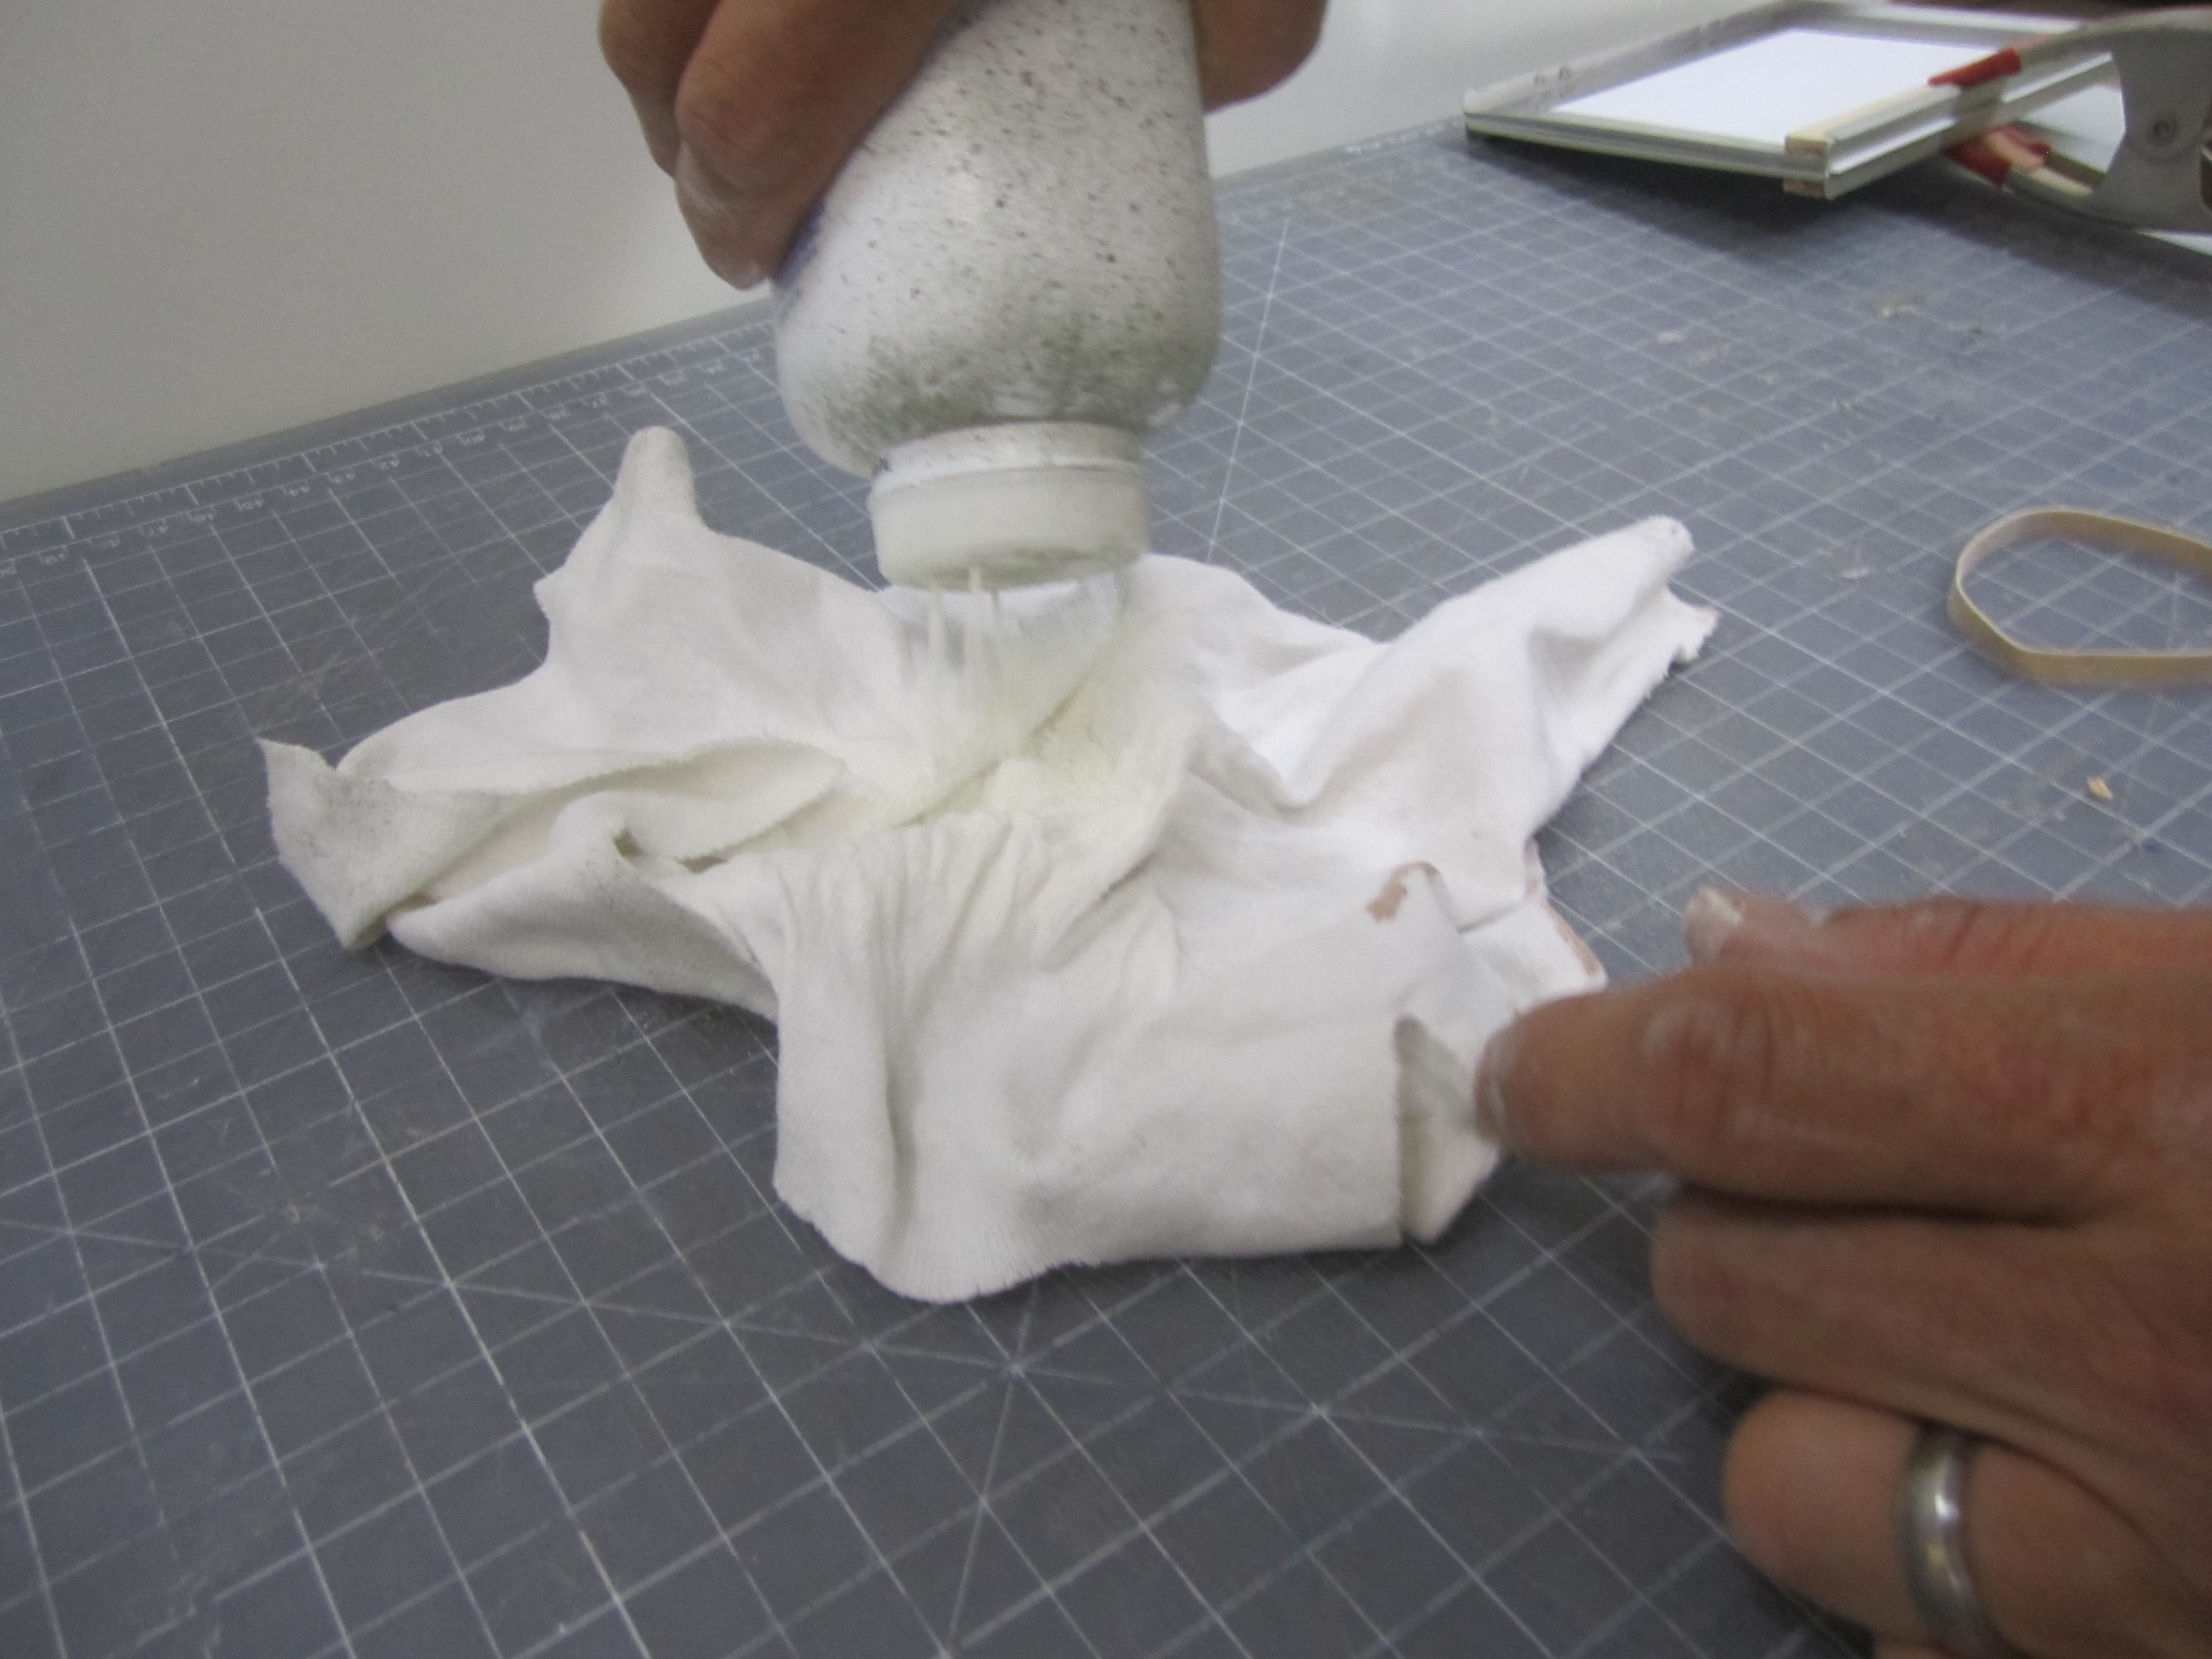
Step #5:

NextPrev
Making a DIY Vacuum Former Cheap in One DayMaking a DIY Vacuum Former Cheap in One DayMaking a DIY Vacuum Former Cheap in One DayMaking a DIY Vacuum Former Cheap in One Day
  • M - You can make a "talc sock" from kid's socks or a cotton rag by pouring talc into the middle of the fabric and closing with a rubberband.
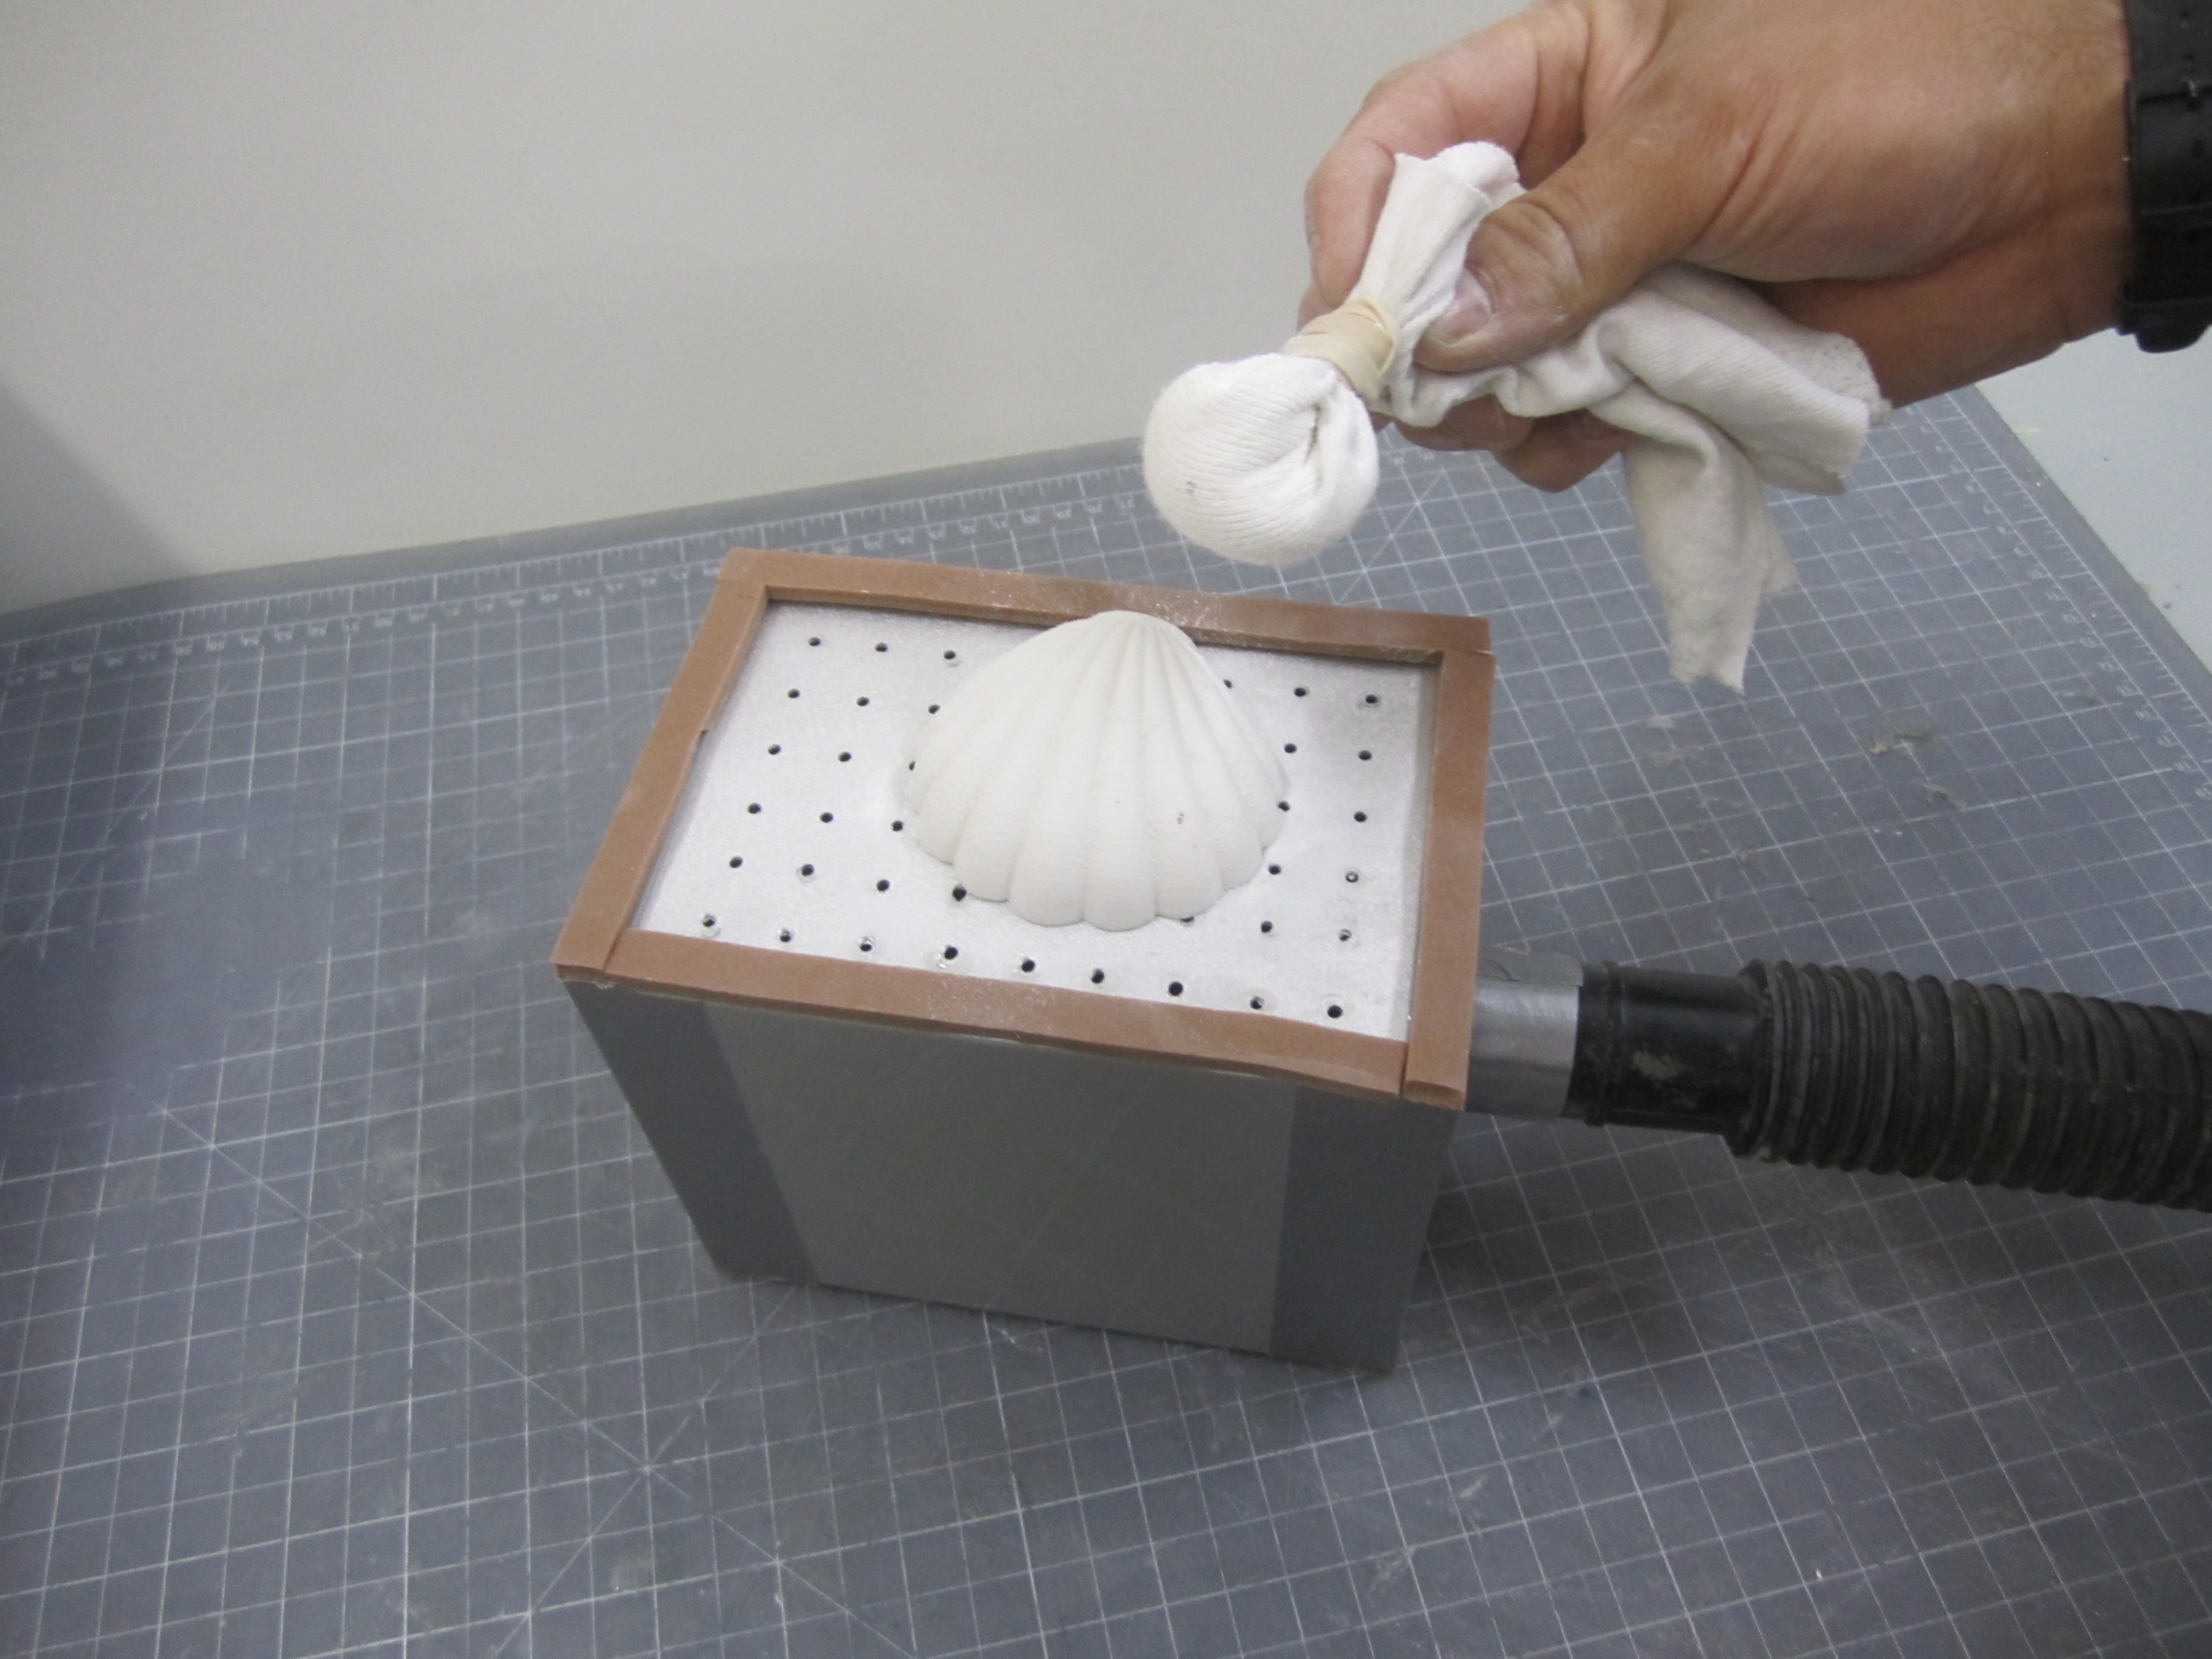
  • O - Lightly powder your pattern to keep the plastic from sticking to it.
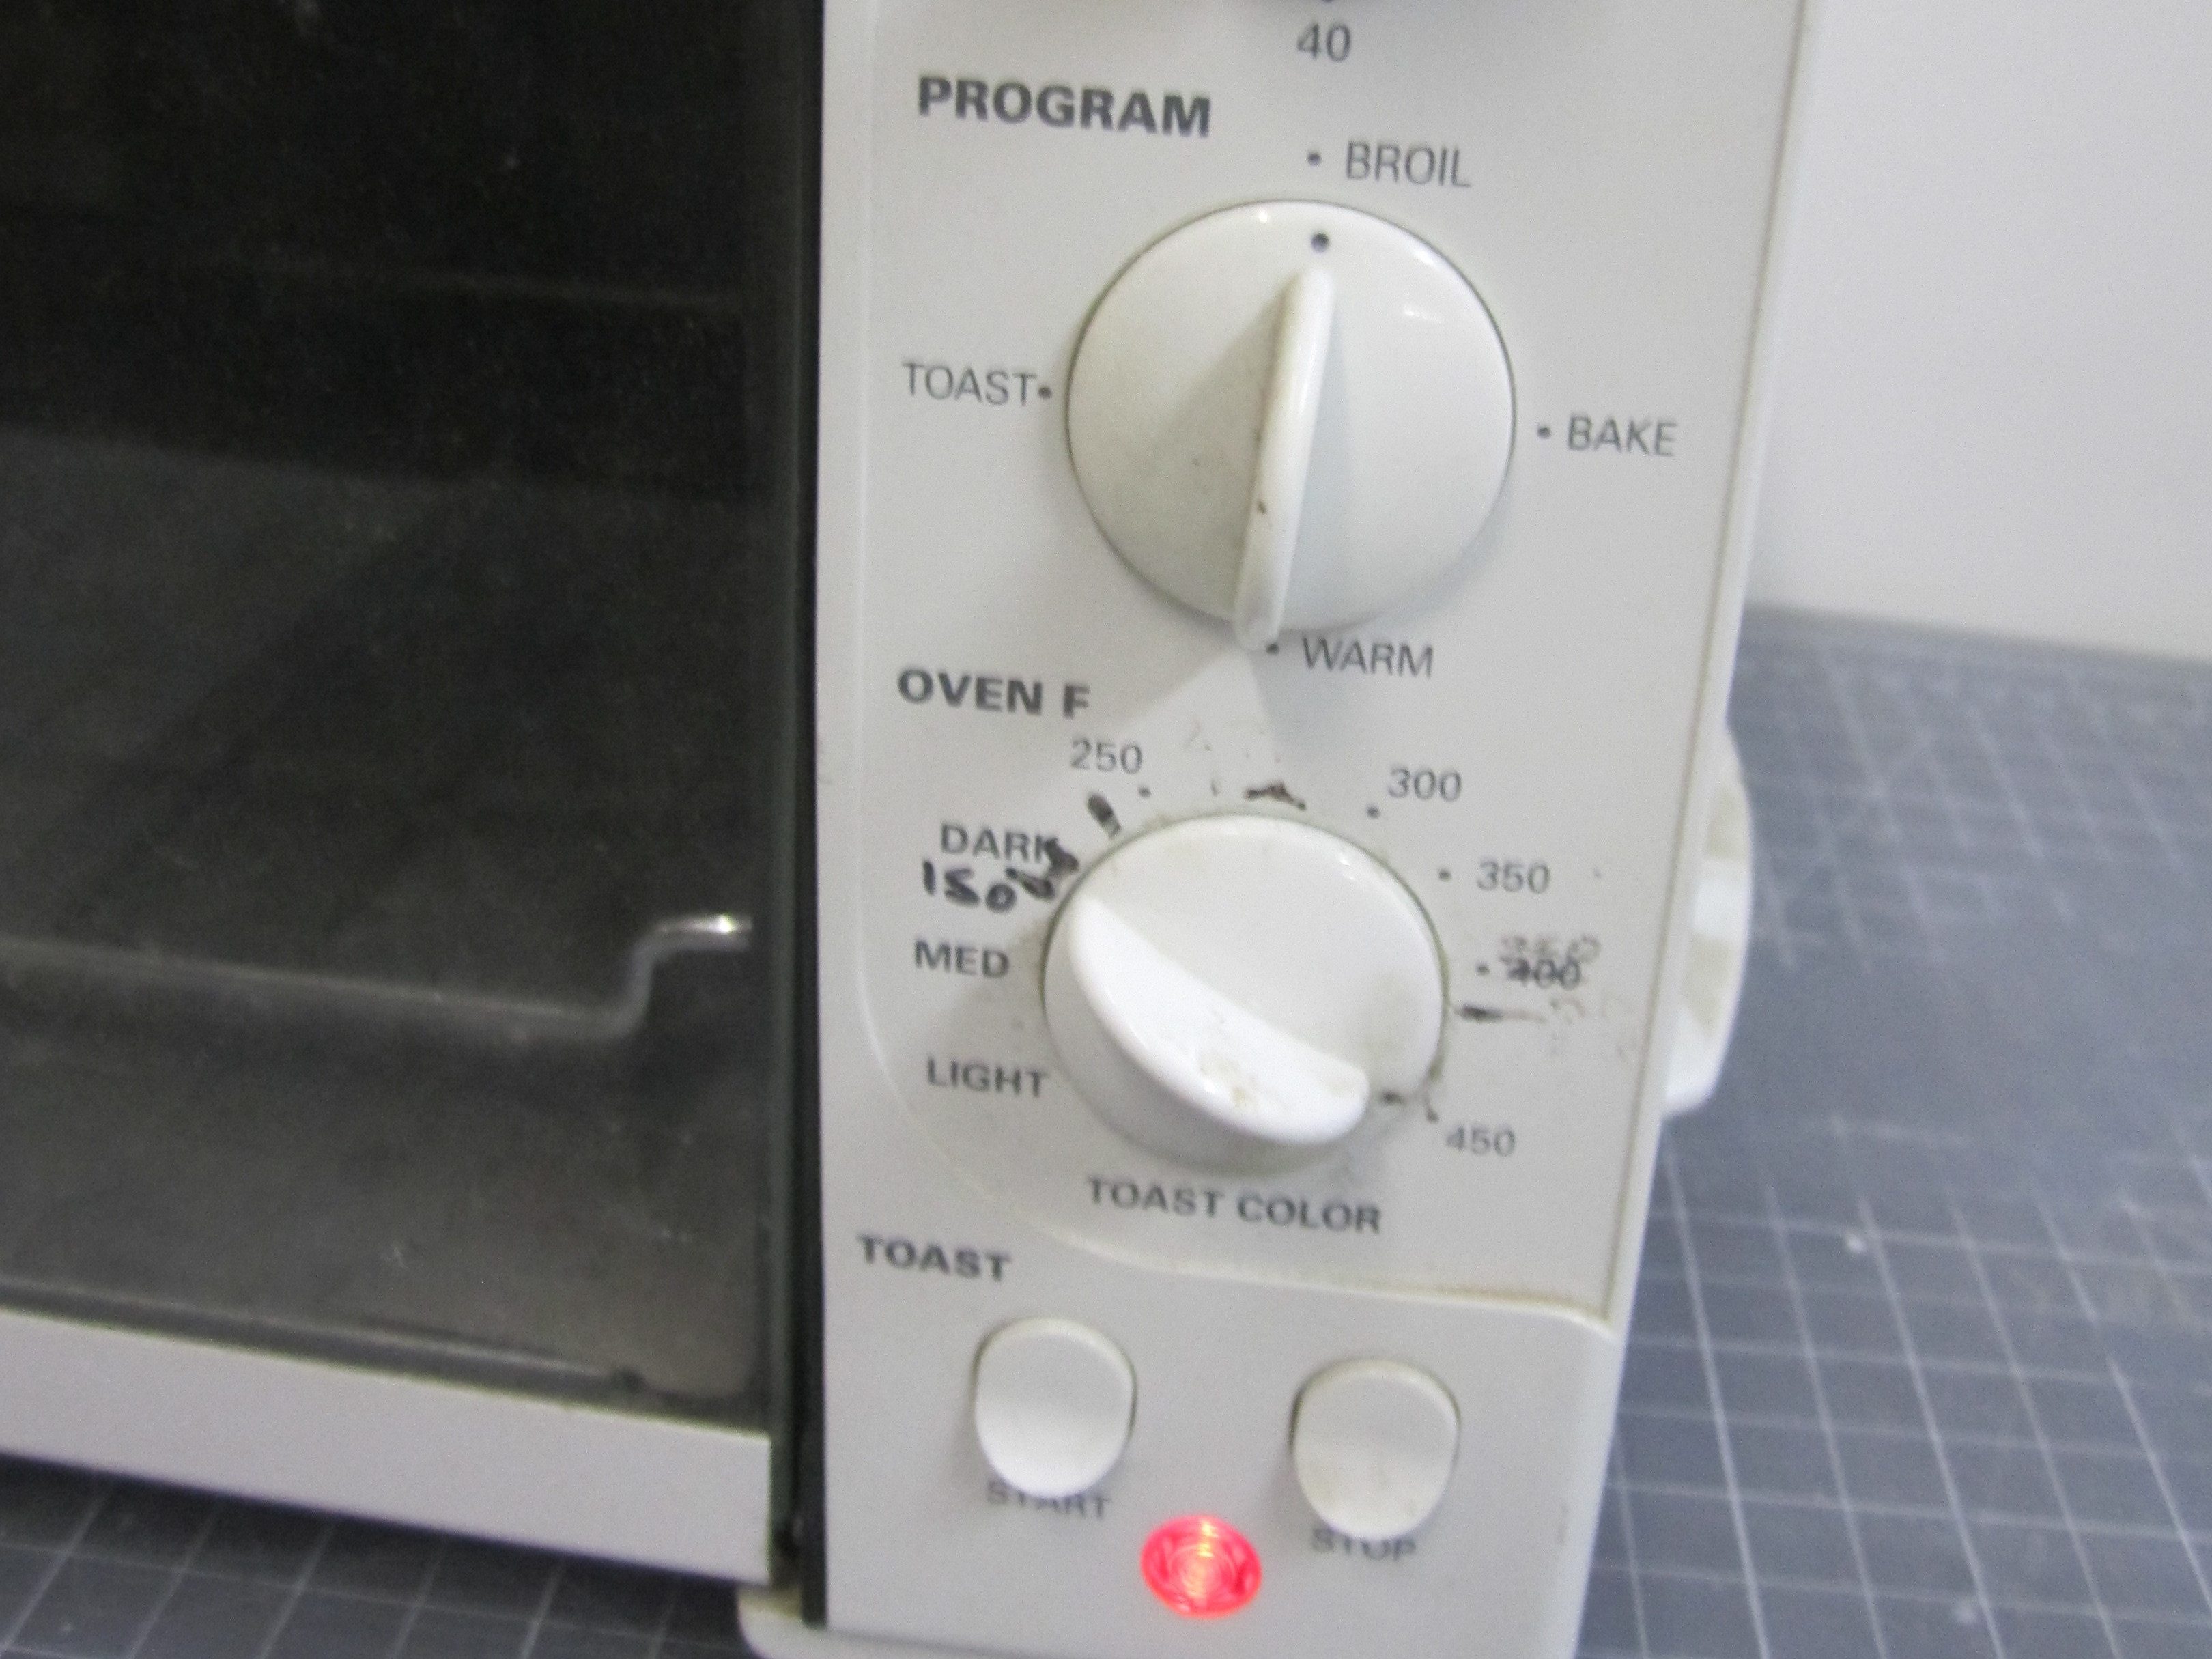
Step #6:

NextPrev
Making a DIY Vacuum Former Cheap in One DayMaking a DIY Vacuum Former Cheap in One DayMaking a DIY Vacuum Former Cheap in One DayMaking a DIY Vacuum Former Cheap in One Day
  • P - Preheat your toaster oven set to broil.
  • Q - Put on some heavy gloves and hold your plastic close to the top heating element without touching the element. Wait until the plastic droops down about the same distance as the pattern is high.
  • R - Turn on the vacuum. Move the heated plastic onto the top of your pattern while making sure the weather seal makes contact all the way around the frame holding the plastic.
  • There you have it! You've just made your own vacuum forming machine. This project is scalable. I have made larger machines using a welded frame, space heaters and larger vacuums.
Fon Davis

Fon Davis

When you buy through links on our site, we may earn an affiliate commission.

Subscribe & Save

  • Get dozens of projects in every issue covering DIY electronics, 3D printing, craft, and more
  • Learn tips and skill-building tutorials from experts in the maker community
  • Save over 40% off the annual cover price for a full year (4 issues) of Make:
SUBSCRIBE TO MAKE: MAGAZINE
Make: Community brand logo Publishers of Make:Magazine Producers of Maker Faire Logo
  • About us
  • Our team
  • Advertise with us
  • Help Center
  • Contact us
  • Support Make:
  • Find a Maker Faire
  • Manage Magazine Subscription

Make:
Maker Faire:
Privacy Policy
Terms of Use
©2019 Make Community LLC. All rights reserved
Special Pinterest-only offer!
One year of Make: Magazine for just $19.99
Cookie Settings
We use cookies to optimally design and continuously improve our websites for you, as well as to display news, articles and advertisements in line with your interests.
We'll assume you're ok with this, but you can opt-out if you wish.

Our websites use cookies to improve your experience while you navigate through the Make: ecosystem. Out of these cookies, some are categorized as essential for the working of basic functionalities of our websites.

We also use third-party cookies that help us analyze and understand how you use our websites. These cookies will be stored in your browser only with your consent. You have the option to opt-out of these cookies. But opting out of some of these cookies may have an effect on your browsing experience.

Your choice here will be recorded for all the Make: Community Websites.

Allow Non-Necessary Cookies
Send this to a friend
FEEDBACK