For more on microcontrollers and wearables, check out Make: Volume 43. Don't have this issue? Get it in the Maker Shed.
For more on microcontrollers and wearables, check out Make: Volume 43.
Don’t have this issue? Get it in the Maker Shed.
  • Time required: A weekend
  • Cost: $100 — $130

Ever wanted to visualize your brain activity? Electroencephalography (EEG) uses electrodes placed against the scalp to detect the tiny electrical changes that occur when neurons fire. By amplifying these signals through a computer, you can observe brain activity in real-time.

Using an off-the-shelf EEG module, you can make a beanie with lights that change color and intensity in response to the wearer’s level of attention and relaxation. You can even use the hat to control interfaces on your computer! The flap and double-layer knit hide the electronics, so it looks and feels just like a comfortable cap.

Detailed step-by-step instructions can be found here.

Get the NeuroSky Brainwave Mobile Starter Set in the Maker ShedGet the NeuroSky Brainwave Mobile Starter Set in the Maker Shed to get started doing brainwave activity right now! It has all the parts you need to get your brainwaves flowing into your projects.

Project Steps

How it works

A NeuroSky ThinkGear ASIC Module (TGAM) circuit board is connected to a TinyLily Arduino-compatible microcontroller running a program that translates brain activity into light through four NeoPixel RGB LEDs.

No modifications are made to the TGAM software or hardware — rather, you integrate the ThinkGear chip into the circuit via a simple mechanical adaptation that allows you to connect it to the board.

The TinyLily is easily accessible via a micro USB connector hidden inside the hat’s pom-pom. This lets you create interactive “brain art” on your computer, using a programming language such as Processing.

Simply connect to your computer via USB (or wirelessly if you make the hat with Bluetooth), and import the real-time serial stream into Processing. Then customize the Processing sketch so that levels of “attention” and “meditation” will control variables such as color, opacity, movement, coordinates, and rotation.

Understanding Electrodes

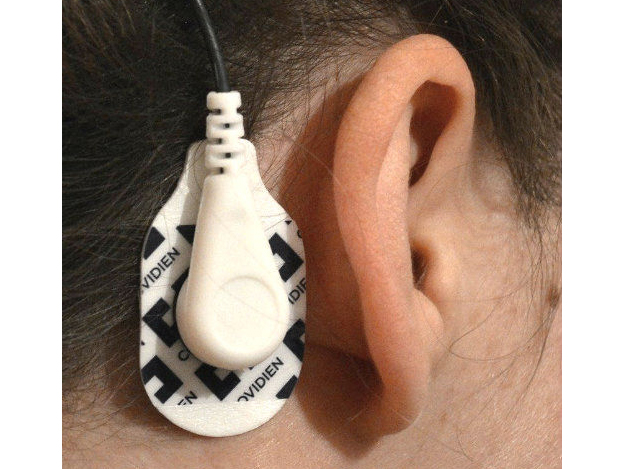
An EEG device has two types of electrodes: the EEG electrode, which records brain signal from the scalp, and the reference electrode, which tells the EEG device what “no brain signal” looks like (i.e. baseline).

I built the hat with a dry EEG electrode — constructed from copper foil, conductive fabric, foam, and conductive tape — which provides a decent signal quality and is less messy than traditional gel EEG electrodes.

You’ll need to ensure constant contact of this electrode with your forehead, and to keep the area sweat free.

Make Your Own

This project requires soldering and some sewing. Detailed step-by-step instructions can be found at makezine.com/go/eeg-beanie

Get Glowing!

Put on the hat, placing the reference electrode over the mastoid bone behind your ear. Snap the sensor wire to the electrode and switch the hat on. The lights in the pom-pom should begin to flicker as the ThinkGear chip starts processing your brain activity.

Take slow, deep breaths to relax and watch as the color changes. Then try focusing on a difficult mental math exercise and watch as the pom-pom glows the opposite hue!