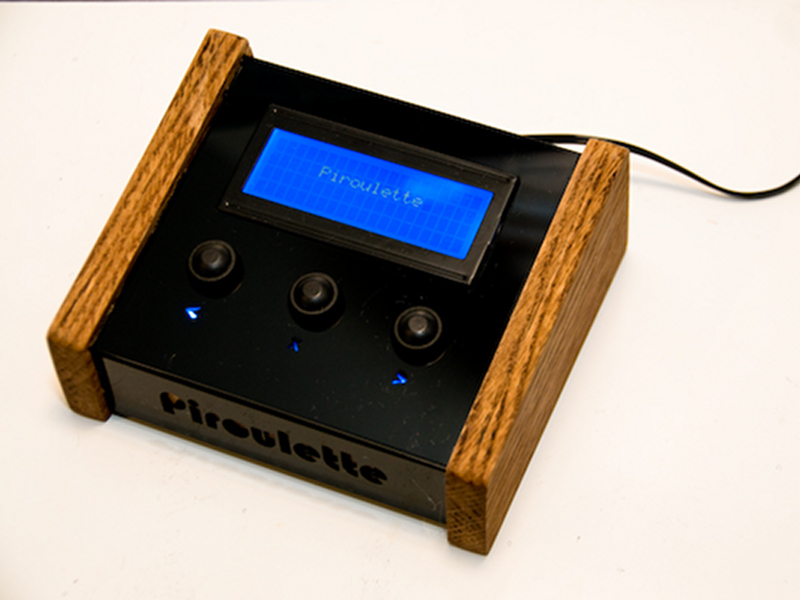
In the Spring of 2011 I worked on a project with artists Steve Hanson and Elliot Clapp that was part of Apexart’s “Let it end like this” group show curated by Todd Zuniga. Steve created a generative questionnaire that polled gallery-goers and presented them with their Last Words. An interactive pushbutton console and LCD was built by Elliot (pictured above) and we built the thing using an inexpensive Arduino variant from Modern Device. Here’s how we did it.
Projects from Make: Magazine
Piroulette: A Machine That Predicts Your Last Words
An Arduino-based interactive LCD console for a gallery installation.

The Console.

Piroulette sits quietly on a pedestal, its backlight pulsing as it waits for someone to interact with it. When the select button is pressed, it begins asking a series of questions such as “Which of the following lines would open your personal manifesto?” A, B and C options are presented on separate screens, which the user can navigate with the buttons. At the end, your last words are generated from a list of a hundred or so poetic options.
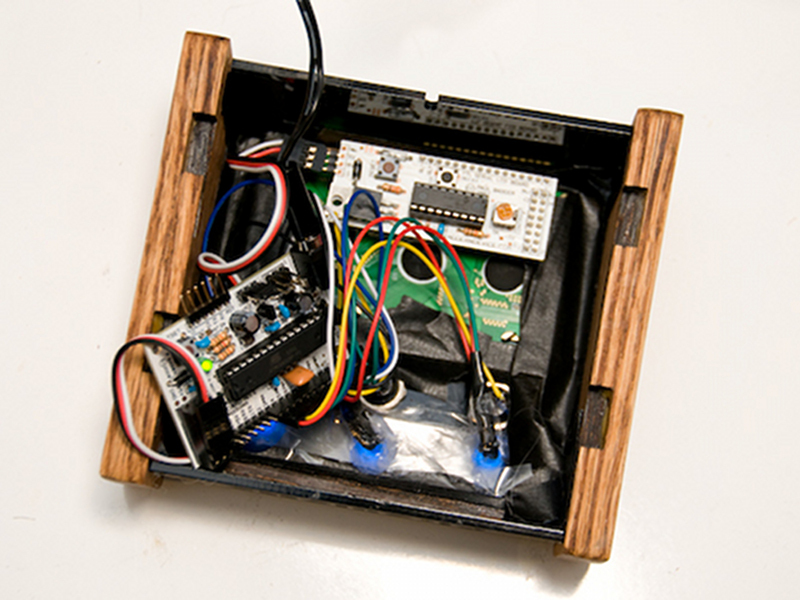
The guts.

Elliot designed the console in Illustrator and used the laser cutter at AS220 Labs to machine the black plexiglass and oak side panels. The laser cutter he used can cut up to quarter-inch wood, so the side panels were doubled up and joined with glue. This allowed for hidden slots for the plexiglass and bottom panel.
The bottom panel slides to reveal the electronics. We used a Bare Bones Board from Modern Device. This is a great low-cost option for embedding a microcontroller in a project.
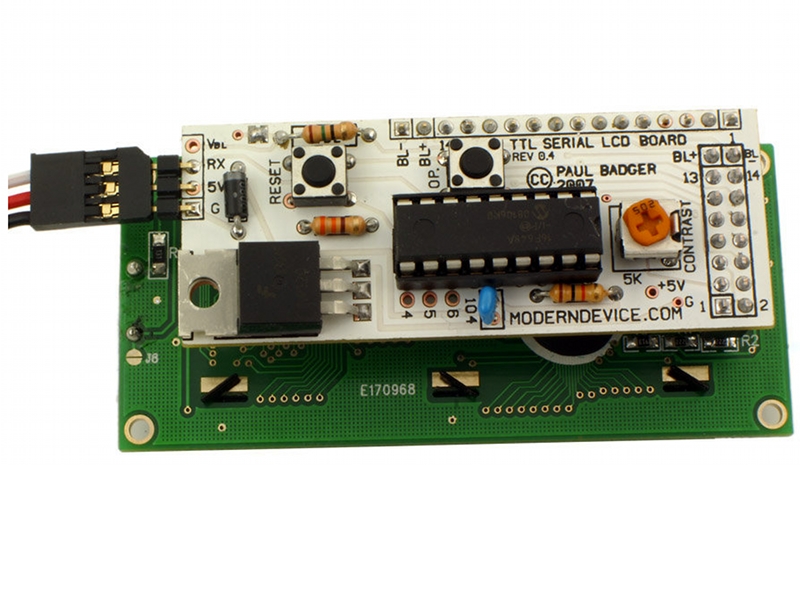
The LCD panel was also from Modern Device. A LCD117 breakout board (with a pre-programmed PIC microcontroller on it) allowed us to easily send strings to the LCD.
Three buttons are wired into the console: Back, Select, and Forward. Each button also has a controllable blue LED mounted below that pulses to give visual hints to the user.
For convenience we used a a couple of six-wire extension cables. One pair of cables went to each button and one pair went to each LED. Pre-crimped cables are the way to go.
The LCD controller.

The LCD117 serial LCD board was created by Peter Anderson. It implements a simple LCD command language that he created. The Arduino sends strings and control characters to the LCD117 over a 9600 baud software serial connection.
The full command set is available at http://www.phanderson.com/ with the docs for the board.
Another option would be to use the Arduino LCD library. In this case I just went with what I knew. :)
The code.

Download the Arduino sketch Piroulette.pde here.
Note the use of the PROGMEM variable modifier, which allows you to store text strings in program memory (of which there is 32k) instead of SRAM (only 2k). This is described in the excerpt from the Arduino Cookbook posted on the Make Blog.
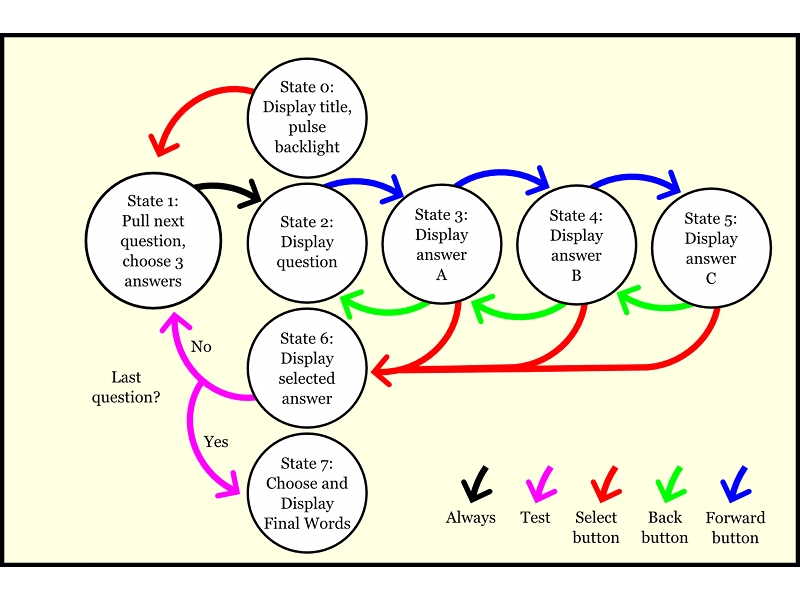
The program implements a simple state machine (left), which I think is an easy way to whip up something like this quickly without introducing too many bugs.
Here’s a Perl script to help you turn a big list of strings in a file (one to a line) into the requisite PROGMEM code.


