walabot_sponsorbuggrey-copy

Sensors and embedded computers are the rocket fuel of the Maker movement — they let us rapidly prototype new contraptions that can react to the world around them. We’re all familiar with sensors for light, sound, and motion, but this year a whole new kind of sensor hit the market, giving makers capabilities they’ve never had before.

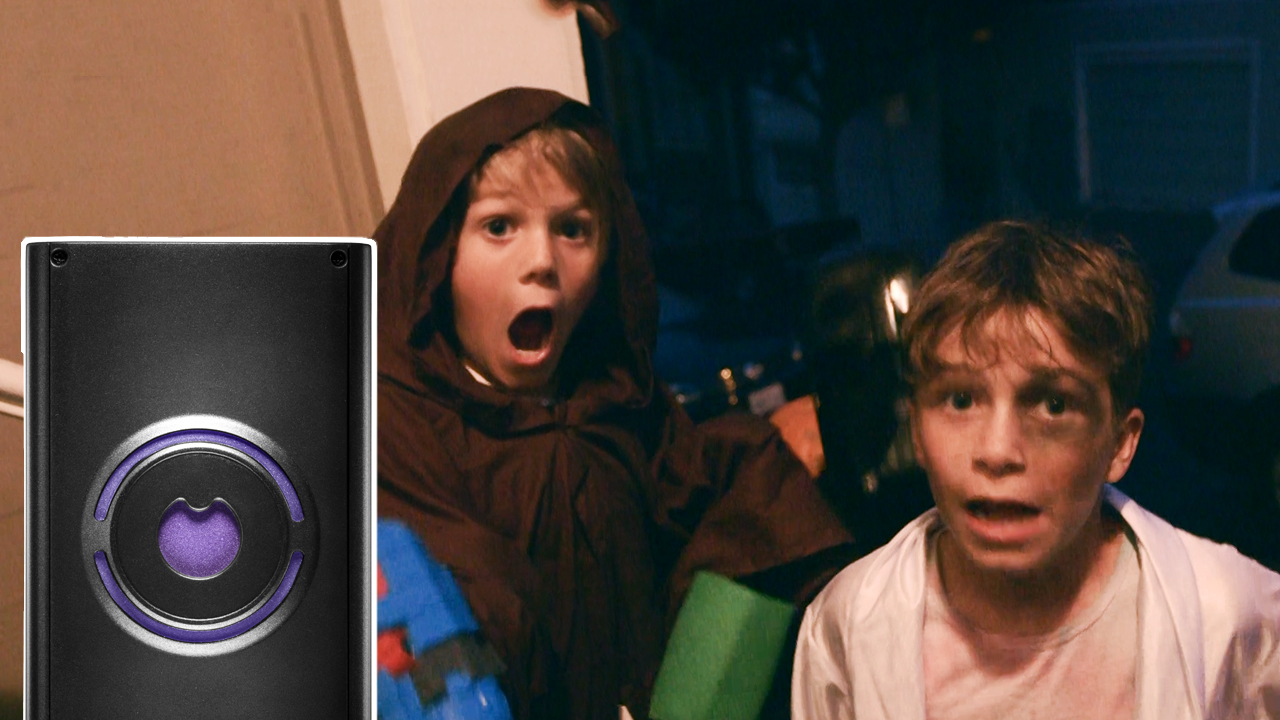
This new sensor, the Walabot, is essentially a personal 3D radar imager that can look through walls, track moving objects, and much more. Using multiple RF transmitter-receiver pairs and a custom chip, the Walabot emits a broad spectrum of RF frequencies (3.3GHz–10GHz in the USA, or 6GHz–8GHzin the EU) and listens for the echoes to sense objects around it. We’ve never used a sensor like it, so we were excited when Walabot asked Make: to explore what it can do. Sure it can find pipes inside a wall, but it can also detect breathing, measure the speed and position of multiple bogies — we can easily imagine the applications to robots, autonomous vehicles, and a whole new class of pranks.

So here’s our first Walabot-powered project, by Sam Brown — a Trick-or-Treater Tracker that can look right through your front door, track the costumed kids approaching your home, and then automatically accost them with different scary sounds and customized messages depending on how close they come and how many there are. We used the Walabot Pro but you can also do this trick with the Walabot Maker model. (The Walabot Starter Kit will also work but you’ll be limited to sensing a single target, at shorter range.) It’s a project that’s sure to mystify your Halloween visitors (“How does it know??”), whether at the front door candy station or the haunted house, by taking advantage of this sensor’s unique capabilities.

If you’re eager to try Walabot, they’re having a temporary special just for Make: readers: Get the most powerful sensor, the Walabot Pro, for $299 (regularly $599) at walabot.com using coupon code Make. Starting November 15th, they’re also launching the Power to the Makers contest with $10,000 in cash prizes — check the bottom of this post for more details.

—Keith Hammond, Projects Editor, Make:

 How the Walabot-powered Trick-or-Treater Tracker works:walabot-internal

* The Walabot radar sensor (being run by a Raspberry Pi computer) watches for targets to approach. Walabot looks for targets in a cone, projecting out from the blank side of the device. In our code, we set the Walabot to watch for targets up to 5 meters (about 16 feet) away, and we narrow the cone down to just a few degrees wide. You’ll find the settings near the top of the code to modify the length and width of the search cone. (The larger an area you tell Walabot to scan, the longer each scan takes and the more chance it has to pick up targets you didn’t mean to count.)

* When it first spots someone approaching (at 3 meters or so away) it plays one sound or message. (“Who’s there?!”)

* When they close to 2 meters away, it plays another sound, depending on whether it detects only one person, or more than one. (“Come closer, little one!” or “You kids come closer!”, etc.)

* When they close to 1 meter away, it makes another sound. (“BOO!”)

* When they run away (retreat to 2 meters), it makes a final sound. (Witch’s laughter …)

The code lives at https://github.com/baudot/Walabot_Haunt and can be cloned with the command:

git clone https://github.com/baudot/Walabot_Haunt.git

Project Steps

BUILD A TRICK-OR-TREATER TRACKER WITH WALABOT

Project by Sam Brown

1. Do your basic Pi setup.

Starting with a fresh new Raspberry Pi 3, do all your basic Pi setup:
— Install the Raspbian operating system, using NOOBs, following the directions at https://www.raspberrypi.org/learning/software-guide/quickstart/
— Update all packages to current by running the commands:
sudo apt-get update
and then
sudo apt-get upgrade

2. Configure the Pi to work with Walabot.

As described in Walabot’s PeopleCounter code example at https://github.com/Walabot-Projects/Walabot-PeopleCounter), simply add the following two lines to the end of your /boot/config.txt file:
safe_mode_gpio=4
max_usb_current=1

Then reboot the Pi so the new settings can take effect.

3. Connect the Walabot to the Pi.

Connect them through an ordinary powered USB hub. The Pi doesn’t provide sufficient power on its own USB ports to run the Walabot, so you’ll get cryptic error messages and crashes if you try to plug the Walabot into the Pi directly.

4. Download the Walabot software to your Pi.

— Open a terminal window.
— Download the Walabot SDK for Raspberry Pi from http://walabot.com/getting-started, then install the downloaded .deb file:
dpkg -i walabotSDK_RasbPi.deb
— Download the Python libraries:
python -m pip install "/usr/share/walabot/python/WalabotAPI-1.0.33.zip"

5. Confirm everything is working so far.

— Download and run the Walabot’s FirstApp example code (https://github.com/Walabot-Projects/Walabot-FirstApp). This app simply prints the Cartesian coordinates of every target detected by the Walabot sensor. It should take a few seconds to get running, after which you should see on your screen directions to the nearest object, as the Walabot sees it. Congratulations, you’ve got radar eyes!
— Test passed? Continue on to …

6. Use pip to install the Enum library

Our trick-or-treater prank program uses it. Type the command:
sudo pip install enum

7. Download and run our Trick-or-Treater Tracker app.

— Download the app by typing:
git clone https://github.com/baudot/Walabot_Haunt.git
— Go into the prank directory by typing:
cd Walabot_Haunt
— Start the program running by typing:
python TrickOrPrank.py

8. Hide the Walabot, Pi, hub, and speakers.

— Run the speakers outside where your victims will hear but not see them.
— Remember, the Walabot can see through walls and doors, so you should be able to mount it hidden inside your house!
— Mount the Walabot horizontally behind the door, with its USB cable near the bottom and its long blank side pointed outward, looking for trick-or-treaters.

9. Prepare to scare!

Decorate your area to attract trick-or-treaters, then power up the project and prepare to scare.

TO ADD OPTIONAL LIGHTING EFFECTS:

For a bonus spooky effect, try adding lights. The code is set up by default to flash an LED strip before and after every time the speakers talk. The Pi can’t tell if the LED strip is plugged in or not, so everything else will still happen normally even if there’s no LED strip plugged in.

In our code, the LED strip is set to flash a pumpkin-y orange, because that’s where I wanted my LEDs to be hidden. You can change the color to a spooky green or any other shade you like. The color is set by the variables red_brightnessgreen_brightness, and blue_brightness. You’ll find them about one screen down in the code.

walabotlighting

Wiring up the hardware:

1. Plug the 3 MOSFETs into the mini-breadboard.

2. Connect the MOSFETs to the Pi.
For each MOSFET:
— Wire the source pin to a shared row on the mini-breadboard, where you will later plug in all the grounds.
The source pin is the rightmost pin, if you’re holding the MOSFET so that its heat-sink is away from you.
— Wire the drain pin to one of the color-control connectors of the LED strip: One MOSFET each for Red, Green, and Blue. The drain pin is the middle pin of the MOSFET.
— Wire the gate pin to one of the RPi’s GPIO pins: 33, 35, or 37, respectively. The gate pin is the leftmost pin, if you’re holding the MOSFET so that its heat-sink is away from you. Then locate pins 33, 35, and 37 on the Pi, and connect them to the gate pins using the female-to-male jumpers.  Pin 1 is the closest pin to the Pi’s SD card.

Then plug pin 39 of the Raspberry Pi into the shared ground row of the mini-breadboard, with the three MOSFETs.
lightingstriptopi

physical-pin-numbers

4. Modify your power supply, if needed.
My power supply came with a barrel plug, so I clipped it off and stripped the wires to expose the positive and negative leads. I then used a multimeter to find which lead was positive, and which was negative, and soldered color-coded jumper wires to each, so I could easily plug them into to the breadboard. Finally, I used heat-shrink tubing to cover the spliced wires.

5. Double check all your wiring!
The wrong wire in the wrong place can fry your Pi.

USING YOUR TRICK-OR-TREATER TRACKER

After installing your pranker, you’ll want to test it. Here are some tips to help you get the best out this project:

Calibration: When you power up the Walabot, it calibrates itself to the environment in front of it.  From that point forward, it can recognize changes to that environment (new objects). This means you don’t want to stand in front of the sensor when you switch the project on!

Door transparency: The Walabot should be able to see through most doors, no problem, since it sees through wood. But metal reflects radar, so if you have a metal door, you’ll need to find a different obstacle to hide the Walabot behind.

Radar cone: The Walabot senses in a conical area, projecting out from the unmarked side of the device. You can change how long and wide of a cone the Walabot looks for ghouls and ghosts in, by changing the R, Theta, and Phi variables near the top of the code. R is the range: how far out the Walabot looks for targets. Theta and Phi control how wide and tall the cone is.

If you still have a hard time getting the Walabot to sense targets or if it’s over-reacting, you can get a better idea what your Walabot sees by cloning the Walabot-SensorTargets project:
git clone https://github.com/Walabot-Projects/Walabot-SensorTargets

Running this project will show you on-screen where the Walabot sees targets presently. You can try out different R, Theta, and Phi settings in this project, to see what best covers the area you wish to watch. You can also experiment with different “Threshold” settings, which causes the Walabot to ignore or be alert to smaller targets.

Detecting multiple people: In our code, the Walabot finds the range of objects by scanning in arcs, for example 0-2 feet away, then 2-4 feet away, then 4-6 feet away, etc.  So the Trick-or-Treater Tracker can detect multiple targets when they’re at different distances (in different arcs), like kids walking single file up a walk to your door. But if multiple kids are in the same arc (side by side, arm-in-arm, etc.) our pranker will detect them as a single target. This can be improved, but we haven’t yet tapped this sensor’s full abilities.

False bogies: If you’re having trouble with false readings, try narrowing the Walabot’s radar cone and make sure it’s not pointed at metal objects, water, or moving objects in the background — all these can reflect radar signals and confuse your pranker. The Walabot engineers advised us that for this project, the ideal setup is in a static environment, e.g., with no moving tree branches in the background, pointing out into an open yard, rather than into an  external “corridor” that funnels guests toward your front door.

Custom sounds: And of course you can customize all the sound effects by substituting your own MP3 sound files for the ones found in the /Sounds folder.

Experiment and have fun — and please share your Walabot projects in the comments below! Also take note: On November 15 Walabot is launching their Power to the Makers contest, and you’re invited to submit your Walabot app to win part of a $10,000 prize purse. Head to walabot.com/contest right now and you can get a 1-week early-access head start, and use the coupon code Make to save $300 on the Walabot Pro. Once the competition ends, you’ll have dozens of new Walabot apps to play with.