What Is Pi-Hole?

Pi-hole is open source software that acts as a DNS sinkhole to protect your devices from unwanted content, without the need for any client-side software like apps or browser plug-ins. Put simply, Pi-hole acts as a mini DNS server that blocks your devices from looking up the internet addresses of advertising servers, so they can’t serve the ads. This way, it blocks ads not only in browsers, but also mobile apps and smart TVs — and it makes your network faster! We call it a “black hole” for internet advertisements.

What Is DNS?

At a very basic level DNS (Domain Name System) is like a phone book for domain names on the internet. It’s what your computer uses to translate hostnames (e.g. pi-hole.net) to IP addresses (in this case, 206.189.252.21). A request for an IP address is usually sent to an upstream DNS server (e.g., Google’s 8.8.8.8).

How Does Pi-Hole Block Ads?

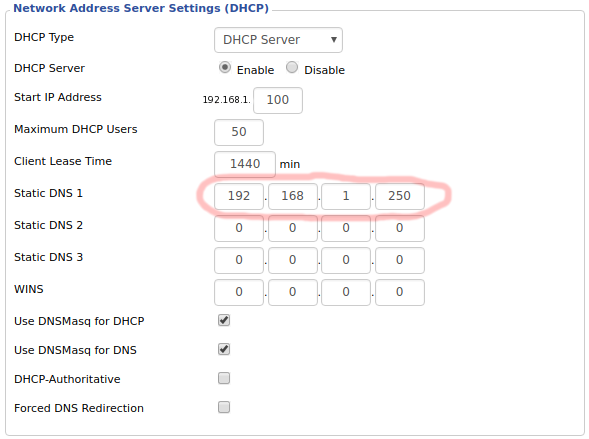
Pi-hole sits on your network in the middle of your computer and the upstream DNS server.

When Pi-hole receives a DNS request, it checks whether the domain exists on its blacklist, and if so, it returns the address 0.0.0.0, which is DNS-speak for “This number has not been recognized, please check the number and try again.”

If the domain is not on Pi-hole’s blacklist, then the request will be forwarded to the upstream DNS server, and the actual IP address will be returned to the client, your device.

Now you see ’em…
…now you don’t!

What Else Can I Block?

Pi-hole was designed to block known ad-serving domains, but really any domain can be added to its blacklist, and it will have the effect of the content not being served to the requesting client. So you can block known malware sites and other odious domains. We can think of a few.
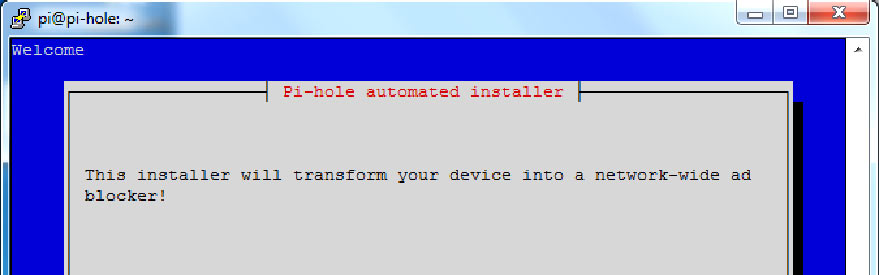
Set Up Your Pi-Hole

Figure A

Pi-hole can be installed on any hardware with a supported operating system (docs.pi-hole.net/main/prerequisites), although most commonly it is installed on a Raspberry Pi. Even a Pi Zero (Figure A) will do!

Oh, the Things You Can Block

Pi-hole v5.0 was released in May 2020 with new features such as per-client blocking (choose which block lists to apply to which devices) and deep CNAME inspection to prevent domains being masked. And in v5.1 released in July, we added Dark Mode!

Pi-hole Away From Home

Pi-hole can also block ads to your mobile devices when you’re away from home. By pairing your Pi-hole with a VPN to tunnel back to your network, you can have ad blocking on your cellular devices, helping with limited bandwidth data plans. Learn more at docs.pi-hole.net/guides/vpn/overview.

Watch Me Block It

Figure E

A satisfying way to extend this project is to add a display right on the Pi. Adafruit built a Pi-hole with a tiny monochrome OLED or mini color TFT (learn.adafruit.com/pi-hole-ad-blocker-with-pi-zero-w) to display the number of ads blocked, DNS queries handled, and client devices benefiting from the blockage (Figure E). Later they upgraded the project (learn.adafruit.com/pi-hole-ad-pitft-tft-detection-display) with a bigger 3.5″ color TFT and PADD client software (github.com/jpmck/PADD) that displays way more information (Figure F), including total domains blocked, total queries Pi-holed, and top offending ad domain.

Figure F

Project Steps

Speedrun Version

1. Once you have your Pi up and running, simply open a terminal and run the following one-line command:

curl -sSL https://install.pi-hole.net | bash

This will download and run the automated install script from github.com/pi-hole/pi-hole/blob/master/automated install/basic-install.sh. (If you’re uncomfortable with directly piping shell scripts to Bash, there are other install methods available at docs.pi-hole.net/main/basic-install.)

Figure B

2. From there, just follow the on-screen instructions (Figure B) to get up and running. Now Pi-hole is installed and you are blocking ads!

N00bs Version

1. Download the latest supported version of Raspberry Pi OS (aka Raspbian) (your choice of desktop or lite) at raspberrypi.org/downloads/raspberry-pi-os. As of this date, Buster is the newest supported version for Pi-hole.

2. Using Balena Etcher software on your computer, burn this downloaded image to your Raspberry Pi’s microSD card, using a card adapter that fits your computer.

3. Set up the new Pi to enable ssh:

  • Copy a blank text file named ssh to the boot directory of the microSD card mounted on your computer.
  • For wireless access (optional), install a plain text file named wpa_supplicant.conf in the boot directory of the microSD card. Use the following text, but substitute your Wi-Fi network info:country=US
    ctrl_interface=DIR=/var/run/wpa_supplicant GROUP=netdev
    network={
    ssid="your-SSID-here"
    psk="your-login-password-here"
    key_mgmt=WPA-PSK
    }

This will enable the Pi to join your home network.

After first boot, both of these text files are deleted and the configuration is saved in other locations on the card for subsequent boot-ups. If you’re outside the U.S., see en.wikipedia.org/wiki/ISO_3166-1_alpha-2 for two-letter country codes.

4. Put the microSD card in the Pi, hook up the power to the correct micro-USB port (on a Zero, the left one is for data only), and plug it in. It should boot up and you should see the Pi on your network. If you don’t, you can run Pi Finder (from Adafruit) and it will help you find the Pi’s IP address on your network.

5. You can access the Linux terminal of the Pi via ssh from your client terminal:

ssh pi@<IP-address-here>

From there, you can continue setting up the Pi.

Note: Putty is a Windows alternative for ssh.

6. Run sudo raspi-config and set up the localization: Wi-Fi in appropriate country, language and keyboard, time zone. The Pi will reboot after this. When it comes back up, shell in again and run ip addr to verify it has the correct assigned IP address.

7. Update the Pi OS to the latest version before you install Pi-hole. From the Linux terminal, run the following commands to update all the software packages to whatever’s current:

sudo apt update

sudo apt upgrade

8. Now it’s time to install the Pi-hole software:

curl -sSL https://install.pi-hole.net | bash

Note: Again, if you prefer not to pipe to Bash, see docs.pi-hole.net/main/basic-install for alternate install options.

The install command installs Pi-hole from the Git master branch. Follow the screen prompts, and when asked, enable the web interface. We recommend Cloudflare (1.1.1.1 and 1.0.0.1) as your upstream DNS servers to start. Turn on IPV6 if you use it on your network.

Pi-hole relies on third-party block lists. Select all the offered lists (these can be changed later) to add them to your Pi-hole’s blacklist.

Note: The Pi-hole documentation discusses the various upstream DNS servers so you can decide which is best for you (or choose any available server not on the list). docs.pi-hole.net/guides/upstream-dns-providers

9. After install is complete, verify that Pi-hole is running by going to the admin page: http://<ip-address-here>/admin or http://pi.hole/admin.

Ads-B-Gone

s-B-Gone

Figure C

At this point you should have a fully functioning Pi-hole. In your router’s DHCP configuration, point your DNS to the Pi-hole (and nothing else), and restart the router (Figure C). On your client devices (tablets, computers, phones), renew DHCP leases and/or clear DNS caches as necessary, and you’re all set. You can also manually configure each device to use Pi-hole as its DNS server.

Figure D

That’s it. Browse, game, and binge ad-free! You can watch your Pi-hole work in real time using the web interface (Figure D). Go to the Dashboard tab to see total queries, blocked queries, total domains on your block lists, and graphs of the action over time.