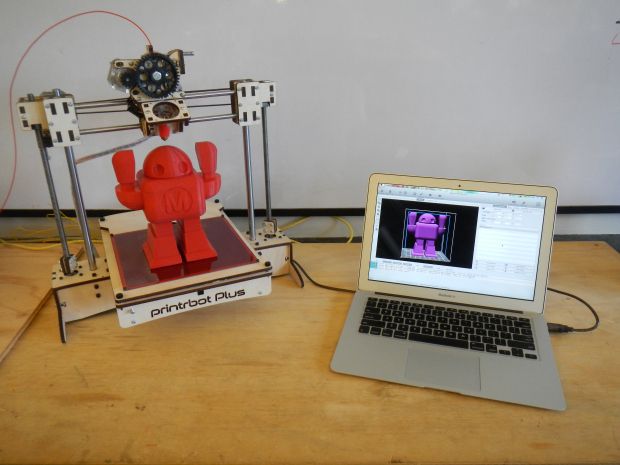
DSCN1894

Some 3D printing software is easier to learn than others. Repetier-Host is one of the tougher ones to get familiar with, and can sometimes discourage people from operating their printers. Since I found this software difficult to learn, I’ve written some instructions to help people get started.

Project Steps

Configure your Printer Settings in Repetier-Host

Printer Settings is where you choose the size that your printer can print, and how it communicates with the computer. Open Repetier-Host and click Printer Settings, located in the top right region of Repetier. Remember these settings because you’ll need to enter them again later in the slicer settings.

Once you’re in Printer Settings, click Add at the top (next to Configuration) to add a new printer. Be sure to enter a meaningful name because you’ll need to refer to this again if you choose to set up multiple printers.

Once you’ve added a new printer, you should see 4 tabs to choose from: Connection, Behavior, Dimension, and Advanced. This is where you enter your printer’s general settings. These are different for each printer and should be provided for you by the printer manufacturer.

Configure Your Slicing Settings: Overview

This is where you configure settings for the filament, temperature settings, infill, speed, and support material. To configure the slicing settings, click the Slicer tab in the upper right region of Repetier, then click Configure.

Once you’ve clicked Configure, a window will pop up with 3 tabs at the top: Print Settings, Filament Settings, and Printer Settings. There are options in each of these tabs that will need to be selected. In Print Settings, there are many options located on the left side.

Configure Your Slicing Settings: Print Settings

Let’s start with Layers and Perimeters. This is where you set the layer heights and the vertical and horizontal shells. For layer height, go ahead and set it to whatever height you like; .1mm is considered fine and .3mm is considered rough, so a number between .15mm and .2mm is a good compromise between speed and print quality.

It’s a good idea to set your first layer height to around .3mm even if your part has a finer resolution than that. Doing this will help the first layer go down properly, which helps limit any print failures in the first layer.

The next setting to configure is Infill. Here you choose the percent that the solid regions of your object are filled in. I usually choose something between 10% and 15%. Using less infill can greatly reduce the print time, material consumption, and weight of your objects.

There are a few options to choose from when it comes to fill patterns. I’ve found that honeycomb tends to be the strongest. Since the toolpaths of rectilinear are more optimized, rectilinear is a good cross between print time and strength.

Once the infill is set, it’s time to move on to speed. Printers can print anywhere from 1mm/s to over 400mm/s. Generally, as the speed goes up, the quality goes down. I typically print at 60mm/s to 120mm/s. In this screenshot, the printer is set to 60mm/s travel and a variety of other speeds for when it’s printing. I would multiply all of these settings by a constant scalar if you choose to increase the print speed. These speeds vary because some parts are tougher to print than others and these areas need to cool more before they can support more material.

The next setting is Skirt and Brim, where you can choose how much filament is extruded to prime the nozzle. The default setting should be 2 loops 6mm away from the object. I’ve found that this works well for priming the extruder for both large and small prints. If you have this set and notice that it’s not fully priming the extruder, either the number of loops or the distance from the object can be increased. Either of these increases will push more filament through to the prime the nozzle more.

One thing you should keep in mind when changing the distance from the object is that as the distance increases, you become more able to approximate if the bed is level before it starts the print. The downside is that as the distance from the object increases, the print gets closer to the maximum build area, and if you’re already close to one or more edges, the printer is more likely to crash or print off the bed.
Configure Your Slicing Settings: Filament Settings

The filament settings can be found in the slicer settings under the Filament Setting tab, to the right of Print Settings. Configuring these is relatively simple. First input the filament diameter, which can be found on the filament spool — it’s usually 1.75mm or 3.00mm. The extrusion multiplier should be 1, unless you’re compensating for under- or over-extrusion.

The temperature depends on the filament type: PLA ranges from roughly 200°C–230°C, and ABS ranges from roughly 230°C–260°C. It’s a good idea to start on the low end and work your way up.

If the filament doesn’t stick to the bed, the heat should probably be turned up. If the filament is coming out like soup, it should be turned down. To help adhere to the bed, it’s a good idea to set the first layer 5°C to 10°C higher than the rest.

Heating the bed can help with PLA adhesion, but it’s only required when printing with ABS. The perfect temperature for printing with ABS is around 110°C, but unfortunately it can take a long time for the bed to reach this temperature. Depending on the printer, the bed can be set to slightly lower temperatures. A sign that that bed temperature is too low is that the prints start to peel off the bed while they’re being printed.

Configure Your Slicing Settings: Printer Settings

The last step to configuring the slicer settings is configuring the printer settings. These settings can be found in the slicer settings under the Printer Settings tab to the right of Filament Settings. Configuring this section feels like doing double work because it’s nearly the same information that was input to Printer Settings (found in the top right of Repetier). Once you’re in Printer Settings in the slicer, click General and enter the bed size and the center position.

Add Scale and Rotate the STL Files

To add an STL file to Repetier, click on the Object Placement tab, then click Add STL File. The object should drop down onto the platform.

To change the size of the object, type a scale factor into the box to the right of Scale (see screenshot). By default this scales the x, y, and z axes by the same amount. If you wish to scale each axis differently, uncheck Lock Aspect Ratio.

You can rotate the object by adjusting the x, y, and z values next to Translation.

Printing

Once the printer is connected and the slicer is configured, it’s time to slice and print your object.

NOTE: Some Windows versions of Repetier have a bug in the software that prevents the printer from printing. If you’re having trouble connecting, try clicking Manual Control then OK in the bottom right next to Debug Options.

Slicing must be done before printing. To slice an object, click Slicer, then click Slice with Slic3r.

Once the slicing is complete, you can click Run to start your print, or SD Card to start an untethered print. As of now, the SD card option is somewhat buggy, but works most of the time.