

Quality cameras for microscope and telescope photography can run $500. But you can also use your family digital camera, attaching it to the eyepiece with a simple mount made from PVC pipe.
Projects from Make: Magazine
Scope Photography Rig
Microscope and telescope photography made easy and cheap.
Prepare the PVC coupling.
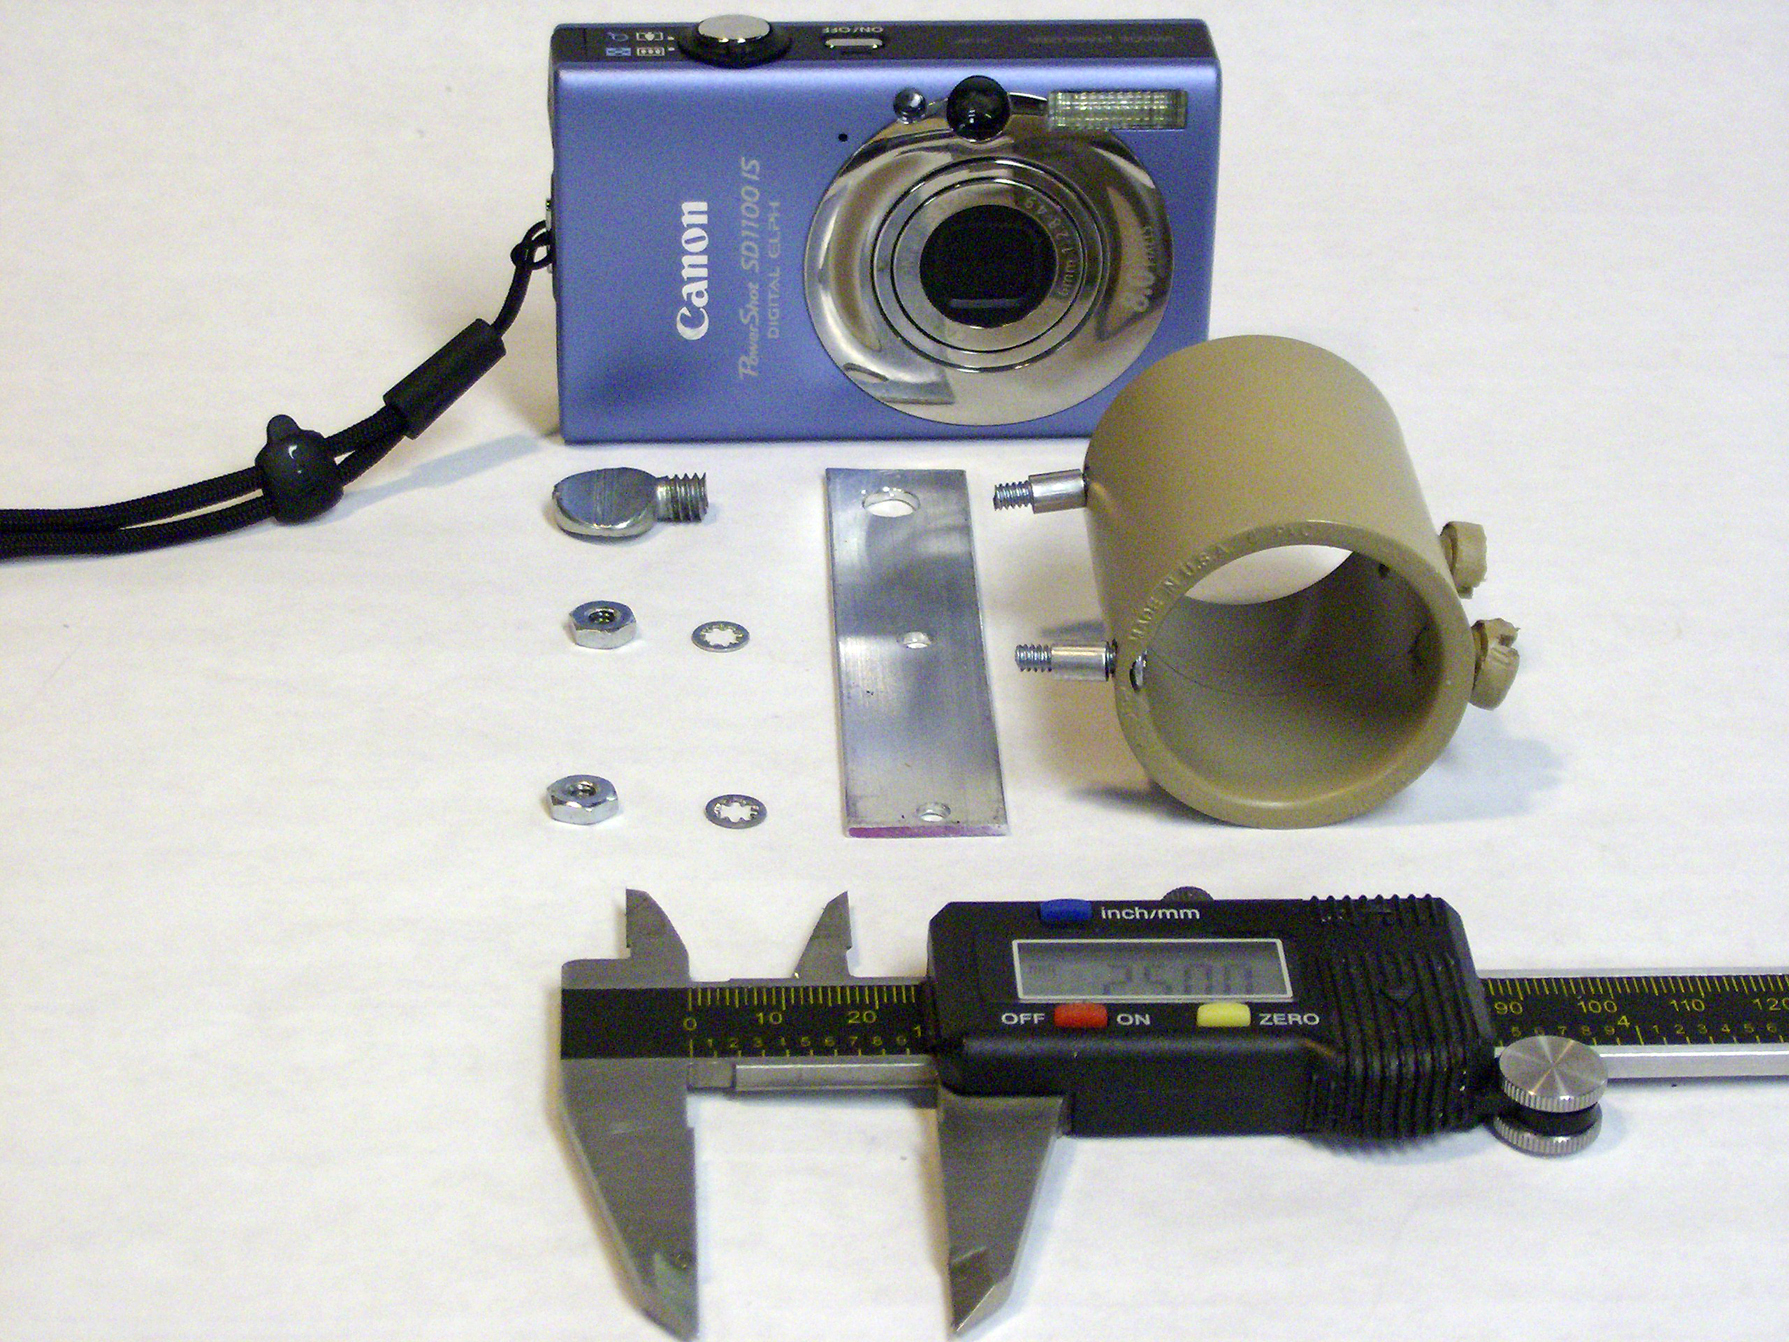
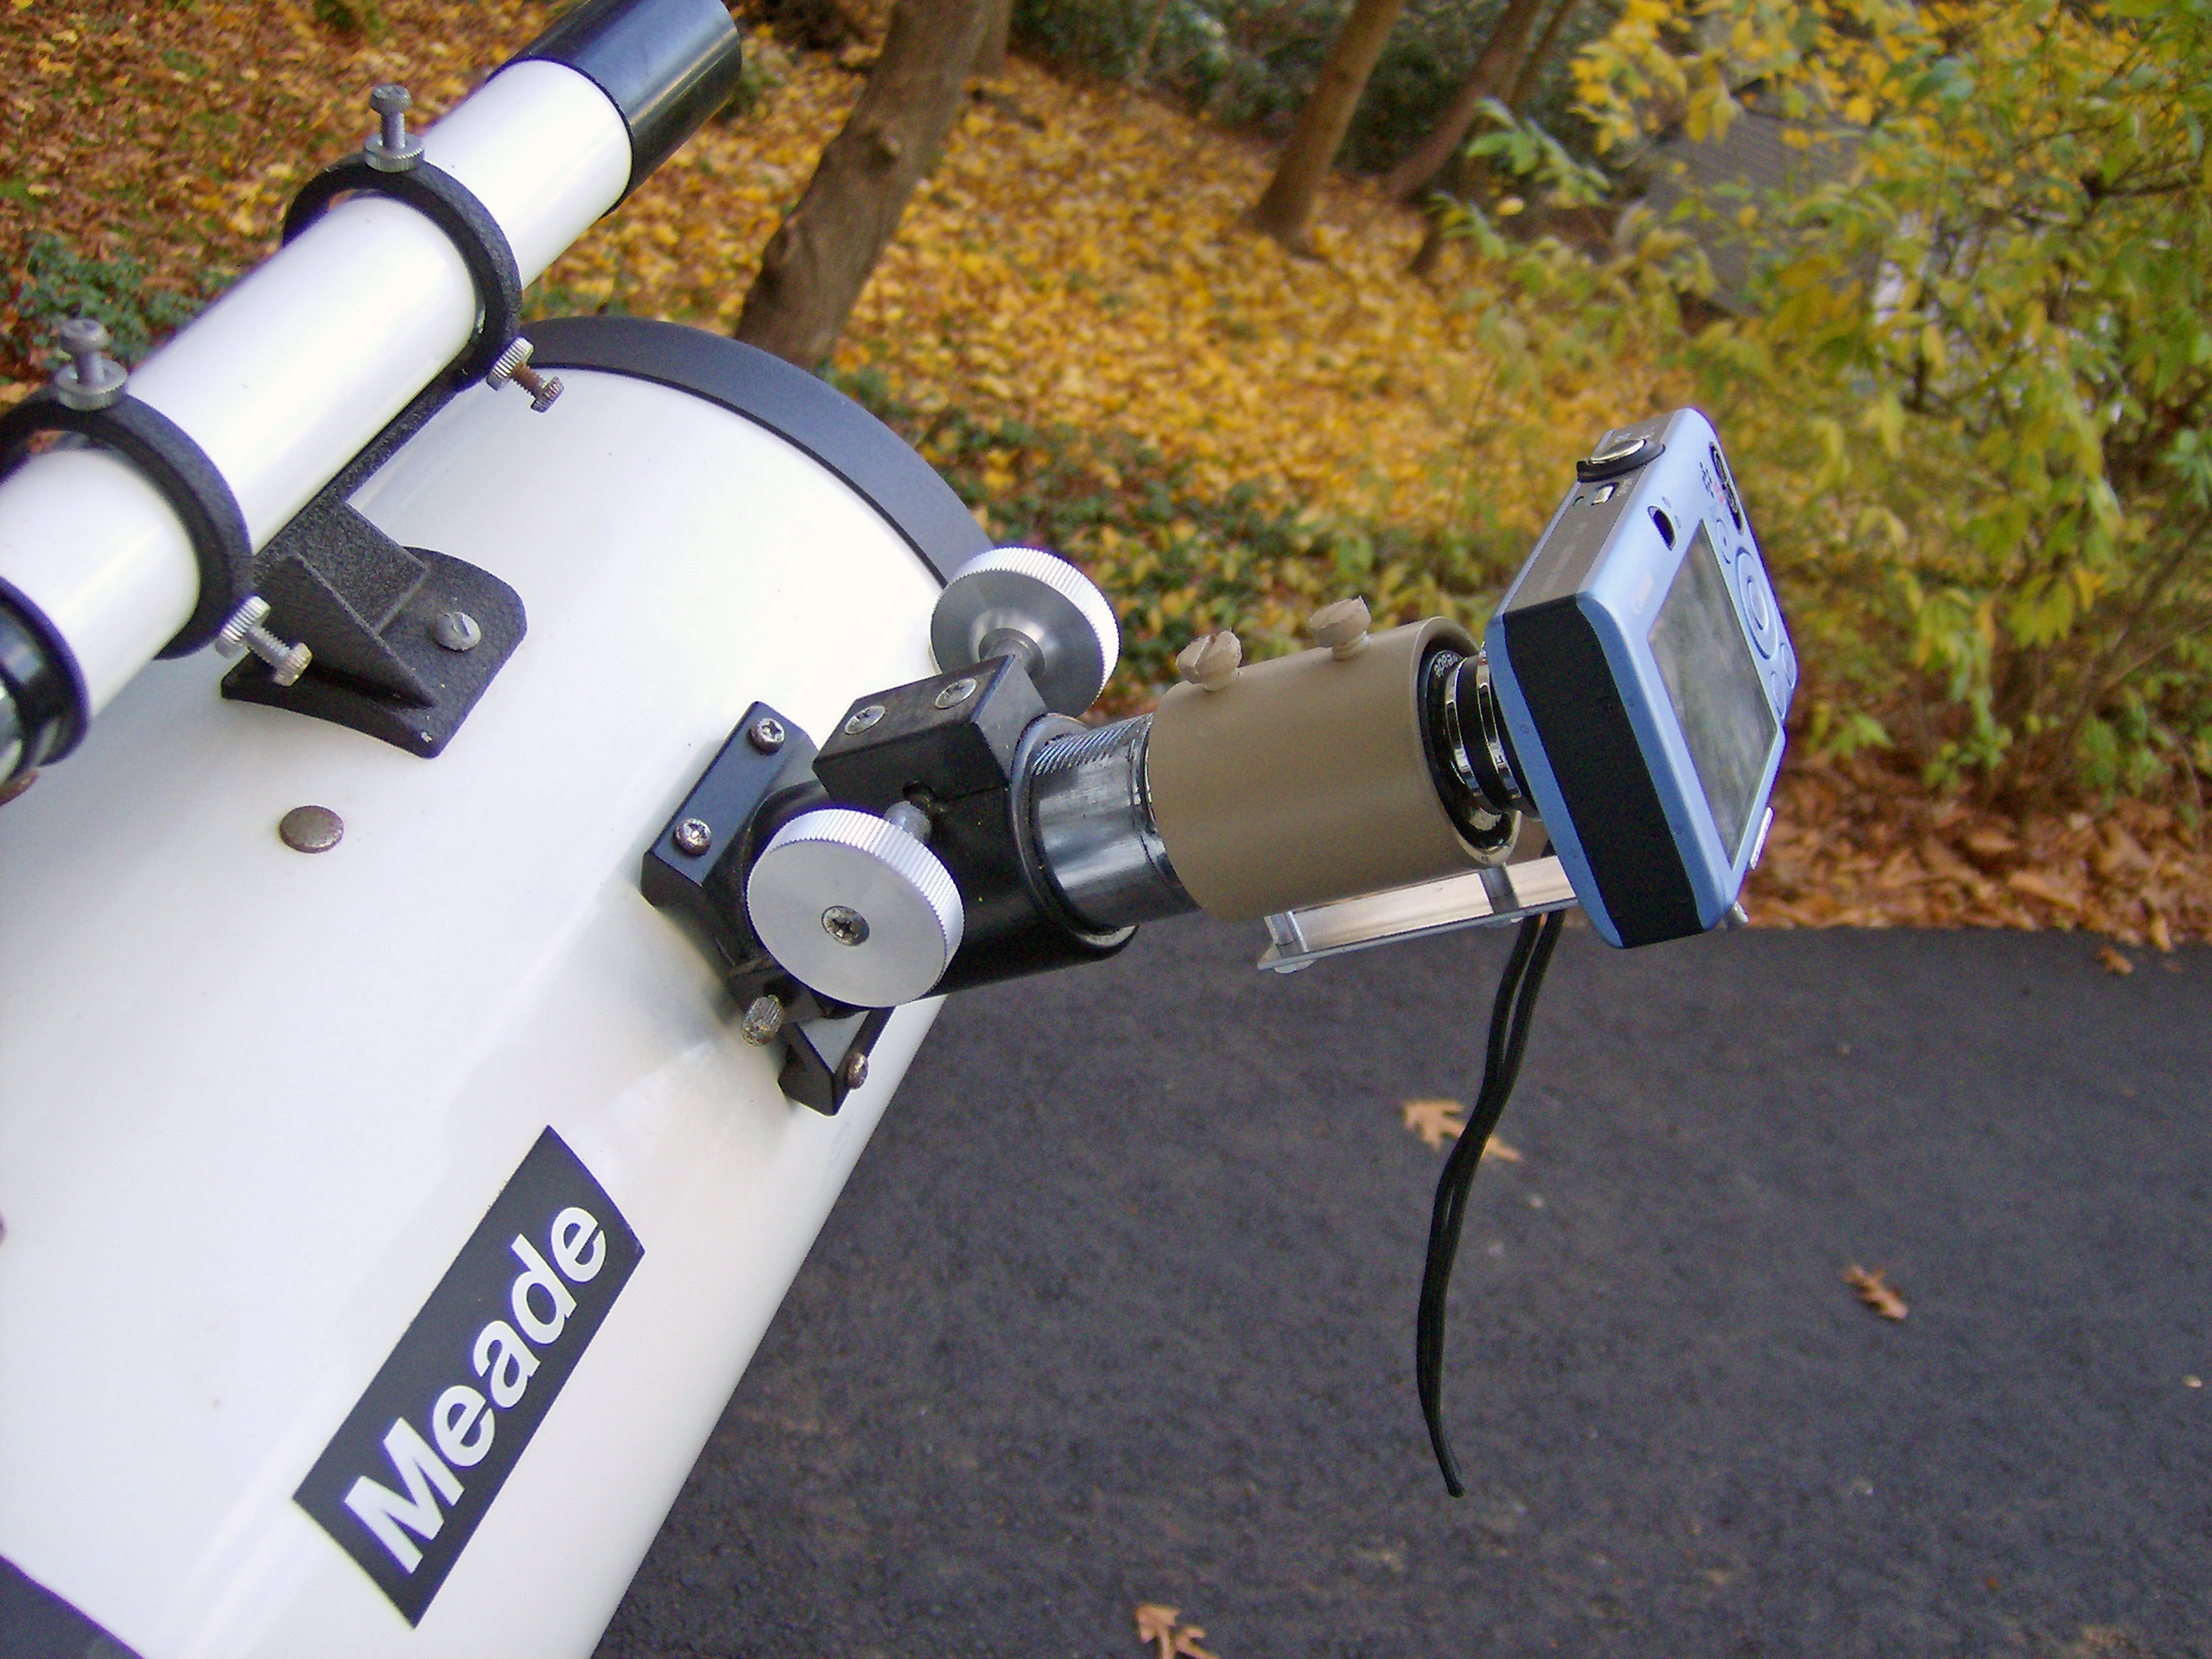
PVC pipe couplings are strong, easy to work with, and won’t mar the eyepieces. For the telescope mount, I used 1″ ID (inside diameter) pipe coupling. Its actual ID measured about 1.3″ and it had a ridge in the middle, so I used a lathe to remove the ridge and enlarge the ID to fit around the telescope’s standard 1¼” eyepiece. Some patient filing with a half round file will also get you there.
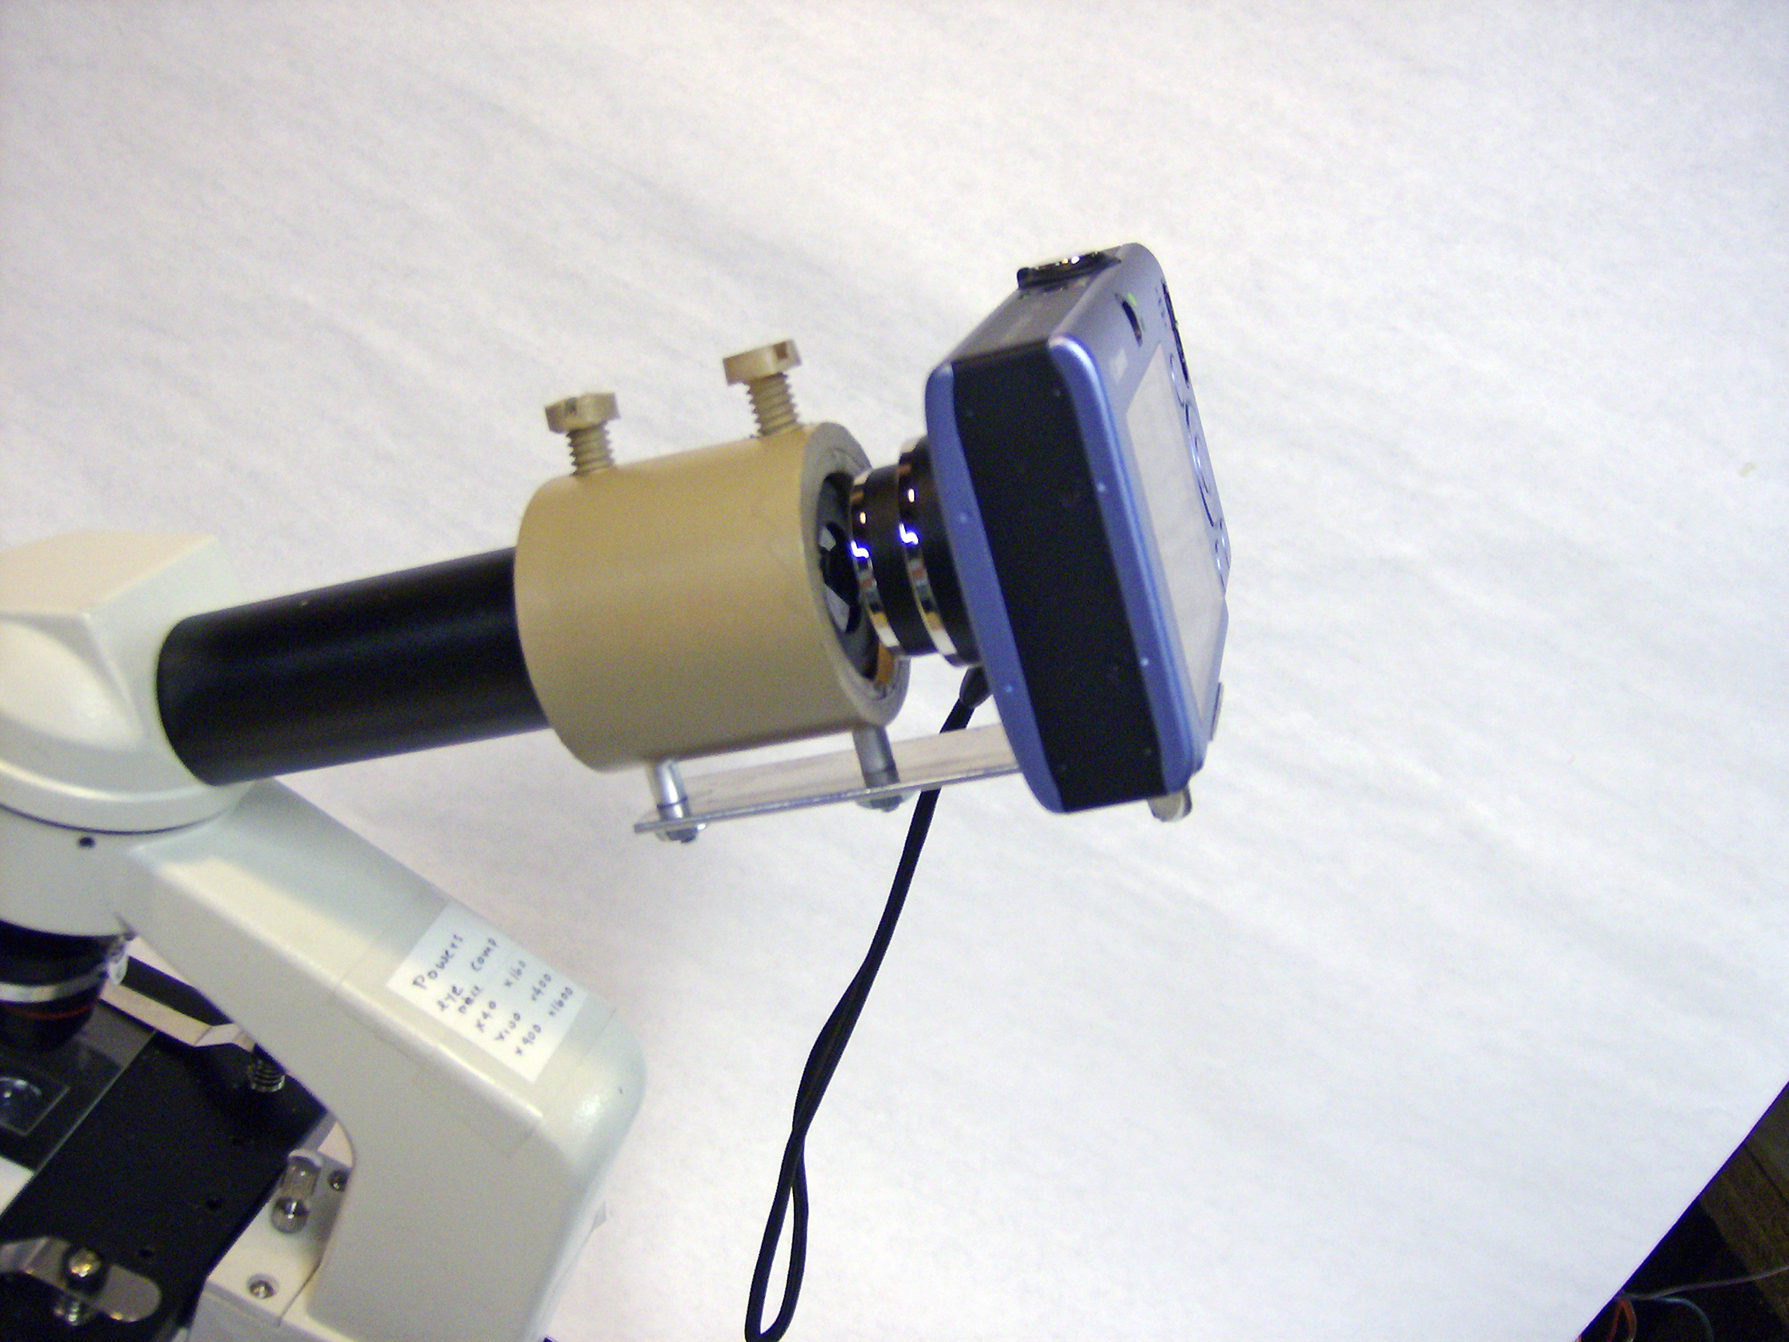
With the microscope, first try holding the camera up to the eyepiece with a tripod to make sure the image can come through. I used a ¾” pipe coupling, which I cemented into a 1″ pipe coupling for greater strength, though that’s not necessary.
I drilled and tapped holes for two ¼-20 nylon screws to hold the scope’s eyepiece in the PVC coupling. This can also be done by hacksawing a slot in the coupling axially (lengthwise), and then tightening it around the eyepiece with an adjustable hose clamp.
Just for looks, I painted my couplings with Krylon plastic bonding spray paint, but it’s not necessary.
Mount the coupling to the bracket.
The coupling attaches to a piece of aluminum flat stock, ¾”×1/16″ for the Canon and 1″×1/16″ for the HP. Most any hardware store carries these.
Attach the coupling to the flat stock with two #6-32 flathead screws, lock washers, and nuts. Locate these screws at the edges of the coupling, because you’ll need to countersink the coupling to accommodate each screw’s head and clear the eyepiece.
Put spacers on these screws as needed to center the camera’s lens on your scope’s eyepiece. For the Canon, I got lucky: a ¼” spacer worked fine. For the HP, a stack of washers did the job.
Mount the camera to the bracket.
Bolt the camera to the flat stock with a ¼-20 thumb screw, screwed into the camera’s standard ¼-20 mounting thread. Generally, this mount is offset from the axis of the camera’s lens, so you’ll need to measure accurately to get the assembly to line up.
Also, you must measure the bracket length accurately to accommodate the camera’s lens when it’s fully extended (not just in zoom mode, when its lens is retracted farther in). This allows the camera to be turned on and off while mounted, with no interference.
Shoot through your scope.
Tighten the nylon screws or hose clamp to secure your camera on your scope’s eyepiece. Power up the camera and shoot away.
Of course, since the microscope is fixed, a tripod can also be used to hold the camera — put the microscope near the corner of a table and the tripod as close as possible.
Conclusion
This project first appeared in MAKE Volume 20, page 121.


