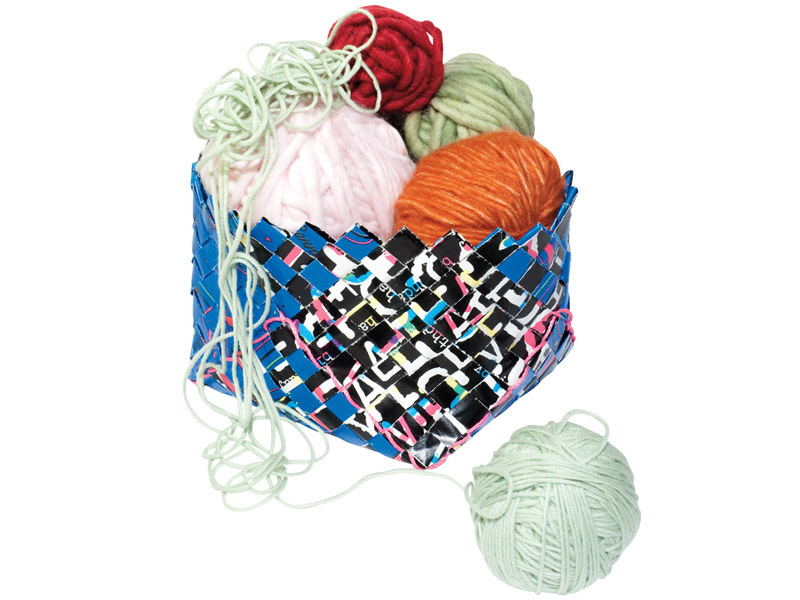
This basket makes a great case for recycling. It’s the perfect project for large pieces of scrap paper like gift wrap and newspaper. Even old maps can be transformed into beautiful new baskets like this woven map basket project.

Weaving a basket is the perfect way to combine a traditional crafting technique with upcycled materials. It’s like recycling with a twist!

Project Steps

Cut your wrapping paper into 28 strips that are 2 inches wide by 24 inches long.

Fold one strip in half lengthwise with the printed side facing out. Open it back up. Fold both sides of the strip in toward the center fold line.

Fold the strip in half lengthwise again so that you have a ½ inch wide, neatly folded strip. Repeat steps 2 and 3 for all the strips of paper.

On a flat surface, arrange seven strips vertically, with the open edge facing right. Then, to the right of those seven strips, arrange seven more strips with the open edge facing left. The two center strips will have their openings facing each other. With your strips vertical, place a ruler about ⅓ inch down from the top to hold them in place.

Next to the vertical arrangement, lay out strips horizontally just as you did in step 4 vertically. The two center strips will be facing each other, and all other strips will be open toward the center.

Weave the horizontal strips in order from top to bottom in your arrangement. Start on the left side of your vertical strip arrangement and weave your horizontal strip over the first strip, and then under the second strip. Continue weaving until you get through all the vertical strips. Next, start weaving the horizontal strips. Tighten up any gaps.

Cut a piece of string 70 inches long. Tie the middle of the string around one of your end strips at the corner of the woven square. Then weave the string over and under each strip around the perimeter of your square. Then weave the other end of the string, opposite under and over from the first weave. This keeps the basket bottom secure.

The next step is to fold a diamond shape within the woven square that you just made. Take a ruler and place it at a 45-degree angle. Count seven strips in toward the middle and seven strips down from the top. Place your ruler edge here. Fold the woven square up at the ruler edge. Repeat this for the other 3 sides to create the base of your basket.

Working on one side of the basket at a time, cross the two center strips. Then cross the second-from-center pieces across the center and over each other. Weave them through the center strips you just folded.

Next, fold the third-from-center pieces and cross them, weaving them through the other folded strips. Continue doing this until you have a woven diamond shape on each side of the square. The original corners of your square will bend up as you tighten the weaves against each other.

The diamond you folded in step 8 will become the new base of your basket. While you work, tighten the weaves as you go along. It helps to clip the strips you’ve already woven with clothespins or binder clips and focus working on one area at a time.

Continue weaving around the entire basket until it starts to take shape and you’ve woven all the strips in the manner described in this step.

Now, working around the basket, tighten your weaves one last time from the bottom of the basket to the top. You can slip a toothpick or the end of a paintbrush under each weave to help pull it snug. This can be tedious, but it will help make the final product nice and strong, so be patient!

Finish off the edges of the basket. Start with one side of the basket and fold the center strip over the last strip that it crossed. Then, weave this folded strip in and out of three or four woven strips on the inside of the basket. Once it’s secure, trim the strip with your scissors. Repeat this for the rest of the strips on the basket.

Conclusion

This gift wrap basket makes a great gift itself!