Image by flydime (Wayang Kulit / Indonesia, Yogyakarta)

Shadow puppetry originated over 2000 thousand years ago in China as a form of storytelling. It was created out of the need to cheer up an emperor in the Han Dynasty when his wife passed away.

After its creation, shadow puppetry became extremely popular and inspired many to create troupes that performed all over China. With its growing popularity, it became more widespread and became an incredibly powerful form of storytelling all over Southeast Asia.

Image by Curtain21 at en.wikipedia
Image by Curtain21 [Wikipedia]

One of the reasons so many cultures adapted it is because of its simplicity. All you need is a light source, an object that casts a shadow and a translucent material in between the puppeteer and the audience.

Now that you know the three simple things that you need to start your career as a world renowned puppeteer, let me show you the steps to get you to your first show!

Project Steps

Gather all materials and tools.

Source tip: large shipping boxes are a great size for creating your theater.

If you want a more durable theater or puppets, you can use different materials, like wood. Get creative!

Chrissy Hoffman who taught a colleague’s friend about shadow puppets used “clothing racks covered in sheets and clipped with woodworking clamps” for the scrim. She has also seen “a simple wood frame with a plastic shower curtain liner stapled tightly around it that looked awesome!”

Make your theater.

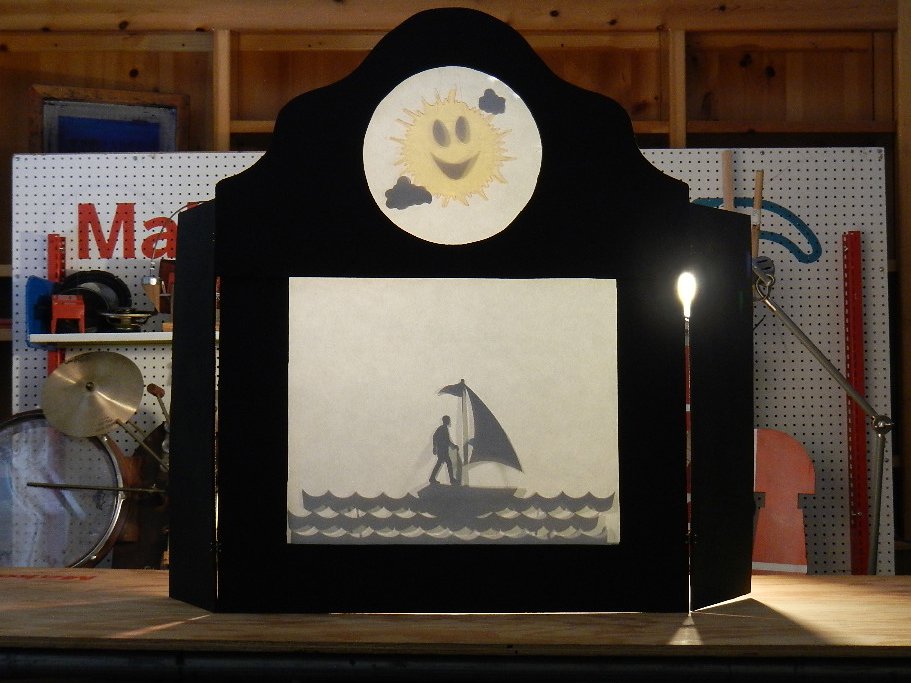
Cut out a rectangle in the center of one of your large pieces of cardboard. I found that cutting out a rectangular hole that is 20 in. x 16 in. works well. If using a presentation tri-fold, cut this rectangle in the center board.

If you’re not using a tri-fold, cut and attach two flaps for your theater sized 8 in. x 24in. each. You can create hinges for your flaps by folding a small piece of cardboard in half and gluing one side to the main theater body and the other to one of the flaps. I recommend using two hinges per flap.

Use your remaining cardboard to create a marquee for your theater. Make it large enough to accommodate a round hole that is 8 inches in diameter. I suggest something along the lines of 28 in. x 12 in.

If using a tri-fold, you can create the marquee right above your cut out rectangle.

Glue your marquee to the top of the main body.

Now that the theater is built, cut a sheet of white craft paper that will cover both the rectangular and circular holes in your theater. Tape or glue that sheet to the back of your theater.

Be sure you stretch your scrim as tightly as possible over your frame, especially if you are using fabric.

Make your puppets.

Shadows can be cast by any solid object, so you can make your puppets out of almost anything!

Draw your puppet on black construction paper or any other material you have available (like some of the leftover cardboard) and cut it out. Cereal boxes are opaque enough to block the light, but easier to cut cleanly than corrugated cardboard,

Shadow puppetry isn’t limited only to black shadows! You can add a splash of color into your creation using colored acetate transparencies. You can cut out some holes and cover them with your colored transparencies to create colored spots. (Please note that while colored acetate will create color, marker ink does not!)

For opaque puppets, use the masking tape to create a flap on a wood skewer and tape that flap to the back of your puppet. Do this for each of your puppets.

Chrissy also uses cardstock and bendy straws. The crook of the bendy straw allows you to keep your hand farther away from the scrim, so its shadow won’t interfere with the shadow puppet image.

Be sure to design your puppets to be big enough to be seen from the back of your audience and to occupy a decent amount of the space of the scrim.

To make your puppets slightly more challenging a project, add joints for motion and movement, and extra sticks to move the different parts independently.

Use only very dark black or brown markers or heavily applied grease pencils to add details. Satbir Multani who runs Shadow Puppets workshops with the New York Hall of Science warns us “With colors people get bogged down by the detail of coloring and when they make their shadows it doesn’t show up, they get confused and sometimes frustrated because they spent so much time on the coloring.”

Put some black contact paper or other opaque tape on a clear transparency.

Put on a show!

Now that you’ve made your theater and puppets, it’s time to put on your show!

Place your theater on top of a table that’s high enough so you can stand or sit behind it comfortably.

Place a light on either side of the theater. Experiment with different light angles to get different effects with your puppets. Or place your second light to minimize unwanted shadows –one light could be used to wash out the shadow of the person

Turn off all the other lights in the room, and bring your story to life!

Place your puppets right against the scrim.

Use your body, colored or textured lighting, music and sound effects to set the mood when the expressions and movements of puppets are limited.

Or do it the Howtoons way!

This project is pretty straightforward, but if you prefer something even simpler, check out this Howtoons that appeared in Make: volume 22 about how to make Shadow Puppets and a simple theater out of a cardboard box. Also available on howtoons.com.

Tips for facilitators.

Satbir Multani of the New York Hall of Science has a couple of tips for facilitators: “Have a bunch of examples to serve as a springboard for ideas when people are stuck. Short scenarios also help spark ideas. Give your puppetmakers a way to test your shadows as they are making them because that allows them to see if the shadow looks how they imagine and gives them time early on the fix or change their design.” Also, check out NYSci’s Google Connected Classroom on shadow puppets:

https://www.youtube.com/watch?v=jsbbFWuPFDM