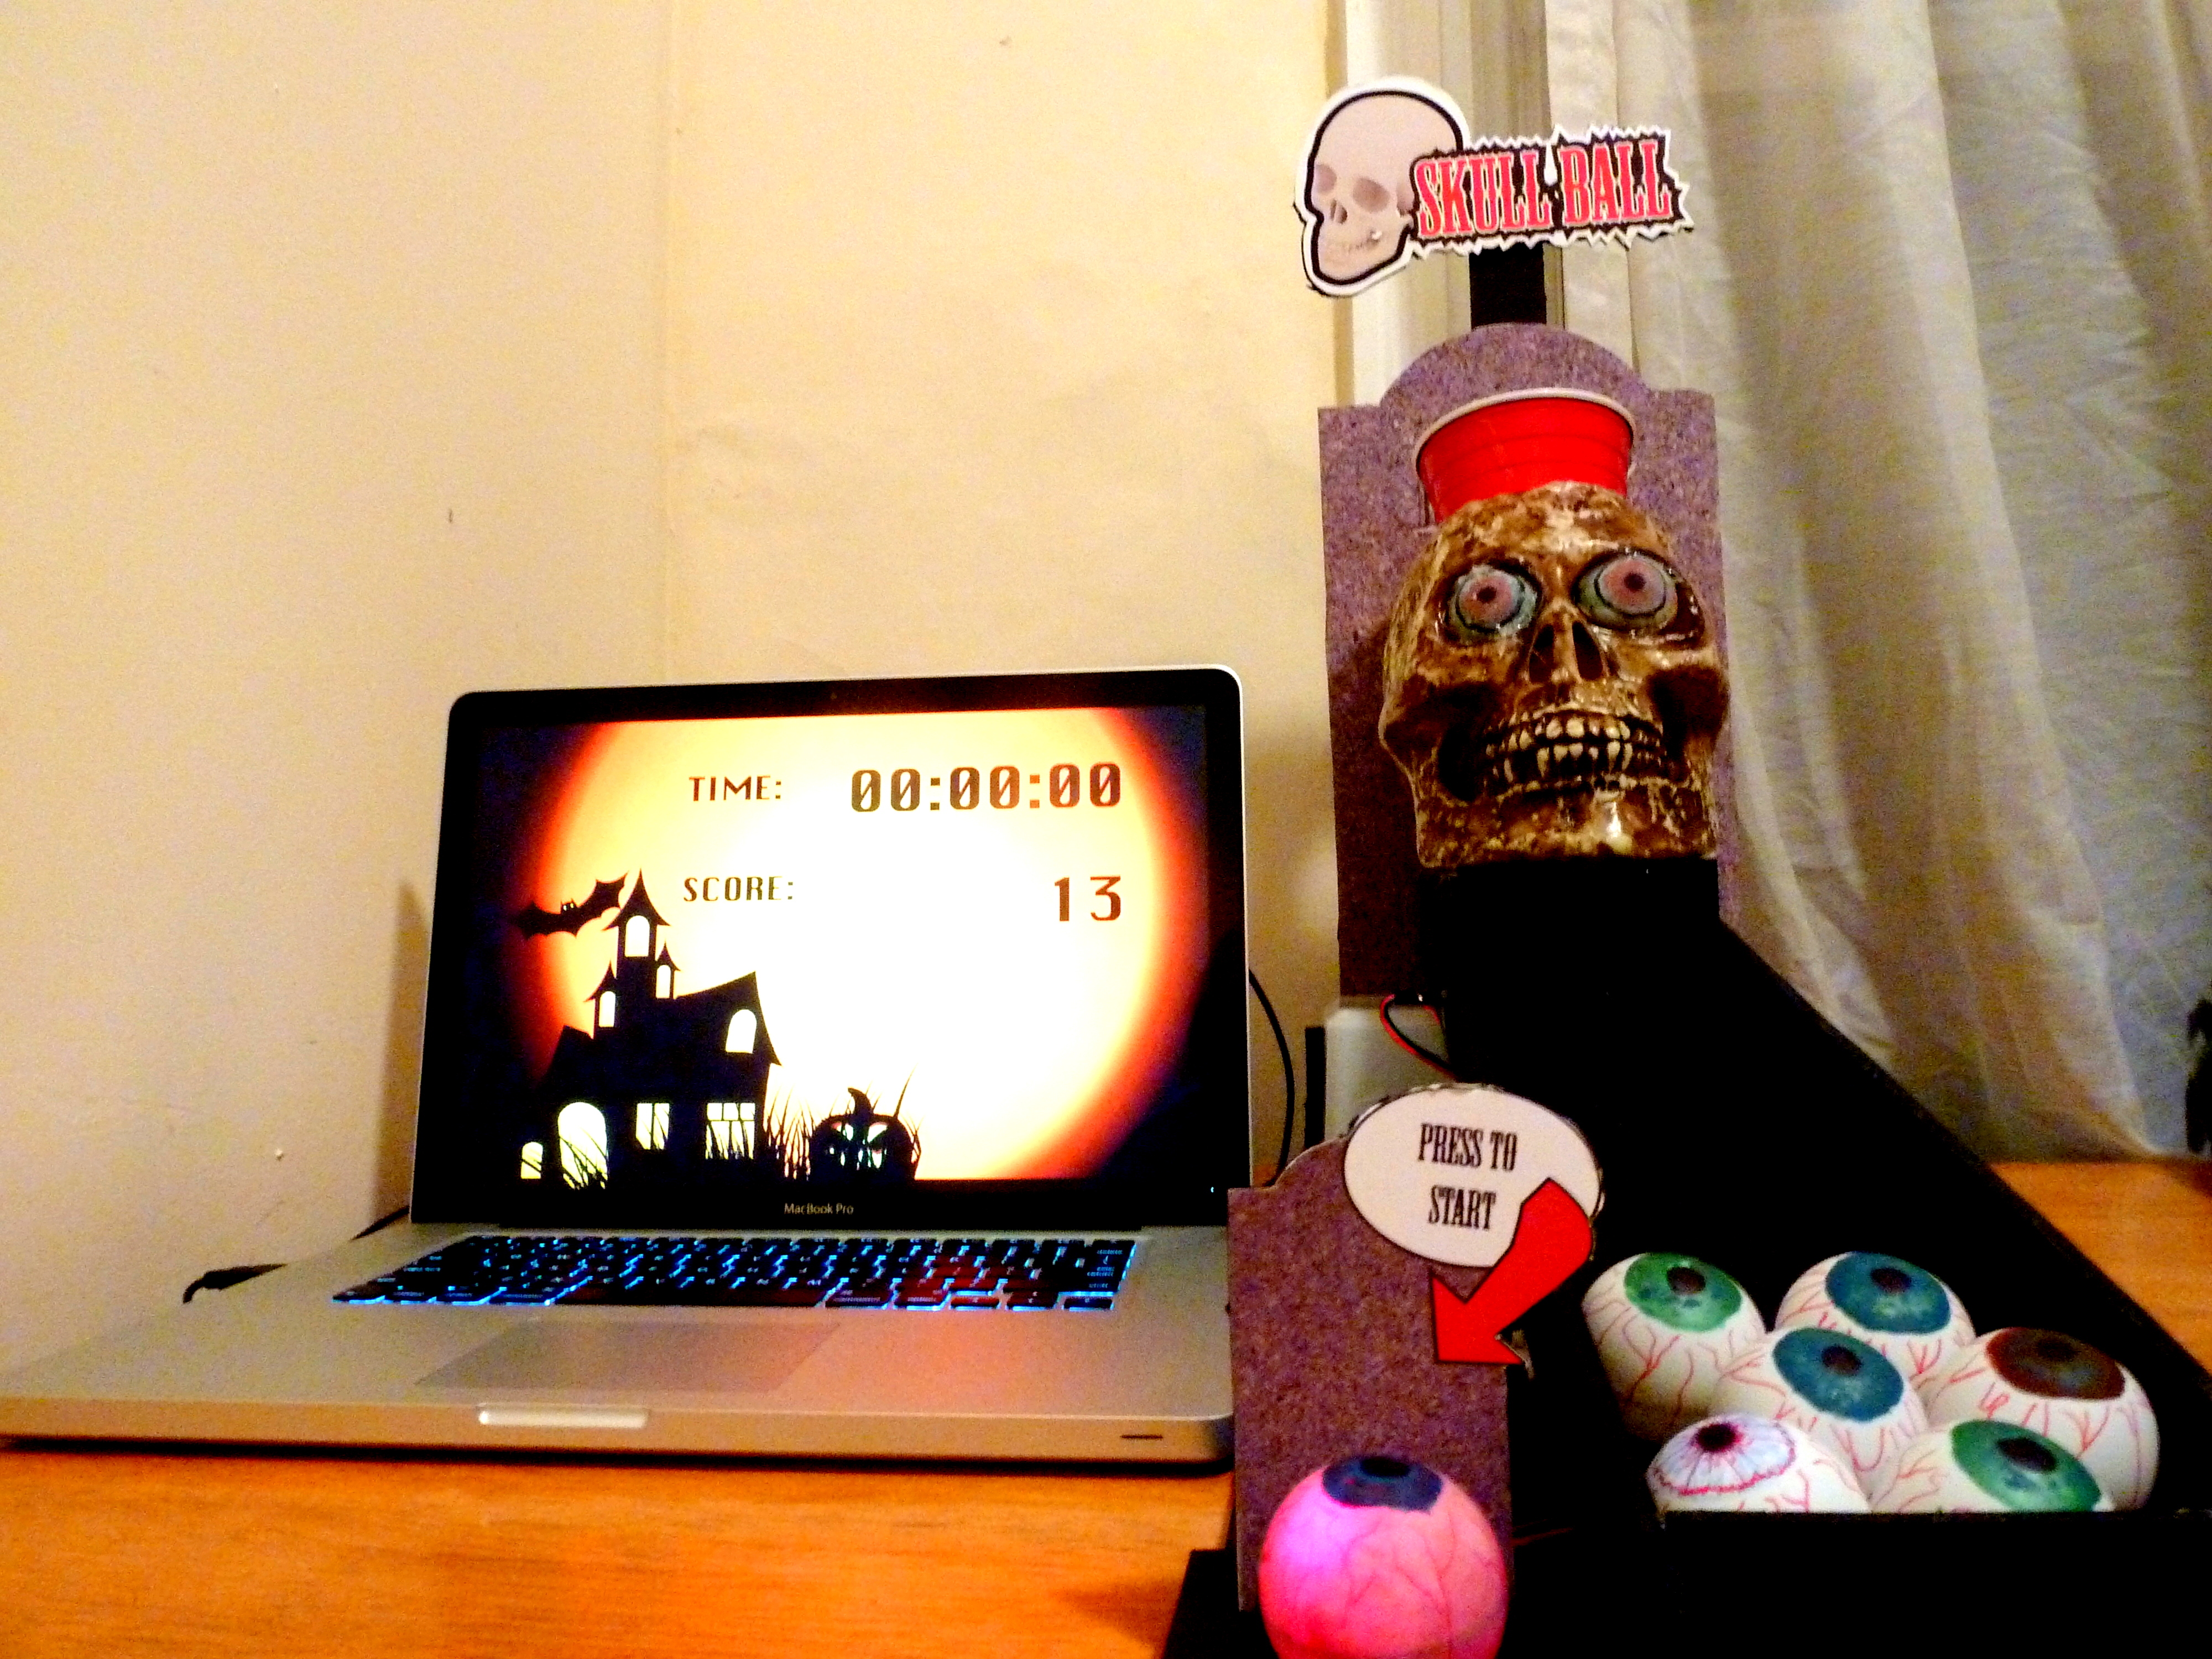
This guide will describe the steps required to build Skull Ball, a DIY interactive game using a teensy microcontroller and a Sharp IR sensor to count ping-pong balls being thrown into a plastic cup mounted in a plastic skull.

I built this project in about 5-6 hours the week of my company Halloween party as a little interactive game for people to play. It isn’t terribly difficult to build and it could easily be rebranded for any major holiday or event. The concept is based on a cross between beer pong and Skee-Ball. The exact dimensions shown will most likely need to be modified to fit your specific need.

YouTube player

Download source files at http://matthewroy.com/skullball/SkullBal…

What will the next generation of Make: look like? We’re inviting you to shape the future by investing in Make:. By becoming an investor, you help decide what’s next. The future of Make: is in your hands. Learn More.

Project Steps

I chose the skull for this project based on the size and the fact that it already had a large hole in the bottom. Your skull may vary or you may opt to make this for a different holiday or branded event and choose something completely different for your cup holder. The key is that whatever you choose is hollow and can be cut with a Dremel.

Prepare the skull:

Cut the top of a plastic cup off of the rest of it a few inches from the top. Just measure down as far as you want your cup to stick out of the top of the skull. You will then lay this ring (smaller side down) on the top of the skull where you want your cup and trace inside it with a pen or marker. Additionally remove any other electronics from the bottom of the skull, and if there is no hole on the bottom you’ll want to trace another smaller circle on it to cut out.

Cut your hole(s). Use a hair dryer a few inches away from your plastic to warm it up so it will be less brittle. Then use a Dremel with a cutting tip (I used a #194 Dremel bit) to cut carefully around the inside of your circle(s). Test that your cup fits inside the way you want, then sand down the rough edges. (You’ll also want a wire pass hole at the bottom of the skull somewhere, assuming you’ll be adding lights to it.)

Cut your cup:

Take a second cup and cut a hole in the side and bottom (as shown in the photo) that is big enough to let your ping-pong balls fall through. This is designed to slow the ball down so that if it is going to bounce it will bounce inside the cup and then roll out the back of it. When you mount your cup in the skull you’ll end up doing it at a slight angle so the balls can roll down the bottom of the cup and out the back.

At this point you’ll want to test your cup like crazy to make sure that balls will pass through it and that it will fit in the skull properly. Place the cup in the skull at a slight angle and rest the jaw of it up on a small peice of foam core off a table slightly so the whole thing is at an angle. Then drop balls into the cup a few times to make sure it will work.

If your skull doesn’t have eyes and you intend to put some in this is the time to do it. Paint 2 ping-pong balls (or cut one in half and paint both sides) to look like eyes then hot-glue them into the eye sockets on your skull.

UPGRADE: you may also want to put LEDs in the eyes! if so, you’ll want to cut a small hole in the back of each eye before mounting it into the skull. Solder LEDs as shown later in this tutorial and insert them before mounting anything else in the skull. My version just had one light inside the skull.

Paint and decorate the rest of the balls to look like eyeballs. I recommend having a bunch of balls for this game (at least 9) since they will get thrown all over and some will get lost. Paint a circle for the irises. Use a thin red Sharpie to draw little red lines. A black Sharpie is good for the pupils.

If your skull is completely hollow you may see that balls bounce forward into the mouth/jaw/face area. If so you’ll want to prevent that by inserting a deflector. This deflector just needs to be high enough (approximately 5 inches on my version) to cover the gap between the bottom of the cup and the bottom of the skull. It should wrap around the front half of the bottom of the hole. I made mine out of heavy paper stock like sketchbook paper. You’ll want to cut some fringed strips so that the whole thing can be glued to the underside of your skull.

With the cup out of the skull, work your paper deflector up through the bottom then place the cup into the top to make sure it all fits.

Use hot glue to glue the deflector in place.

Create a ball return out of foamcore.

The ball return I built was 17″ long and 4″ wide with 1.5″ sides. First measure 1.5″ from the edge of your foamcore, then 4″ from that, then 1.5″ and mark the board. Cut the 7″ x 17″ piece completely out of the board.

On your second 2 lines you’ll only want to cut part way through the foamcore so the sides can just be folded up. See the pictures for clarification.

Cut out 2 end pieces for the ball return as 4″ x 1.5″ rectangles.

Glue the ends and sides into place.

For my project I used an empty baby-wipe container with the lid removed and turned upside down for the ball return trough to sit on. You could do this with foamcore also if you’d prefer.

Next you’ll want to build the sides up at the top of the ball return to hold the skull in place. Rest your trough on the box, hold the skull with the cup inside it so the back of the skull is touching the top/back of the trough and drop balls through the cup to make sure they run out the bottom. Once you have the correct angle measure the distance up from the trough to the front/side of the jaw where the skull will be attached.

IMPORTANT: Test your balls through the cup a lot here to make sure you’re at the right angle. You don’t want to glue it all together and find out the balls always get stuck! (Note: Your fiancée may want to kill you after she hears about the 86th ping-pong ball hit the plastic cup.)

Now cut wings that fit on the sides of the trough to hold the skull. The wings should be higher in the front (the measure to the jawline). See picture for clarification. Glue these wings onto the inside of the trough and place your skull on top of it. Test it some more just to make sure. ;)

Measure and cut a base for the whole project out of foamcore. Hot-glue your box in place and glue your ball return to it and the base at the correct angle.

You may need to put some strips of foamcore under the front of the trough in steps to secure the trough at the proper angle.

You may have to cut 2 pieces of foamcore and attach them together with a strip of foamcore glued to each piece to make the base long enough.

Start on the electronics!

Solder header pins on your IR Sensor so you can easily plug/unplug a connector.

Make a wire to connect your sensor to your breadboard with a crimp connector housing and female crimp connectors on one end of it and male crimp pins on the other end.

Also, if your Teensy microcontroller doesn’t already have header pins, solder them on now and mount it onto your breadboard. Set up a test circuit and write some code to detect a ball passing the sensor.

Cut a small rectangle in the side of your ball return to fit your sensor. Place the sensor into it then plug it into the Teensy and test some more.

TIP: Optimal Placement of the sensor seems to be just past where the skull sits on the trough. I decided this was the best place for it because there would be minimal bouncing and the ball would already be moving smoothly down the trough.

The sensor i used requires the ball to pass right beside the sensor instead of up to several inches away. I built a bumper to guide the balls as close to the sensor as possible. You’ll need to test this and adjust appropriately depending on your sensor.

Once you have your sensor hole cut and tested mount the sensor with hot glue being careful not to get glue on the front of the sensor.

Make a switch to start the game.

For my switch I mounted one of my eyeballs (with an LED inside of it) on a small square of foamcore. Solder wires onto a switch then hot-glue the bottom of it to another piece of foamcore that is a little bigger than the eyeball part. Place the eyeball top piece over the pushbutton so it can activate when pressed. (The switch came from the skull itself so I just had to put new connectors on the back but used the existing wire.)

Hot-glue ONE edge of the top part into place so it will act like a hinge when a player pushes the eyeball down.

I included a graphic behind the switch that says “Press to start” so people knew to push the eyeball.

To wire the LEDs you’ll want to solder a 560-ohm Resistor on to the ground lead of the LED (shorter lead) then solder the other end of the resistor to a wire (black). Solder the other LED lead onto another wire (red).

Place a small length of heat-shrink tubing on the ground lead to cover both the whole lead and the resistor then shrink it with a lighter. Press your two leads back together and place a wider piece of heat shrink tubing around both the leads and the wires and shrink again with a lighter.

Add 2 male crimp connectors to the ends of your wires so the whole thing can be easily added to a breadboard.

For any LED that will be on continuously, plug the positive lead into the +5v terminal of your Teensy breadboard and the negative lead into the ground. My single LED inside the skull runs off of Pin 10 on the Teensy.

Program the Teensy!

The Flash application is set up to accept 2 keystrokes to work. The “s” key starts the game, and the “o” key registers a point. So the Teensy firmware needs to send an “s” when the switch is pressed and an “o” when the sensor reads a ball. Complete code can come from the attached PDF, or you can get the actual PDE file with the rest of the source files here.

TIP: TEST EVERYTHING!

The Teensy code provided with this tutorial is set up to have the button on pin 8, the sensor on pin 11 and the Skull LED on pin 10. Feel free to change these to suit your needs.

Spray-mount any graphics you have for the game to foamcore then cut them out and attach them to the base.

Attach all the wires to the breadboard.

Glue the skull into place on top of the ball return trough.

Glue the switch into place.

Put some double-sided tape on the bottom of your breadboard and place it under the trough.

Tape any wires up under the ball return trough to conceal them.

Create a Flash game timer (or use mine) to show a score from the Teensy on the computer. Plug your Teensy in, run your Flash game, and throw some ping-pong balls!

You can download the Flash source file (or the precompiled Flash projectors for Mac and Windows) here or use the source code in the attached PDF.

Place the game on a table with your computer running the Flash file and put a line of tape on the floor an arm’s length away from the start button. Enjoy! :)