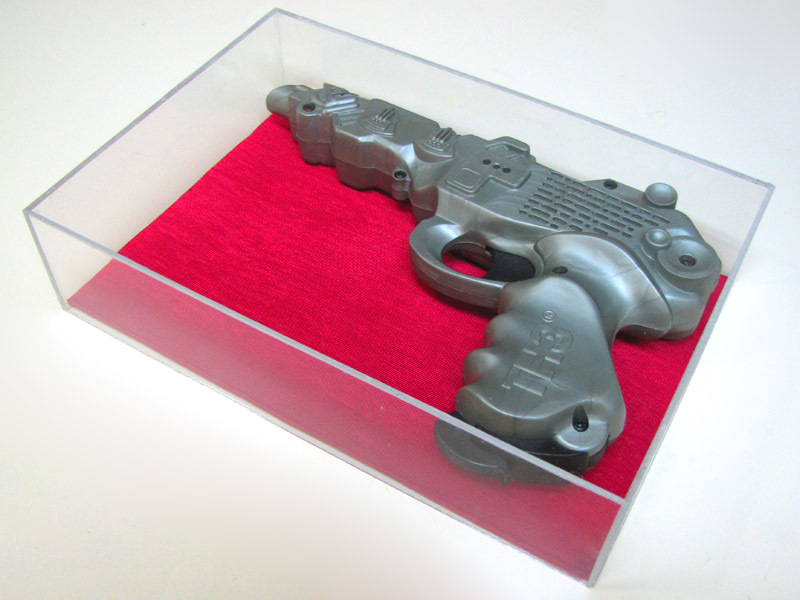
If you have a router and the means to cut a straight line with it, this trick for building a 5-sided acrylic box is considerably easier than the common slab-joint method, and gives better-looking results, to boot.

Project Steps

Start with the right size panel

Figure out how long, wide, and deep you want the finished box to be, measured on its outside edges. Call these X, Y, and Z.

The starting panel should have dimensions X + 2Z, Y + 2Z.

Cut your panel to the right dimensions, making sure to keep the sides straight and true.

Scoring and snapping will probably not be accurate enough. Alternately, you can…

use a router with an acrylic bit, a table saw with an acrylic blade, or a computer-controlled tool like a laser cutter to cut the panel yourself.

contract someone to cut the panel to size for you, or

don’t cut the panel at all, and use the whole sheet as it came from the factory. (That’s what I did.)

Set up your router table

Mount a 90-degree V-groove bit in your router chuck.

Adjust the depth of the bit to cut almost all the way through your material, but not quite. Test cuts can be made from the waste areas (each of dimension Z x Z) in the four corners of the panel.

Set the distance between the fence and the point of the bit exactly equal to Z.

Pop your sheet of acrylic into the freezer. Let it cool for at least a couple of hours before cutting.

Make a push stick

This is not optional, but essential–both for safety and for consistency of cutting depth, especially with thinner material like the 3/32″ sheet I’m using here.

Select a 1″ (nominal) board at least as long as your panel’s longest edge, and at least as wide as Z.

Mount a narrow “heel” of scrap acrylic, or other suitable material, of the same thickness as your workpiece, to one end of the board, as shown. Use short flat-head wood screws countersunk flush with, or below, the surface.

In use, the “heel” will slide behind the workpiece, pushing it into the blade, while the board rides on top of it, holding it flat against the table.

Cut the grooves

Determine the correct feed direction for the cut. You want the rotating bit to be pushing the incoming acrylic against the fence, as it cuts, rather than away from it.

Remove the cold sheet of acrylic from the freezer.

Put on goggles, ear protection, and gloves. Start the router.

Position one edge of the acrylic sheet against the fence, and hook the trailing edge of the sheet with the “heel” on your push stick.

With your dominant hand, press down on the push stick to hold the acrylic against the router table. With your free hand, maintain gentle pressure against the outside edge of the acrylic to keep it tight against the fence.

With a continuous, steady, relaxed motion, feed the workpiece through the spinning router bit, making the cut.

Repeat the preceding three steps for the three remaining edges of the panel. When you’re finished, turn off and unplug the router.
Clean up the cut sheet

Peel off the protective film on both sides of the sheet.

When the cuts get too hot, small pieces of cut plastic may re-melt and stick in the groove. These are easily identified as white “furry” patches in the grooved areas.

Remove any re-melted plastic with a small chisel. Unless the cut got much too hot, they should come off easily.

Apply

Lay the cut acrylic on top of your work surface with the grooved side down.

Apply a continuous strip of tape along the entire length of each groove, centered, as best as possible, directly over each groove.

Smooth the tape down starting in the middle, on the groove, and working out to the sides and ends. A big advantage of using clear tape, here, is that it’s easy to see any spots that are not well adhered.

Cut the ends of the tape strips even with the edges of the acrylic sheet.

Snap the cuts

Bending toward the grooved side of the plastic, apply pressure with your hands as necessary to snap the acrylic along each cut.

If you have the cut depth right, this should be fairly easy. If the grooves are a bit too shallow, the technique can still work well, but you may want to snap along a table edge or other guide.

Once all four cuts are snapped, lay the sheet back on your work surface with the grooves facing up.

Fold up the box

Remove the four square pieces of scrap from the corners of the panel. Be careful not to damage the tape as you do so.

Make a single cut in each corner, to free the L-shaped sections of tape that formerly held the square scraps. Cut the “overlapped” side of the “L”, and leave the other side uncut to wrap around the corner of the box.

Fold up the sides of the box, as shown. Hold each corner firmly together and wrap the loose tape tightly across the edge. It is vital to get a good seal all the way along the point of each edge.

Apply adhesive

Stretch a large rubber band around the box, as close to the open side as possible, to help hold the miters together during the gluing operation.

Load a small paintbrush with acrylic solvent cement, and lightly touch it to the top of each of the four vertical joints. You should be able to see the solvent “flash” down the joint from capillary action.

Repeat the above, touching the paintbrush to the center, and perhaps a couple of additional points, along the inside of each horizontal joint. Again, you should be able to see the solvent flowing along the joint.

Let the adhesive sit for several hours at least. Overnight is best.

Remove tape and clean up

When the solvent is completely evaporated, peel off the tape.

If you applied enough adhesive, and had good seals at each taped joint, you should now have a sturdy box with nice clean joints and no marring from leaked solvent.

Goo-Gone or generic citrus oil cleaner has proven effective, for me, in removing any tape residue that persists on the acrylic.

Conclusion

Adequate cooling of the cut is essential; a groove that gets too hot will have a bad finish and make a bad joint. The freezer trick I used here might work for you, but longer and/or deeper grooves may require spot cooling at the router bit itself. A vortex tube would be perfect, if you have one, but canned air might be an inexpensive substitute for small jobs.