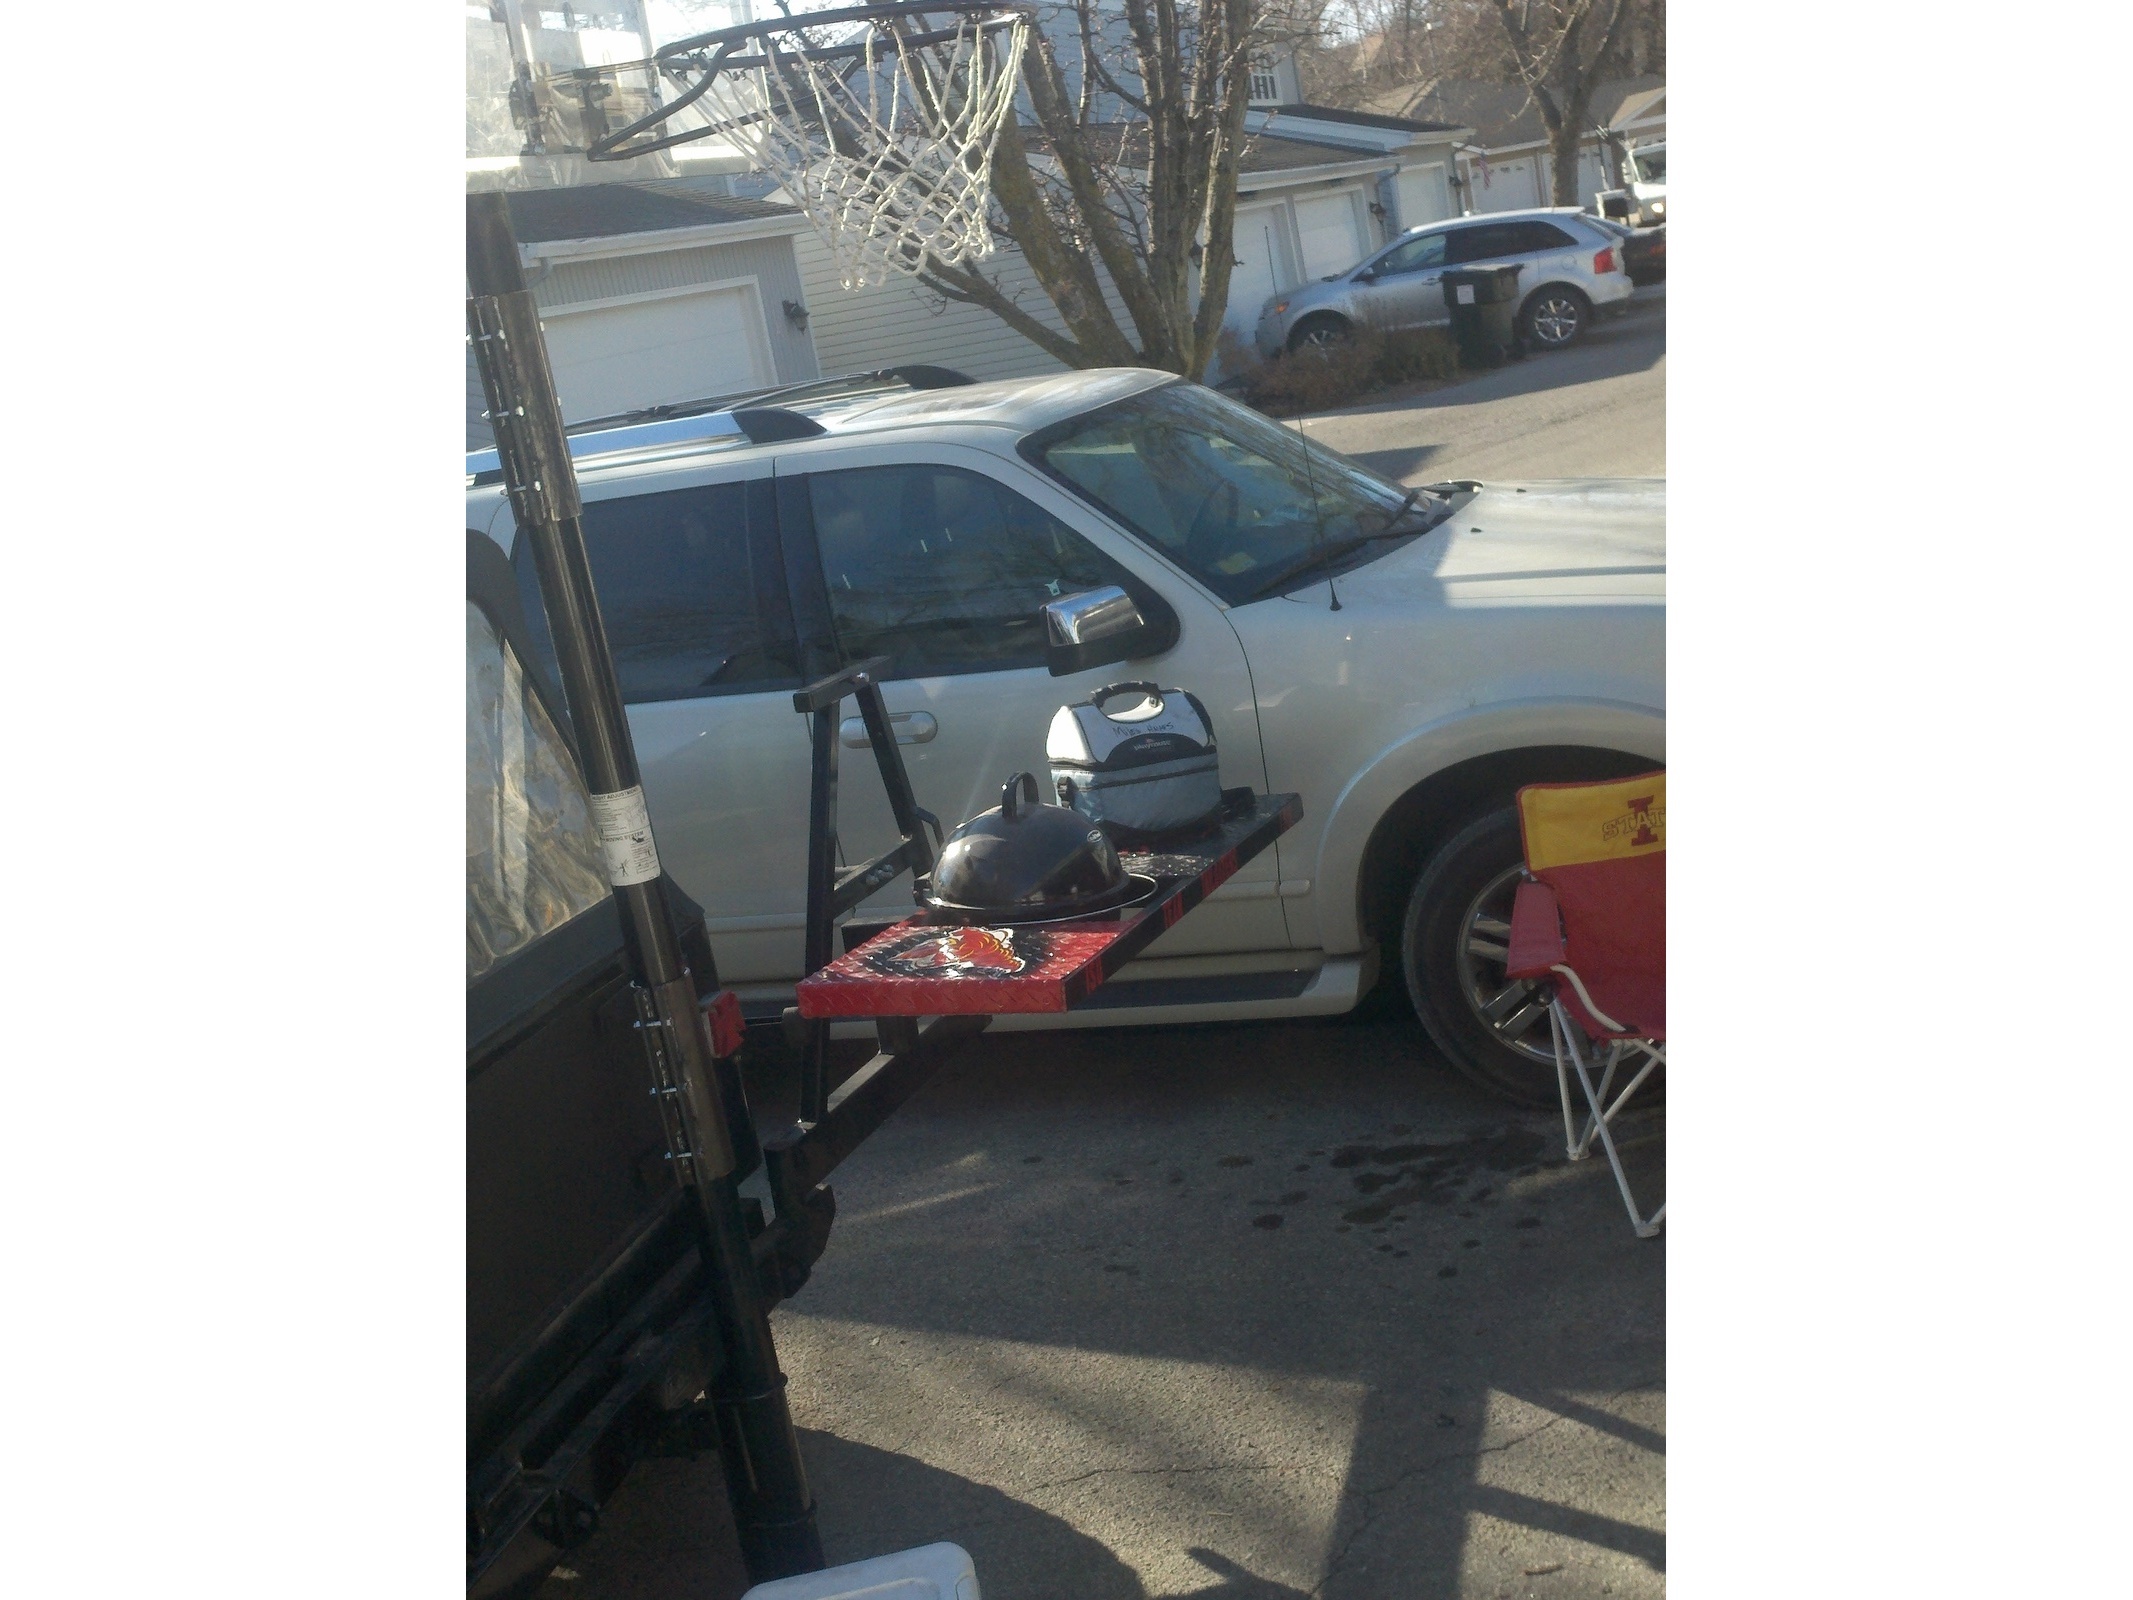
The following instructions will guide you through the process of turning your Jeep, or another sport utility vehicle, into a multifunctional tailgating paradise. The Park’n’Play features a basketball hoop and a shelf that can hold a grill, food, etc.

What will the next generation of Make: look like? We’re inviting you to shape the future by investing in Make:. By becoming an investor, you help decide what’s next. The future of Make: is in your hands. Learn More.

Project Steps

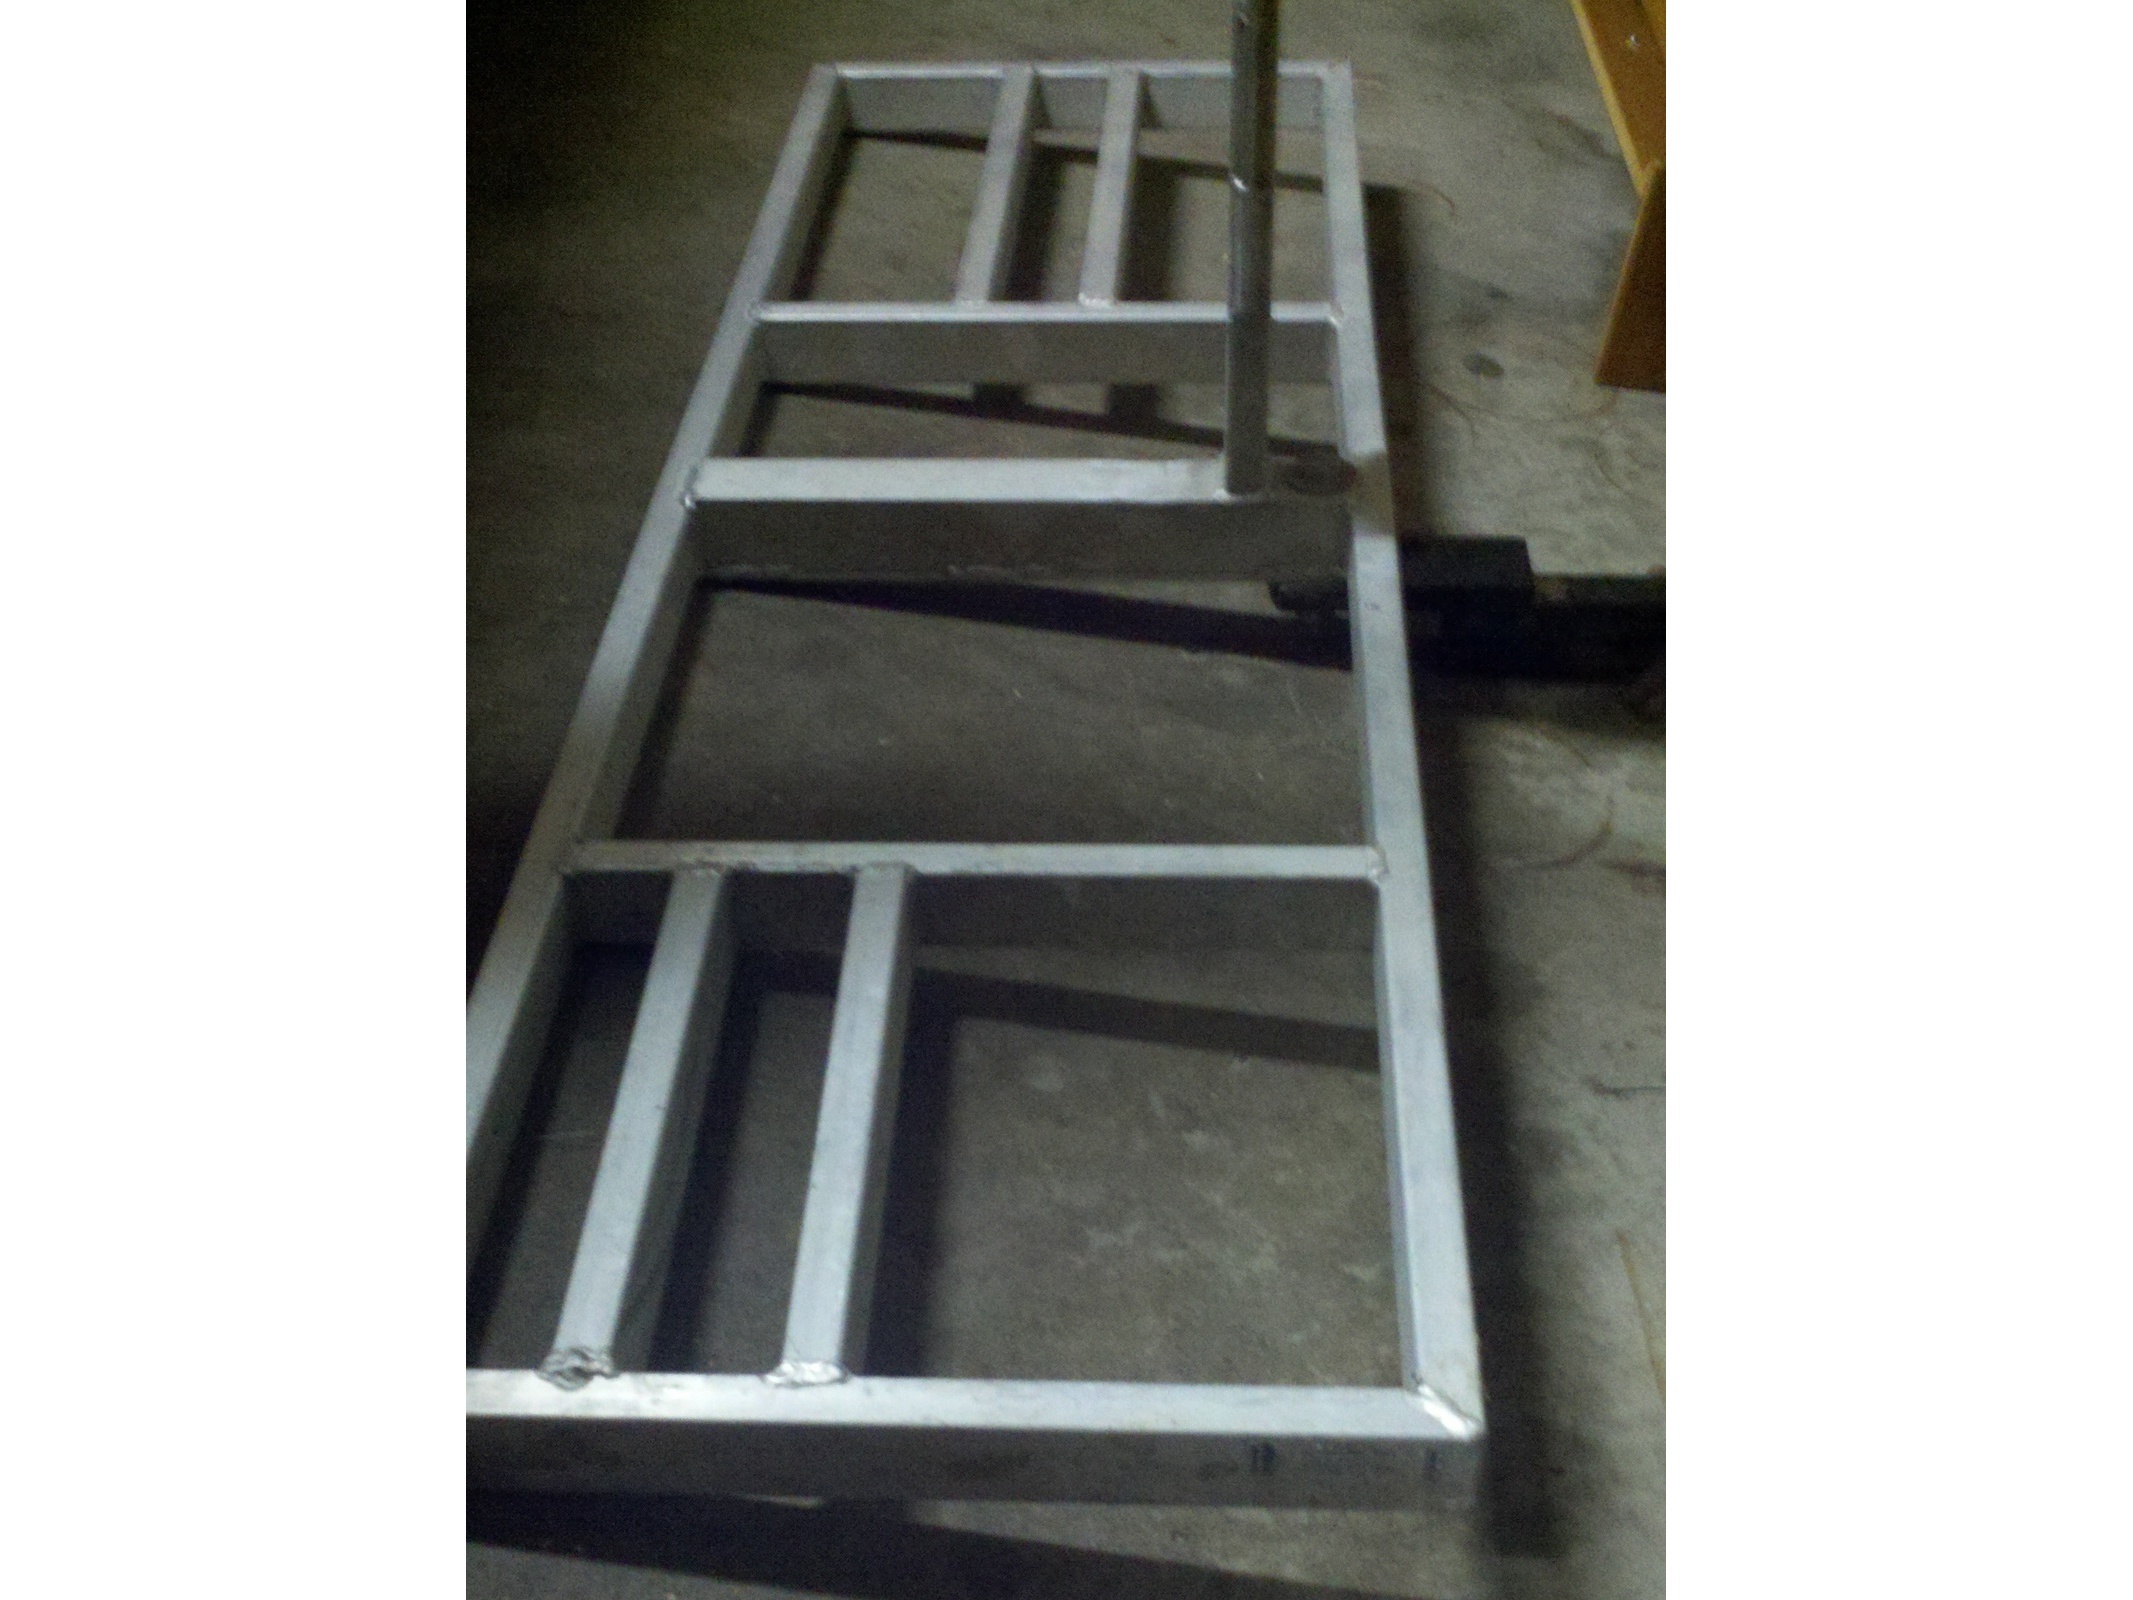
Constructing the shelf

The shelf will act as both a shelf to used while tailgating and a support to store the pole sections and basketball hoop during transportation.

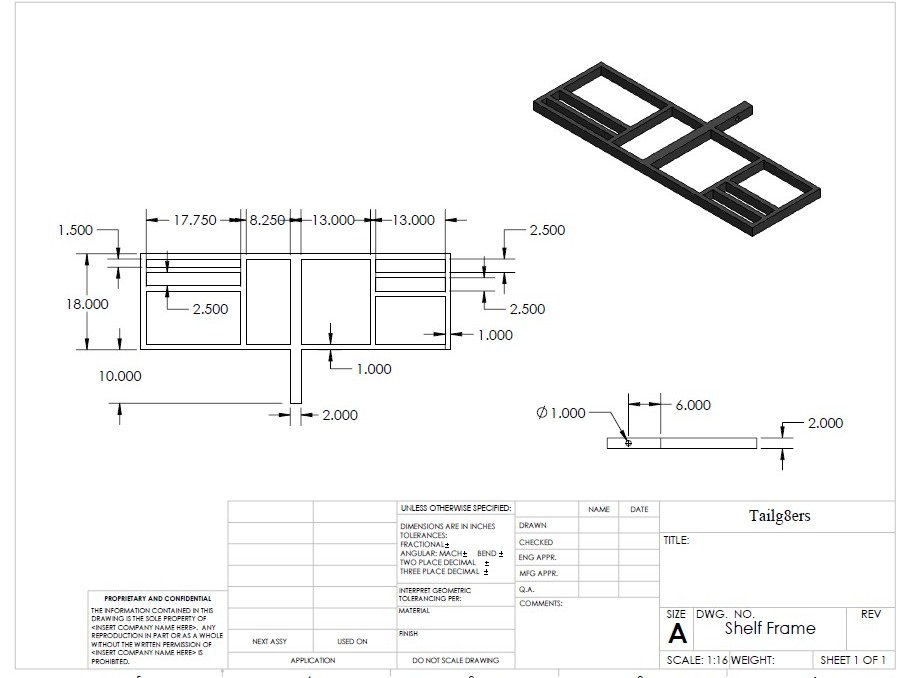
a. Cut the aluminum tubing to the dimensions shown.

b. Weld aluminum tubing together as in the diagram shown: NOTE: Welding is not required. You can fasten the tubes together with steel bolts and 90-degree aluminum corner plates. We suggest using 5/16” nuts, bolts, and washers. Be aware you will also need a power drill and drill bits for proper sized holes.

c. Weld ball mount to the shelving frame as in the second image. NOTE: Welding is not required. You can fasten the ball mount to the shelving frame with steel fasteners.

d. Cut diamond plate into two pieces: 30″ x 18″ and 19.75″ x 18″. Weld steel diamond plate (or fasten other flat sheet material) to the frame as in the third image.
Constructing the basketball hoop and pole sections

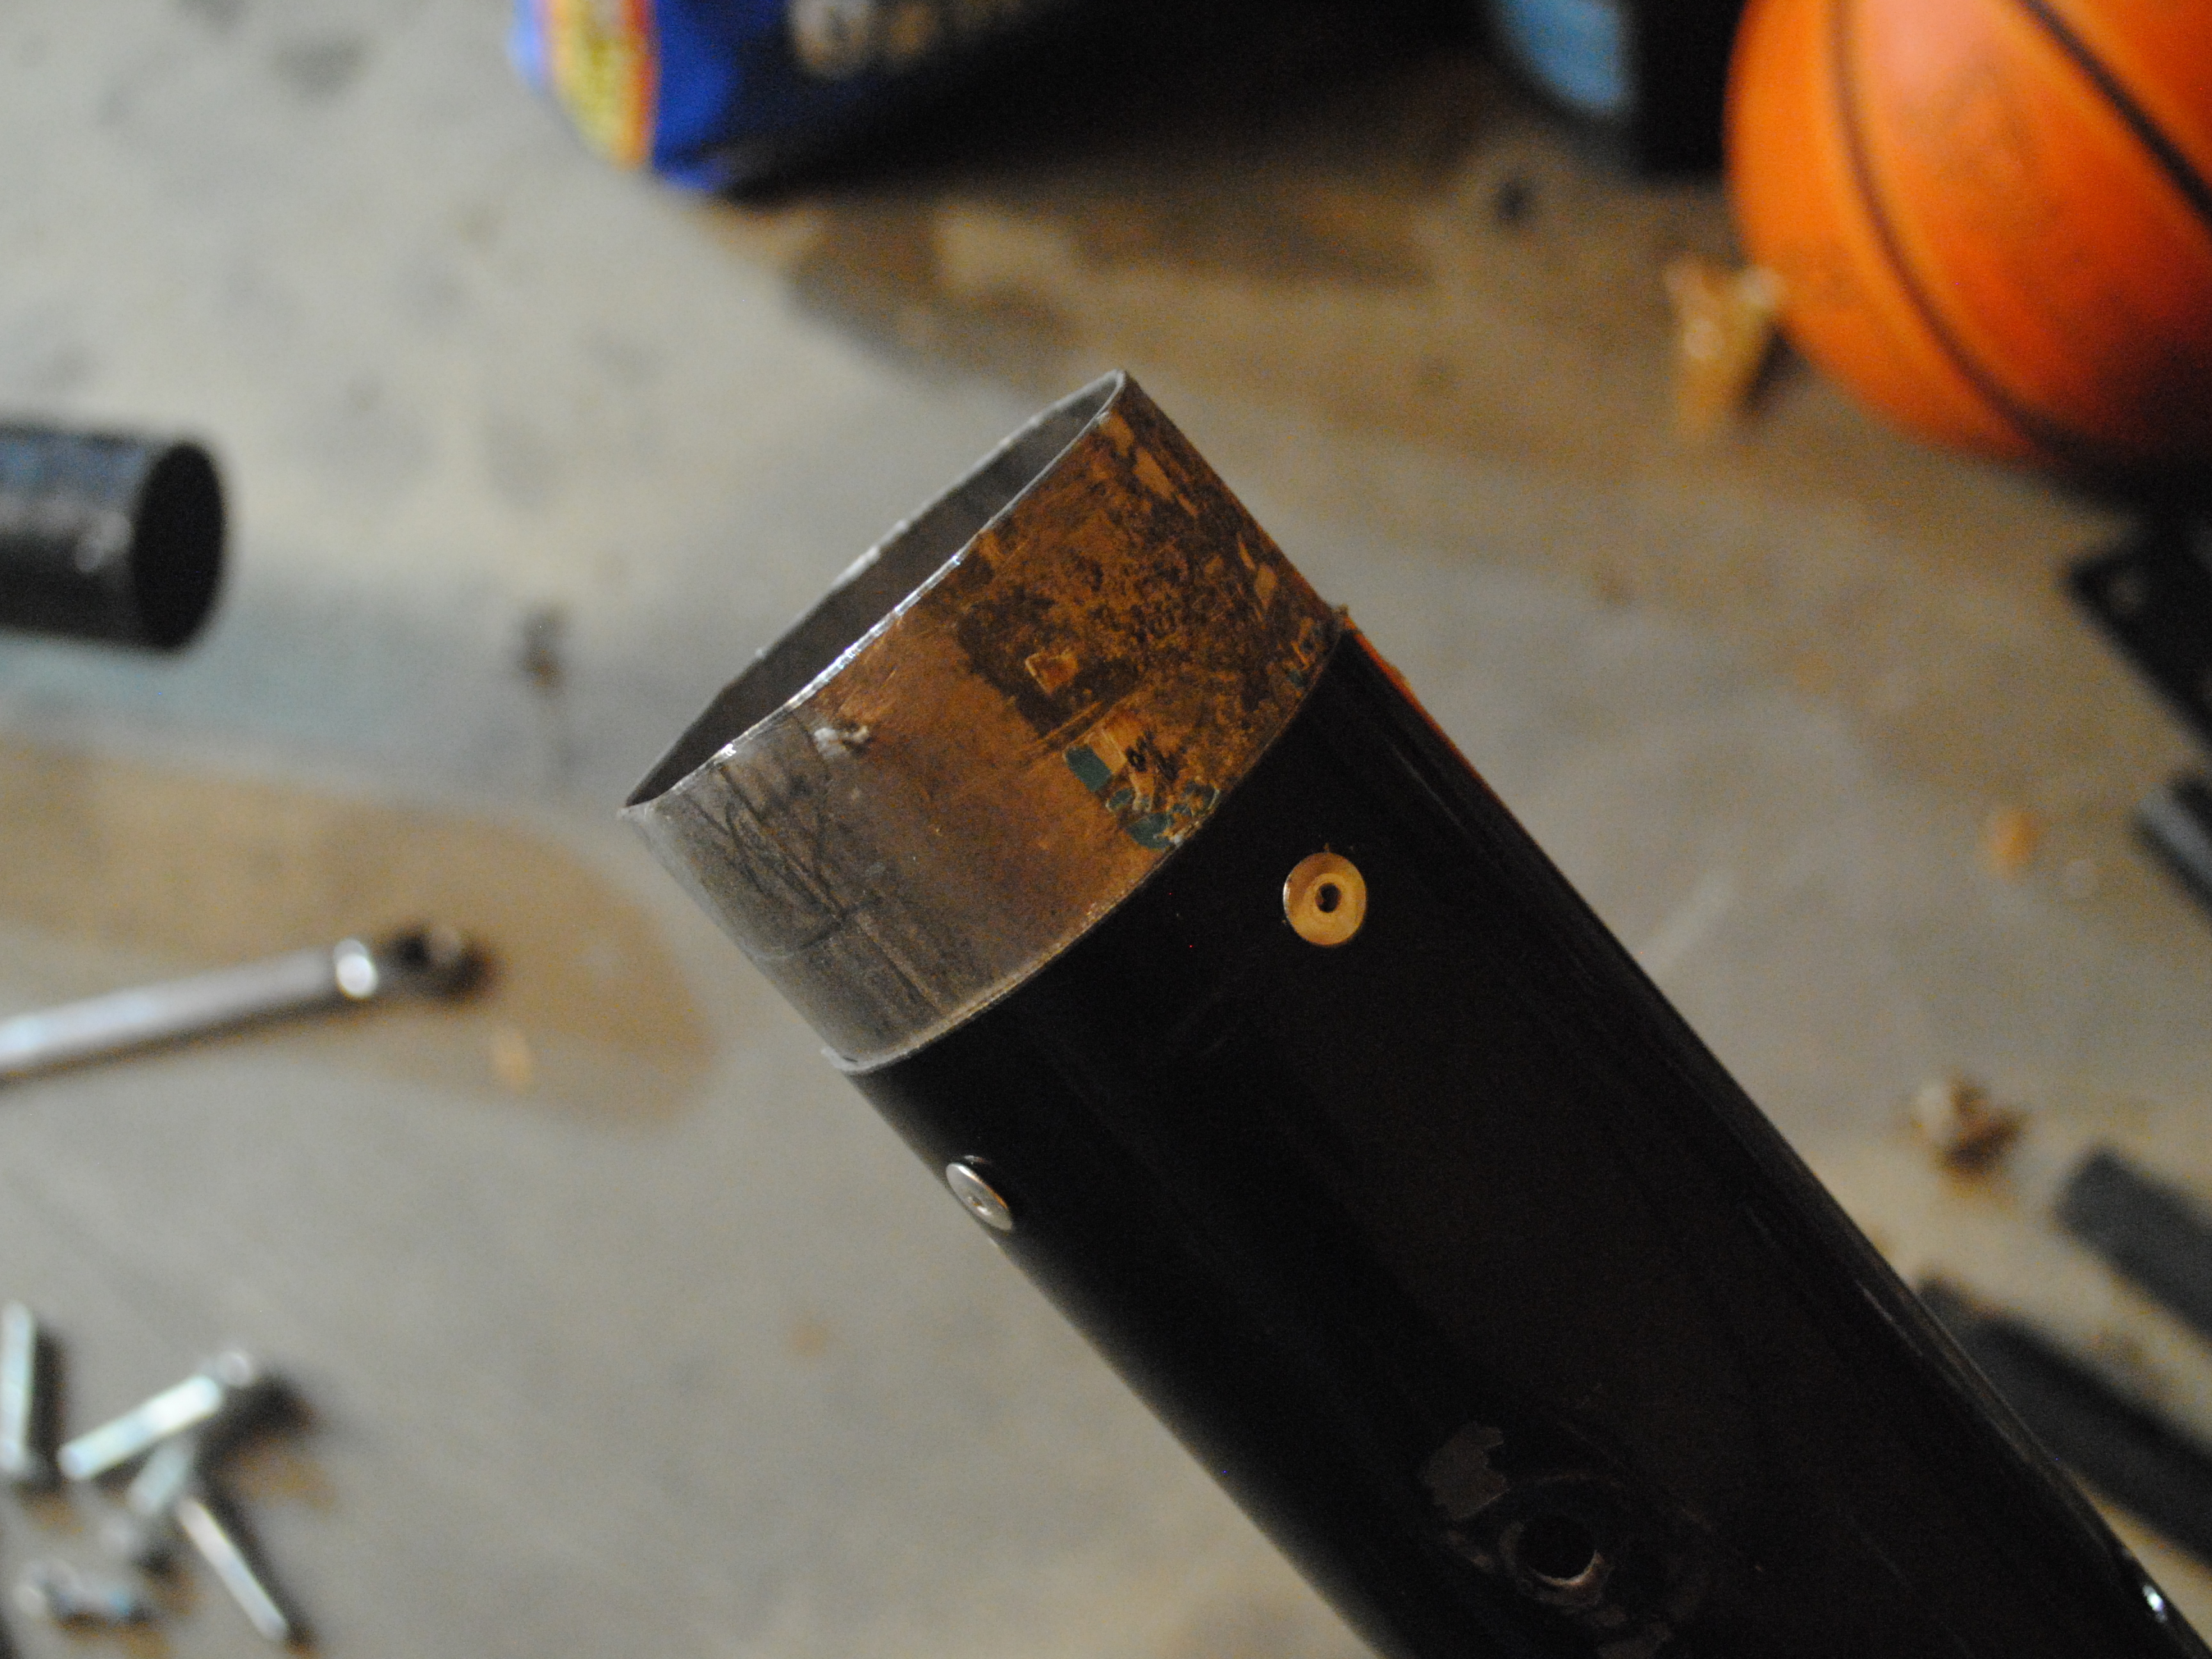
The sections are made so that the assembly can be broken down during transportation.

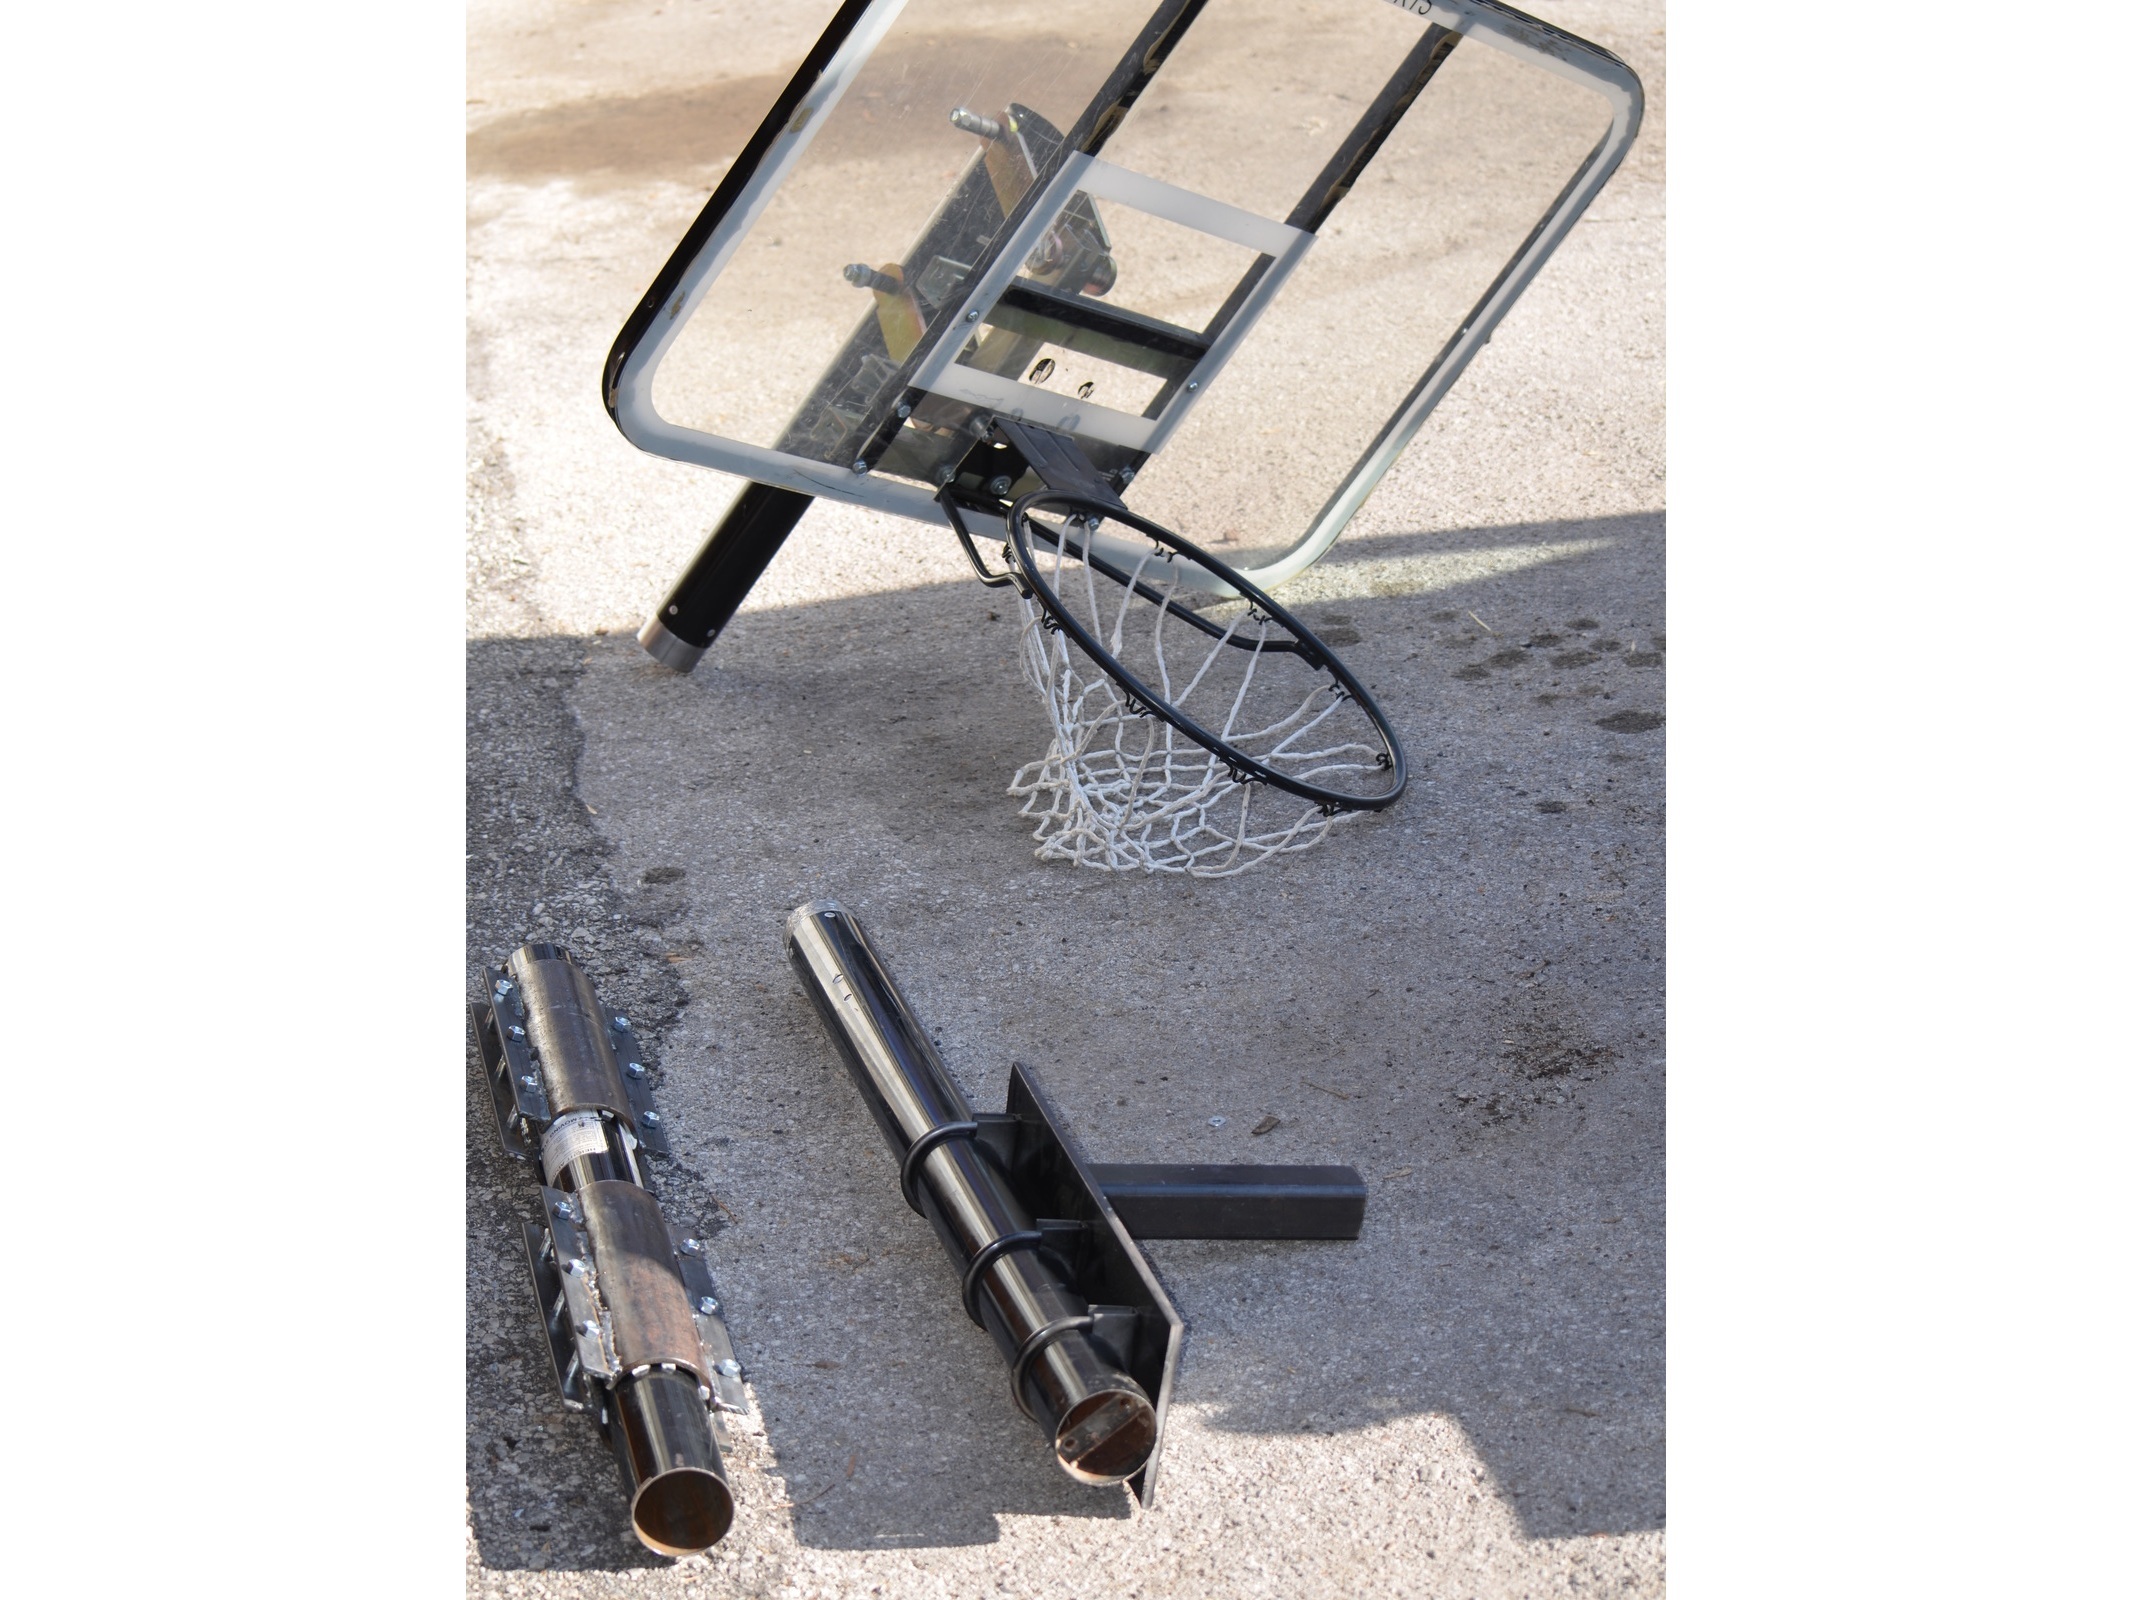
a. Remove basketball hoop and backboard from pole. Note: this is only for transportation purposes.

b. Cut the basketball hoop stand into 3 equal sections.

c. Internal couplers may be added for support. Choose an OD that will suit the ID of the basketball hoop pole section. Two of these couplers will be needed. Make sure to fasten them into the bottom two pole sections.

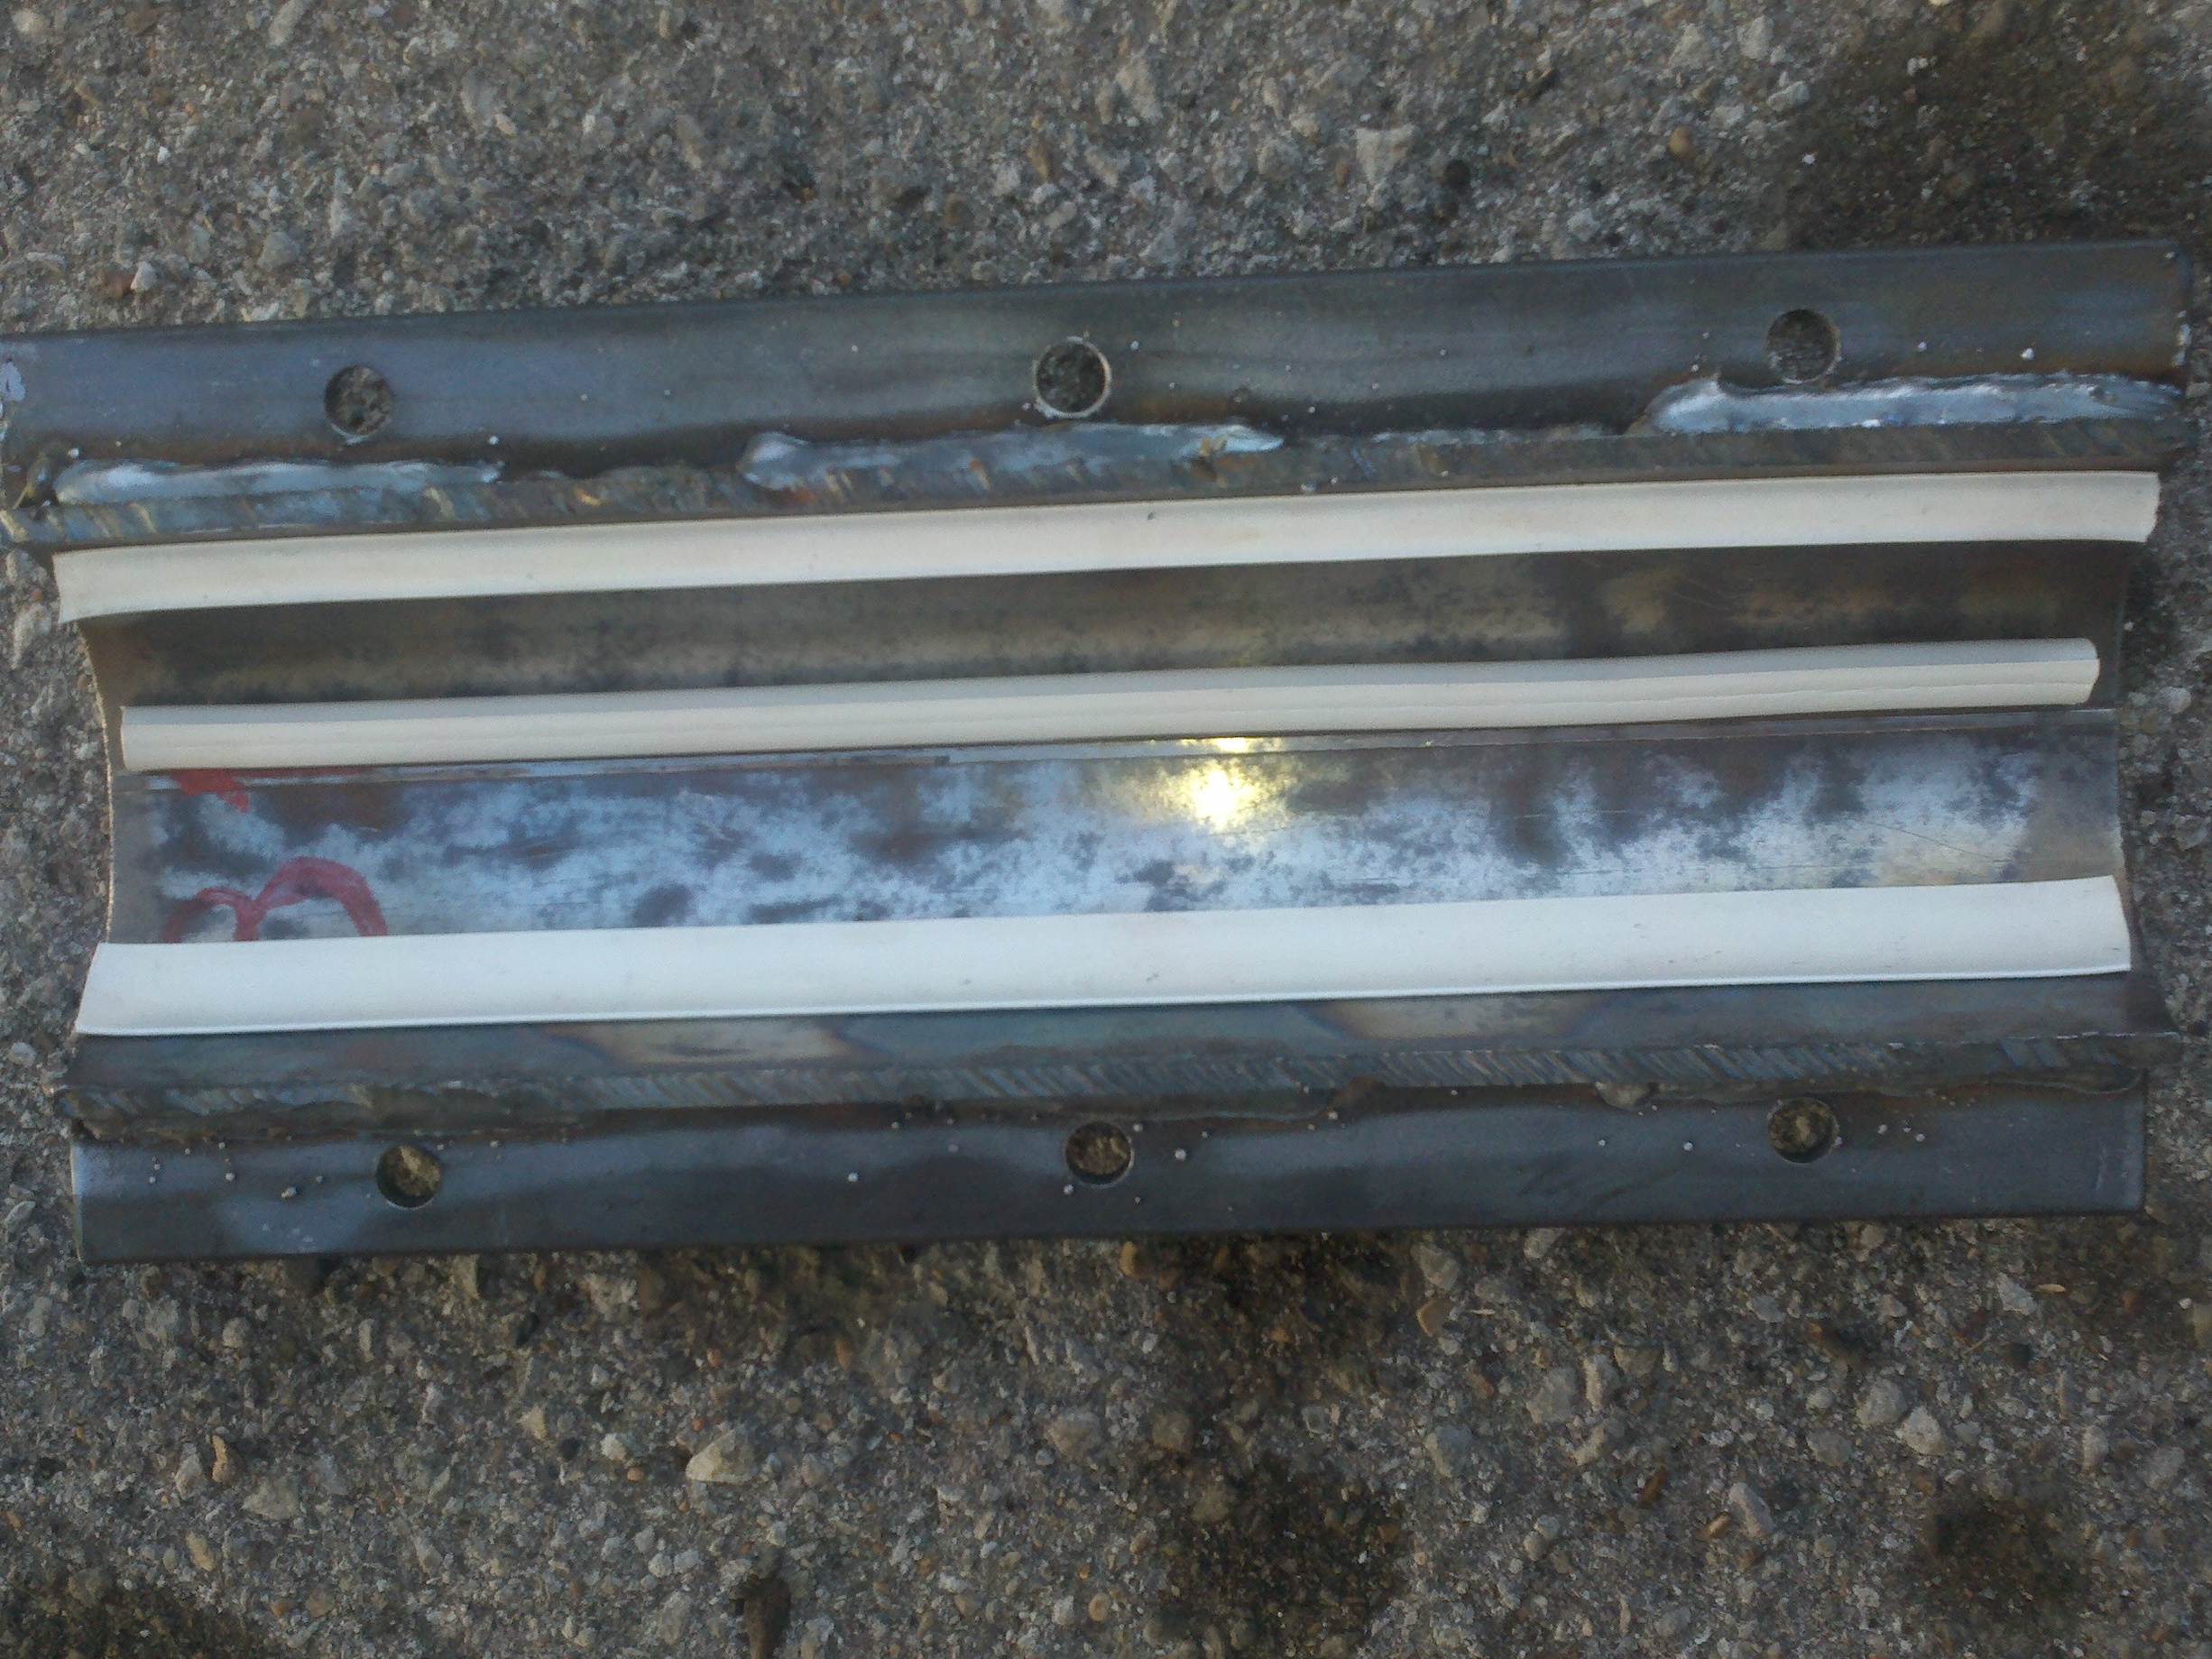
Constructing the external couplers

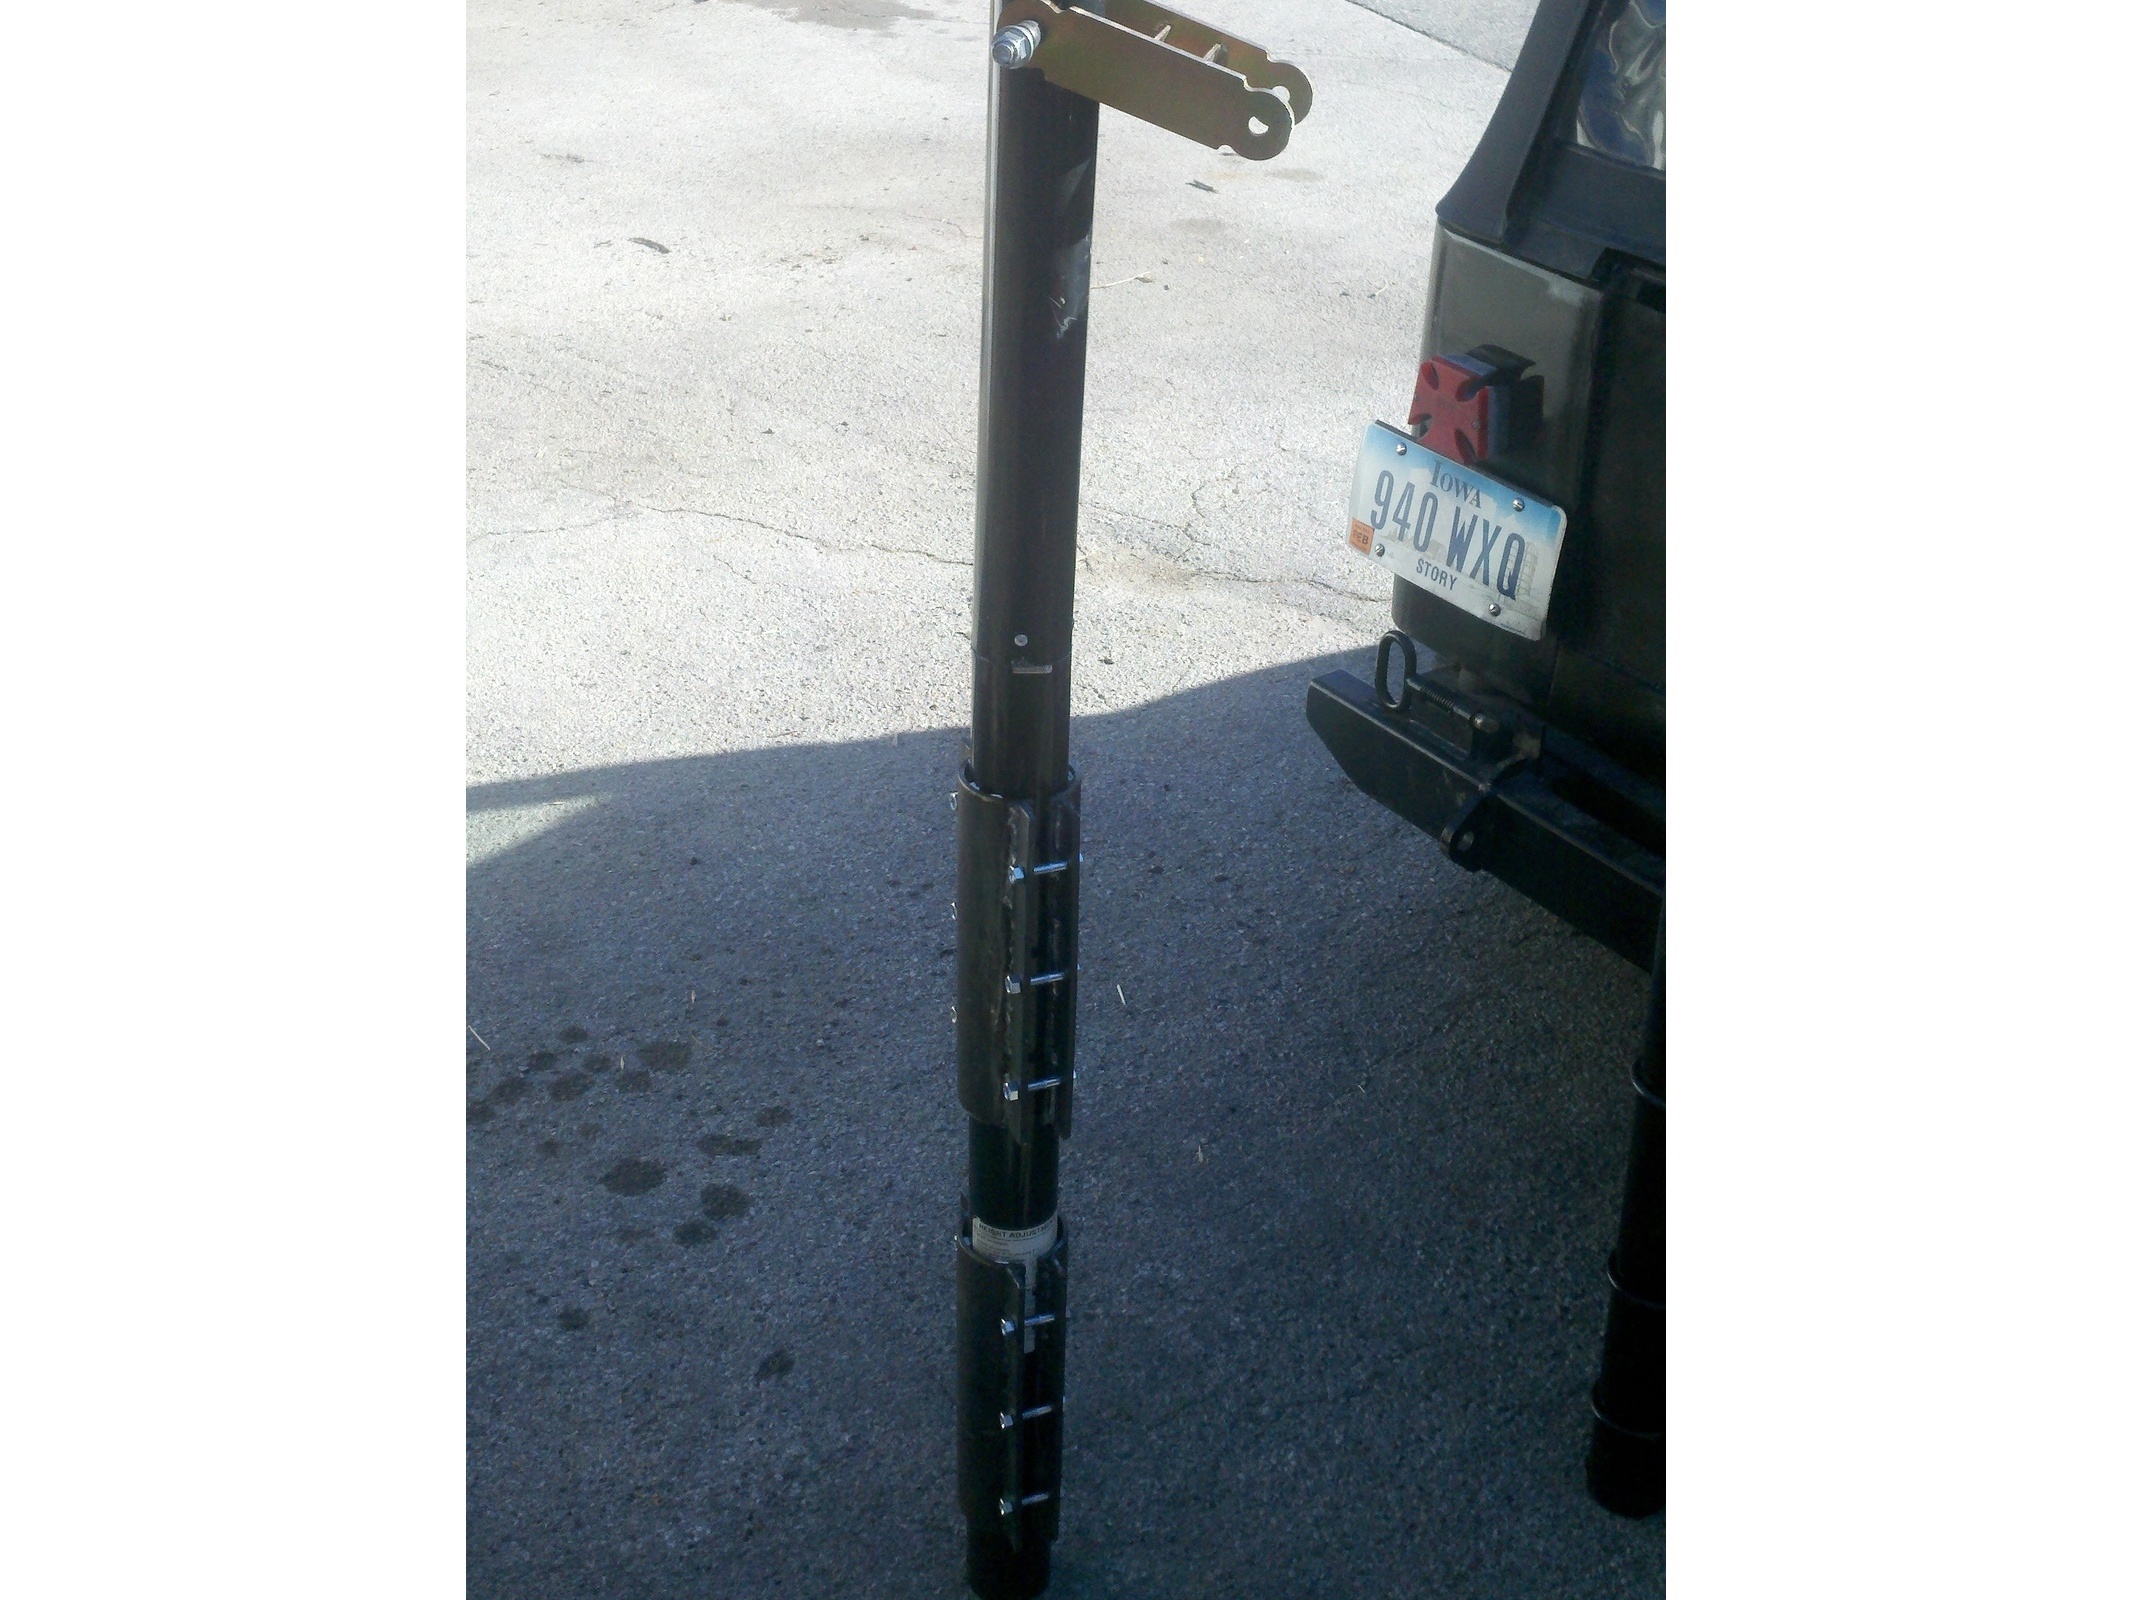
The external couplers will hold the pole sections together while the basketball hoop is in use. Two will be needed.

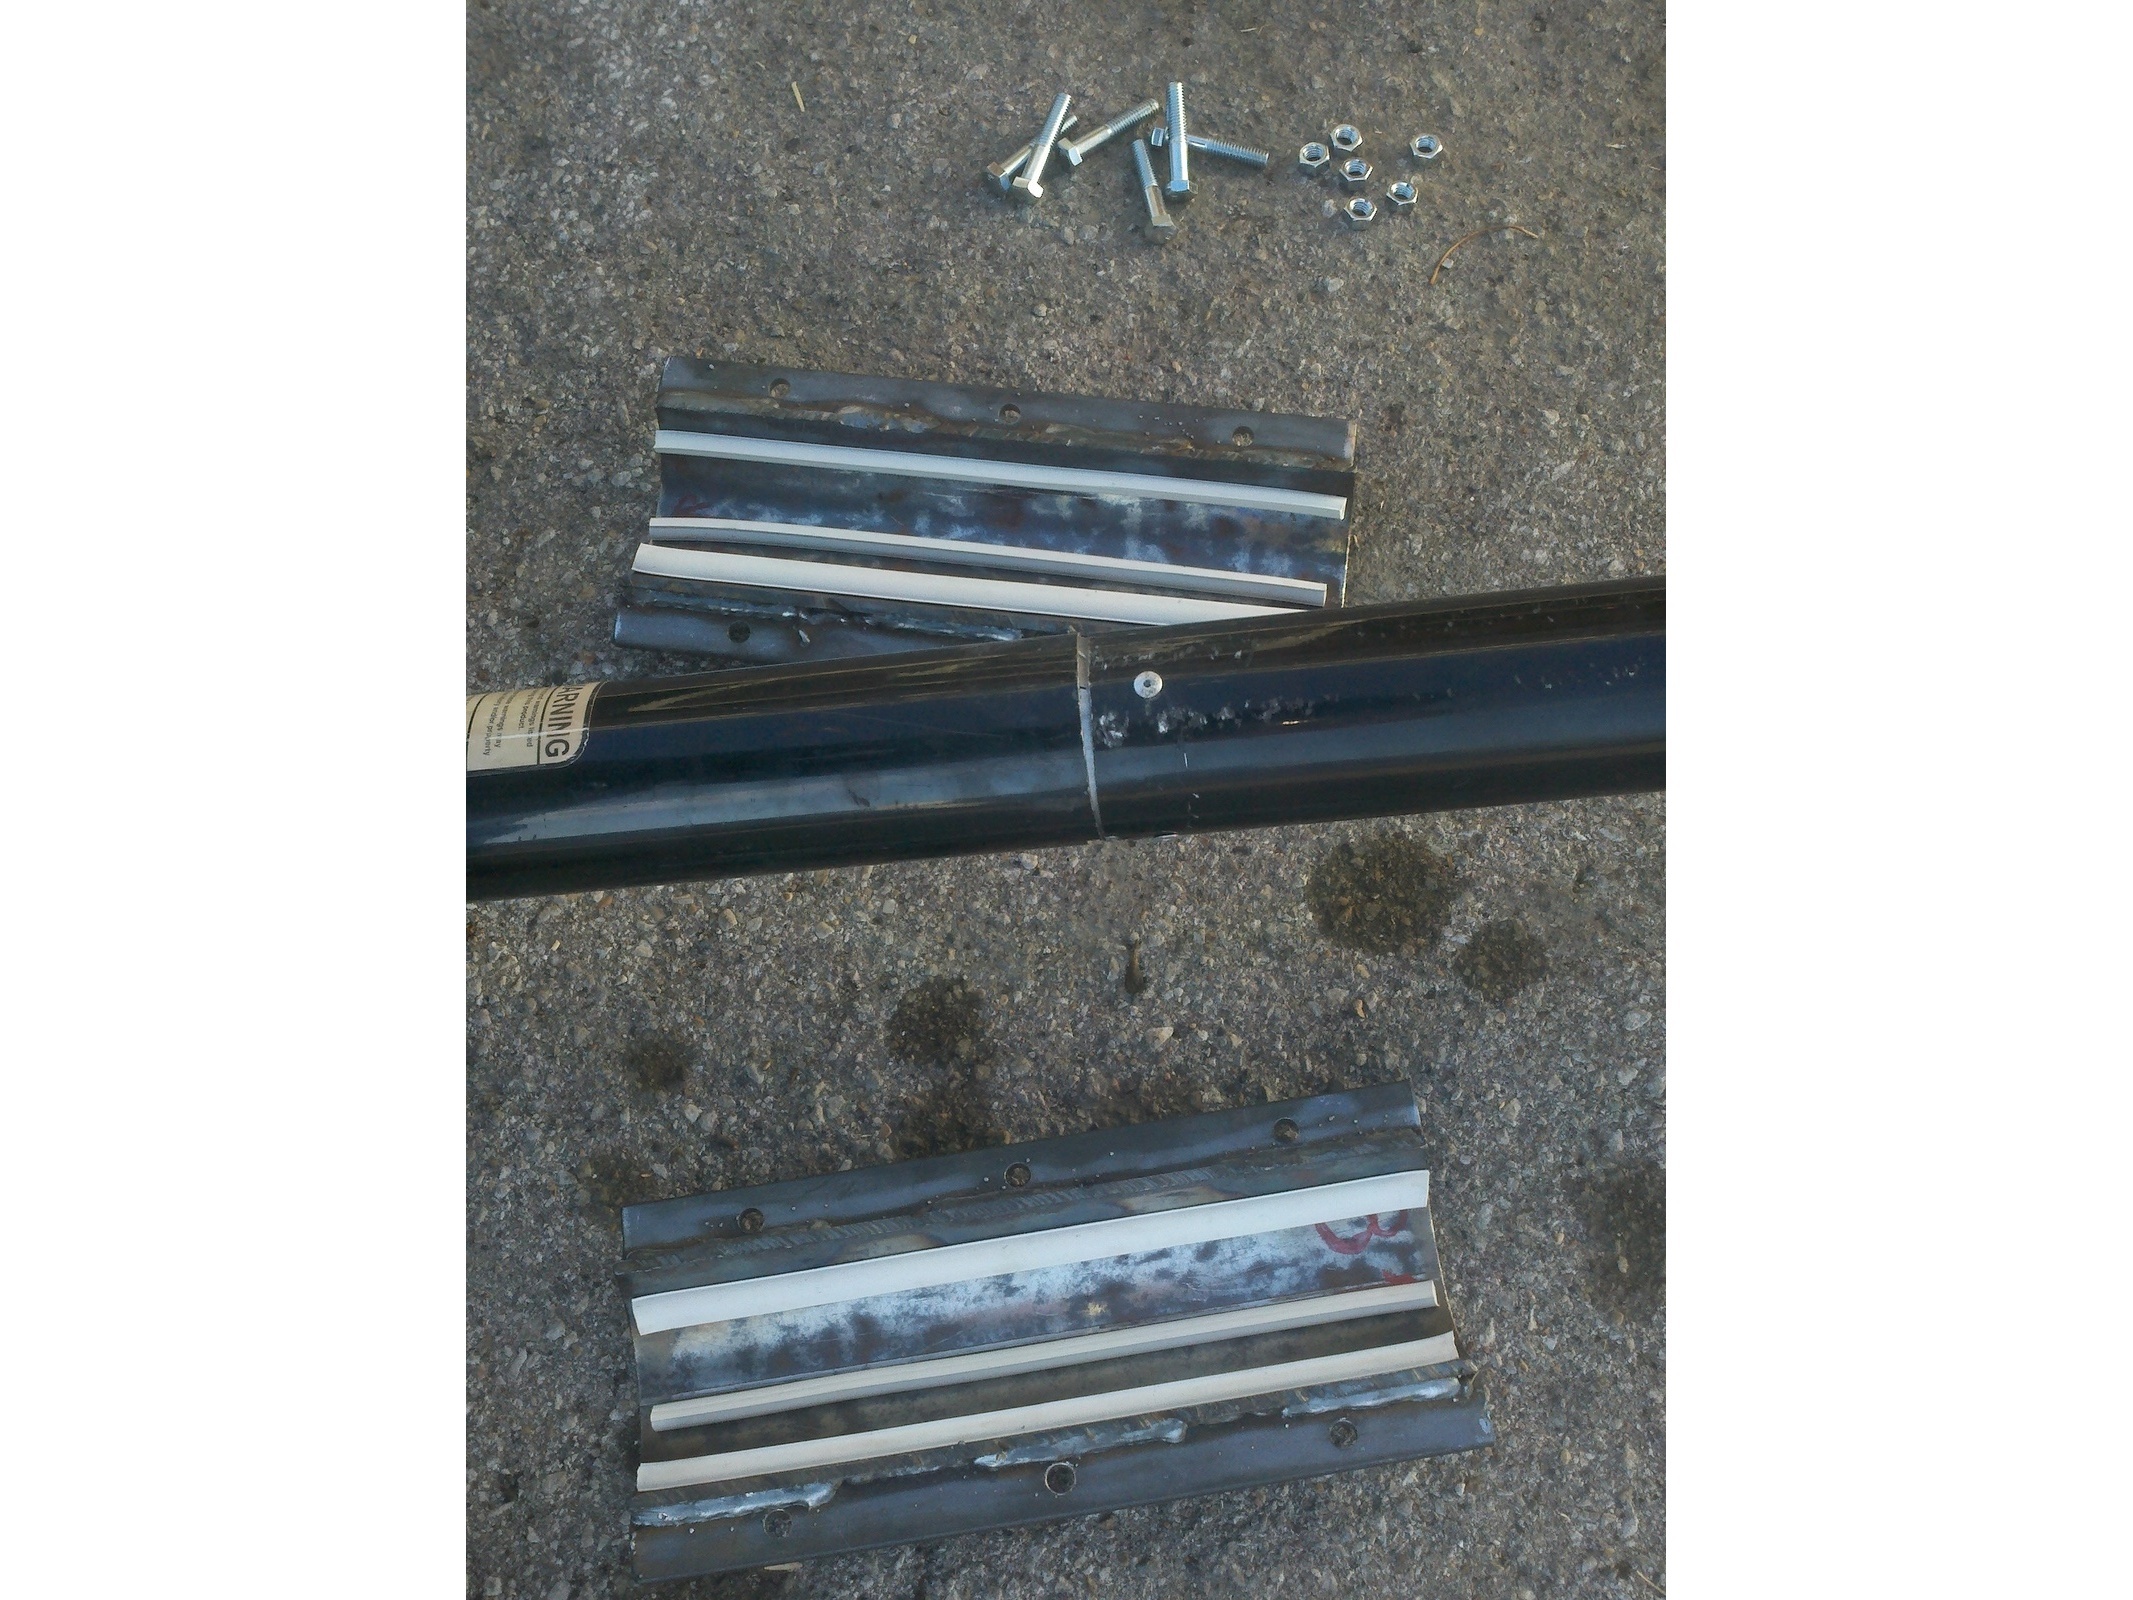
a. Cut 3.5” metal tubing in half, then remove 1″ from each edge of the tubing.

b. Cut the ¼” metal plates to 1″ x 12″.

c. Weld flanges to the external couplers as in the photos.

d. Drill holes in external coupler plates for bolts in any configuration desired.

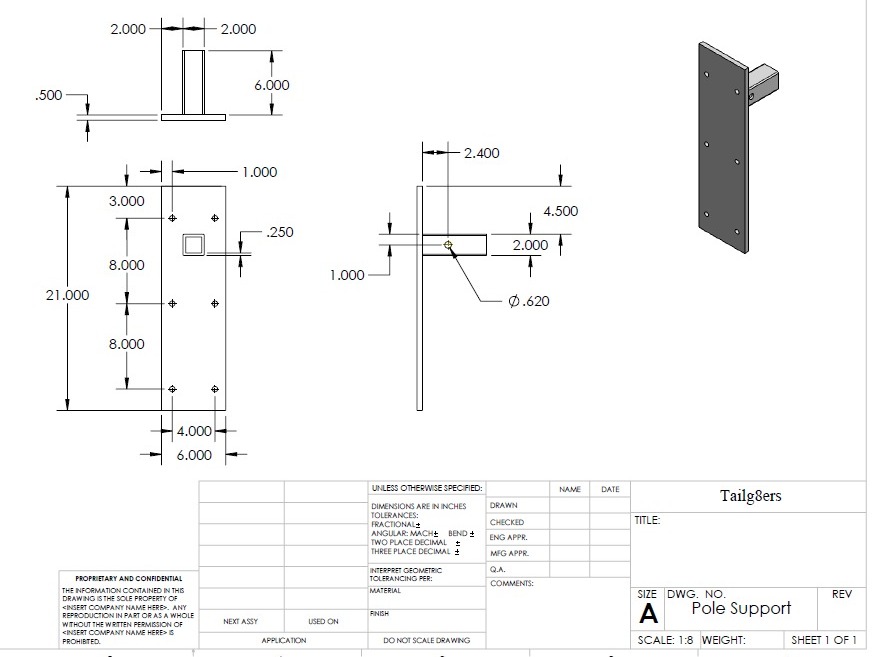
Constructing basketball pole receiver assembly

This will hold the bottom pole section rigid during use.

a. Cut metal plate and drill holes as in the diagram.

b. Weld plate to ball mount as in the diagram.

c. Use U-bolts to fasten bottom pole section to the pole receiver assembly and insert into hitch receiver.

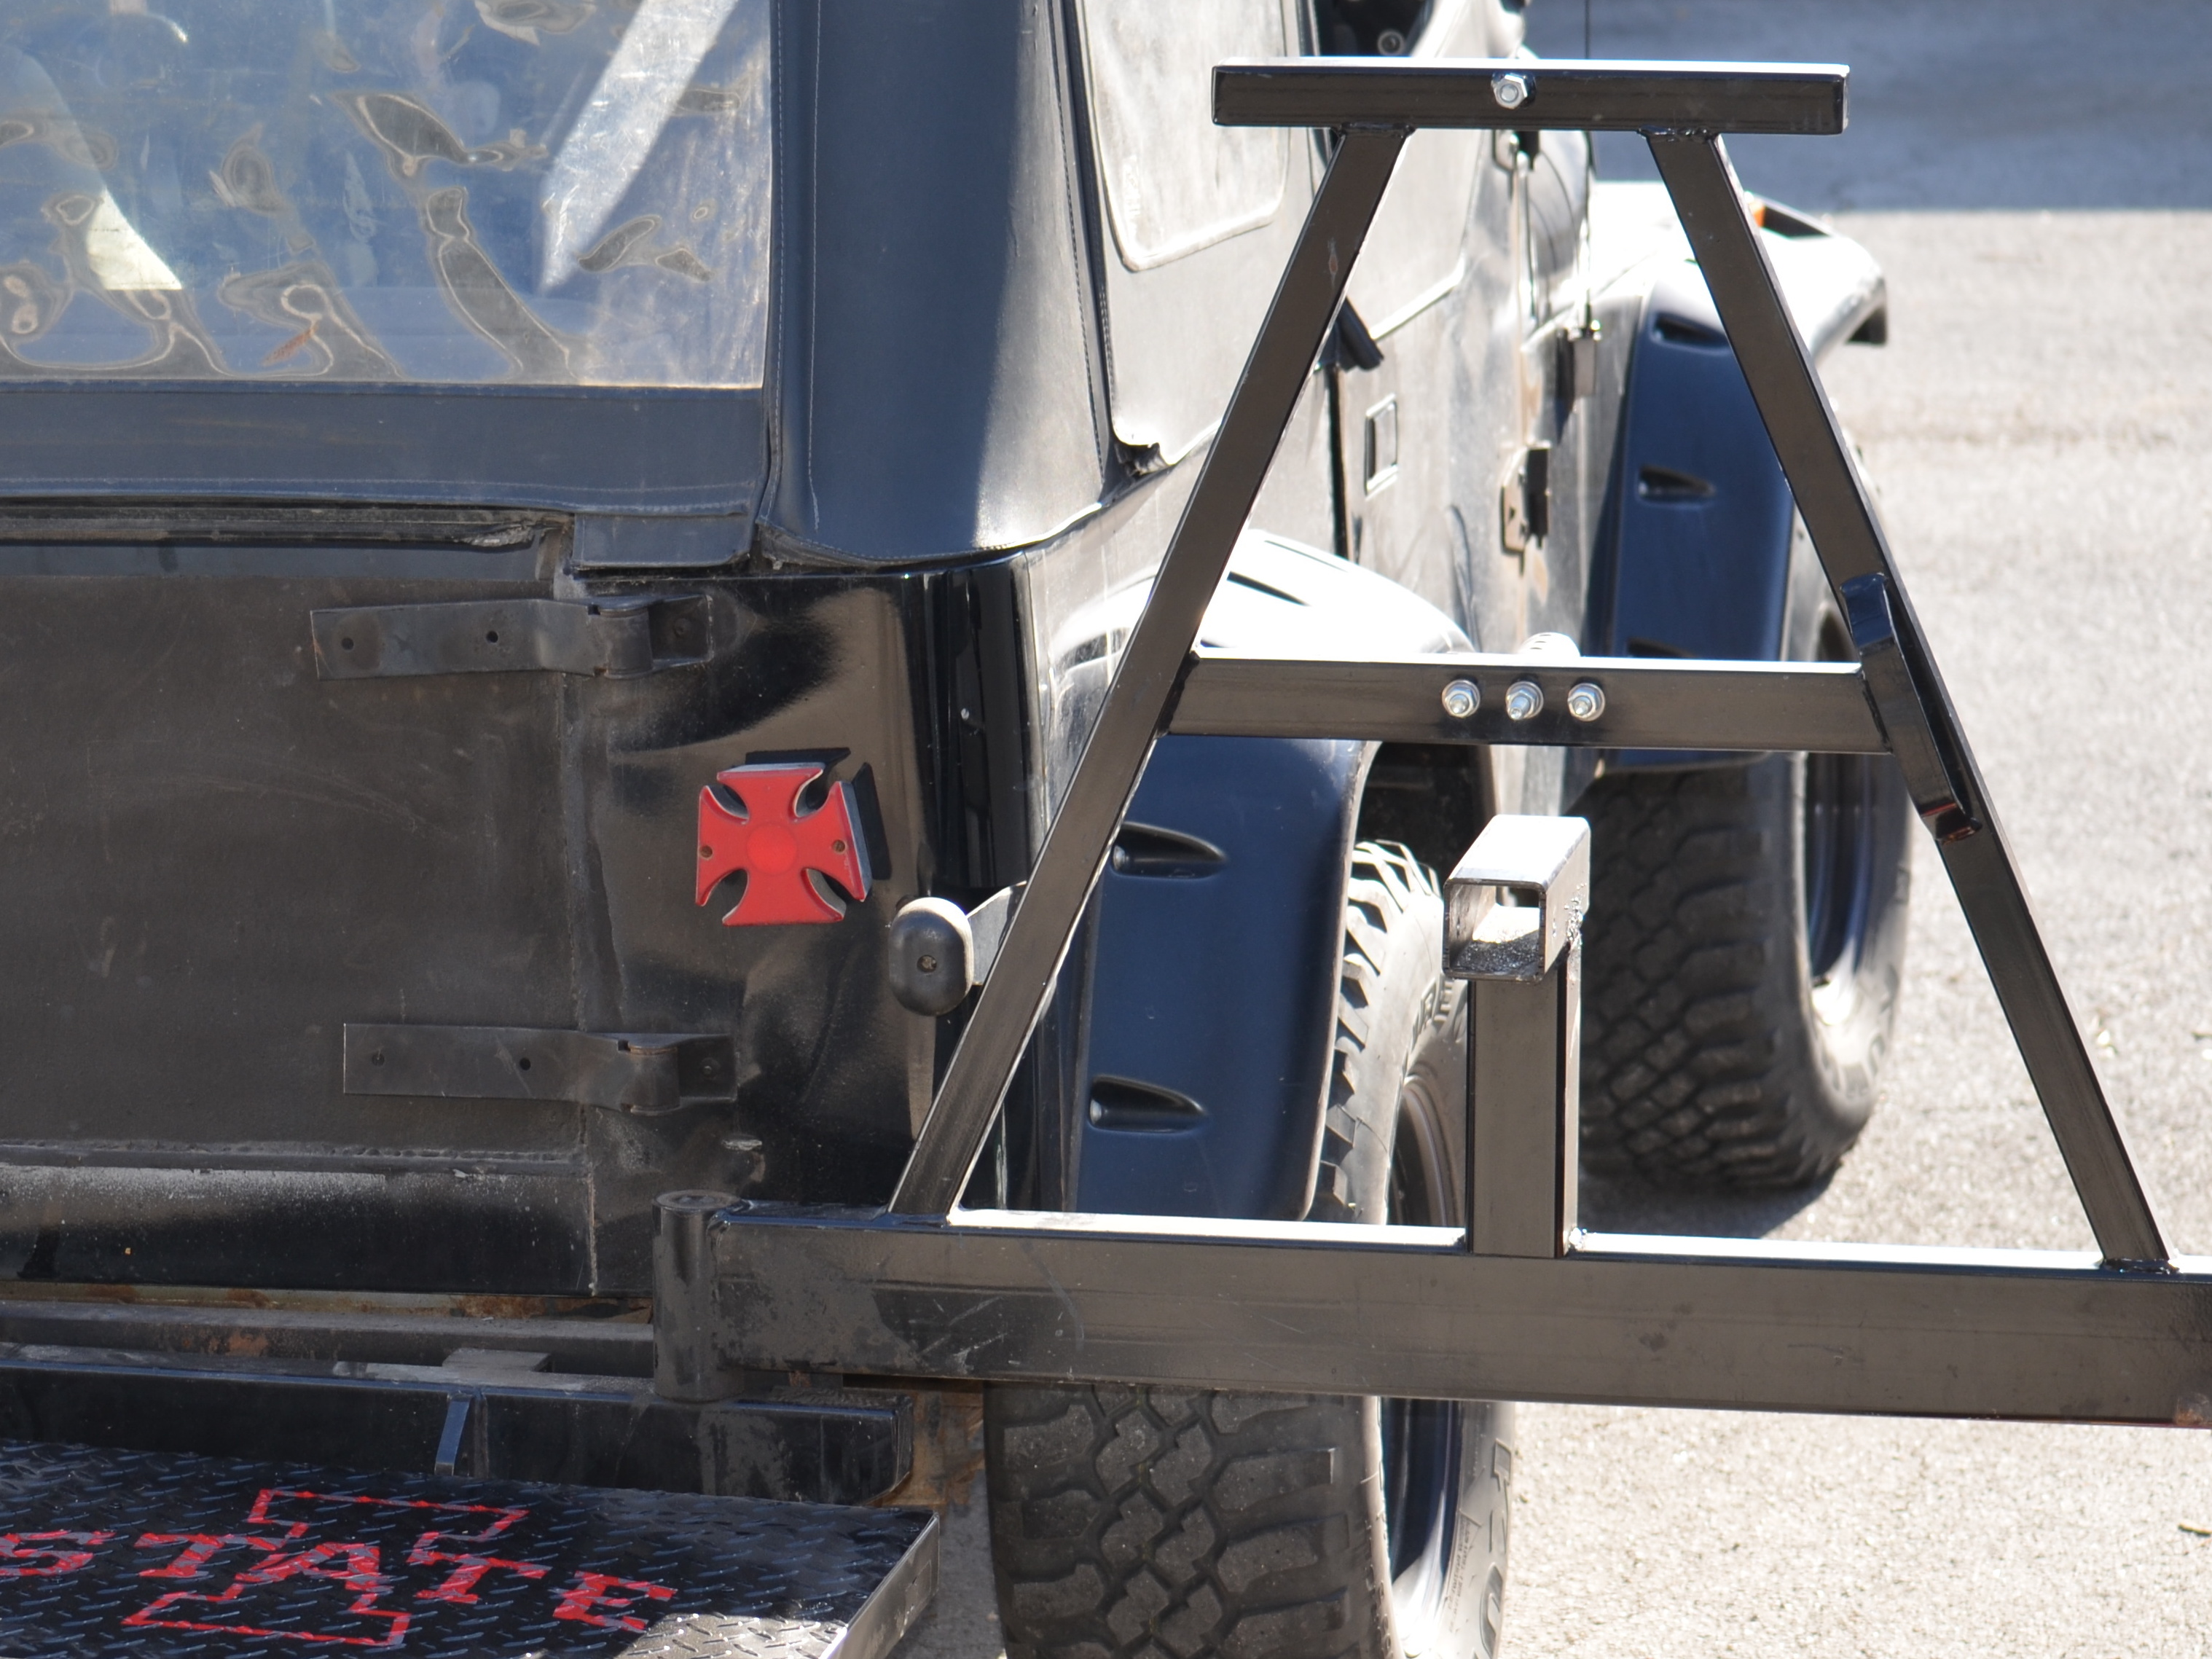
Attaching second hitch receiver to swing arm

Note: The swing arm shown here is specific to this model of Jeep. However, the purpose of this step is to make an attachment for the table to be used at an appropriate height.

Weld or fasten hitch receiver as in the photo.

Attach pole sections and external couplers together as in the photos.

Assembly and disassembly

When packing up for transportation, the shelf inserts into the standard hitch receiver and the bottom pole mount inserts into the swing arm hitch receiver. Everything else is set on the shelf.