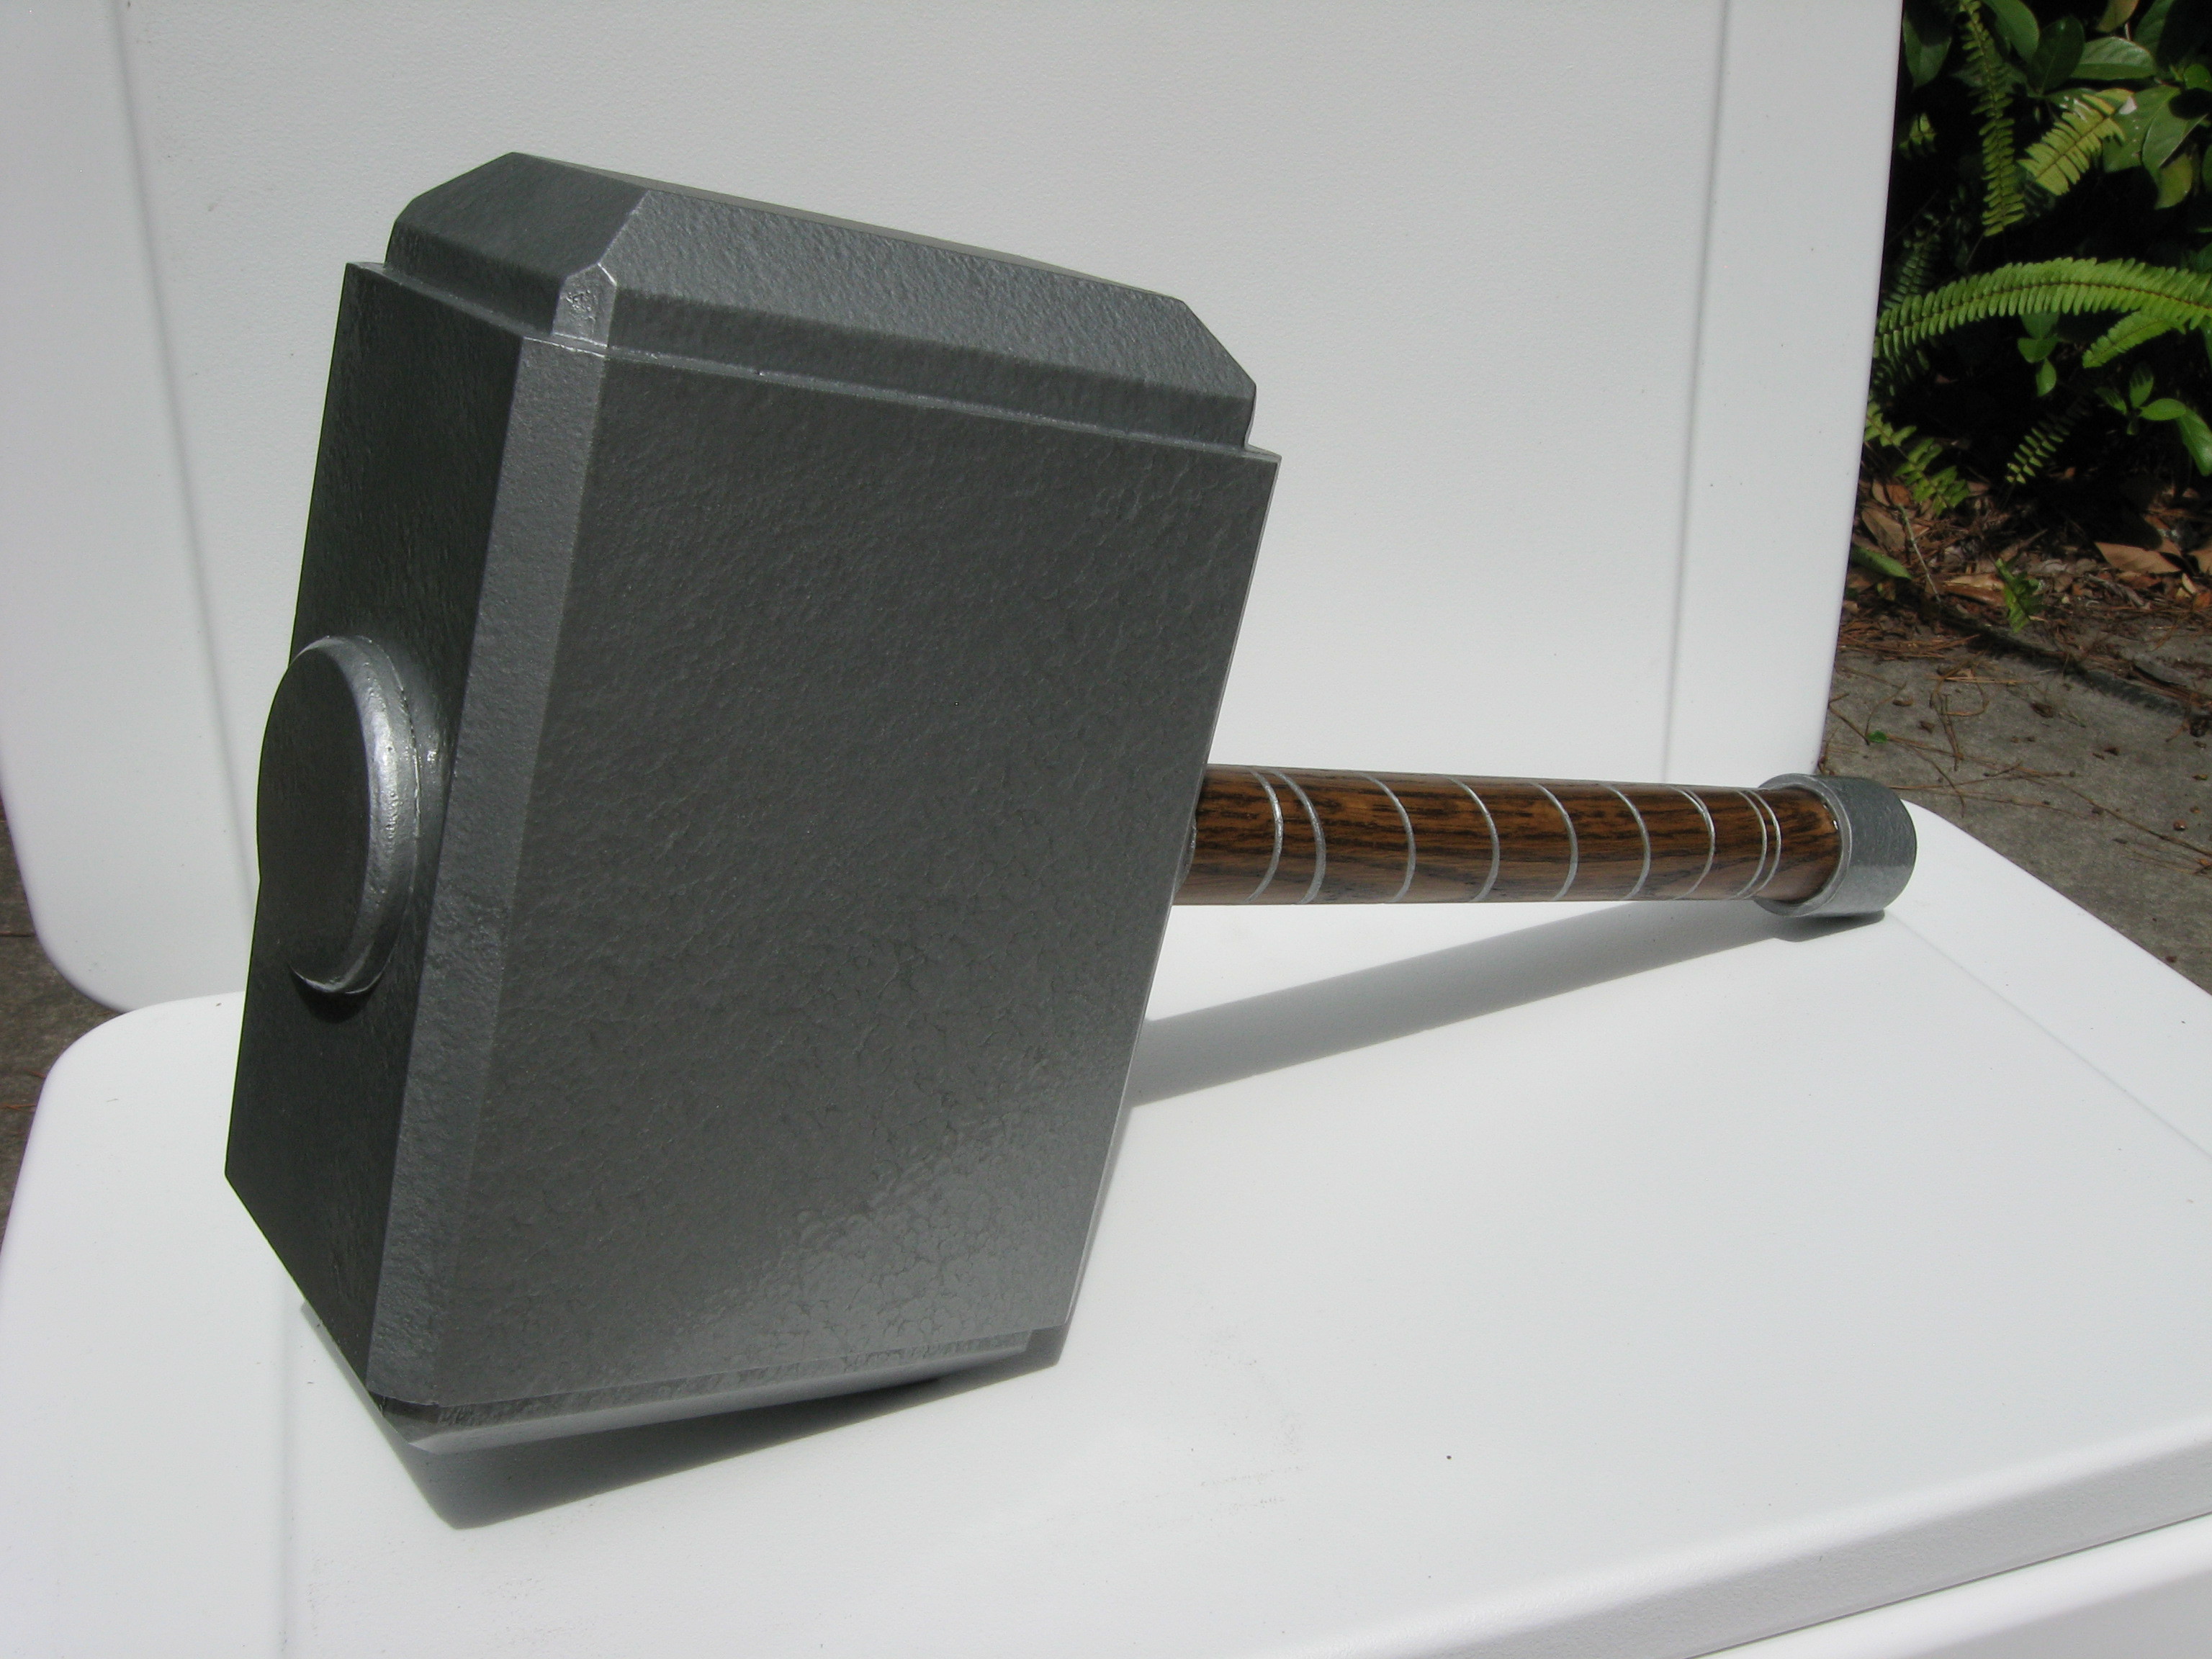
I’m not usually one to build film props, but my wife and I were waiting on line for the new Avengers movie and she said, “You know, it would be great to have Thor’s hammer.” She wasn’t the least bit serious, but her remark got the old maker gears spinning.

As soon as we got home, I was off to the internet, where I found several different designs for home-made versions of Mjölnir (the actual Norse name for Thor’s legendary weapon). The designs I found were typically of the cardboard-and-foam variety; nice enough to look at, but too flimsy to last for longer than a single costume party. I wanted something that would have more heft and look more realistic, even if I’m only going to be swinging it around the house.

For my own Mjölnir, I tried to compromise between fidelity to the film prop and ease of construction. My finished product is different from the film version in a few ways. It’s less decorated and has a carved wood handle rather than a leather-wrapped design. I also changed the proportions a bit. The film prop hammer is a bit more square where mine is rectangular, but this design allows the hammerhead to be constructed out of simple pieces of 2×4.

I’m providing specific measurements here, but this project is easy to modify. You can change the size or proportions of the hammer to suit you. Personally, I would be impressed to see someone do the black scroll-work found on the actual prop.

In the meantime, this is a good project for anyone with moderate woodworking skills. The one tool you really need is a good table-saw; something with a fence that will allow you to make very precise and repeatable cuts. Most of the rest of the work can be accomplished with hand-tools and creativity.

What will the next generation of Make: look like? We’re inviting you to shape the future by investing in Make:. By becoming an investor, you help decide what’s next. The future of Make: is in your hands. Learn More.

Project Steps

Cut four 9″ lengths of 2×4. Use your saw’s fence and make sure the pieces are pretty exact. I used Lowe’s “select whitewood” because it was cheap, but any 2×4 will do.

If necessary, square the ends with a sanding block and some coarse-grit sandpaper.

Cut the 3/8″ plywood into two 9×6 rectangles and two 4×6 rectangles.

Glue the pieces of 2×4 together. You can use any good wood glue, but I prefer Titebond.

You know you have used enough glue if some squeezes out on the ends. Be sure to wipe the excess glue off while it’s still wet.

Glue the plywood to the block of 2x4s. Use as many clamps as necessary to keep the clamping force even. You really don’t want the plywood to bend or buckle as it dries. Don’t worry too much about lining the edges up perfectly since we’ll be cutting them off in a later step anyway.

While the glue dries, sand the dowel down to 220 grit and stain about 24″ of it. You probably want to go with a dark color to get that old, weathered look. I used Minwax oil-based Mahogany, but any dark color is fine. Don’t cut the dowel. It’s easier to work on the stained portion if it’s still attached to the rest of the dowel.

You’ll need to cut three bevels to turn this block of wood into a credible hammerhead. In the picture, I’ve labeled them “edge,” “face,” and “shelf.” These cuts are the toughest part of the whole project. They require precision and a little bit of setup.

Tilt your saw blade to 45 degrees. Lay a straight-edge along the blade and use a fine-tipped marker to make a small mark in-line with the blade at the front edge of the table. We’ll use this mark to align the block and make the cuts.

You may have to make the following cuts without the blade-guard so BE CAREFUL. People cut themselves badly on table saws literally every day, so don’t take chances. Use the guard whenever possible. Use a riving knife if you have one. Use a push stick for the long cuts. Buy/make one if you don’t have one already. I made these cuts using a safety saw, so be extra careful if you don’t have access to one of these.

Make the “face” cut by making a mark 3/4″ from the corner on one end of the block.

Align this mark with the mark you previously made on on the saw table. Bring the fence in on the right so that it fits snugly against the long side of the block.

Make the first cut and check to be sure it’s straight and deep enough. If you are happy with your cut, do the parallel edge and then the same edges on the other end. Save the shortest cuts for last, since these are the toughest to do while keeping the block squarely against the fence.

I practiced this cut on a piece of scrap before cutting the block. Practicing on scrap is an especially good idea if (like me) you haven’t made a lot of angled cuts before.

At this point, your block should look like this. Now we’re going to make the “edge” cuts.

Mark your block 1/2″ from one corner. Align this mark with the mark on the table as in the previous step. Bring in the fence and make your cut.

If you are happy with this cut, make the other 3. If you set up the saw properly, you should be able to make all 4 cuts without changing anything.

To make the “shelf” cut, return your saw blade to perpendicular and set it so that it only protrudes 3/16″ above the surface of the table. Align the mark on the saw with the top edge of the face bevel you just made and make a cut.

Make the same cut around the rest of the face bevels. You will now have a series of shallow cuts right at the edge of the face bevel. All you need to do now is make another cut perpendicular to these first cuts. Set your saw at about 7/8″ (exact measurements may vary) and cut in so that the very top edge of you new cut meets your last cut and you make a neat right angle that runs around the whole face.

All of this sounds complicated in print, but it’s not hard at all. If you look at the picture and see the finished product, you’ll get the idea.

If this step seems too difficult, feel free to skip it and the next one. Your hammer will still look great.

You can get the edge bevel to continue onto the hammer face by trimming off the corners of the face bevel. Just slide a sharp razor in at a 45-degree angle until it meets the shelf and then cut off the chip you just made by sawing down along the shelf.

You are now done shaping your hammer-head. It should look similar to the picture.

The sides and faces of the hammer-head will be easy to finish, but cutting the bevels exposes end-grain wood, which can absorb much more paint and still look rough. On many projects, we would solve this problem with thorough sanding, but over-sanding on the hammer-face will destroy the nice, straight lines we’ve worked so hard to create.

To reinforce the end-grain, make a mixture of wood glue and water. I use a 50/50 mix and try to get it to the thickness of milk. Brush the mixture on the end-grain of the bevels and allow to dry for several hours.

When the glue dries, apply a thin coating of wood putty to any exposed end-grain. Use the edge of the putty knife to get even coverage and flat surfaces. Make sure all the lines still look sharp and defined.

Let the putty dry overnight and then sand lightly with a sanding block and 220-grit paper. You can sand the shelf with a piece of sandpaper wrapped around a small wood block with a square edge.

Sand the rest of the hammer-head with the block and 220 paper.

Pick one narrow side of the hammerhead to be the bottom. Find the center of this side and use the 1-1/4″ spade-bit to drill a hole roughly 2″ deep. The exact depth doesn’t matter because you haven’t cut the handle yet.

Because of the height of the block, you may need to be a little creative with your clamps. I used several pieces of scrap wood and two bar-clamps to secure the block to my drill-press table.

To make the cap for the top of the hammerhead, cut a 2-1/2″ disk of 1/2″ plywood, screw it to a stable surface, and bevel it with a router and a 3/8″ round-over bit.

Or, if that sounds like a pain (and it was), just cut the disk out of 3/8 plywood and sand the edges a bit. If I were doing it again, I’d go this route.

Glue the cap to the top of the hammerhead.

The hammerhead is done for now. Set it aside.

Time to decorate the handle. You can do any design, but I chose a combination of circles and a spiral because they mimicked a leather-wrapped handle.

Before you decorate, decide on the length of handle you want to extend out from the hammerhead. Remember that about two inches of the handle will be inside the hammerhead and another inch or so will be inside the PVC cap. Mark these points on the dowel and be sure to do your decorating only on the area that will be visible after the parts are fitted together.

To make a circle, wrap the dowel with two bands of masking tape, about 1/8″ apart. Start a groove between the bands with the triangular file. You can then widen and smooth the groove a number of ways. I used a bass-guitar string held with a pair of vise-grips, but a small, round file will work, too.

You can do a spiral the same way. Just wind a single, long piece of tape so that the edges are about 1/8″ apart. Keep the masking tape on the whole time you are working on each groove to protect the finished wood.

As you finish each groove, peel off the tape and check to make sure that you didn’t damage the stain on the edges of the groove. Small scrapes can be fixed with a little stain on a toothpick.

Re-mask the grooves and paint them with the silver acrylic paint and a small brush. Let each groove dry for about 1/2 hour and then peel off the masking tape.

When the grooves are all decorated, spray the whole handle with several coats of clear acrylic. Let it dry for an hour and then buff lightly with steel wool. Sand the finish off the part of the handle that will be inside the hammer-head. Cut the handle to length.

Sand any lettering or markings off of the PVC cap, paint it with the Rustoleum Hammered Finish Silver Paint, and let it dry for at least an hour. When it’s dry, scuff the inside of the cap with sandpaper and epoxy the cap to the end of the handle. You may need a small shim to make it fit snugly. I used a strip of plastic from a drill-bit package. Allow the whole handle to cure overnight.

Spray the hammerhead with the Rustoleum. You don’t need to prime, but you do need two coats for the full “hammered metal” effect, which really helps keep the hammer from looking like painted wood. I recommend doing each surface one at a time. Lay the hammerhead so that whatever surface you are spraying is facing up. Paint with even strokes and aim for a moderately heavy finish. Let each side dry for an hour before moving on.

Coat the end of the handle with wood glue and insert it into the hammerhead. Dry-fit the parts together before you add glue. If the fit is very tight, file some small channels into the sides of the handle to let glue and air escape as you insert the handle. Stand the hammer on its head and allow it to dry overnight before handling.

Conclusion

Now you can impress your friends with your sick hammer-making skills. You might not have Thor's abs, but at least you can swing his hammer.