Even in an age of emails and texts, stamp collecting is still a favorite hobby of adults and kids. You can explore and learn about lots of things: geography, history … and toys.
There are lots of U.S. postage stamps that commemorate classic toys, and some novelty stamps are toy-like and fun in themselves!


These USPS stamps are scented with the real scratch-and-sniff aroma of ice cream pops — fragrant philately!

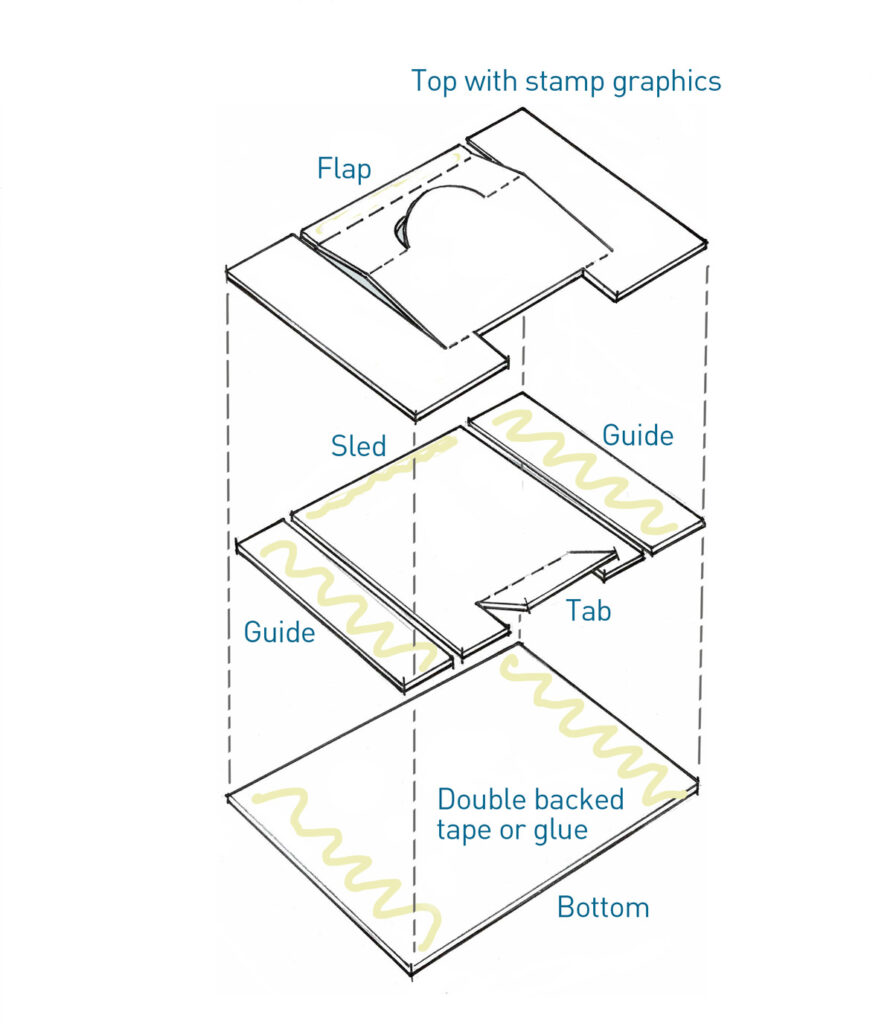
This 2012 stamp from the Netherlands (below) was made to commemorate a Children’s Book Fair. This gummed stamp is a working pop-up toy. The cleverly engineered three-layer design has a top layer with the stamp graphics, a middle layer with a “sled” between two side guides, and a base layer. When pulled, the sled slides along, bending and folding a flap, which pops up revealing a cut-out shape. When pushed, the stamp goes flat again.


The latest toyetic stamp design is this sheet of “Message Monsters” from the USPS. They’re real “Forever” postage stamps but with a fun gimmick: the border of the peel-and-stick sheet is filled with extra stickers of hats, talking balloons, hearts and stars. Use the silly monster themed stamps on your mail, then add the extra stickers to make your own silly monster designs!
(Tip to parents of little kids: cut the fun “free” stickers off from the sheet of stamps — before they use up the expensive stamps on non-mail!)


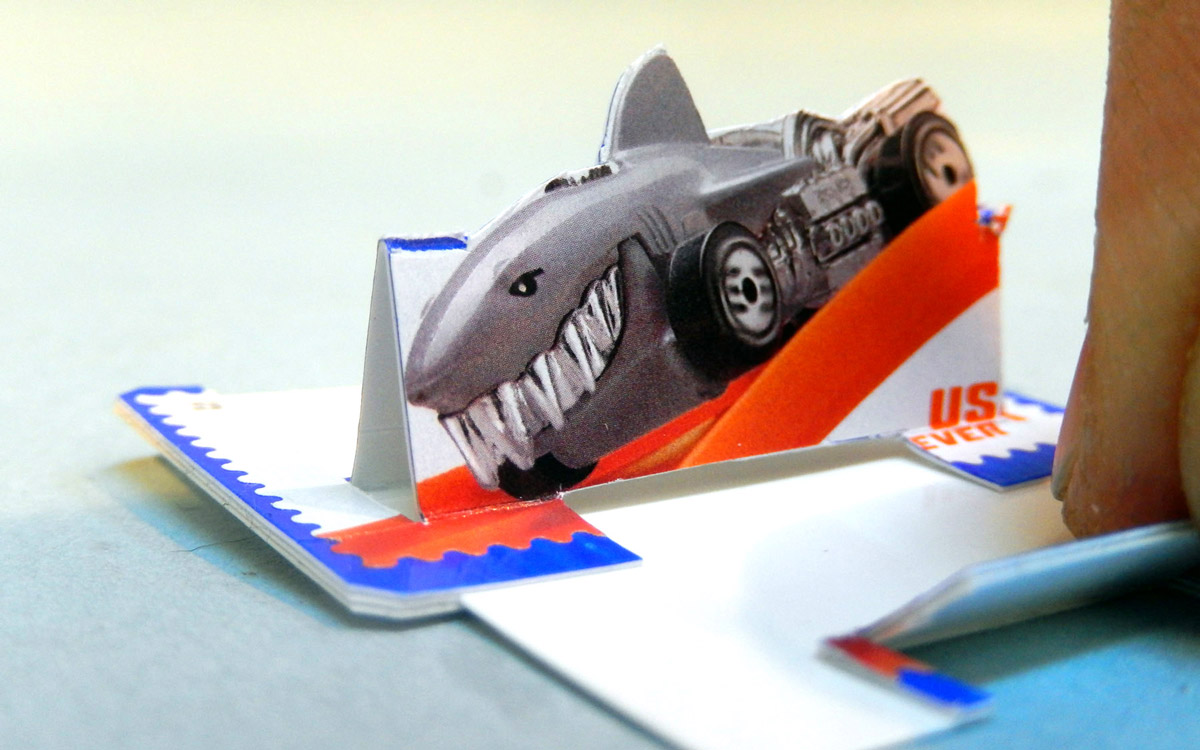
You can make your own pop-up stamp like I did. I used a USPS commemorative stamp of a Hot Wheels car on some heavy paper.
Project Steps
Make a Pop Up Stamp
First, choose which part of your image you’ll make “pop up.” With a sharp hobby knife cut two slits to make a flap, then cut around your pop-up shape. Gently score on the fold lines with a nail or hard pencil. For best pop-up effect, the middle fold line should be centered between the other two folds.
Cut out a sled and two side guides from more heavy paper. Make the sled a little wider than the width of the flap and cut two slits to make a little pull tab. Use double-backed tape or glue to fasten the guides onto the base so the sled slides smoothly between them.
Then tape the guides to the top and use a tiny strip of tape to fasten the flap to the very end of the sled. Cut and glue a matching tab from the stamp to cover the sled tab. Lastly, trim all three layers to a neat, final size.
You can make this sliding pop-up design with any size printed image: greeting card, photograph, drawing. Go wherever it leads you!
Conclusion
Find more fun novelty stamps with the Exploring Stamps YouTube channel.
This article appeared in Make: Volume 77.


