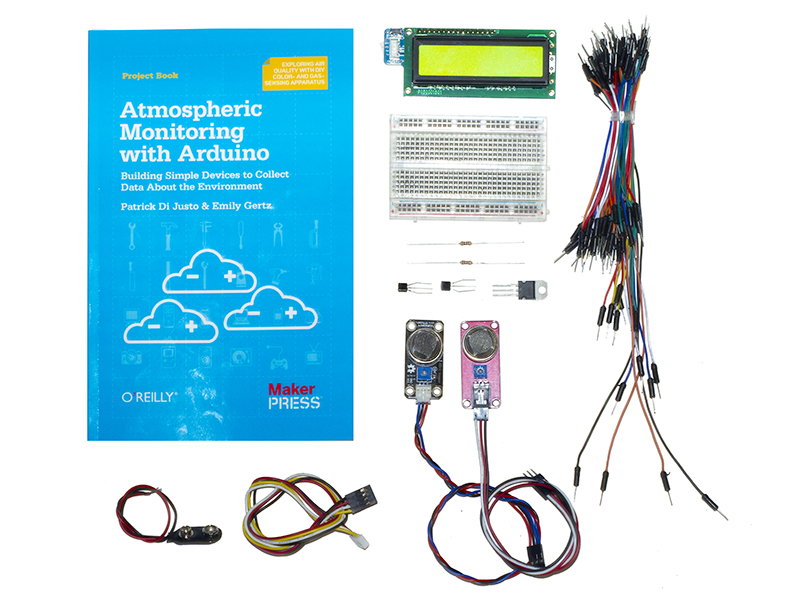
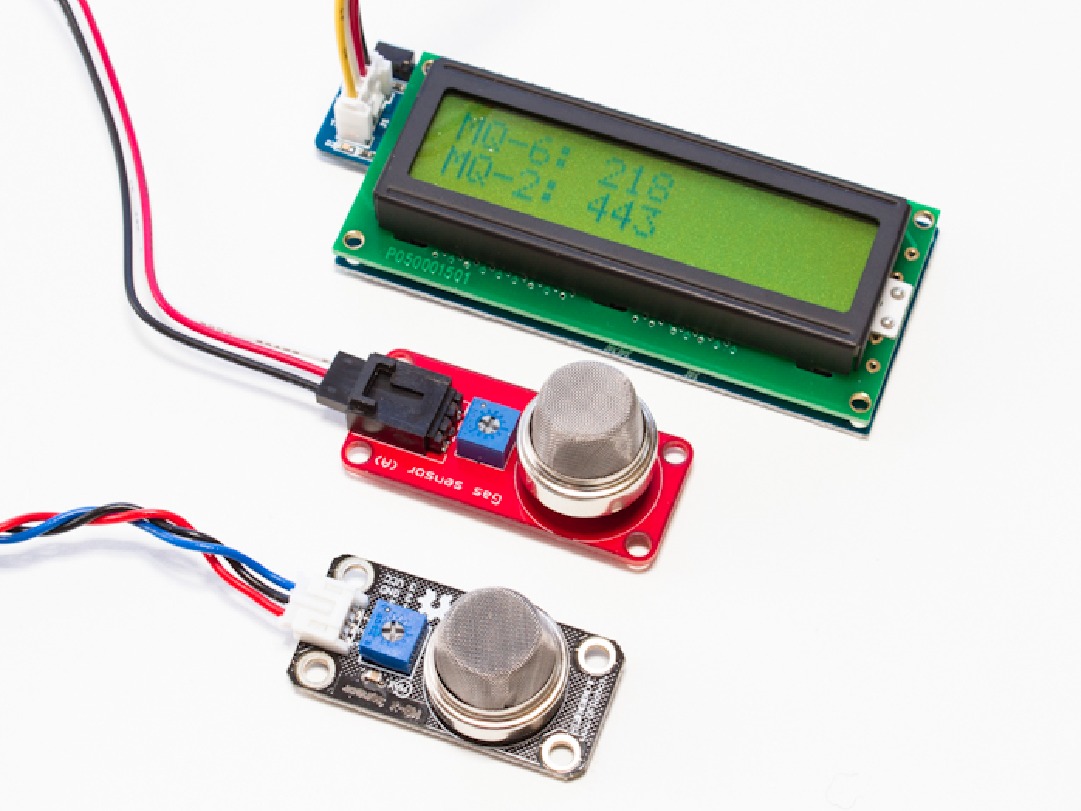
All components required for the build are included in the Maker Shed Atmospheric Gas Detector Kit. Directions come directly from the Atmospheric Monitoring with Arduino book, which is included in the kit.

Before you begin: The two gas sensors are shipped in separate, labelled, bags but look identical (unlike the sensors shown in this project). In order to differentiate between the two, mark one of them with a Sharpie, or another method, immediately after taking them out of the bag.

What will the next generation of Make: look like? We’re inviting you to shape the future by investing in Make:. By becoming an investor, you help decide what’s next. The future of Make: is in your hands. Learn More.

Project Steps

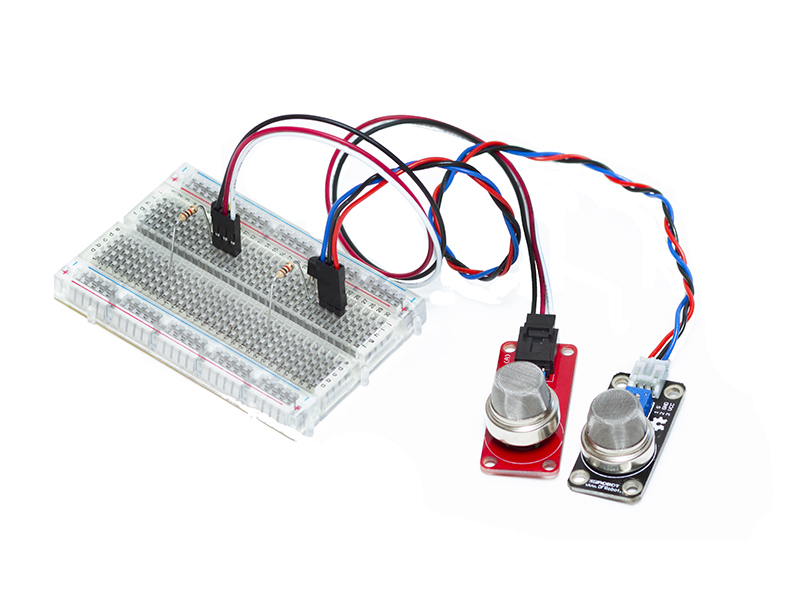
Make sure you have all the parts necessary for the build. Everything you need, other than an Arduino, is included in the Maker Shed Atmospheric Gas Detector Kit.

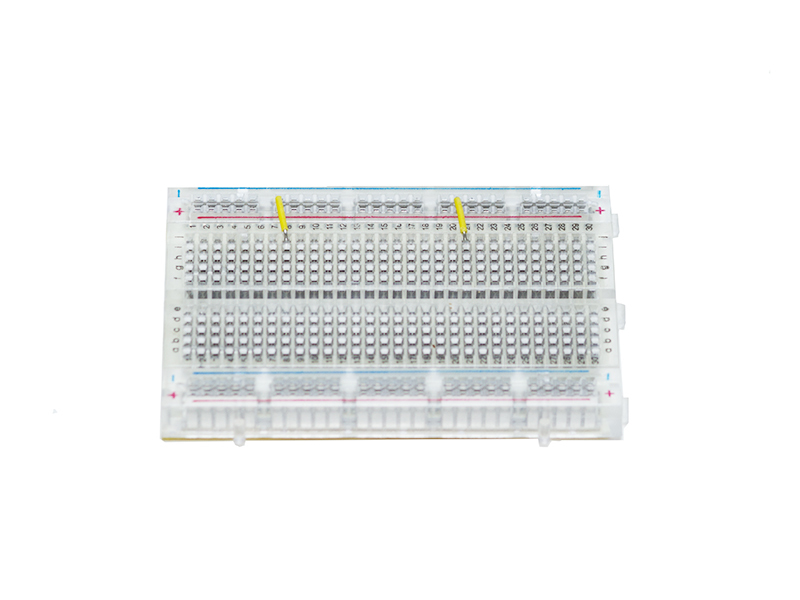
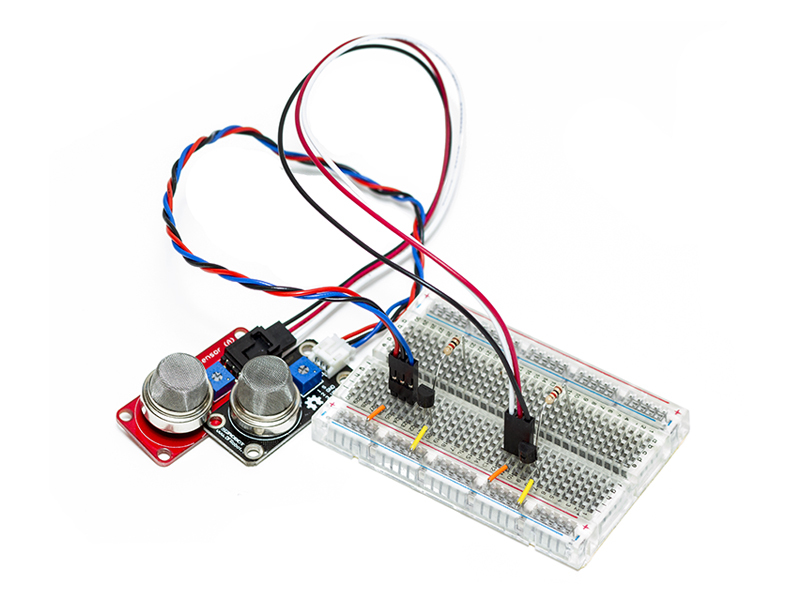
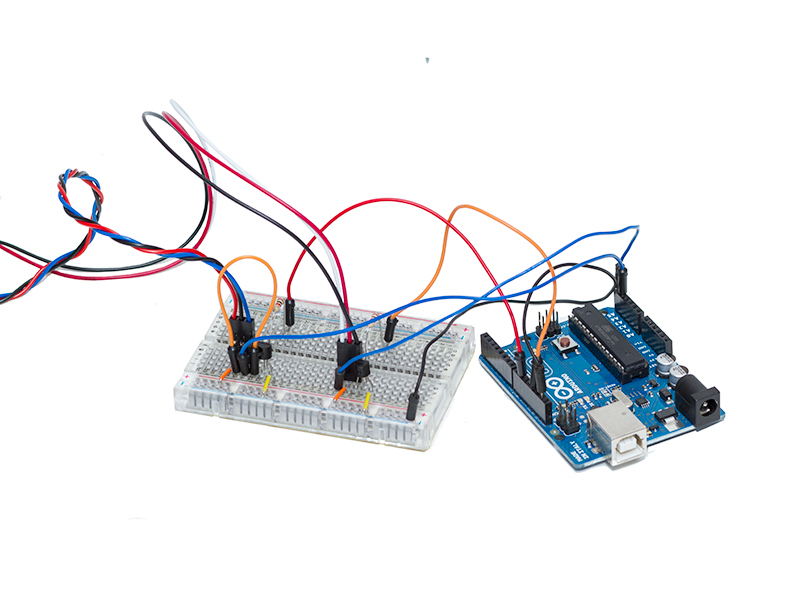
We’re going to start with the ground rails on the breadboard. Wire them up like the photo!

Your placement doesn’t have to be exact – as long as you’re getting GND to two rows on the breadboard with a reasonable distance between them, it’s all good.

We’ll be using a few flat jumper wires to assemble this device for the sake of photography, but the flexible jumper wires included in the kit will work just fine.

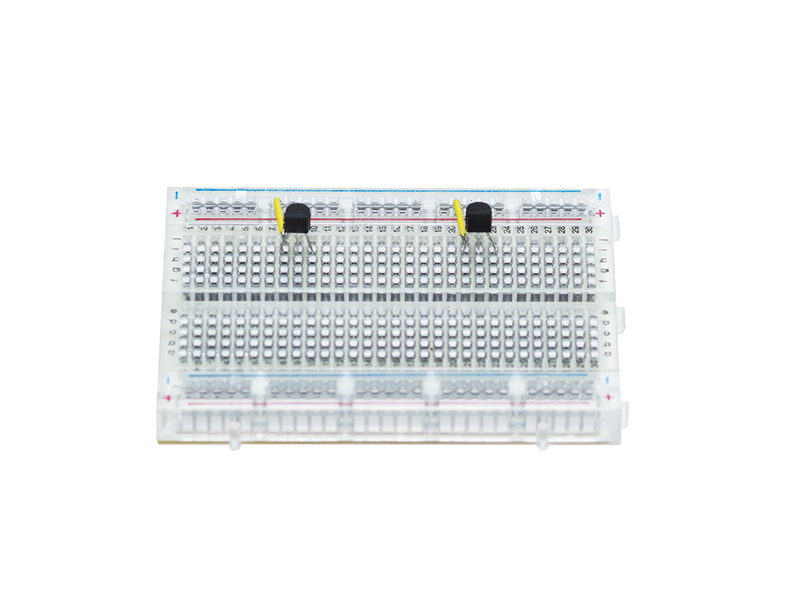
Next, place the transistors on the breadboard. Their collector leg, the left-most one when the flat part of the body is facing you, should go to GND.

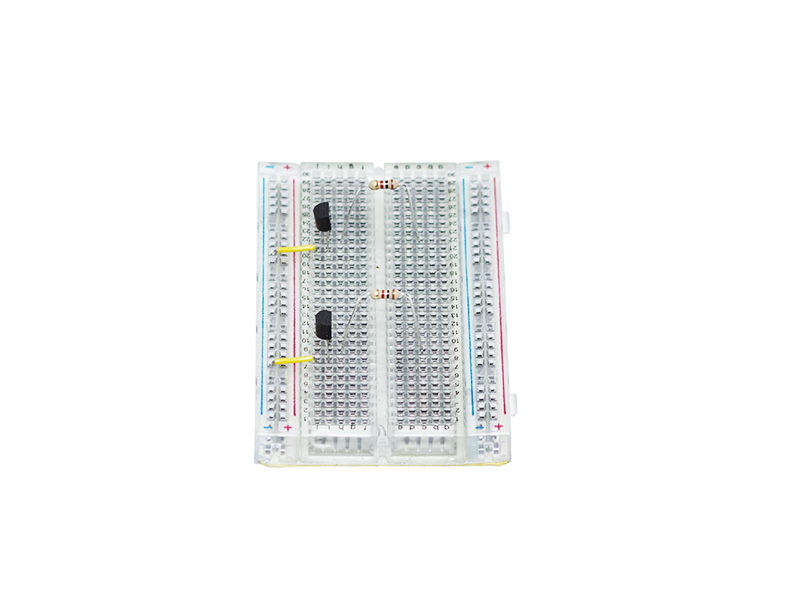
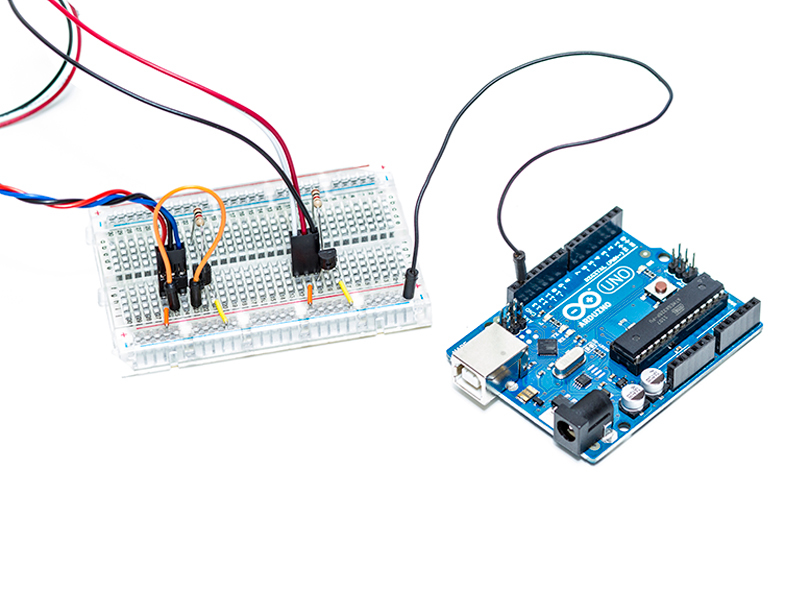
Now wire up the two 1kΩ resistors. They should go from the base leg of each transistor (the middle one) to the opposite side of the breadboard, as shown in the second photo.

Next, add the two gas sensors. The sensor cables have male headers on one end, so they can be plugged right into the breadboard. The black (GND) wire should line up with the emitter, or rightmost, pin of the transistor. Repeat this process for the MQ-2 sensor.

If you haven’t done so already, now would be a great time to get some power to those sensors, via the power rail on your breadboard. Use two jumpers to connect to the red wires of each sensor cable from the rail.

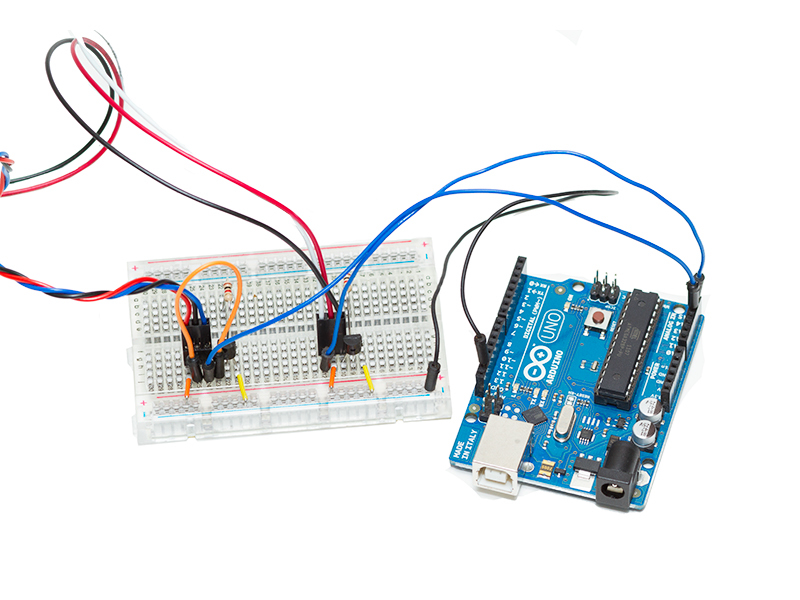
Now use a jumper to connect the GND rail on your breadboard to one of the GND pins on your Arduino board (not included in the kit).

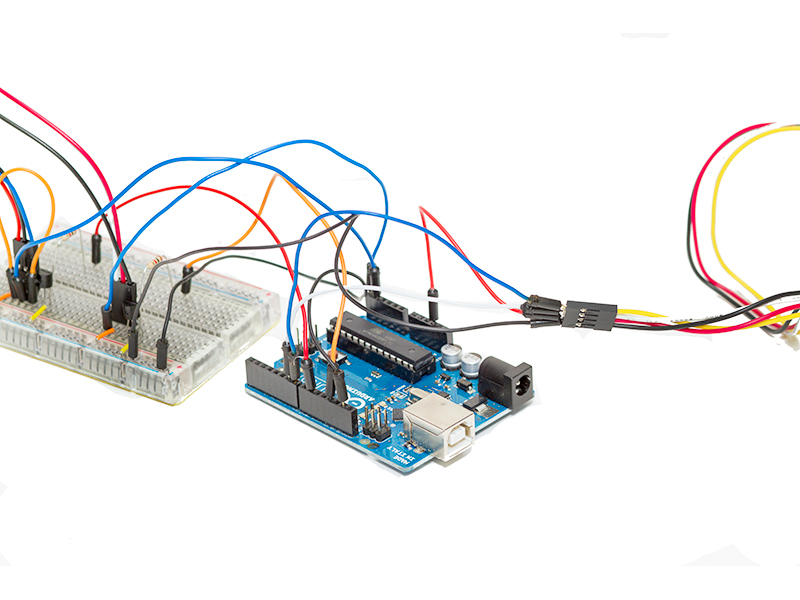
Now connect the MQ-6 and MQ-2’s data wires (colored white) to the Arduino. The MQ-6 goes to A5 and the MQ-2 goes to A4.

Next, Digital pins 12 and 9 on the Arduino need to be connected to the MQ-6 and MQ-2 resistors, respectively. The Arduino will use these pins to activate the heaters inside each sensor.

Now it’s time to plug in the LCD. Connect the four-pin cable to the LCD breakout board, and four jumpers to the other (black) end of the cable.

Hook the VCC pin (red) up to the 5V rail on the breadboard, the GND pin (black) up to a GND rail or pin, the white (RX) to Digital Pin 5 on the Arduino, and the yellow (TX) to Digital Pin 3 on the Arduino.

When it comes to powering the device, you can plug your Arduino 5V output into the power rail on the breadboard, or refer to page 21 of the book for a way to power the circuit with the included voltage regulator and 9V battery clip.

And that’s it, you’re done! You can find some “Getting Started” code for the Gas Detector here and refer to the Atmospheric Monitoring with Arduino book for ways to expand the project.