


Wood turning is a fun hobby that is simple and satisfying to pick up. Turning has been around for centuries and it’s no surprise why — the results are stunning, and even easy turning projects can give a professional feel to many a design. I’ve been surprised where I find myself using it. I like the personal feel of being able to turn small pieces of timber I’ve gathered myself into useful parts for various projects, from tool handles to kitchen utensils.
In this project I show how to make your own simple wood turning lathe using 3D- printed parts and some hardware you may already have on hand. The print job is simple but the build requires some hand tools and electronics knowledge.
A full video tutorial is available online, along with all the files to print the parts, at Printables. Here I’ll provide some build notes about the important components.
The Base
The base of the lathe consists of a few simple pieces of lumber, arranged as shown. Apart from the obvious size decisions, there are two essential design elements in the base: the gap down the middle of the boards and the gap under the boards. These two gaps allow you to adjust the tailstock and tool rest clamping mechanisms; both of these components have a threaded rod that clamps under the lathe using a knob. Originally I didn’t have this system in place and the tailstock was unusably wobbly.

You could do without this setup and attach the lathe directly to a bench if you were to use a fixed tailstock, but this limits you to turning one length of timber, which could be wasteful for smaller projects.
The Bed
The bed consists of the four components shown. The two end pieces (orange) attach to the V bed (red) via four threaded inserts. The headstock is then bolted on, and this assembly is used as a template to drill the holes for mounting it to the base.

Once this assembly is mounted, the headstock is then removed and a special headstock template piece is used to align the final four holes, as shown. This assembly is designed to be simple to assemble and mount.

The V bed is shaped this way so when the tailstock clamps down, the bed is compressed on the V of the tailstock, keeping it more firmly in place. The only downside of a V-shaped bed like this is that it is harder to clean, but not by much.
The Headstock
Once the headstock template is removed and the headstock is replaced, it can be secured using two wood screws and four 3/16″ threaded rods. These rods run the length of the headstock and clamp it down securely under the base.

The headstock is the strongest part of the whole lathe, and for good reason. Because the workpiece is attached to it, if something goes wrong the headstock will have to take the bulk of the force. 3D prints are weakest along their layer lines, and I wanted to avoid failure via layer separation. These rods prevent it — for the layers to separate completely, the nuts on the threaded rods would also have to fail — making the lathe much stronger.
You could theoretically print the headstock in another orientation, however this runs the risk of splitting the print when tightening the rods, which are still required regardless to keep the headstock rigid.
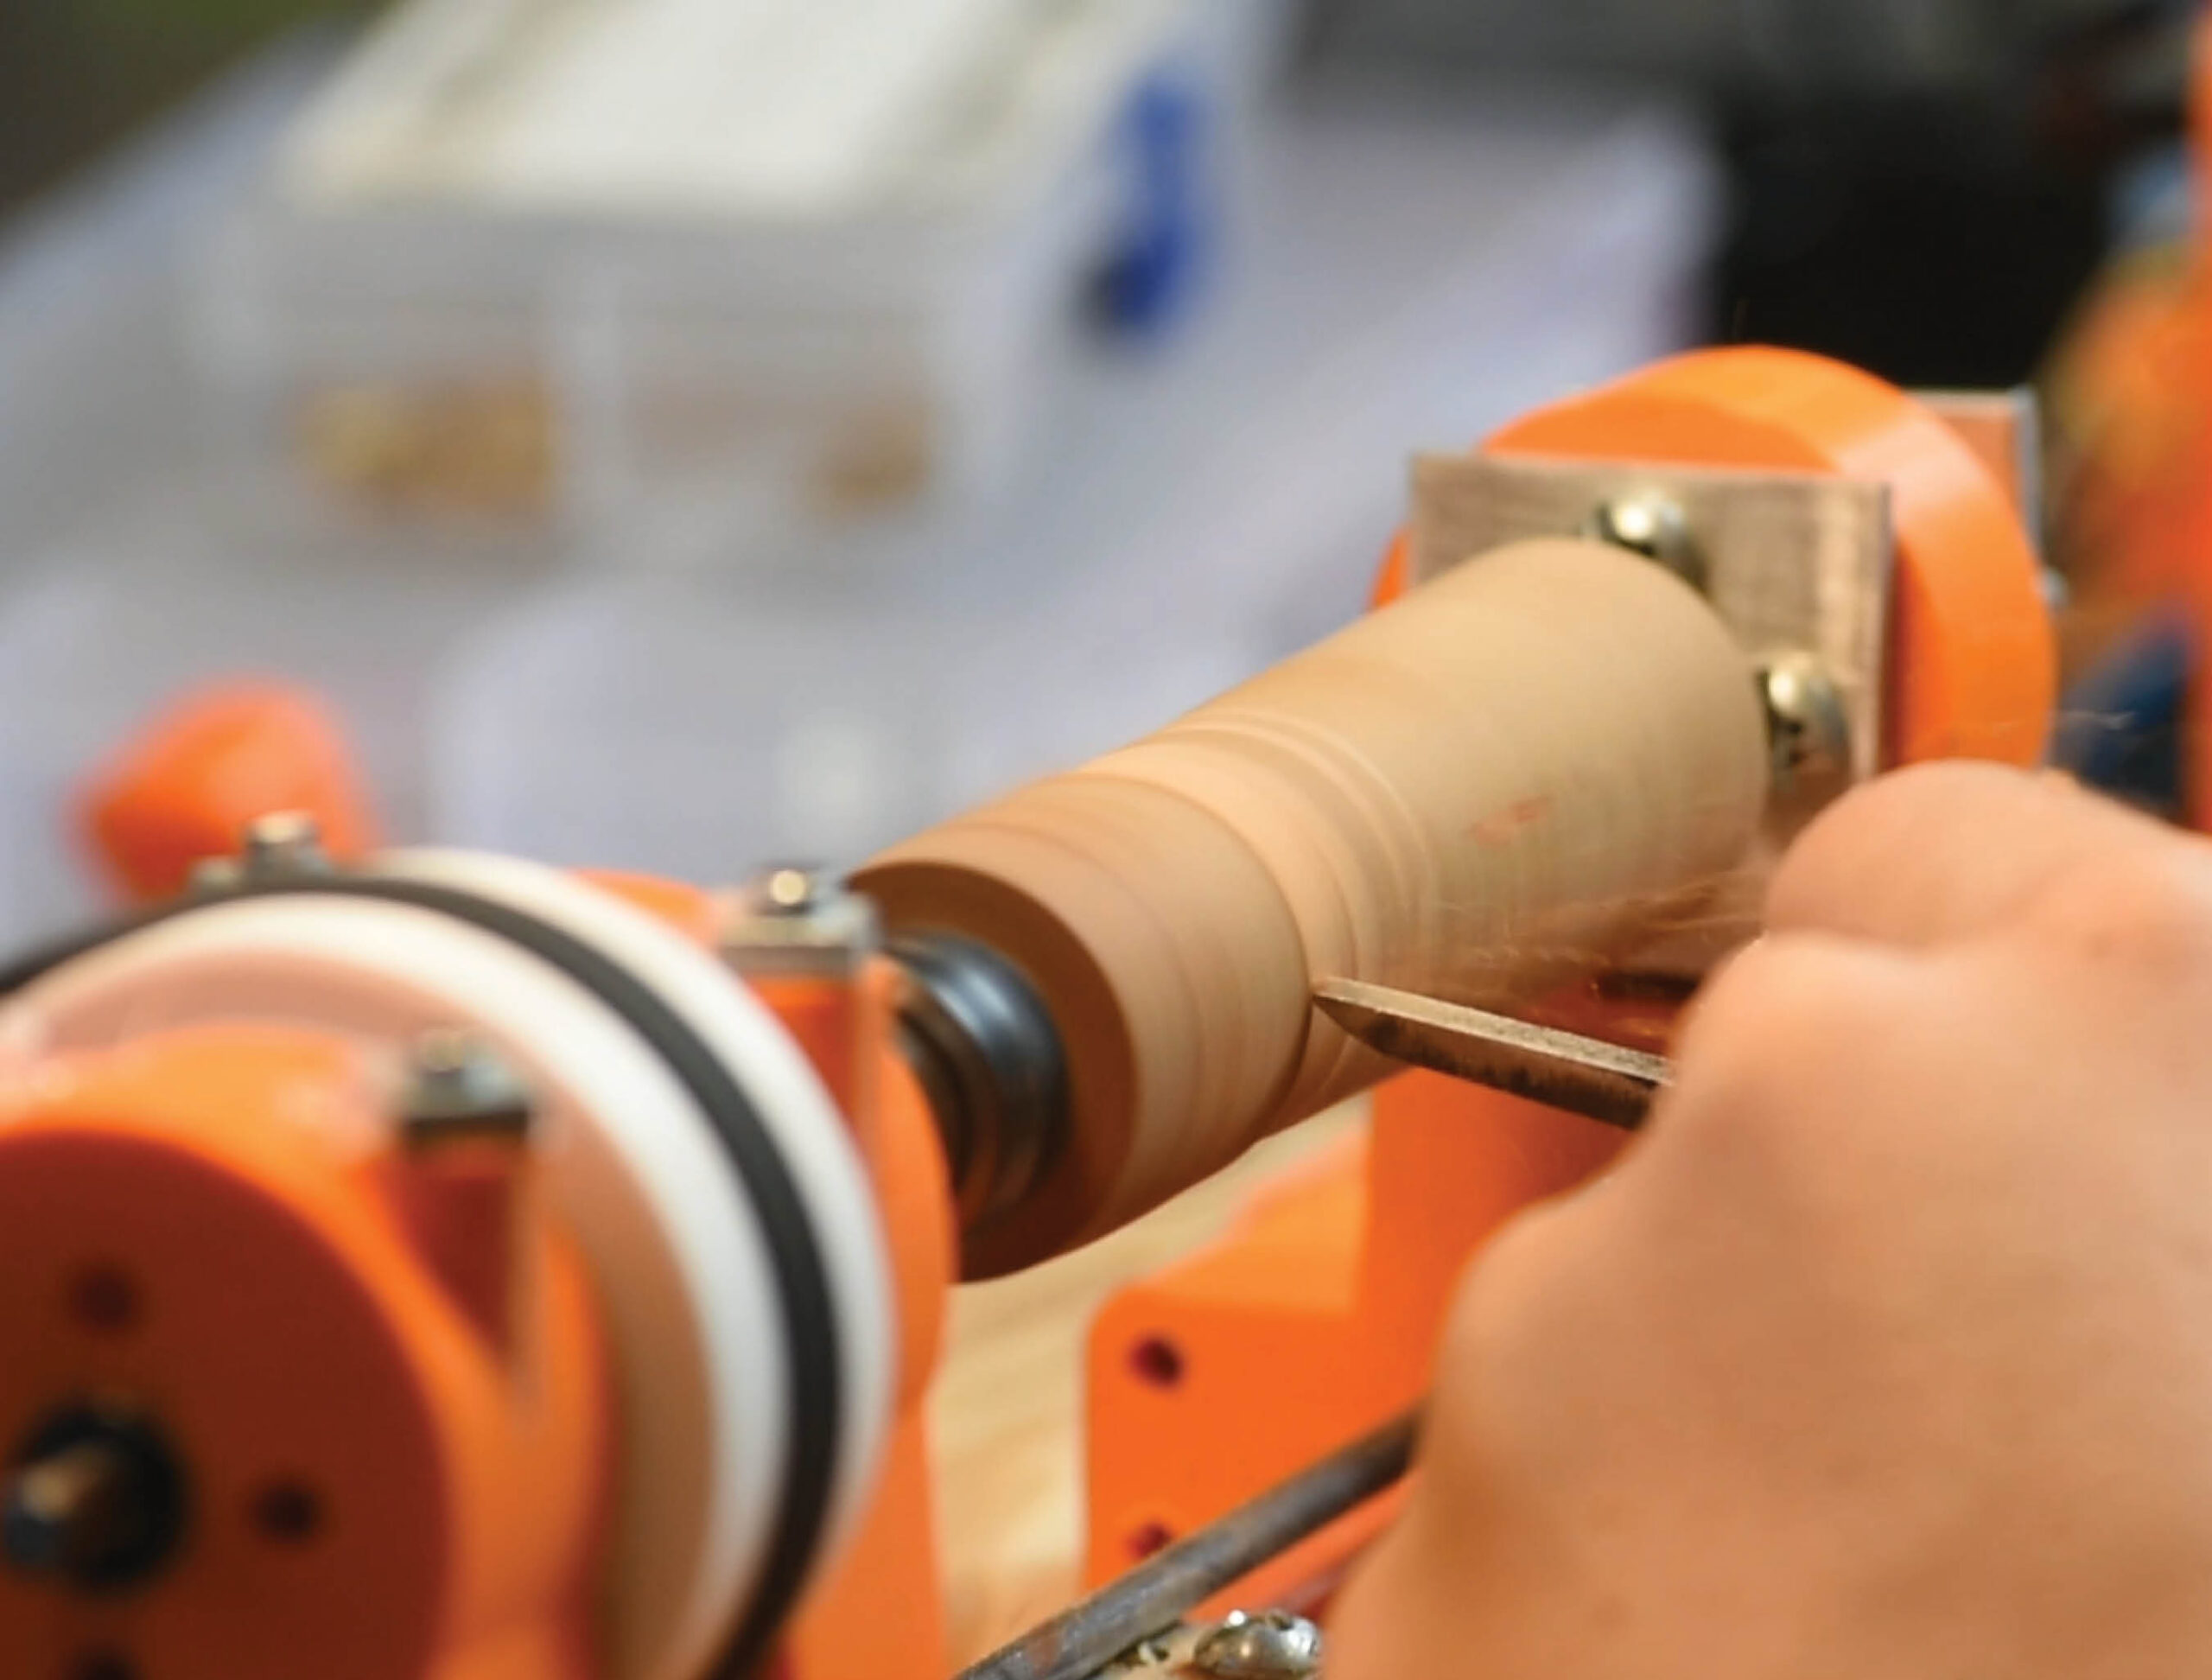
Apart from these rods the headstock is constructed from four bearings, a length of 5mm stainless steel rod, a pulley, and an ER11 collet chuck. I chose this collet chuck because it’s pretty affordable and allows me to mount using a wide range of hardware. To mount my workpiece I usually just use a wood screw with the head cut off, and this has worked well for me.

The Tailstock
The tailstock was actually the most complicated part to get working, and had the most failures, but this latest design has worked well. The tailstock consists of three aluminum plates, two bearings, a center (a bit of sharpened rod), and a threaded rod to clamp it all down. The tailstock can also have pressure applied from behind as shown, to further increase its rigidity.

Early tailstock designs without this clamping force would shake loose and break if I let them run for long enough. (Usually it’s immediately evident that a design didn’t work and I’d stop the test.)
Another issue I had with the tailstock was the bearings overheating and melting the housing, which interestingly isn’t an issue I’ve had with the headstock. The aluminum plates are how I overcame this. The three plates function as a stronger guide for the tailstock, and also act as a heat sink. With this setup I’ve had zero failures of the tailstock.
Tool Rest
The tool rest comes in two versions: a simple 8mm rod that runs the length of the workpiece, and a new, more compact, adjustable “T rest” version. I’ve used Version 1 for many projects without much issue, but being able to get the tool rest closer to the workpiece is useful for wood turning, so I designed the new T rest to allow adjustment for a variety of workpiece sizes.

Motor
The best option here is a sewing machine motor. They are powerful, readily available secondhand, spin at an ideal rpm, and usually run off a foot pedal, which is great for both control and safety. I use the default belt that came with the sewing machine motor, and I designed a pulley to fit it. I’ve also experimented with leather belts, like those used for small horological (watchmaking) tools; these worked fine and are easy to make in whatever size you need, but I found the original belt to be more convenient.

Some other motor options include drills, which run at a good rpm of up to around 2,000 with high torque, or a geared-down DC motor off from somewhere like eBay. I’ve found that 2,000–3,000rpm is OK for a tiny lathe like this but you would not want to do big turning at those speeds! Rotary tools are unfortunately too fast with not enough torque — a Dremel for example runs at 36,000rpm which is much too fast to be safe. It might be possible to gear down a Dremel to work, however.
Chisels
To use the lathe you will need chisels, and while not ideal, regular wood chisels can work, at least at the beginning. If you find you enjoy woodturning, it’s definitely a good idea to get proper turning chisels, aka lathe chisels — it’s faster and won’t ruin your bench chisels.
Turning Projects
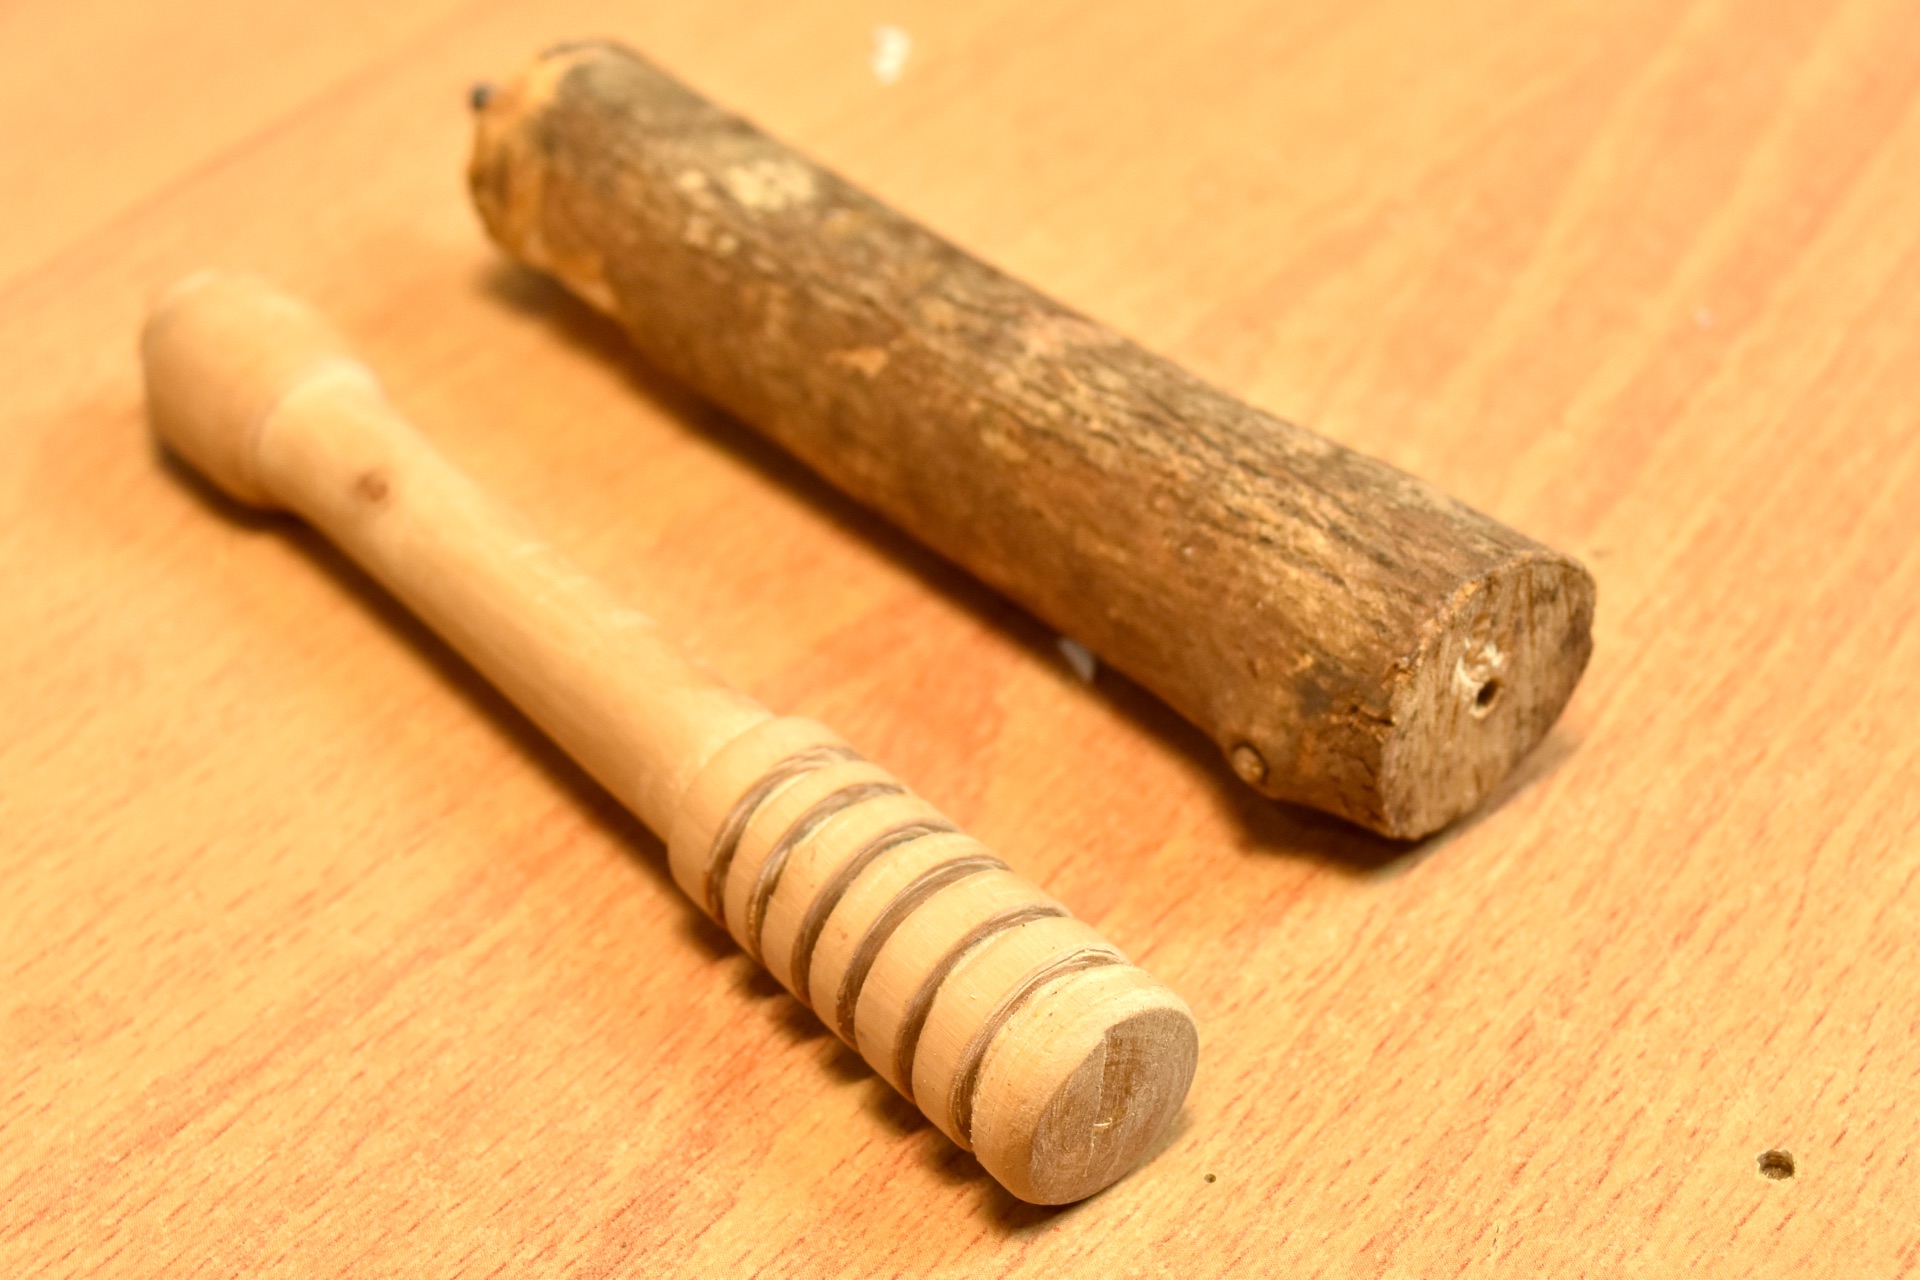
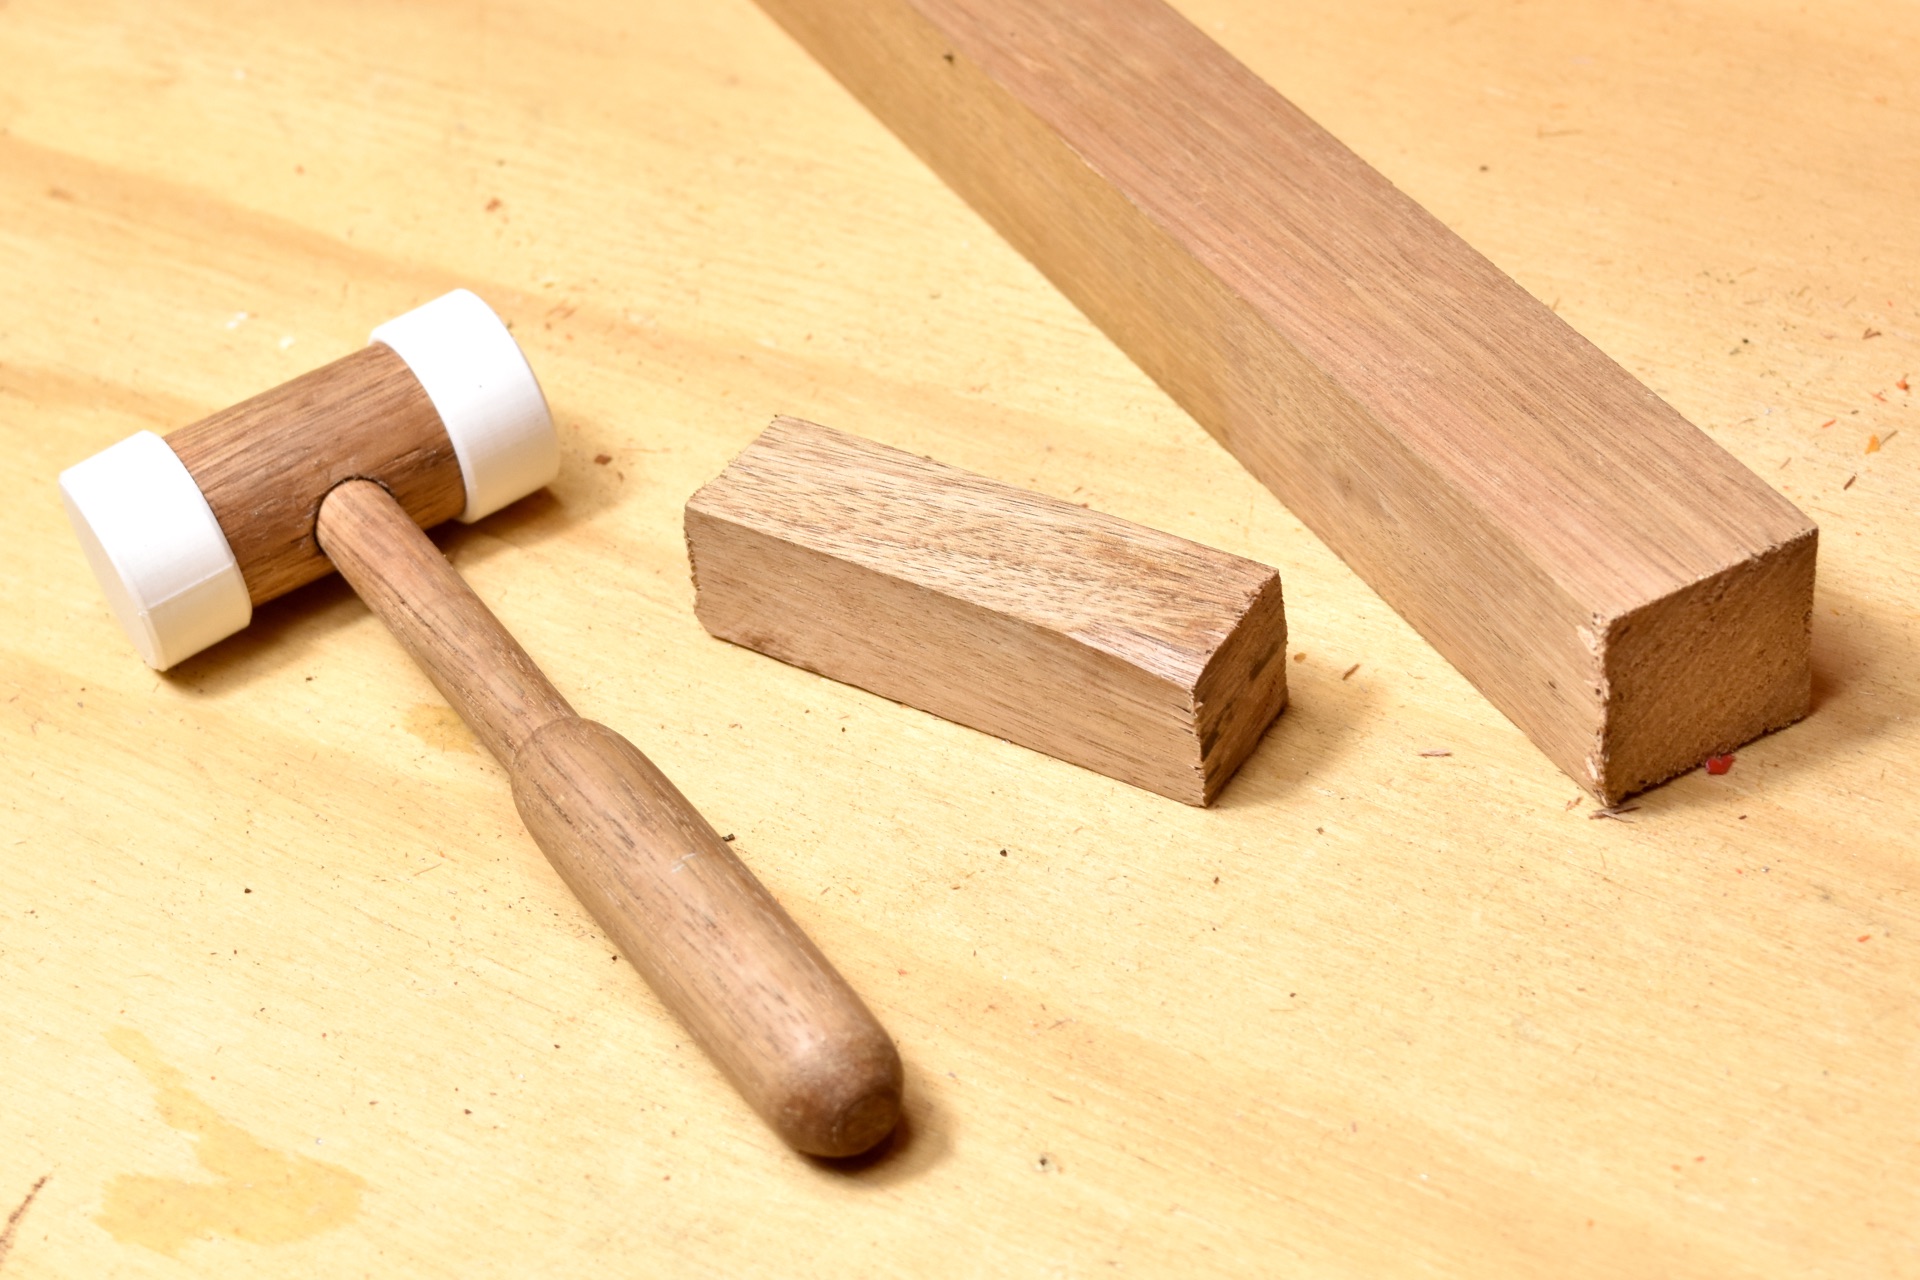
Finally, pictured here are some projects I’ve done on this lathe, including what each one started as, and how it ended up.

As you can see, it’s more capable than just turning bits of dowel! The tool handle shown uses a chunk of Australian red gum that’s over a century old and hard as a rock, as well as being very unbalanced. I considered this the ultimate test for the lathe and it handled it flawlessly.
Other projects include a honey dipper stick from an olive branch, and a tiny hammer from Tasmanian oak, which found use as a gavel for an 11-year-old’s debating class, and survived!


Fun and Functional
This lathe is a cheap but capable option for someone who is only just starting out, or perhaps has very little space. It works well, but there is plenty of room for improvement. The back of the headstock, for example, has another mounting rod sticking out which could accept perhaps a small disk sander or grinder attachment to add extra function to the machine. I’ve also thought about using a belt printer to print a longer V-bed; a goal of mine is to get it long enough to turn my own drumsticks on it.
Overall it’s a fun weekend project and a great example of how 3D printing can be used for making functional parts.
This article appeared in Make: Volume 79.


