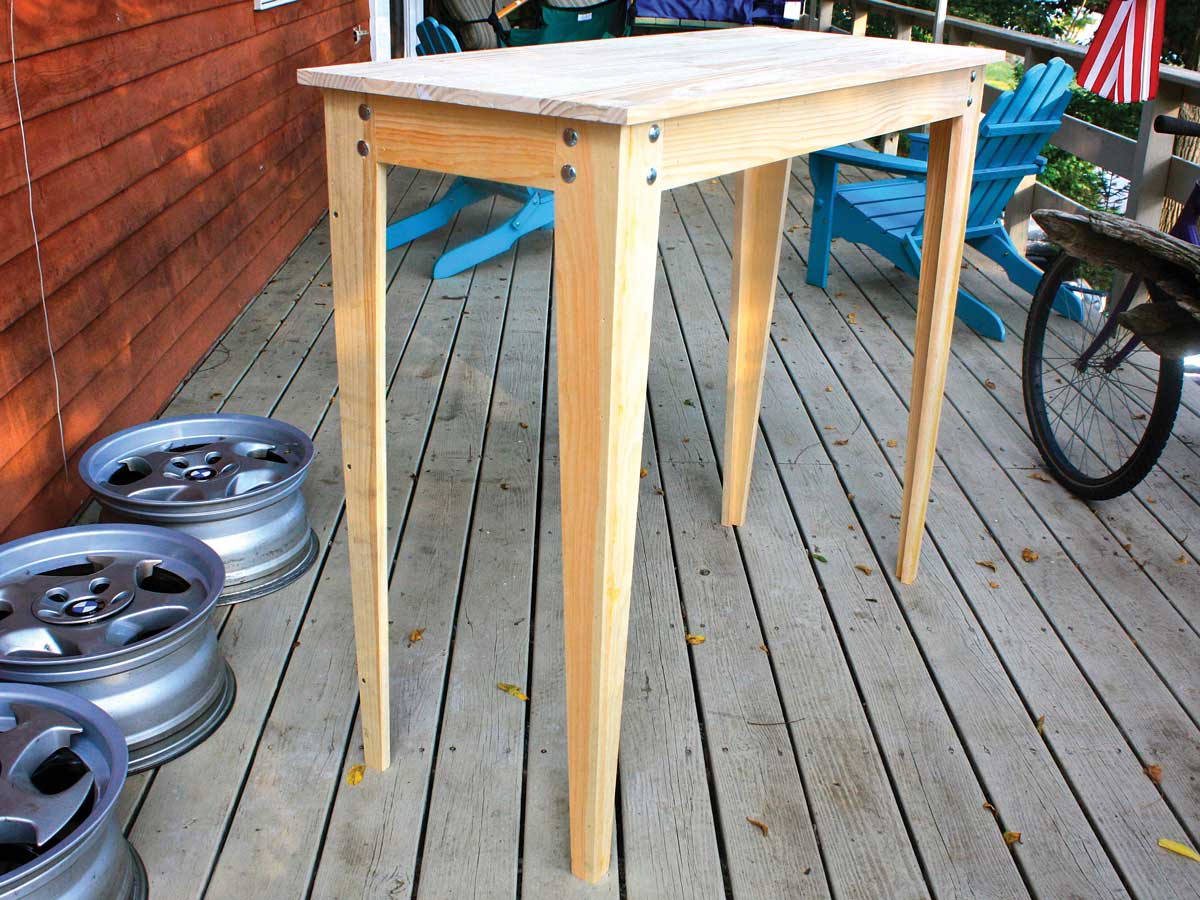
M36 two hour table opener

You’ve heard the old joke: A thing can be built fast, good, or cheap — pick any two of these qualities. Well, I like fast, good, and cheap. With this table I wanted all three.

I wanted an enduring shape with tapered legs that would age gracefully, hold plenty of weight, and weigh no more than a decent wooden chair. Using inexpensive, off-the-rack materials from a big-box lumberyard, I wanted to load up with supplies after work and have the table done before dark. That gave me about 2 hours from first flying sawdust to cleanup.

What will the next generation of Make: look like? We’re inviting you to shape the future by investing in Make:. By becoming an investor, you help decide what’s next. The future of Make: is in your hands. Learn More.

Project Steps

Shop and chop.

I started with a shrink-wrapped, edge-glued and finger-jointed, 3/4″ thick, kiln-dried pine panel measuring 48″×20″. For some projects these “convenience” panels are perfect. They’re durable, they don’t delaminate or require edging like plywood, and they provide a square and accurate reference for building the rest of the table.

I also grabbed seven 8-foot pine 1×4s and sixteen 2″×2″ carriage bolts with washers and nuts. You’ll save big if you buy these bolts in bulk or find a farm supply store that sells loose hardware by weight, not by the piece.

I rolled my table saw and chop saw out of the garage and onto the driveway to minimize indoor cleanup.

Clamping 4 of the 8-foot 1×4s together, I gang-cut all 8 pieces for the legs with just 3 chop cuts. The length? Whatever you like, as long as all 8 match. I chose 41″ so I’d have a few nice, square-ended scrap pieces to use for temporary mounting blocks later.

TIP: Time sands all wood, I say. Choose materials that can take a beating and age

gracefully. That’s why I avoid veneers and laminates. Solid lumber will withstand abuse

(and refinishing) over the years. Oh, and I like wood-filler, primer, and paint for projects like this. Once painted, this table will last for centuries.

Make a taper jig.

I love taper jigs. They take only minutes to make and, for projects like this, you can eyeball the layout start to finish.

You’ll run the entire jig through your table saw between the fence and the blade, with the table leg piece attached to it. The blade will remove the part of the leg extending beyond the edge of the jig. If the jig holds the leg at an angle, the result will be a tapered edge. The taper can be whatever angle you like, as long as the last 4″ of the leg remains untouched by the blade. This keeps the leg tops square and parallel for final assembly with the tabletop.

To make the jig, I placed a leg piece on top of the jig’s backing board at an angle that looked about right, being careful to keep the top 4″ of the leg from extending beyond the edge of the backing board. Then I screwed down 2 scraps (of the same ¾” thickness) to backstop one side and the top end of the leg piece. Next, I added 2 extra scraps as hold-downs.

Rip.

Once the jig was completed it took only a couple of minutes to run all 8 pieces through the table saw to taper them.

To make the finished legs symmetrical when the pairs are butted together, I chose 4 of the 8 pieces and ripped 3/4″ off the untapered edge. This left 4 pairs of tapered boards, 2 for each leg: one measuring 3-1/2″ wide at the untapered end and the other measuring 2-3/4″.

TIP: Start with factory-squared materials when possible and make your project “self-referential” to minimize the need for measurements and custom cuts. A flat tabletop with true corners, off the shelf, makes its own project benchmark.

Assemble the legs.

I brushed on wood glue and tacked each of the 4 leg pairs together with a brad nailer. I like to use brad nailers to accurately stitch glued boards into place before adding C-clamps. This is especially helpful when clamping tapered pieces made slippery with glue.

A meticulous carpenter would use glue blocks to keep the C-clamps from denting the soft pine, but I was racing the setting sun.

Make the tabletop.

To attach the legs to the tabletop I made a rectangular box out of 1×4. I wanted a lip under my tabletop of (about) 1-3/4″, so I cut 2 long side pieces at 45″ and 2 end pieces at 15-1/2″. I tacked this box together with the brad nailer, and then, using a straightedge, I scribed a line on the underside of the tabletop, 1-1/2″ from each edge. This is one of the beauties of starting with a factory-squared top.

TIP: Pneumatic brad nailers, with fine wire brads, are handy for tacking things into place or stitching multiple pieces together when you don’t have a second pair of hands.

Adding glue to the inside of that line, I pressed the rectangle into place, squeezing out the excess glue. Then I grabbed 4 of those scrap pieces I made earlier and screwed them to the underside of the table as temporary mounting blocks to hold the rectangle in place. I added 4 (also temporary) screws to hold the rectangular box to the mounting blocks and the top.

TIP: Torx or Star-Drive self-tapping, general-purpose wood screws will spare you the frustration of using Phillips-head screws that tend to “cam out” or strip during hasty projects.

Then I flipped it over and stitched down the top with sturdy, countersunk, screws. (There are, of course, ways to do this without screwing smack through the top surface of the table if that bothers you. You can buy special hardware for mounting the top from underneath. You can even leave the mounting blocks in place.)

Finally, I flipped it back over to remove the temporary screws and mounting blocks, and I wiped up the extra glue with a damp rag.

Attach the legs and trim.

From there I went into “Erector set” mode. With the tabletop upside-down on a flat surface, I held each leg in place, drilled 4 holes, slathered on some glue, and then clamped it into place using 4 carriage bolts with washers. If you’ve cut carefully, the legs will align themselves so that you only need a quick check with a square before wrenching them tight.

Finally, I cut 4 pieces of 1×4 trim to fit tightly between the legs on the outside surface, screwed and glued these into place from the inside, and I was ready to scrub off all excess glue and sweep the sawdust from my driveway.

TIP: Self-clamp when you can. Clamping and gluing take time. By using slightly oversized bolts with washers, you can drill, glue, assemble, adjust, tighten, and proceed without waiting.