

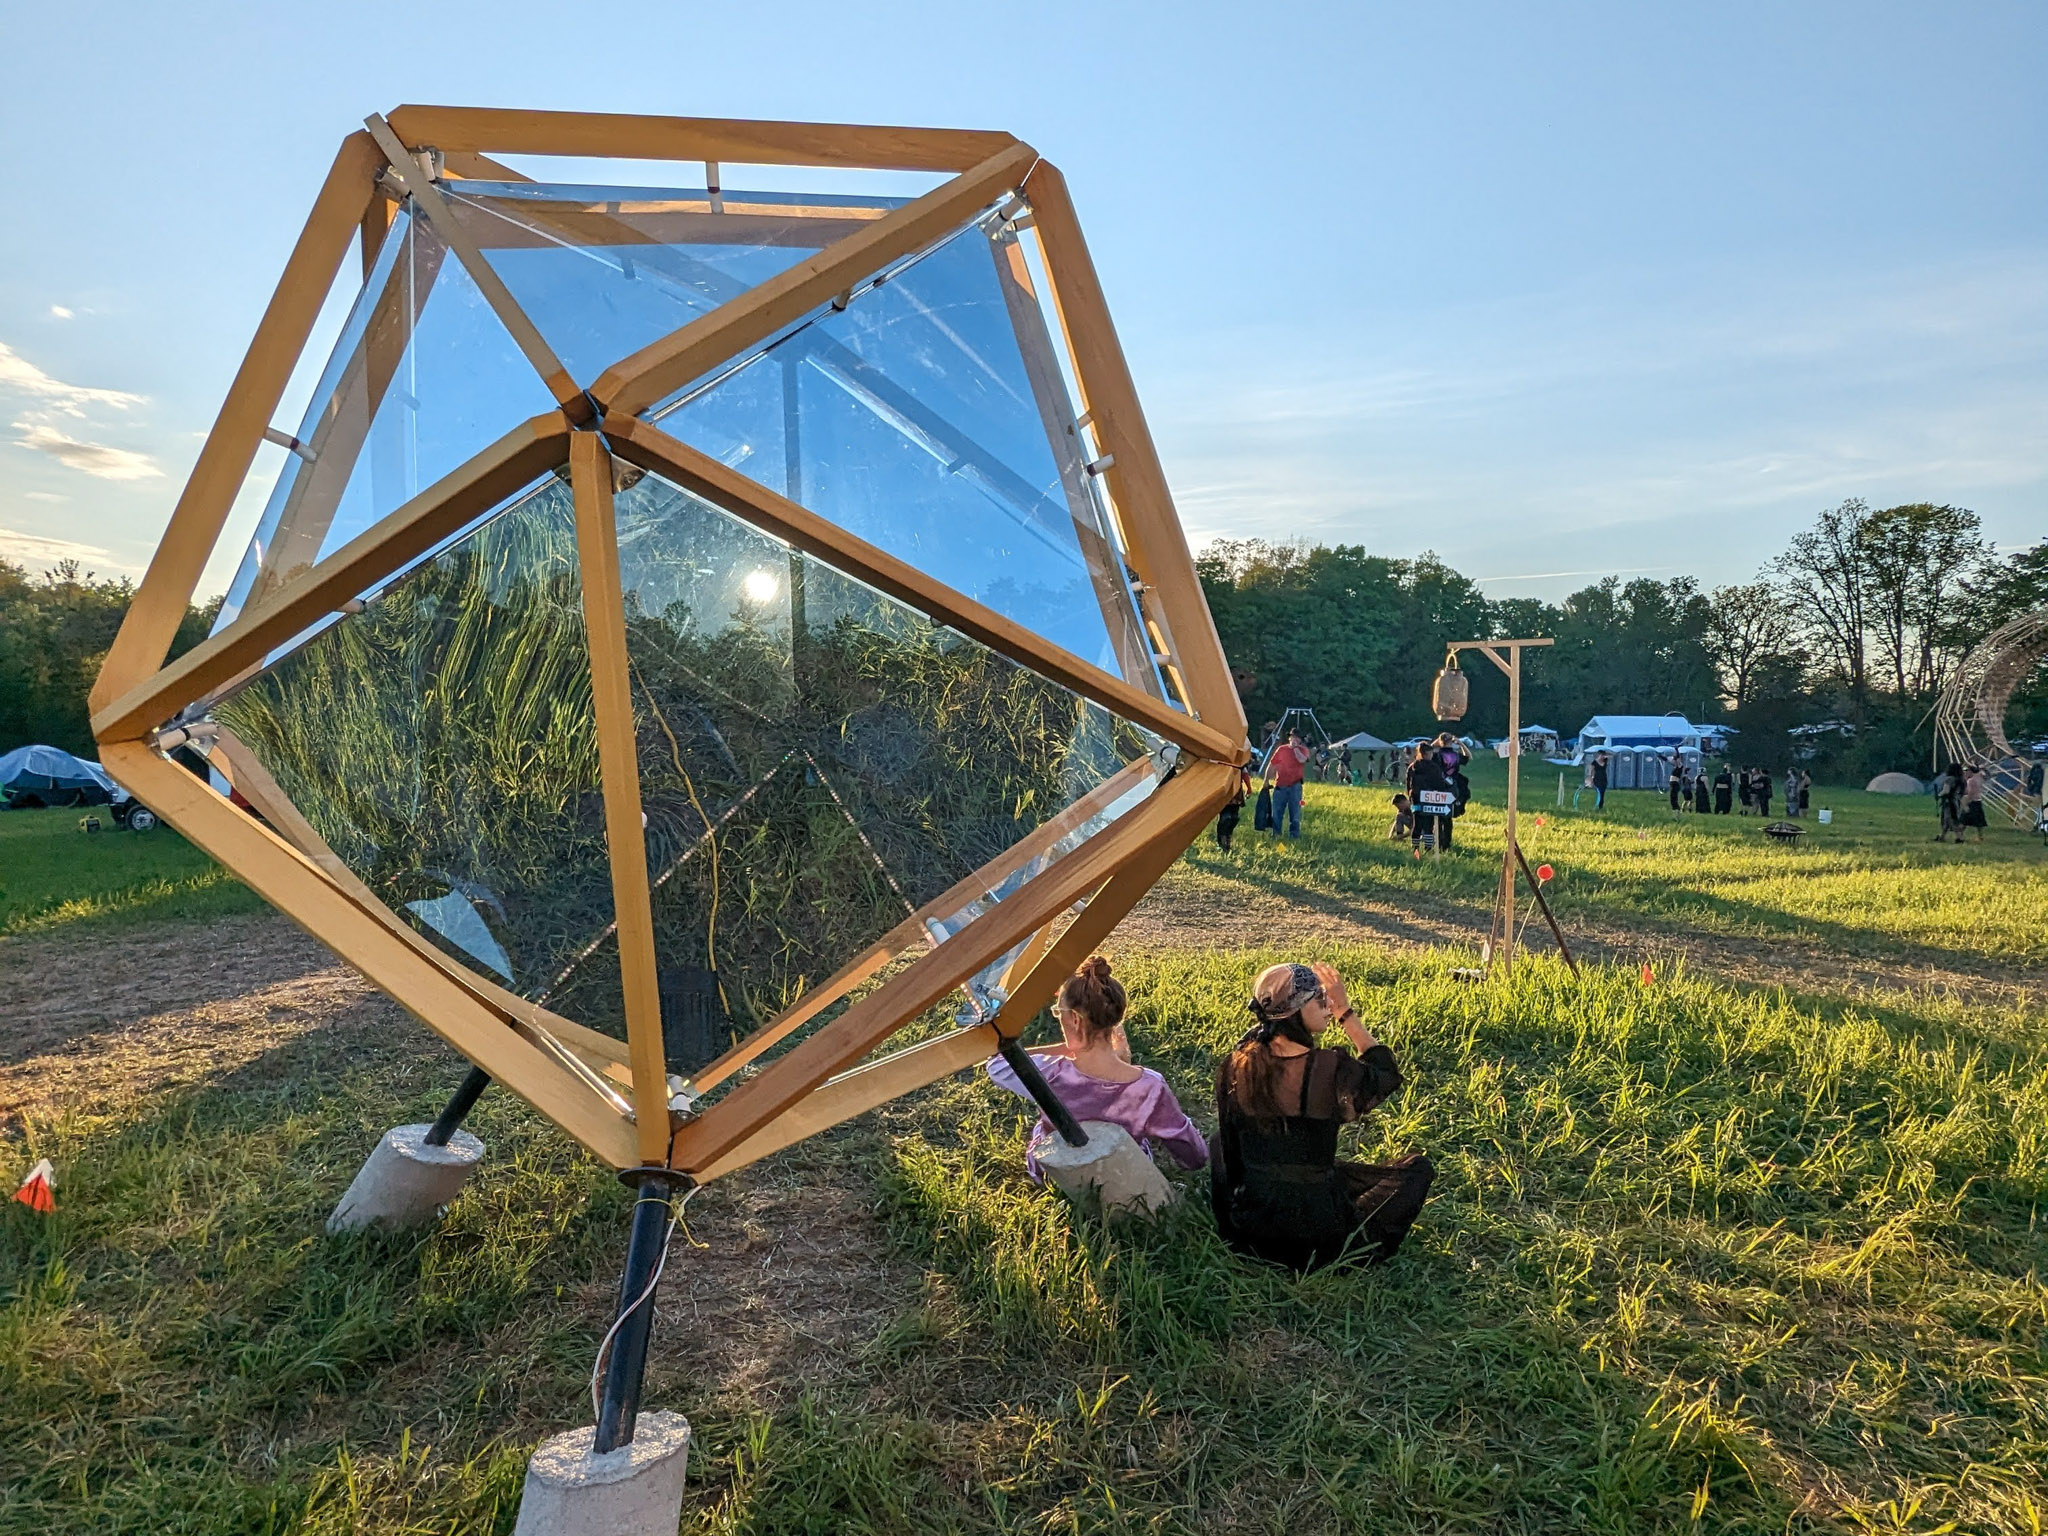

Every winter, Trillium Park on the waterfront in Toronto is lit up with amazing sculptures at night. For a few years now, my friends Kyle Chisholm, Hillary Predko, and Daemon Baliski and I have had the opportunity to create some of these works. This year we’re super excited to have made Greenhouse Reflect, a mesmerizing mirrored sculpture that changes throughout the cycle of the day, and is my favorite shape, the icosahedron. During the day it’s a reflective fragmentation of the landscape, and at night it’s a warm, kaleidoscopic greenhouse in the winterscape.
The 12-foot sculpture is made out of two-way mirrors and wooden supports. Two-way mirrors are either transparent or mirrored, depending on which way the light is coming from. It’s kind of hard to explain, but if you imagine an office building in a big city that’s reflecting the sky during the day, but you can see inside at night, it’s the same kind of material. What I love about it is that we can control the effect by putting LEDs inside the sculpture, and letting the sun and moon do the rest!
As a result, when you’re standing inside the sculpture during the day you can see the entire landscape outside, and everyone viewing from outside can see the landscape reflected in the exterior. At night, standing inside the sculpture creates an amazing kaleidoscope, and outside people can watch you ogle the effect! I personally do a variety of related works, like my piece VOID that uses a similar shape and materials to invite people to put their heads inside the sculpture. This was an extension of that line of work, but it wouldn’t have been possible without collaborating with Hillary, Kyle, and Daemon to make it so big and awesome!
Good Big Art

There are a number of considerations when making public art: It has to be sturdy, instructions should be clear, and it should be viewable at all times of day. Making this sculpture sturdy was an issue we were concerned about from the beginning. We knew it would be on uneven ground, on the Toronto waterfront which can get pretty windy, and it had to last 3 months in the Canadian winter. While part of me wanted to see the giant shape rolling across frozen Lake Ontario, we knew that would be frowned upon. We used concrete feet on the bottom of steel posts to hold it in place, along with large bolts to secure each facet.
As with any good big art, we also wanted it to be able to have another life — to be stored and reassembled after the show was done. We were lucky enough to have it shown again at another festival, and hopefully more are on the horizon. Each panel and truss comes apart, and remarkably it can fit inside a small hatchback! With the use of threaded inserts, it’s easy to set it up again without a fuss, and taking it down is quick too. The only annoying part is the concrete feet, but luckily there are only three.
Another concern we had was how the public would treat the sculpture. Because of cost limitations, the acrylic mirror panels are only 3mm thick. We had a few people try to climb inside the structure and unfortunately some panels did break, but they were easy to swap out (even if they weren’t cheap).
Geodesic and Kaleidoscopic

To avoid reinventing the wheel, we purchased some pre-made geodesic dome brackets for the corners. By getting two sets of dome brackets, we had enough to make a full sphere. We removed one truss in order to let people walk or roll inside with ease, and installed LED lights around the entrance.
The electronics are quite simple; the only catch was that we wanted the light pattern to change throughout the day. We used a real-time clock (RTC) Arduino module. It was my first time using one of these, and it was pretty simple. The device has a small battery so it’s powered at all times. You can select time zones and set the current date, and the RTC does the rest to keep track of time. I set the LEDs to a warm yellow at night, and a cool purple during the daytime, with some transition in the middle.

In order to make the interior mirror effect as immersive as possible, we used interior standoffs to hold the mirror panels away from the skeleton to ensure a close panel fit. These we made out of PVC pipes, long bolts, and 3D-printed parts that helped distribute the pressure on the panels.

There were also supports along the edges of the structure to stop the panels from sagging and ruining the mirror effect.

We all worked very hard on every part, but Daemon was the real genius on the lumber and finishing, Kyle modeled and designed it all using FreeCAD, and Hillary was the glue and hands to make it all into reality. My focus was the mirror effect and electronics. It’s such a joy to collaborate on ideas with amazing people.


