


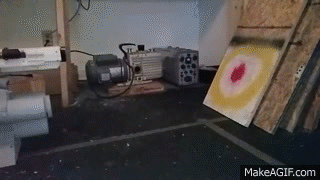
 An early (failed) test of the “WXPR-1" railgun.
By now, you may have seen the viral story about a guy, going only by “NSA_Listbot,” who built this massive, portable 3D printed railgun (an electromagnetic projectile launcher). We decided to track NSA_Listbot down and ask him more about himself, the details of his build, and what motivated him to build this Buckaroo Bonzai-worthy contraption. Turns out, ominous online handles aside, he wasn’t hiding his identity for any nefarious reason, only out of concern for his employer (whom he didn’t reveal) and concerns over negative blowback, given the obvious, ah… weapon-y nature of his experiments. As he tells us below, “3D printing guns gives the community bad press, which is the last thing I want to do.”
Here’s our interview. At the beginning of the email exchange, he wasn’t ready to share his real name. At the end, he told us. It’s David Wirth. David has no plans to do another railgun and has already moved on to experimenting with a new technique for 3D printing metal objects.
 Putting a name to the online handle; David Wirth shows off his 3D printed railgun.
What can you tell us about yourself?
I can tell you that I graduated from UCLA with a concurrent degree (MS/BS) in aerospace engineering with a specialization in nanoelectromechanical systems. I always enjoyed toying around with gadgets and making new things in my free time. I love the feeling you get when you know that you’re the first person to do something, and I grew up wanting to be a test pilot because of that drive. Later in life, my passions turned to research/engineering because it was another way for me to be first at things.
Is this the first railgun build that you’ve attempted?
Not really. I built a small railgun for my physics final project in high school (based on this design). But I don’t normally build projects on this scale.

Do you work in the engineering field, work with CAD/3DP, etc?
My degree was engineering, but currently I am doing other work.
How did this railgun project come about?
Basically, it came after a bet from a friend. I have a reputation for building crazy gadgets and he bet me that I couldn’t build a railgun. It was on the back burner for a while until I arrived at a job with a lot of downtime so I put my passions into the railgun project. A year and a half of machining, soldering, and printing later, and it was done. I actually finished the project around June of this year, but was tweaking the system until mid July. Most of my friends (including the one who made the bet) knew about it in July but I didn’t think to post it on Reddit until recently. Honestly I didn’t think it would get much attention.
Besides winning a bet, what was your overall goal for this project?
My goal was to demonstrate that 3D printing could take a concept that used to be big, bulky, and (usually) mounted onto a plywood board, and rapidly prototype it into a functional, portable design. I feel that 3D printing guns gives the community bad press, which is the last thing I want to do. I made a point of distributing the source files and code only to students, serious hobbyists, and academia. I also don’t plan on making a version 2, even though “WXPR-1" initially stood for “Wirth eXperimental Portable Railgun Version 1".
There appears to be a CO2 canister on the device. How does that work?
The CO2 canister supplies the injector system. This is basically like a potato cannon that shoots the projectile (also known as an armature) into the rails. The projectile must enter the rails at some initial velocity or else it will weld due to the high currents involved. The CO2 accelerates the armature to around 100 m/s, and the rails take this velocity upwards of 250 m/s.
Does the railgun actually need to be this big?
No. The weight could be reduced considerably by using more advanced capacitors (mine were purchased off of eBay for around $50). If advanced capacitors were used you could cut the weight by at least 10lbs. You could also cut weight from the charging system. My charger was non-optimal. An optimal ZVS [Zero Voltage System. -ed] like the one used in this design would cut the weight by another 3-4lbs. So, you could probably reduce the weight to around 30lbs total in a version 2.
Can you point out any other unique or interesting features of the WXPR-1?
This rail design is unique to hobbyist projects. Almost all hobbyist railguns use a square bore because it is much easier to build, but it’s less efficient. The rails in my design are more efficient but also must be machined to incredibly close tolerances. Mine is one (and probably the first) hobby design to use a circular bore. After 6 months of working at a machine shop and throwing away many failed rails (some off by less than a hair’s width), I finally found a design that worked. Another interesting feature is the removable rails. In most designs, the entire structure must be disassembled in order to replace the rails at considerable cost. With my design, I use two sets of rails, an inner and an outer, so that you can easily and cheaply replace the inner rails without disassembling the whole thing. This makes it much more maintainable and durable than other designs.
What printer(s) did you use?
I used a delta 3D printer that is capable of printing polycarbonate (PC). I used a custom PEI (Polyetherimide) build plate for most of the prints. Build volume was 11" diameter X 18" height. I used PLA, ABS, nylon, and PC. Most of the printing was done in PLA and ABS, with only a few highly-specialized parts in nylon and PC. Print resolution was 0.2mm radially and 0.25mm vertical.


Wirth posted this video last night on his YouTube channel (along with several others). It shows him firing a 15g solid tungsten armature (@1050V, 1.5kJ) at a cantaloupe.
You can see more images of the WXPR-1 in this Imgur gallery and more videos on Wirth’s YouTube channel.
ADVERTISEMENT


