YouTube player

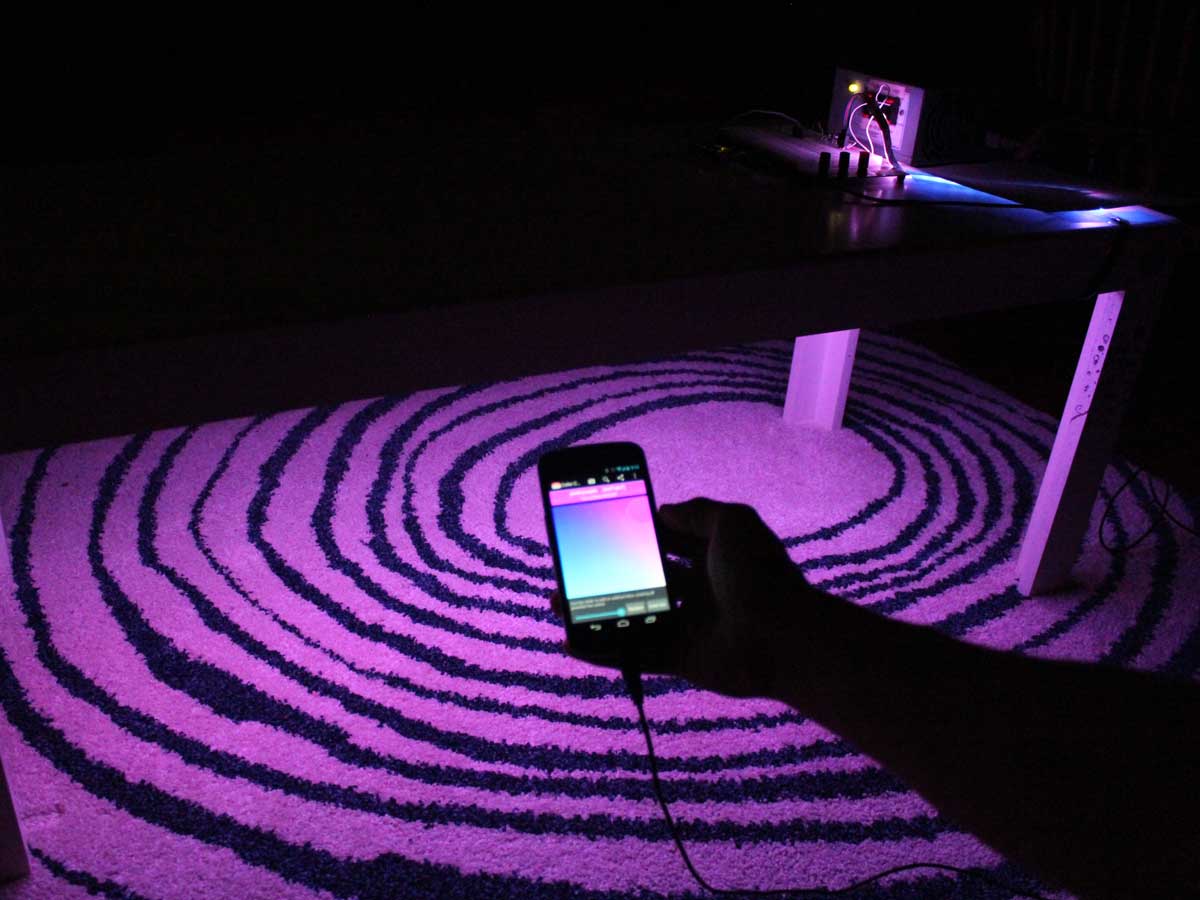
Connect a multicolor LED strip to your smartphone to make a touch-controlled light show! You can attach the color-changing LEDs to the underside of a coffee table, your bike, or anything else you think needs a bit more color.

There are many ways to connect your smartphone to an embedded microcontroller. In this project you’ll use an Android phone in USB host mode. This way, the Android phone both powers and communicates with the Arduino! Even though the Arduino is connected via USB, the communication happens via serial, just like when an Arduino is connected to your computer.

Once you’re able to make your phone talk to an Arduino, a whole world of new projects opens up!

image14

Download the code

CAUTION: Build this project at your own risk. We fried a phone during our test build. Not all Android phones are compatible with USB Host Mode. Use only compatible phones, with the proper Android operating system and USB Host Mode drivers. To learn more, visit How can I determine if my device has USB host mode (OTG) support?

Project Steps

Build the circuit.

RGB LED strips usually have 4 wires: one for power, and one each for red, green, and blue control. When the strip is powered, pulling any of the control lines to ground will cause that color LED to light up at full brightness. Using pulse-width modulation (PWM) on those control lines allows you to modulate the brightness of the lights.

A strip 1m long can draw nearly 1A when the red, green, and blue LEDs are on full brightness. An Arduino’s output pins can only supply around 40mA each, so you’ll have to help it out with a driver circuit to boost the power. This circuit takes 3 PWM signals from the Arduino and uses them to drive 3 transistors supplying power to the red, green, and blue LEDs — giving you full control over the brightness of each color, so you can mix them to create any color in the spectrum.

NOTE: Want to power 1 or 2 LEDs instead of a whole strip? Ignore the transistors and connect the LEDs directly to the Arduino’s output pins.

The driver circuit (1st photo) is a basic transistor amplifier repeated 3 times. A 5V, low-current PWM signal comes from the Arduino to the transistor’s base (B) via a 1K resistor. This signal switches the transistor, allowing it to conduct higher current at 12V across the collector (C) and emitter (E) through the LEDs. The transistor can switch fast enough so that the LED power is PWM’ing just like the input signal, resulting in the desired brightness control.

NOTE: Take care to keep straight which transistor will control which LED color, and connect the transistors the right way around, according to the pinout of the TIP31 transistor (2nd photo). And don’t forget to connect the Arduino’s ground pin to the 12V power supply’s ground!

Your completed circuit should look like the 3rd photo. The outputs of the circuit go to a 4-pin header on the right, ready to accept an RGB LED strip.

Hack a cable (optional).

Many Android phones are USB On-The-Go (OTG) devices, which means they can act as the USB host (providing power) or slave (receiving power). In order for your phone to host a USB device such as an Arduino, you need a USB OTG cable. You can buy these for a few bucks online, but if you have old USB cables around it’s more fun to make one Follow the instructions here .

Install the Android app.

By adding a few lines of code to an Android app, you can send any kind of data to the Arduino via your USB OTG cable. In this case, you’ll send brightness values between 0 and 255 for the red, green, and blue LEDs. The critical piece of the puzzle here comes from Mike Wakerly. He wrote a fantastic driver for the USB-to-serial chips used in Arduino boards, called usb-serial-for-android. Sending data to an Arduino from your phone is as simple as calling device.write() within your Android app!

One great example of this is Katie Dektar’s open-source app called Color Namer (github.com/kaytdek/ColorNamer). For this project, I simplified Color Namer into a version called Arduino Color. Download the app and installer at trevorshp.com/creations/ArduinoColor.apk. You can also grab the complete source code at github.com/trevorshannon/ArduinoColor.

Code your own app (optional).

If you’re developing your own app, download Wakerly’s driver from code.google.com/p/usb-serial-for-android and copy the usb-serial-for-android JAR file into the [your_app_root]/libs directory. This is a pre-compiled library that includes all the necessary functions to open, close, write to, and read from a Serial device from your Android app.

Next, copy the device_filter.xml file into the [your_app_root]/res/xml directory. This file acts as a lookup table for USB devices connected to your phone. When you connect an Arduino, its device ID (set by the manufacturer of the USB-to-serial chip) is sent to the phone. If this device ID appears in your app’s device_filter.xml file, then your app will automatically open. (The Arduino’s ID is already in Wakerly’s device_filter.xml file, so you shouldn’t need to make any changes to that file.)

Finally, make your app aware that it should be looking for USB devices in the first place. Open your app’s AndroidManifest.xml file and add the appropriate information within your tags: example code 1.

To integrate Wakerly’s library, you first have to write code that opens the serial device when the app begins and closes the device when the app stops. Here is some code from Arduino Color as an example: example code 2.

Then, you can send data to the opened serial device using the write() function. For example, the Arduino Color app will send color data via serial when the user touches the color picker: example code 3.

Upload the Arduino firmware.

The Arduino code for this project is fairly simple; download it at trevorshp.com/creations/android_leds.ino, then open it in the Arduino development environment (IDE) and upload it to your Arduino board.

The code uses the Serial library, which is provided with the Arduino IDE and makes it easy to read data sent via serial to the microcontroller. The code endlessly loops while querying the number of available bytes on the serial port. When there are at least 3 bytes available, the bytes are read and stored in an array as red, green, and blue brightnesses. Those brightness levels are then used to set the PWM outputs accordingly.

Notice that there are constants called max_red, max_green, and max_blue. You may find that your LED strip is not well color-balanced. In theory, if you turn on the red, green, and blue LEDs at max brightness, the resulting light should be white. In practice it may have a slight color cast (generally green or blue). You can compensate for this by tweaking the max value constants that are called by the map function. See example code 4.

Connect it all together.

You’re ready to begin your light show! Connect the Arduino to your phone and you should see a notification pop up asking if you’d like to open the Arduino Color app. Yes, please!

Connect the LED strip to your driver circuit, and turn on the 12V power supply. Using the Android Color app on your phone, you should now be able to adjust the color of your light strip in real time.

Attach the light strip to the underside of a coffee table, bring it to a nighttime party, or stick it on your bike!

Conclusion

Other Explorations

Now that you understand how to talk to an Arduino with an Android app, you can take this project further in all kinds of ways:

  • Go wireless: add a Bluetooth or Wi-Fi module to your Arduino and get rid of the cable.
  • Make lights that change color based on the orientation of your phone.
  • Use the GPS in your phone as well as some fancy sensors connected to the Arduino to make a location-aware data logger.
  • Use an individually addressable LED strip and adjust the code for more control over the light show.

To learn more about getting started with Arduino, check out our best-selling book Getting Started with Arduinoand our Arduino projects and tutorials, from beginner to advanced.