


Make this fun mini projector just in time for Halloween. It throws a shadow image of a black cat — which then disappears, leaving only his spooky grin!
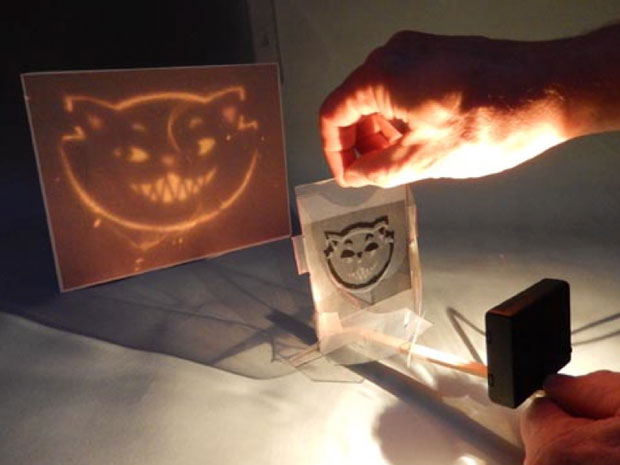
No lenses or focusing needed. Just download the image file. Print it out full size on a single sheet of transparency film. Use a hobby knife to cut out the 2 shapes. Carefully cut the slits as shown and use a small-size (⅛" hole) paper punch to make the little circles to provide stress relief at the inside corners.

Score on the dashed fold lines by tracing over them with a ballpoint pen and straightedge. Then fold as shown. The sides fold forward and interlock. Fold the bottom backward and bend the 2 wings up and tape together at A and B. Thread an unbroken pair of takeout chopsticks through the square holes. Insert the tabs of the second shape into the slits, matching the asterisk on the first shape. It should freely slide up and down in the slits.
Solder the 2 leads from a four-AAA battery pack to the contacts of a PR13 flashlight bulb. The battery box I used had a built in on/off switch. If yours doesn’t, just take the batteries out to turn it off. Hot-glue the battery box to the other end of the chopsticks. Hot-glue the light bulb to the chopsticks and to the backside of the battery box. Dim the lights and slide the film up and down to make the cat disappear and reappear!
Feeling ambitious? Take the project to the next level by adding a small motor and cam to automate the effect into a free-running display. Or replace the flimsy film with some laser-cut fiberboard (first add some bridges and a frame to the isolated image “islands” so it all holds together.) Happy Halloween!


