Dear Becky,
I have something I would like to mend this month (and it is Mending Month) — my sofa. My awesome and sweet cat, Flaquita, has spent years scratching at the upholstery. On the back corners you can see some stuffing and framing. I plan to keep my sofa, but I really would like to cover up the corners that my cat has macked. I am not a slipcover girl and my sewing skills leave something to be desired but I can always try.
Laura
New York, N.Y.
http://ladylulu.wordpress.com
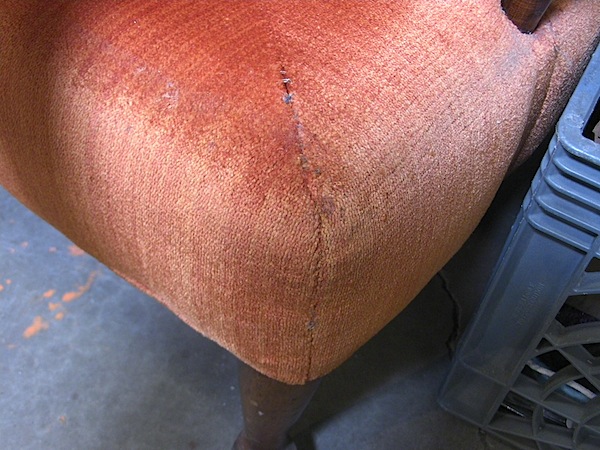
Laura, it happens to us all. Here’s mine:
Sweet Beatrice just loves this chair so much, she tears it to shreds. I can show you how to mend it if you can get the pieces of fabric to line up, but yours looks a little further gone. Use the tips and sewing technique below, but you’re going to have to use an inset piece of matching fabric. Maybe there’s an extra piece you could cannibalize from another part of the couch (under the cushion, perhaps?). Otherwise, snip off part of the fraying bit as a swatch and go hunting for a match. Since you live in NYC, see if the folks at Mood can help you find the right one. Once you find it, cut off the damaged bits from the couch and patch it using an invisible stitch. This method doesn’t make the patch sit above the base fabric, but lay flat with it, so you should hardly notice when you’re done. Read on to see how!
If you have a crafty question, send it to me at becky@craftzine.com. You can record a video, send me pictures, or use just text; ask any way you like! Check out this post about Ask CRAFT for more info.
Thread a needle. If you’ve never performed an invisible stitch before, use a thread that matches the fabric you’re sewing. Hide the knot on the inside of the folded seam allowance, and start by making an in-out stitch along the very edge of the fold. If you’ve created your own patch for setting-in, you’ll be making up your own seam allowance; 5/8" is usually fine. Since I’m repairing a seam that was split open by kitty claws, I can see where the original seam was and have the excess already creased under.
Now make the same stitch, but on the opposing piece of fabric, directly across from the previous stitch. This is also called a ladder stitch, because the threads will look like rungs of a ladder before you pull them tight.
Here’s a little graphic of a ladder stitch I got from the Embroiderer’s Guild website.
Here’s what my ladder stitch looked like before I pulled it tight.
I just continued up along the seam, tied a tiny knot, and buried the tail in the fabric by stitching under to another area, pulling the thread through, and snipping it close. Laura, fixing your couch isn’t a beginner’s task, but look at it this way: you can’t make it any worse! If you try and it doesn’t look good, just take out the stitches and try again. It may help to used a small, curved upholsterer’s needle, available at your local fabric store, but I managed with a standard straight needle. I hope that helps! Next Tuesday we’ll also have an upholstery repair how-to from Diane Gilleland. If you have tips for Laura, post them in the comments.
ADVERTISEMENT


