


Scanning in museums is the perfect challenge for the photogrammetry hobbyist. Not all museums have in-house scanning programs, but it’s important to archive and share these objects with people all over the world. You can help make it happen.
Photogrammetry is the process of converting hundreds of photos into a 3D model. The principles of 3D scanning and photogrammetry are similar to photography; if you can take great photos, you can make great scans. I shy away from using iPhone lidar as it doesn’t always work at smaller scales, and you get way more flexibility from using photogrammetry.
How many photos do I take?
The answer is not as simple as it seems. Photogrammetry works by comparing two photographs and finding common points, and then using those to triangulate points in 3D space. The more photos you have, the more detailed your 3D mesh will be. To ensure good photo alignment, aim for at least 60% overlap between two images — you can use your camera’s built-in “rule of thirds” guide to include two-thirds of your last image in your next — and make sure you go in linear order instead of skipping around to different parts of the subject. But be aware that overshooting a subject can make the texture appear blurry, or cause parts of the texture to overlap. A balance must be struck between the mesh detail and the texture.

So how many photos do you need to take? Well, that depends on the subject’s size and your camera’s resolution. The higher the resolution, the fewer photos you need. When I use my iPhone for scanning and I want to get all sides of an object, I will try to get over 200 photos.
Can I use a video?
Nope. Video often has motion blur, and blurry photos are photogrammetry’s worst enemy. You should avoid burst mode for the same reason. Slow down, it’s not a race. Your scans will be better if you take your time capturing the photographs.
Always check the photography rules.
Scanning can be quite obtrusive. Some exhibits will not allow photography at all, while others will, as long as you take off the flash. A phone will draw way less attention than a camera. Email or call the museum if you’re unclear on their policy, or check the FAQ on their website.

Go handheld, and leave your tripod and selfie sticks at home.
Most museums don’t allow tripods or selfie sticks. To combat this, keep the shutter speed high and crank up the ISO for dark exhibits. Remember that the most important thing for photogrammetry is to take the sharpest photos possible. Most museums are dark and absolutely do not allow flash photography, so prioritize cameras that work well in low light.
Be polite!
Stop every few photos and stand back from the subject to allow other people to enjoy the work. Be aware of your surroundings and make sure you’re not blocking anyone’s view. If it’s a busy exhibit just be patient and wait, enjoy the art.
Use a color chart.
If you plan to share your models, a color chart is a must-have. If you can’t afford a color chart (e.g., ColorChecker Classic), or you left it at home, a white piece of paper will do in a pinch to ensure the white balance is set properly. Just snap a quick pic of your color reference after your scan. This frame will also double as a great way to separate the photos and subjects when you sort through them later, as photo thumbnails can often blend together in the folder.
scanned at the Met with Reality Capture
Cite your sources.
Before or after you scan, take a photo of the art’s plaque. A great tip for iPhone users is to use the Copy Text tool from the image to create the descriptions. This trick will save a ton of time.
Color correct your photos.
Bulk color correction can be tricky, but Lightroom Classic does an OK job. Color pick the white area of your color checker and add a bit of denoise to combat the high ISO required for photos in dark areas of the museum.
Convert photos to 3D scans.
For photogrammetry software you have several options, each with various learning curves. For beginners I recommend Polycam’s web version and also its mobile app, which now allows you to export the raw images. Polycam limits you to 250 photos, but most exhibits won’t require that many for a successful scan. You’ll get a feel for the required number of photos after some practice.

For years I have used Reality Capture for all of my photogrammetry because it gives you a lot of control and is an extremely powerful tool for creating beautiful 3D models. That being said, it can be expensive, requires a beefy computer with an Nvidia graphics card, and the GUI and workflow make the learning curve steep, especially if you don’t have a background in 3D.
The world’s great works of art and architecture are difficult to experience firsthand, stashed away in far-flung museums and temples. But one by one, they’re being 3D scanned by a global network of volunteers and shared, open source, in the Scan the World project, a non-profit initiative of MyMiniFactory. So far they’ve captured an impressive digital archive of 25,000 “fully 3D printable sculptures, artworks, and landmarks for the public to access for free.” Enjoy the collection at myminifactory.com/scantheworld, 3D print your favorites, and email stw@myminifactory.com if you’d like to contribute. —KH
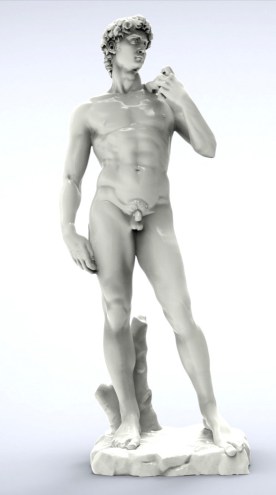
Michelangelo’s David, scanned in Florence, Italy, with both photogrammetry and structured light, and released open source, as part of the Scan the World project.
Clean up your scans.
Photogrammetry often creates artifacts that will need to be deleted. I recommend using Blender for your clean-up, as it is free and extremely powerful and there are thousands of tutorials on how to use it. You could also upload the raw, uncleaned model, just make sure in the listing you specify that it has not been cleaned.
Posting your scans.
Sketchfab is the best 3D art platform because of their in-browser viewer and thriving community; for an example, check out my page. When posting to Sketchfab, your scans will probably have shadows baked into the textures, as museums utilize dramatic lighting to help show off the art. Uploading directly from Polycam to Sketchfab will automatically set the model to “shadeless.”
Archive your work.
The world of photogrammetry is always updating and changing. Archive your hard work, and never delete your photo sets. You never know when a new program or technique will change what we can do with photos. The future is bright for 3D capture! 
ADVERTISEMENT


