


I have quite the scissor collection. I used to keep them loosey goosey in a box, but after reaching in to grab a pair, and ending up almost loosing my hand, I decided to devise a new and more safe way to store them. I took a cue from simple knitting needle holders, and stitched up a quick roll-up holder. I used some sturdy printed canvas, and a lovely silk ribbon. This is a great project for using up scraps, and a fun way to organize your tools.
Materials:
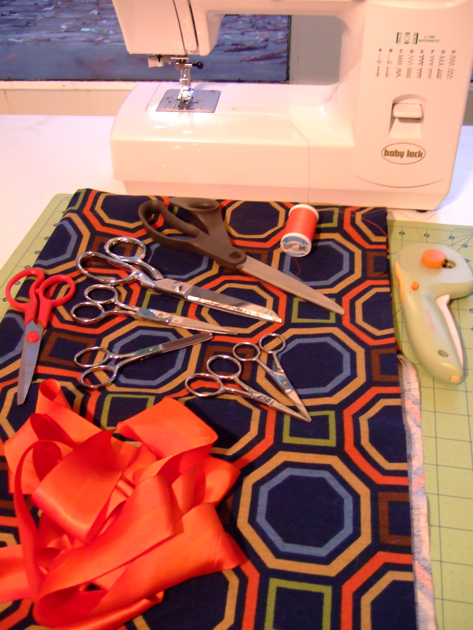
Your scissor collection
1 yard heavy cotton fabric
1 yard ribbon
Rotary cutter and mat
Sewing machine
Thread
Not shown: Straight pins

Step 1: Fold the cotton fabric in half. Set your scissors out on the fabric. I lined up the screw of each pair, regardless of the handles or blade length. This way all the scissors will be centered on the holder. Cut out the fabric, being sure to cut through both sides.

Step 2: Cut a strip of fabric 1" wide, and 4" longer than the lined up scissors. Center it over the scissors.

Step 3: Pin down the strip in-between each pair of scissors. Push the straight pins into the fabric, as close as you can to the sides of the scissors.

Step 4: Set your sewing machine to the straight stitch. Sew along the three cut edges and the one folded edge of the fabric holder.

Step 5: Sew the strip down, along each line that you have pinned. I knew that I would have trouble sewing straight and even, so I purposefully made slightly uneven stitches. I sewed over the fabric strip three times where each pin was placed.

Step 6: Cut all the thread ends from the holder. Also cut off the remaining edges of the strip.

Step 7: Cut 2 pieces of ribbon, one 6" long, and one 12" long. Sew the short ribbon to the back of the holder, right against the edge.

Step 8: Mark where the rolled up holder meets the edge with the short ribbon. Take the scissors out, and then sew the long ribbon to the back of the holder, where you have marked.
Step 9: Now you can put all the scissors back and roll up the holder. Wrap the long ribbon around the bundle to secure it, and tie it closed. Volia!
ADVERTISEMENT


