I get ridiculously excited seeing people make things. I just want to revel in the creativity I see in makers. My favorite thing in the world is sharing a maker's story. find me at CalebKraft.com
View more articles by Caleb Kraft
Over the past few years I’ve seen a few pieces of kinetic art that really stuck with me. Usually these are things that are simulating organic motion with simple mechanical structures. At some point, I decided I wanted to make a piece of kinetic art of my own. The concept I settled on was a “wave machine”. I’m not the first to come up with this concept, many have approached it with variations on similar mechanics. If you do a google search for “wave machine” you’ll see quite a variety.
My idea involved swinging “arms” that would ride on a cam. The cam should be interchangeable, allowing for me to simulate multiple different types of waves.
The initial vision I had for this project was machined out of brass and aluminum. I thought the juxtaposition of the heavy and hard metals with the smooth and flowing forms and motions would be neat. To do this required I learn some cnc machining. I’ve had this Tormach 770 cnc mill for a few months now, and finally felt comfortable enough to tackle this project.
Before I started machining things, I had to make a decision. Would I create custom fixtures to hold everything to get the ultimate quality of parts, or would I cut the amount of time and effort in half and just rip the shapes from the metal in the fastest way I could figure out. As my summer schedule filled with travel all around the globe, I decided to go the route of doing things quickly. If you’re a machinist, you’ll think of many ways I could have achieved better finish, but most of those methods would also require custom workholding and more time than I had to give.
Ideally this project would have been completely plastic free. I enjoy 3d printing, but I also find value in having projects that are free from plastic. However, I simply didn’t have the time to figure out a workflow for producing the cam section on the mill, so I 3D printed it. I do have a 4th axis, but that learning experience will have to wait till I have more time.
Since I had the design sitting here, fully 3d modelled, I figured I’d make the few minor adjustments necessary to turn this into a 3d printable version.
If you want to 3D print it, check out the files on thingiverse.
Machined Aluminum Arms

The arms were the only part of this that I had a clear mental image of before I began. I knew I wanted some long curves with a few holes at the ends. My mind was kind of mimicking the shapes of bones for this. I measured my brass rod and determined the size of the holes and kind of built everything else around that.
My local metal shop has tons of these little sheets of aluminum that are 6mm thick, so I just designed the arms to be 6mm thick.
I spent some time thinking about all the proper ways that I should hold the aluminum in order to machine these arms. Ideally I would have created a custom fixture that allowed me to get a perfect surface finish and come back and bevel all the edges. However, looking at the amount of time I had available for this project (mostly evenings and weekends during a very busy summer) I decided simply to cut the shapes as quickly as I could.
Machined Brass Base

The base piece was designed after the arms. The thickness of the design turned out to be much thinner than the big brass blocks I was using. This initially led me down a route that failed as I attempted to hold the work in a really unstable way. Finally I just machined away all the extra material, somewhat wastefully, so that I could cut the outlines just as I had the arms.
3D Printed Cams

The cam is where the magic happens. I knew I was going to be 3d printing these as I currently didn’t have an efficient method of machining this smooth shape. I was very pleased with the quality that I was able to get on this, even at the most low resolution print settings.
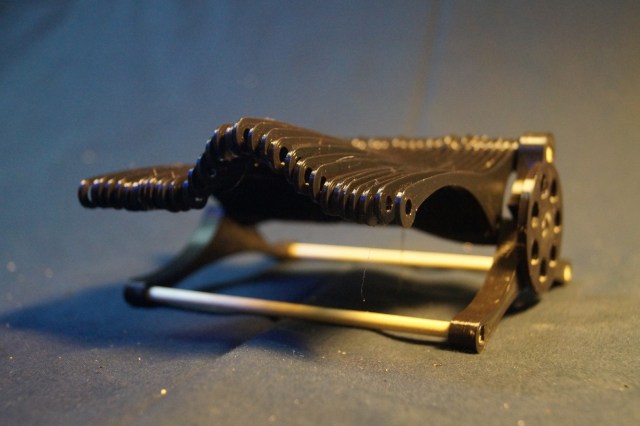
After designing the cams, I decided to also do a fully 3d printed version of the design. Since 3d printing them was less labor intensive than milling them, I could experiment easier with thicknesses. I settled on a 2mm thick arm, which allowed for many more to be lined up. This made the wave form much more visible.
I get ridiculously excited seeing people make things. I just want to revel in the creativity I see in makers. My favorite thing in the world is sharing a maker's story. find me at CalebKraft.com
View more articles by Caleb KraftADVERTISEMENT
Join Make: Community Today


