


By Paul Stern
There is something universally beloved about handmade bread. In all my efforts to make pleasing food, either as a professional or at-home chef, I’ve never found anything more likely to impress my guests at a dinner party or satisfy my family at breakfast. Making it, too, brings me the kind of gratification that can only come from crafting something both artful and useful.
| Download the Recipe PDF Right click to save the PDF to your desktop. Directions on downloading PDFs. |
I’m using a formula developed by Jeffrey Hamelman, master baker for King Arthur Flour, in his award-winning book entitled Bread: A Baker’s Book of Techniques and Recipes (John Wiley & Sons, Hoboken, N.J.)
Ingredients
1 lb, 9.6 oz white bread flour, I use King Arthur brand, 12.7 percent protein.
3.2 oz whole wheat flour
3.2 oz rye flour
3/8 tsp instant dry yeast, sometimes called “bread machine yeast“
0.6 oz salt, I recommend sea salt, because it is finer.
1 lb, 6.1 oz water
2 tbsp caraway or poppy seeds, optional
Note: Keep a small quantity of “bench flour” handy for lightly dusting your work surface and hands while working your dough.
Equipment
Considering how few ingredients there are in bread, there sure is a lot of equipment. Here’s what I would recommend to get the best results from this project:
Kitchen scale
Pizza peel
Pizza or baker’s stone
Cast iron pan (an old weathered one, preferably)
Measuring cups, spoons
Baker’s couche
Plastic wrap
Bench scraper and rubber spatula
Cooking spray
Various bowls and/or plastic food containers with lids
Baker’s lame or razor
Spray bottle
Instant thermometer
Timer
Directions
To be done properly, this recipe requires part of the dough to ferment overnight. I recommend you undertake Steps 1 and 2 after dinner. You will then be positioned to continue your baking after breakfast the next day. (This particular bread makes great breakfast toast, by the way.)

Step 1: Make the biga. (A biga is one of several kinds of “pre-ferments” or “sponges” used to build flavor in bread.) Assemble all of your equipment and ingredients. Then, using the kitchen scale, measure out flour, salt, yeast and water as follows:
1 lb white bread flour
1/2 tbsp sea salt
1/8 tsp instant yeast
9.6 oz water, room temperature
This will take you about 30 minutes.

Step 2: Combine and mix the dry ingredients in a bowl, being careful not to pile all the salt on the yeast, since it will kill it. Add the water and mix with the rubber spatula until you achieve a kind of shaggy mass. Dust your hand with bench flour and use it to mix and knead the biga into a fairly smooth and solid mass. Spray a plastic food container or second bowl lightly with cooking spray and place the biga it in, covering tightly with an airtight lid or plastic wrap. It should look like the photo.
Step 3: Place the wrapped bowl in a safe place where it can sit at room temperature (ideally, around 72° F) overnight – 12 to 16 hours.
Step 4: Retrieve the biga and measure out the following ingredients in a separate bowl. As with the biga, put them in a large bowl:
9.6 oz white bread flour
3.2 oz whole wheat flour
3.2 oz rye flour
1/2 tbsp sea salt
1/2 tsp instant yeast
12.5 oz water
Step 5: While mixing the dry and wet ingredients, tear the biga into small chunks and drop them into the bowl with the other ingredients. Dust your hands and knead the chunks into the main dough until it all comes together in a shaggy mass. (You will be able to see lighter areas of biga dough scattered around in the dough mass.)

Step 6: Dust your work surface and dump the dough onto it. Using both hands, knead carefully until the dough is uniform and feels tacky yet smooth to the touch. This will take about 10 minutes. You may have to dust your surface a few times during this process, but don’t allow too much bench flour to work its way into the dough.
Step 7: Spray a large bowl lightly with cooking spray and put in the dough, turning it over until the entire ball has a light coat of the pan release. Cover tightly and place in a warmish (room temperature, 70° F) place for 50 minutes to an hour.

Step 8: Uncover the dough and fold it into thirds as if folding a letter. This may be done in the bowl or on the work surface, whichever is easiest for you. Press down gently on the dough as you do this, helping expel built-up gas. Turn the dough 90 degrees and fold again. Return the dough to the bowl for another one-hour period of bulk fermentation.
Step 9: Fold again and let the dough ferment for another half hour.

Step 10: Dividing and scaling – Lightly dust your work surface again and dump out the dough. Using your bench scraper, cut the dough mass into equal parts. (I usually do three pieces with this much dough, but you could as easily make four smaller loaves or a dozen rolls.) If you wish to be very precise, use your scale to make pieces of identical weight. (This formula makes a total of about 55 ounces of dough, so it would make 11 5-ounce rolls, for example.)

Step 11: Shaping rounds – Use both hands to shape each piece of dough into a smooth, round ball. This is most easily done by cupping the dough in your hands then dragging it toward yourself across the work surface. This will cause the dough to form with a nice tight “skin.”

Cover the rounds with plastic wrap and let them rest for 15 to 20 minutes.

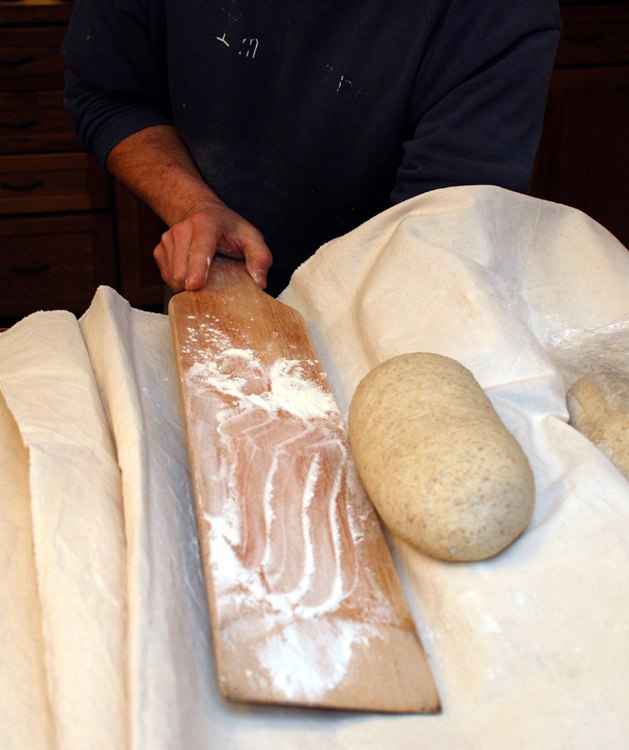
Step 12: Shaping loaves: Use both hands to stretch the dough gently while folding it in half. Use the heel of your hand to flatten the seam, then begin rolling the load back and forth on the work surface to form the loaf. (This may require a little practice.) In this case, you are not shooting for a stretched-out baguette shape – rather, an elongated but fairly squat loaf.

Step 13: Place the finished loaf, seam side up, between two folds on the baker’s couche. (The couche draws a little moisture from the surface of the dough, resulting in a better crust.) Repeat this with successive loaves, then cover the tops of the loaves with plastic. Let them rest for another hour and 15 minutes.
Step 14: While the loaves are resting, begin to heat your oven and stone to 460° F. Place the cast iron skillet at the bottom of the oven, making sure it is visible and accessible. (You are going to be throwing ice into it later.)
Step 15: Dust your peel carefully with bench flour. (Cornmeal or rice flour also work well for this because they don’t burn as easily if spilled on the stone.) Open the oven and throw or pour from a pitcher a handful of ice cubes into the cast iron pan. They should immediately produce a lot of steam. (Be careful to withdraw your hand quickly, because that steam can deliver a nasty burn.) Close the oven and let it steam up as you proceed with the next steps.
Step 16: Load a loaf onto the peel by putting your hand under the couche and flipping the loaf over.

Step 17: Using the spray bottle set on a very fine mist, spritz the loaf a little and sprinkle on the poppy or caraway seeds. If you don’t want seeds, you can elect to rub a layer of fresh flour down the top of the loaf with your hand. This produces a very rustic effect.

Step 18: Using the lame (or a razor blade or sharp knife), cut three long slashes in the top of the loaf. Try not to saw through the dough; rather, cut about a half inch down in a smooth, quick stroke. Tilting the blade slightly will produce a nice crisp “ear” when the loaf is baked.
Step 19: Open the oven and, using the spray bottle again, spritz the baking stone once or twice before sliding the loaf off the peel. (Note: failure to adequately dust the peel can cause the loaf to stick to the peel and not slide off. This is disaster when half the loaf is on the stone and the rest is stuck to the peel. To prevent this, shake the loaded peel back and forth gently after you load it to make sure the loaf will slip off easily.)

Step 20: Bake the loaves for 30 minutes or so (this will depend on their bulk and shape). They are done when they have a nice hollow sound when tapped, or when the center of the loaf reaches around 205° F when tested with an instant-read thermometer.

Step 21: Cool your finished loaves on a rack. Their flavor will improve as they reach room temperature. Eat them immediately or freeze them. The refrigerator, however, is not bread’s friend.

About the Author:

Paul Stern is a part-time chef and freelance writer from Connecticut who enrolled in culinary school after 35 years as a journalist at newspapers from Fort Lauderdale to Hartford. In addition to cooking, his interests include helping his wife convert a 300-year-old house into a bed-and-breakfast.
ADVERTISEMENT


