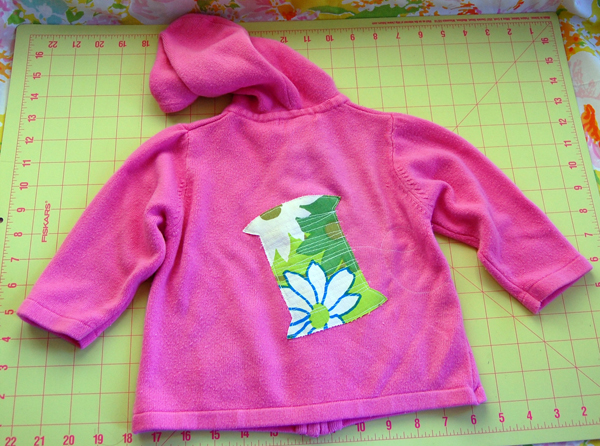

It seems like a large percentage of my female friends are either pregnant, trying to get pregnant, or dealing with new babies. It must be something in the water! Here’s a fun project you can make for your favorite little one, which is quick enough to whip up in an afternoon–and best of all, it’s made using recycled materials.
Needle & Thread Hoodie Revamp
download the templates here
Materials:
• Thrifted hoodie or cardigan sweater (any size, mine is for a 12 month old)
• Patterned Fabric Scraps
• HeatnBond Lite Iron-On Adhesive
• Thread
Note: Be sure to use a sweater that is 100% cotton (or that is made from a large percentage of non-synthetic material). Otherwise your sweater may melt or discolor when you iron on the appliqués. Natural fibers are also nicer for the baby.
- Iron the HeatnBond to the wrong side of the fabric according to the manufacturer’s instructions and let cool.
- Trace the spool and needle templates (download them via PDF here) on the the fabric and cut out.
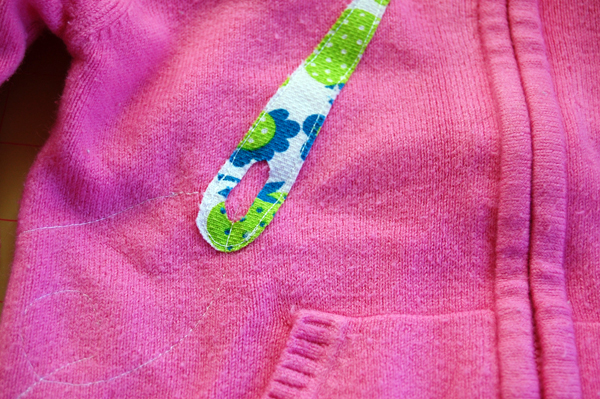
- Peel away the HeatnBond’s paper backing and place the needle shape on the front of your sweater (on what will be the baby’s right hand side), with the tip of the needle pointing up. Iron into place using a press cloth.
- Repeat step 3 with the spool shape, placing it on the back of the sweater wherever you like.
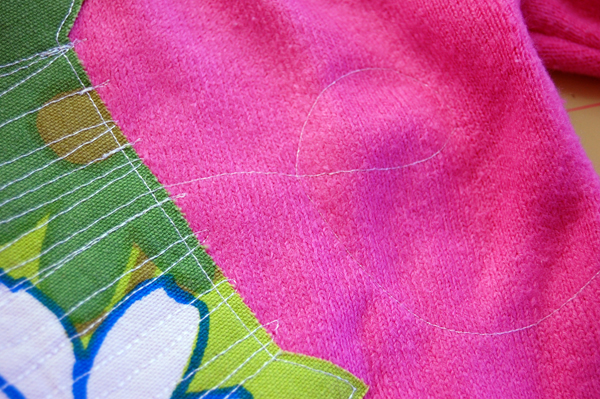
- Stitch around all edges of each appliqué using a straight stitch on your sewing machine.
- Now stitch some random lines back and forth over the spool appliqué to mimic the look of thread.
- Continue sewing in a single line from the spool shape on back all around the side towards the front. It’s nice to try and sew some simple loops and twirls as you go, but just do whatever is comfortable for you, as stitching on sweater material can take a little getting used to. Using longer stitches may be helpful for this step as they will allow your material to stretch.
- Finish up your stitching by bringing the thread line through the “eye” of the “needle” on the front of the sweater. Now you’re done!
Tip: If you’d like the look of the thread to be a bit more prominent, you could also complete steps 6-8 by hand, using embroidery floss.
ADVERTISEMENT


