Here’s a simple how-to on adding some blinking lights to any old laptop bag, for this example I use my childhood companion, a 2-XL 8-track “robot” toy and a 555 chip…
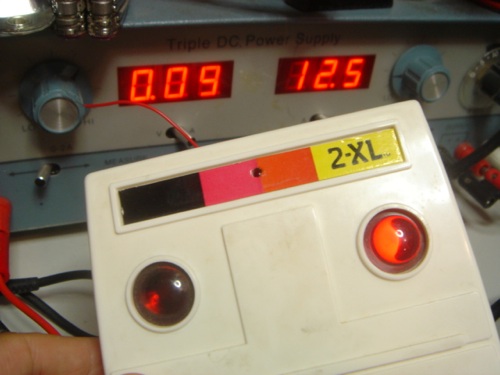
This is the original 2XL head, pulled from the robot toycorpse.
We tested out the LEDs with a benchtop power supply. The LEDs were so old, they required 90mA just to light up at the brightness we wanted! So we will replace them with much brighter ones that were manufactured less than 30 years ago.
The eyes use 5mm red diffused LEDs, pretty high tech for the 70s!
We soldered in new LEDs. The two eyes are wired together in parallel and the forehead LED is wired up seperately (theres one more wire to go).
With the new LEDs, the robot eyes are super bright at only 30mA!
Ee want to have the LED eyes blink, a good and common chip for this is a LMC555 monostable multivibrator. We will connect the LEDs to the output pin (#3) and power everything off of a battery pack. CMOS 555s such as the LMC555 are better than TTL ones like the LM555 because they use less power and can run at lower voltages. You can get an LMC555 at radioshack for about $2.
First we prototyped the circuit on a solderless breadboard. For C we used 100uF and for RA and RB, 10K resistors. We also put at 47ohm choke resistor in series with the test LED. Once we verified it worked the way we wanted, it was soldered onto a more permanent breadboard:
Ra was changed to a 1K resistor, this makes the blink rate closer to 50% on and 50% off. The battery pack is is a 3 AA pack from Radioshack, they have a battery switch on the back to turn the circuit on and off.
We then soldered it up the the 2XL head!
Special thanks to Adafruit Industries for their help and electronic expertise.
6 thoughts on “HOW TO – Make a 2-XL laptop bag (blinky LED lights for your bag)”
Comments are closed.
ADVERTISEMENT
Join Make: Community Today


Aww, poor little 2XL, you took his face! But seriously, this is a pretty cool idea. You should make a version that the little guy’s eyes blink when theres an open Wifi network nearby.
next version(s) do just that :)
Sweet, I’ve actually been looking for something to attach to my firefox bag that does that. Maybe I’ll wire the little fox’s eyes so that they blink when the next how-to comes out.