Whether you’re considering purchasing a standalone BeagleBone Black, the updated kit complete with components and a Getting Started guide, or just happen to have this single-board computer laying around looking to be put to use, listed below are a few projects to consider that show off the range and capabilities of this embedded Linux platform.
Our Weekend Projects are designed to be “beginner-friendly” and take anywhere from 30 minutes to 2 days to build, depending on inherent complexity and the number of steps involved. That said, the following projects range from easy to moderate difficulty, and each will require a small amount of time to either update the OS or install specific packages to power the project. Therefore, the three sample projects listed below are ordered by the estimated time required to get them up and running.
Novice users will want to dive in to the first project not only because it is quick to build, but also because it’s immediately rewarding and fun to watch the project change depending on your network’s activity. The other two are both moderately difficult projects and require different blocks of time to make them succeed. All the software for these projects is provided, and all are fairly plug-and-play once you gather the core components of the projects together.
First let’s take a quick tour of the BeagleBone Black:

When you first handle the BeagleBone Black, you’ll likely be surprised by its build quality. The rounded corners make the board pleasant to hold, and the sizeis nearly identical to a driver’s license. The board is light but full of GPIOs and connectivity options. More recent boards have increased memory available — and therefore a slightly higher price than shown above — but the general layout is similar to this image. In short, it’s a fun board to hold, and all the more exciting to prototype with.
Internet Speedometer
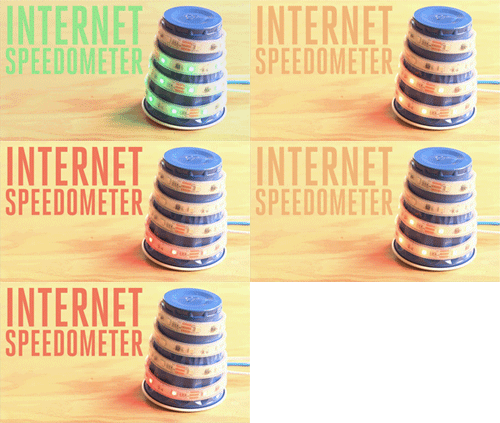
The easiest project of this bunch is without a doubt the Internet Speedometer. As the name implies, it’s a visual speedometer of your network’s activity, rendered as flashing and color-changing LEDs. In addition to the BeagleBone Black, this project requires only a mini breadboard, jumper cables, various data and power cables, and a strip of tricolor LEDs.
While simple to build, the speedometer does deal with one unique aspect of the board: Its two PRUs, or Programmable Realtime Units. Not pointed out in the image above, the PRUs are two additional CPUs on the same die as the main Cortex-A8 CPU. They run at their own, lower, clock speed of 200Mhz (compared with the main CPU’s 1000Mhz), but with dedicated allocation to I/O events. As Shabaz put it on element14’s community forums, “The PRU is efficient at handing events that have tight real-time constraints.”

BeagleBone Audio Looper
Next up is the BeagleBone Audio Looper. Also named exactly for what it does, the BeagleBone Black here is combined with a basic breadboard and enclosure circuit, Python and Pure Data open source software files, and a USB sound card to create a three-switch effects looper. The enclosure design is quite simple and could easily be modified to something more robust. If you’ve ever watched a Dorkbot presentation on Pure Data or been interested in mixing and manipulating audio through your computer with the benefit of analog switches, the BeagleBone Audio Looper is simple and effective.
You could consolidate the project further by soldering your own cape for the board, shrinkifying the breadboard circuit & switches to plug directly into the BeagleBone Black’s expansion headers. Otherwise this project is also pretty straightforward, and fun for music makers.
Dirty Dish Detector
Last but not least is the Dirty Dish Detector. In the first two projects, the BeagleBone Black is exposed and has a supplementary breadboard circuit. With this project the board is housed in an enclosure, however it’s a bit more complicated than that. Once the physical build is complete you’ll need to do some clever installing of the project above your makerspace or office sink. And that’s when the fun begins.
We’ll walk you through initiating and configuring the Cloud9 IDE, an “online code editor” that allows you to directly execute files on the BeagleBone Black from a web browser. It even has a built-in terminal “for command-line wizardry.” With the aid of OpenCV, we’ll then train the Logitech webcam to detect the presence of dirty dishes, and also when the sink is clean, and to send respective notifications (via email, MMS, or both) to your colleagues or coworkers.
If you think they’ll loathe getting “dishes are dirty” notifications, trust me when I say they’ll loathe even more the notion of dirty dishes because of the notifications, and adjust their habits accordingly. And if the detector alone doesn’t do it, you can always upgrade the project to a “detective” to catch culprits in the act, by using a PIR sensor or other proximity detector to trigger photos, instead of only focusing on items in the sink.
No matter which project you plan to build (or better yet, modify and hack into your own Weekend Project), leave a note here or on the respective project page with pictures and a story of your build. We love to see what you come up with.
Further BeagleBone Black Reading and Viewing:
How-To: Get Started with the BeagleBone
Boost Your BeagleBone Black with Breakout Board
Programming BeagleBone Black PRUs
BeagleBone Black – Working with the PRU-ICSS/PRUSSv2
Embedded Linux Meets FPGA Capes
ADVERTISEMENT


