YouTube player

Make clothing that lights up when you move! This is a sewing (no soldering) FLORA project using 12 color-changing NeoPixels and the FLORA accelerometer/compass module.

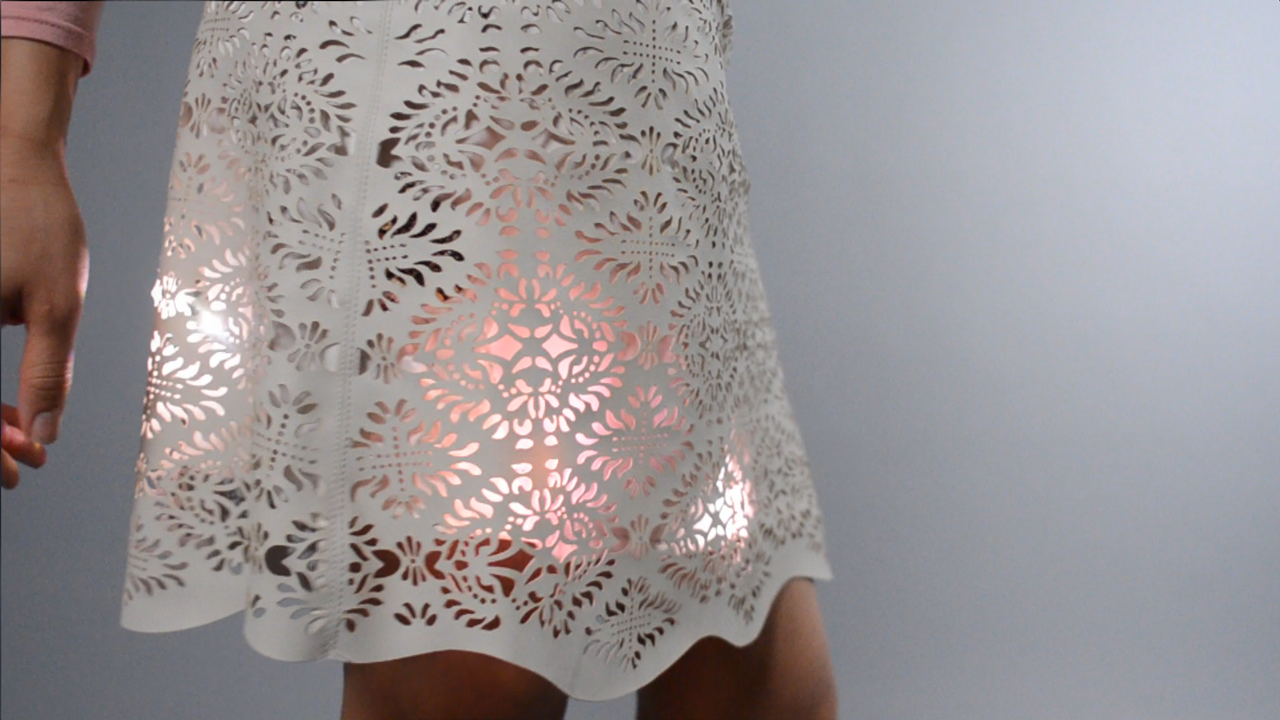
Spikes in the sensor readings cause the pixels to flash and sparkle. The pixels are sewn to the skirt’s lining and are diffused by the outer layer of fabric, whether it be a sheer overlay or a cutout lace design. If a skirt doesn’t appeal to you, use this circuit and code on a hat, a belt buckle, or even a blinky dog collar.

This and other great wearable projects can be found in the book Getting Started with Adafruit FLORA, available from Maker Media.

materials needed for a Sparkle Skirt
Figure 2. Some of the materials needed for a Sparkle Skirt.

Project Steps

LAYOUT AND CIRCUIT DIAGRAM

Select a skirt and start planning where your pixels will go. The Sparkle Skirt diagram shows how you can connect all the parts of this circuit.

Skirt Diagram
Figure 3. Sparkle Skirt diagram.

Each component connects to the FLORA main board as follows:

  • Accelerometer:
    • GND → GND
    • SCL → SCL
    • SDA → SDA
    • 3.3V → 3.3V
  • Array of NeoPixels:
    • Vcc (Power) → FLORA VBATT
    • IN (Data Input) → FLORA D6
    • Gnd (Ground) → GND

Since the conductive thread has nontrivial resistance, pay close attention to the extra connecting power and ground lines on either side of the skirt—​they will help your colored lights shine to their full potential.

Lift the outside layer of the skirt away from the lining (The pixels will shine through the laser-cut top layer). If the layers are attached with small threads, snip them.

laser-cut top layer
Figure 4. The pixels will shine through the laser-cut top layer.

Place your components on the front of the skirt lining according to the diagram. We’ll do the back pixels separately, after all six of the front pixels are working.

Arranging the pixels
Figure 5. Arranging the pixels

Lift each component and make a mark with a water-soluble marking pen (or just use a very fine tip permanent marker to make a tiny dot), as shown in Figure 6.

Marking pixel locations.
Figure 6. Marking pixel locations.Select a skirt and start planning where your pixels will go. The Sparkle Skirt diagram shows how you can connect all the parts of this circuit.

Skirt Diagram
Figure 3. Sparkle Skirt diagram.

Each component connects to the FLORA main board as follows:

  • Accelerometer:
    • GND → GND
    • SCL → SCL
    • SDA → SDA
    • 3.3V → 3.3V
  • Array of NeoPixels:
    • Vcc (Power) → FLORA VBATT
    • IN (Data Input) → FLORA D6
    • Gnd (Ground) → GND

Since the conductive thread has nontrivial resistance, pay close attention to the extra connecting power and ground lines on either side of the skirt—​they will help your colored lights shine to their full potential.

Lift the outside layer of the skirt away from the lining (The pixels will shine through the laser-cut top layer). If the layers are attached with small threads, snip them.

laser-cut top layer
Figure 4. The pixels will shine through the laser-cut top layer.

Place your components on the front of the skirt lining according to the diagram. We’ll do the back pixels separately, after all six of the front pixels are working.

Arranging the pixels
Figure 5. Arranging the pixels

Lift each component and make a mark with a water-soluble marking pen (or just use a very fine tip permanent marker to make a tiny dot), as shown in Figure 6.

Marking pixel locations.
Figure 6. Marking pixel locations.

SEW THE CIRCUIT

Begin by tacking the FLORA main board to the skirt lining with regular thread (Figure 7), using two unused pads (3.3V and the GND opposite it are good choices). Set up the fabric in a large embroidery hoop.

Tacking FLORA
Figure 7. Tacking FLORA.

Stitch the four connections between the FLORA main board and the accelerometer board (Figure 8).

Sewn accelerometer (front).
Figure 8. Stitches to accelerometer (front).

Seal your knots and trim the thread tails at the back (Figure 9).

Sewn accelerometer (back).
Figure 9. Stitches to accelerometer (back).

Then begin stitching to connect your pixels’ data pads (marked with inward- and outward-facing arrows) from FLORA pad D6 (Figure 10).

Running stitch.
Figure 10. Running stitch.

Knot, seal, and clip the ends of the threads, being careful to avoid unintended connections (aka shorts), as in Figure 11.

Sealing knots
Figure 11. Sealing knots.

Using one extra-long piece of conductive thread, stitch the power bus for the six pixels on the front of the skirt (Figure 12). Repeat with another for the ground line (Figure 13). Make sure to test these pixels first, as described in the next section, before connecting more on the back.

Stitching the power bus.
Figure 12. Stitching the power bus.
Power and ground.
Figure 13. Power and ground.
WARNING
Don’t power up your skirt until you’ve checked for shorts! Double-check that your tails are clipped and your skirt is lying flat on a nonconductive surface. Never stitch pixels with the power connected, and never connect power with the skirt bunched up in your lap!

The following video provides some useful tips for successfully sewing NeoPixel circuits.

YouTube player

CODE AND BATTERY

Triple-check that all your conductive thread tails are trimmed and your skirt is lying flat on a nonconductive surface, and then connect your FLORA main board to your computer with a USB cable, as shown in Figure 14.

Open the Adafruit Arduino IDE. You will need the NeoPixel library for this next step, which comes preloaded with the Adafruit Arduino IDE and Codebender.

First, test out all six pixels by uploading the sketch in File→Examples→Adafruit_NeoPixel→strandtest.

Plug in the USB cable
Figure 14. Plug in the USB cable to load sample code.

If all of your pixels light up and change color, you’re good to continue to the back! Disconnect the USB cable before stitching more pixels on the back of the skirt.

To test the accelerometer, you’ll need to install the Adafruit Sensor library as well as the unified LSM303DLHC library. You can test out the accelerometer by uploading the sketch in File→Examples→Adafruit_LSM303→Test. Open up the serial monitor and watch for changing motion values.

When you have pixels on the front and back of the skirt, place a piece of scrap fabric in between them for testing (so they don’t touch and short each other out), or put the skirt on a (nonconductive) dress form. When you’re wearing the skirt, your body will keep the front and back from touching.

If your skirt has lots of folds, you may have trouble with your pixel connections shorting out against each other. You can insulate them under a piece of ribbon, wear a slip under the skirt, and also add some wobble to your pixel line so when the skirt folds, traces aren’t up against each other.

To add sparkle to your skirt, copy the following code into your Adafruit Arduino IDE and click Upload. You can specify the colors in the myFavoriteColors array, and if you’re not getting any reaction to your movement, you can adjust the sensitivity by setting MOVE_THRESHOLD to a lower number.

You can also download the code from Adafruit; there are two versions of the code on that page. The first one uses the older Adafruit_LSM303 driver. The second one requires you to install the drivers listed earlier in this section. Make sure you use the version that matches the libraries you’ve got installed. The second version is listed here:

#include <Wire.h>
#include <Adafruit_Sensor.h>
#include <Adafruit_LSM303_U.h>
#include <Adafruit_NeoPixel.h>

// Parameter 1 = number of pixels in strip
// Parameter 2 = pin number (most are valid)
// Parameter 3 = pixel type flags, add together as needed:
//   NEO_RGB     Pixels are wired for RGB bitstream
//   NEO_GRB     Pixels are wired for GRB bitstream
//   NEO_KHZ400  400 KHz bitstream (e.g. FLORA pixels)
//   NEO_KHZ800  800 KHz bitstream (e.g. High Density LED
//   strip)
Adafruit_NeoPixel strip = Adafruit_NeoPixel(6, 6, NEO_GRB + NEO_KHZ800);
Adafruit_LSM303_Accel_Unified accel = Adafruit_LSM303_Accel_Unified(54321);

// Here is where you can put in your favorite colors that will
// appear! Just add new {nnn, nnn, nnn}, lines. They will be
// picked out randomly.
//                                  R   G   B
uint8_t myFavoriteColors[][3] = {{200,   0, 200},   // purple
                                 {200,   0,   0},   // red
                                 {200, 200, 200},   // white
                               };
// don't edit the line below
#define FAVCOLORS sizeof(myFavoriteColors) / 3

// mess with this number to adjust TWINklitude :)
// lower number = more sensitive
#define MOVE_THRESHOLD 45

void setup()
{
  Serial.begin(9600);

  // Try to initialise and warn if we couldn't detect the chip
  if (!accel.begin())
  {
    Serial.println(
      "Oops ... unable to initialize the LSM303.
      Check your wiring!");
    while (1);
  }
  strip.begin();
  strip.show(); // Initialize all pixels to 'off'
}

void loop()
{
  /* Get a new sensor event */
  sensors_event_t event;
  accel.getEvent(&event);
  Serial.print("Accel X: ");
    Serial.print(event.acceleration.x); Serial.print(" ");

  Serial.print("Y: ");
    Serial.print(event.acceleration.y); Serial.print(" ");

  Serial.print("Z: ");
    Serial.print(event.acceleration.z); Serial.print(" ");

  // Get the magnitude (length) of the 3 axis vector
  // http://en.wikipedia.org/wiki/Euclidean_vector#Length
  double storedVector =
   event.acceleration.x*event.acceleration.x;
  storedVector += event.acceleration.y*event.acceleration.y;
  storedVector += event.acceleration.z*event.acceleration.z;
  storedVector = sqrt(storedVector);
  Serial.print("Len: "); Serial.println(storedVector);

  // wait a bit
  delay(100);

  // get new data!
  accel.getEvent(&event);
  double newVector = event.acceleration.x*event.acceleration.x;
  newVector += event.acceleration.y*event.acceleration.y;
  newVector += event.acceleration.z*event.acceleration.z;
  newVector = sqrt(newVector);
  Serial.print("New Len: "); Serial.println(newVector);

  // are we moving
  if (abs(newVector - storedVector) > MOVE_THRESHOLD) {
    Serial.println("Twinkle!");
    flashRandom(5, 1);  // first number is 'wait' delay,
                        // shorter num == shorter twinkle
    flashRandom(5, 3);  // second number is how many neopixels
                        // to simultaneously light up
    flashRandom(5, 2);
  }
}

void flashRandom(int wait, uint8_t howmany) {

  for(uint16_t i=0; i<howmany; i++) {
    // pick a random favorite color!
    int c = random(FAVCOLORS);
    int red = myFavoriteColors[c][0];
    int green = myFavoriteColors[c][1];
    int blue = myFavoriteColors[c][2];

    // get a random pixel from the list
    int j = random(strip.numPixels());
    //Serial.print("Lighting up "); Serial.println(j);

    // now we will 'fade' it in in 5 steps
    for (int x=0; x < 5; x++) {
      int r = red * (x+1); r /= 5;
      int g = green * (x+1); g /= 5;
      int b = blue * (x+1); b /= 5;

      strip.setPixelColor(j, strip.Color(r, g, b));
      strip.show();
      delay(wait);
    }
    // & fade out in 5 steps
    for (int x=5; x >= 0; x--) {
      int r = red * x; r /= 5;
      int g = green * x; g /= 5;
      int b = blue * x; b /= 5;

      strip.setPixelColor(j, strip.Color(r, g, b));
      strip.show();
      delay(wait);
    }
  }
  // LEDs will be off when done (they are faded to 0)
}

Use a scrap piece of coordinating fabric to sew a small battery pouch. We doubled ours over, used the sewing machine to stitch in an L, then clipped the corner and turned the pouch right-side out (Scrap fabric battery pocket).

Fabric battery pocket
Figure 15. Scrap fabric battery pocket.

Stitch the battery pouch to the skirt lining with regular thread in a place nearby the FLORA main board (Battery pocket near FLORA).

Battery pocket near FLORA
Figure 16. Battery pocket near FLORA

WEAR IT!

Pixels flash in the layers of fabric
LED NeoPixels flash in the layers of fabric.

Wear your new flashy skirt to your next party or out dancing, make one for each bridesmaid, and be sure to document and share your creations online! Change the colors to match the rest of your outfit or suit the occasion.

This and other great wearable projects can be found in the book Getting Started with Adafruit FLORA, available from Maker Media.

Getting Started With FLORA
Check out the book Getting Started with Adafruit FLORA for this and other great projects.