This project appeared in Make: Vol 92. Subscribe for more maker projects and articles!

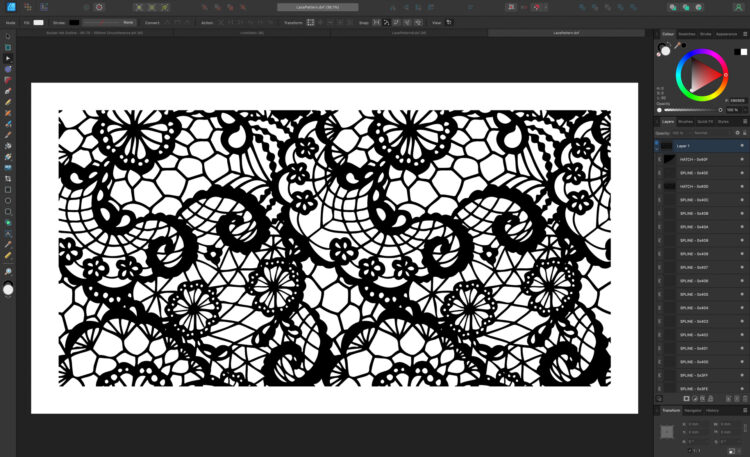
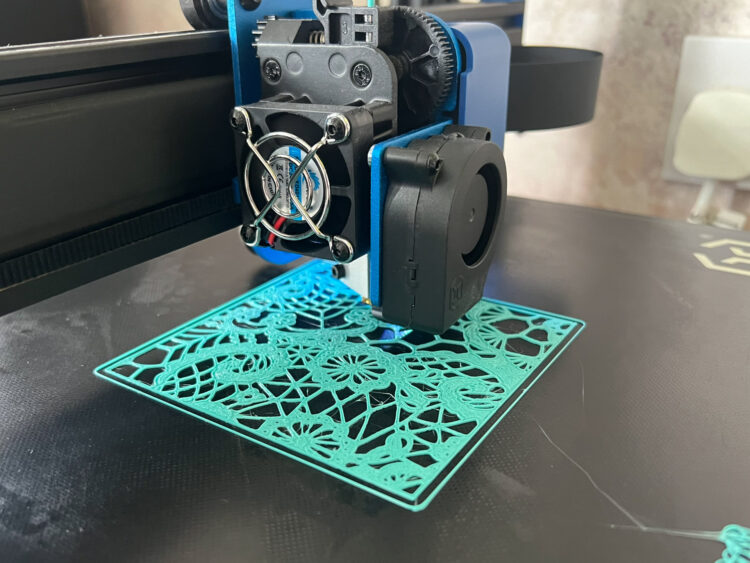
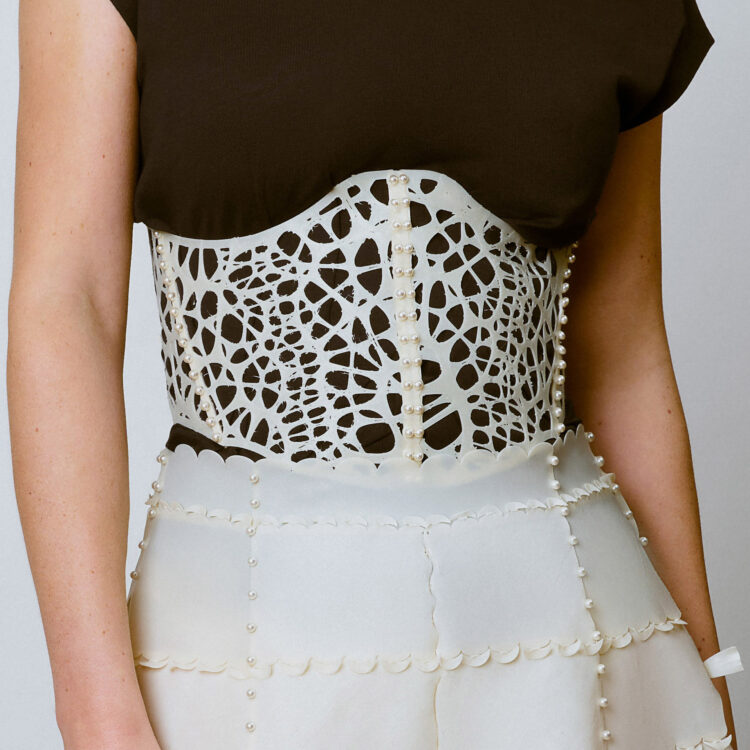
Over the years, I’ve identified nine different ways to 3D print fabrics. In this article, I’m thrilled to share one with you: the lace method. If you’ve ever wanted to create intricate, detailed textiles that would take forever by hand, this technique is for you. Best of all, you just need a bit of 2D graphics know-how and access to vector software. I typically use Adobe Illustrator, but for this article, I’ll walk you through the steps using Affinity Designer’s free trial to keep things as accessible as possible.

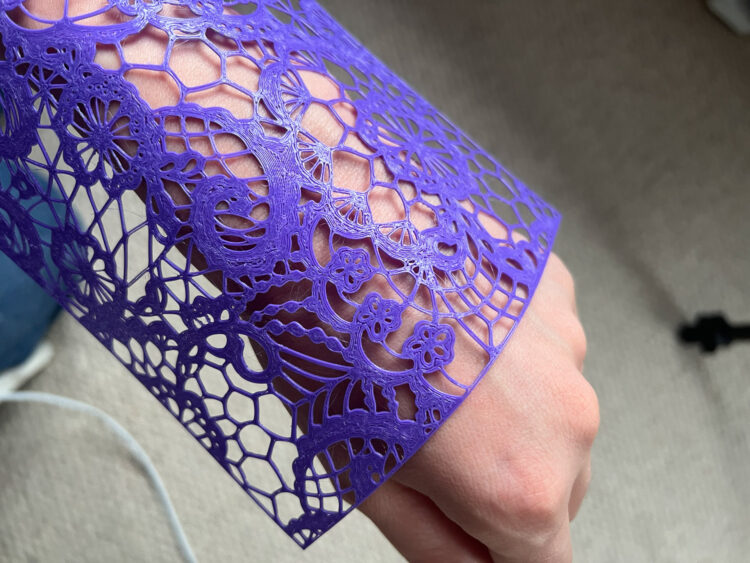
One of the most exciting things about 3D printing is how it allows us to create designs that would normally be complex or costly, with almost no waste — and all from the comfort of home. The lace method shows how even a basic home 3D printer can open up new creative possibilities. Whether you’re into fashion, accessories, or just love exploring new techniques, this approach is a game-changer.

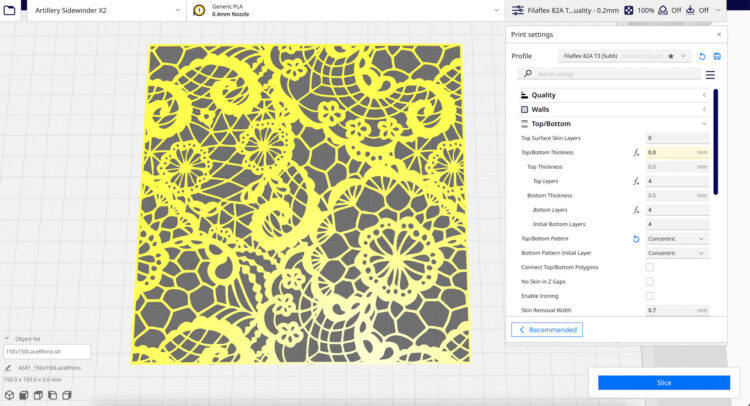
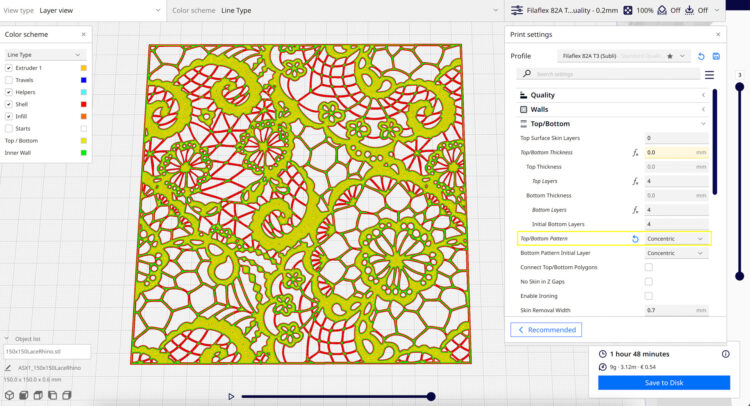
By the end of this article, you’ll know how to turn a simple 2D lace pattern into a 3D printable fabric file. It’s a perfect project if you’re ready to push beyond the usual slicer infill patterns but not quite ready to dive headfirst into full 3D modeling.

So, grab your computer (and maybe your coffee mug), fire up your software, and let’s get started!

Create Your 3D-Printed Lace Fabric

Before you begin, you might like to see my overview video:

YouTube player

Project Steps

Find Your Lace Design

First, decide whether to create your own lace design or use an existing one. If you’re curious about designing your own, you can explore five DIY methods in my course at variableseams.com. Whichever route you choose, ensure that your file meets the criteria outlined in this step. For beginners, I recommend starting with a predesigned pattern like the one I used, from PatternWorldShop on Etsy.

When choosing a lace design file, here’s what to watch out for:

  • Avoid floating bits and spirals if you’re 3D printing the entire lace without any fabric underneath — anything floating will detach, and spirals will flop without support.
  • Ensure consistent lace thickness for even tension across the fabric.
  • Pick “seamless” patterns so you can extend designs without visible joins.
  • Choose files meant for laser or vinyl cutters (.dfx or .eps format) to avoid issues like open or duplicate lines and make editing in vector software easier.

Tip: Looking to explore free options? Sign up for Adobe Stock’s free trial. You’ll get ten EPS downloads, and it’s a handy way to gather some high-quality patterns.

Create Your Fabric Shape

By the end of this section, you’ll have a black-and-transparent SVG file of your lace fabric design ready to go. Here are the detailed steps:

2a. Open your lace file

Start by importing your lace design into your 2D vector software — in my case, Affinity Designer.

2b. Create your fabric outline

Start a new project and draw the fabric outline you want to 3D print. For this test I’m keeping it simple, drawing a 150mm×150mm square using the rectangle tool and a 0.8mm stroke weight. To make it stand out, use a contrasting color like red.

2c. Position your lace design

Copy and paste your lace design onto your canvas within the fabric outline. If it doesn’t cover the whole area, use the Add tool to merge multiple lace patterns into one larger, seamless version).

Even if your design is labeled “seamless,” zoom in and you may spot minor imperfections. Don’t worry, they won’t show when it’s 3D printed.

Pro tip: Avoid duplicate lines (which can cause errors) by slightly overlapping your lace patterns. For a smoother process, add a 0.4mm stroke to your lace, expand it into a shape, and merge all shapes. This ensures that even the thinnest lines are thick enough to print, and eliminates most file error issues.

2d. Duplicate the fabric outline

Duplicate your fabric outline and align it perfectly with the first outline, creating a layer order of outline-lace-outline.

2e. Trim the lace to fit

Select both the lace pattern and the fabric outline, and use the Intersect button (top toolbar again) to trim off any lace that sits outside your fabric shape.

2f. Clean up lace outline (optional)

If you want to 3D print open edges, delete the second fabric outline and skip to the next step. But if you’re like me and prefer a clean border, merge the second outline with the lace.

Start by converting the outline into a shape using Layer → Expand Stroke, then combine it with the lace using the Add tool.

Voilà — your 2D lace fabric design is ready!

2g. Export as SVG

Switch from Designer Persona to Export Persona in the top left corner to reveal the Export Options. Select your lace (without the canvas), set the background to transparent, and export as an SVG file. Your lace design is now ready to be transformed into a 3D model.

Turn Your Fabric Shape Into a 3D Model

In this step, we’ll take that 2D lace design and turn it into a 3D model — no fancy 3D modeling skills needed. Cue big smirk. We’ll be using Tinkercad, a free 3D modeling software. You can find it at tinkercad.com.

3a. Set up your workspace

Create a new 3D model to open up Tinkercad’s workspace. Go to Settings in the bottom-right corner and adjust the size to match your 3D printer’s build plate (for me, that’s 300mm× 300mm). This ensures that your design will fit when it’s time to print it.

3b. Import your lace design

Now import your .svg lace file — but before clicking Import, double-check that your dimensions match the original 2D vector image. For example, my design was 150.8mm, but Tinkercad somehow enlarged it to 425.2mm. No idea why!

Tip: Scaling your design later in the Tinkercad workspace can mess with the height settings, so make sure you have the correct width and height here.

If your design has a unique shape, you can find the exact width and height in Affinity Designer, under the Transform tab.

If your lace is detailed, give it time to load — 5 minutes isn’t unusual! If it takes longer than 15 minutes, there may be an issue with duplicate or intersecting lines in your SVG file. Since Tinkercad doesn’t provide error messages, you’ll need to check your 2D design for issues.

3c. Set the height of your lace

Select the lace shape and a pop-up will let you adjust the height. For 3D printing fabric, I set it to 0.6mm, which gives three layers at the standard 0.2mm layer height — the sweet spot for flexibility and strength. For finer lace, try 1.0mm or 1.2mm. Again, it may take a few minutes for Tinkercad to process.

3d. Export your 3D model

When you’re happy with the design, export it as an STL file. And that’s it! You’ve created a complex 3D model in just a few minutes — no advanced skills needed.

Slice Your Lace 3D Model

In this step, we’ll slice the 3D model and convert it into a file format your 3D printer can understand.

4a. Load your lace into a slicer

Open your lace model in slicer software. I personally use Cura (free) because of its user-friendly interface, but there are plenty of great options out there.

If it’s your first time using a slicer, make sure your 3D printer and settings are configured for the material you’re printing with. If you need help with this, check out my other YouTube videos for more guidance.

4b. Adjust the print settings

Set the Infill Density to 80% or higher, and for the Infill Pattern choose Lines. For lace designs, I recommend using Concentric for the Top/Bottom Pattern.

Tip: There’s a bug in Cura where it sometimes doesn’t recognize the holes in the lace; this tends to resolve itself when you set the Wall Line Count to 2. If that doesn’t work, you might try an alternative slicer, like PrusaSlicer.

4c. Slice and export as G-code

Once you’ve tweaked your settings, slice your design and export it as a .gcode file.

3D Print Your Custom Lace Fabric

Finally, it’s time to bring your 3D lace design into the physical realm! I recommend picking a TPU filament that’s not too flexible, between 90A–95A, if this is your first time 3D printing with TPU (thermoplastic polyurethane). A lower Shore hardness (70A–80A) will be more textile-like but is much more challenging to 3D print.

5a. Send your G-code to the printer

Transfer the file to your 3D printer. Once it’s loaded, keep a close eye on the first layer to ensure all your settings are correct and the filament adheres properly to the build plate. If anything’s off, stop the print and tweak the settings from Step 4.

5b. Remove your finished lace

When the print is complete, carefully remove your 3D-printed lace. And yes, it’s time for a well-deserved celebration — you’ve done it!

Tip: If you’re impatient like me, you might be tempted to pull your lace off before the printer has even finished homing to its start position — but doing so can lead to permanent deformation, like curling. Hold off until the bed cools down to room temperature, and your print will come off much smoother — and without warping!

Conclusion

Wear it: Making 3D-printed lace garments

Now that you’ve mastered this technique, the real question is: What will you make with it? If you’re looking for a fun starter project (rather than printing square samples over and over), I’ve got just the thing — a cute 3D-printed lace bucket hat! By the end of the day, you could be wearing it to dinner.

I’ve also used this technique for corsets and other garments, so feel free to get creative with your own designs. If you need a little more guidance or want to dive into a bigger project, I’ve got an online course packed with detailed instructions, plus bucket hat files customized to your size. Check it out for all the details!

Images by Brigitte Kock

This project appeared in Make: Vol 92. Subscribe for more maker projects and articles!