This article appeared in Make: Vol. 91. Subscribe for more maker projects and articles!

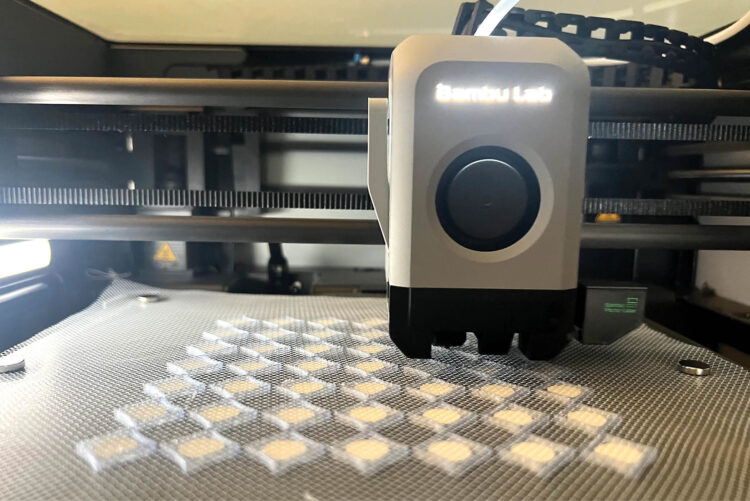
I’ve been experimenting with 3D printing textiles for some time now. While exploring ways to create shinier 3D prints, I initially considered using holographic pattern flats on the print bed, aka P-flats, which offer a decent sparkle, but I wanted something more eye-catching.

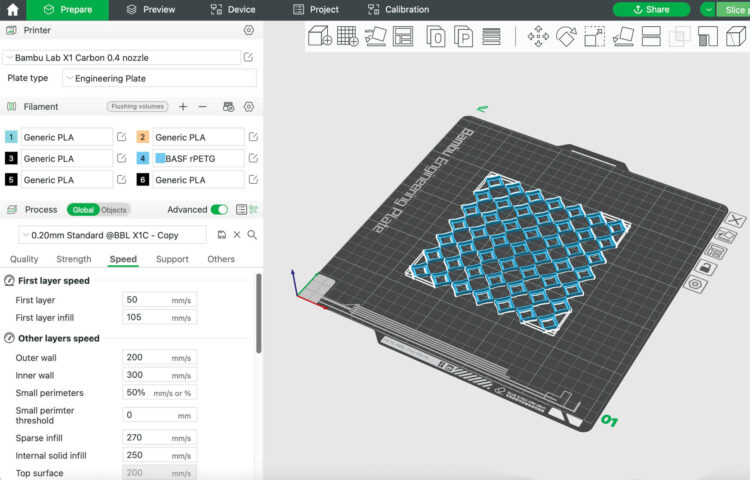
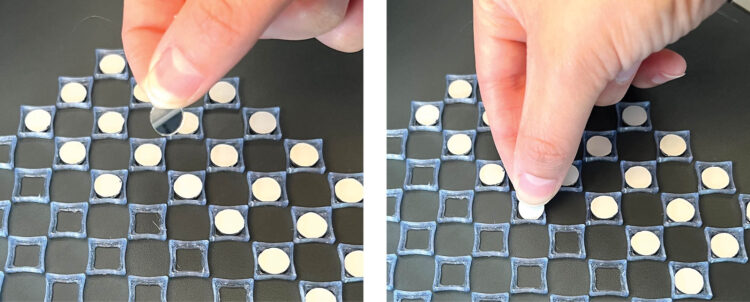
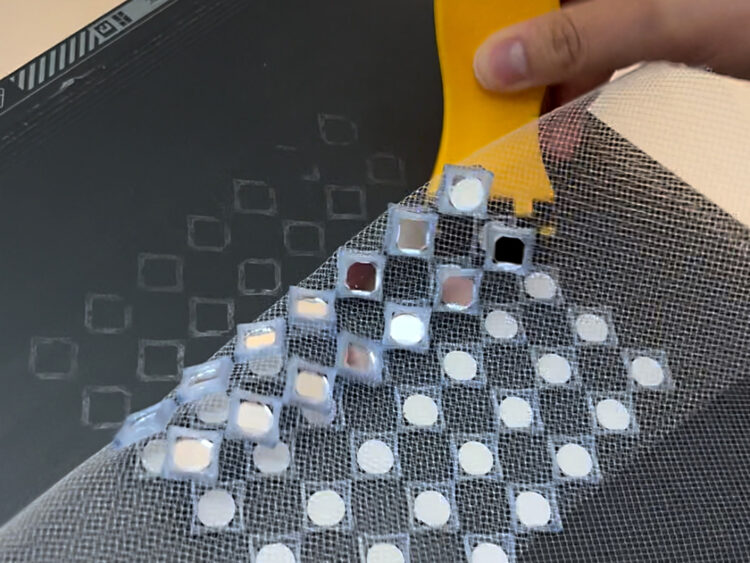
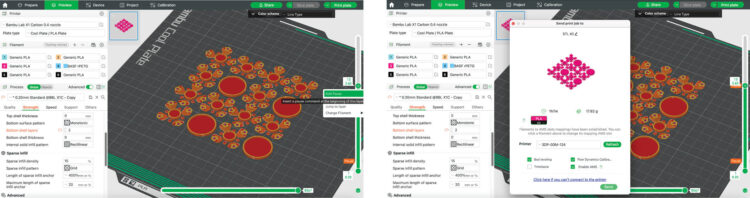
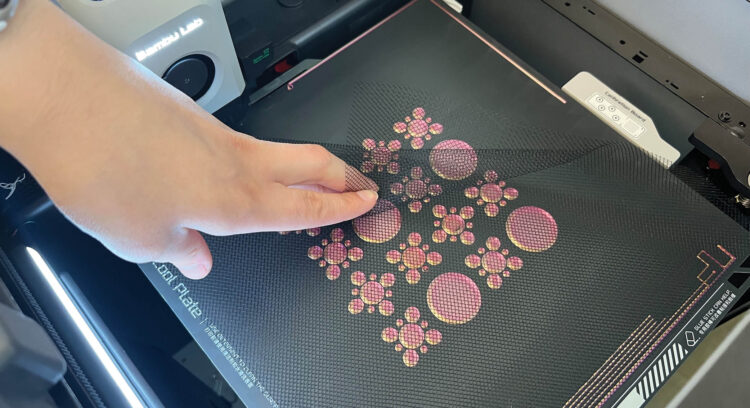
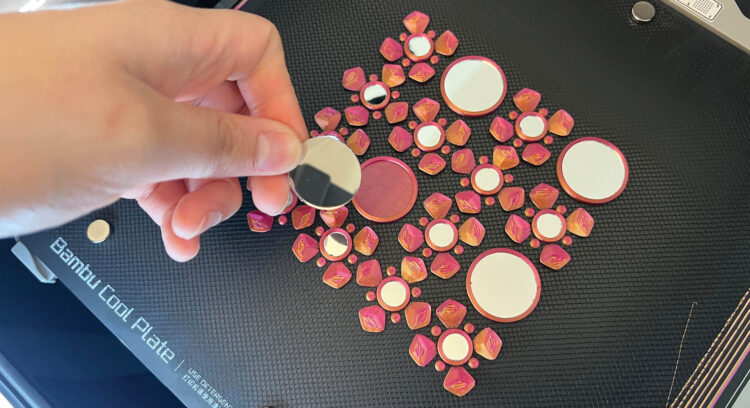
The idea of embedding craft mirrors into prints came to me after researching an Indian embroidery technique called shisha. It took a few attempts to perfect the measurements, but I’ve successfully used this technique to 3D print a set of wearable wings, a halter top, and even a handbag with heart-shaped mirrors. I’ve designed and 3D modeled two STL files that you can print out to try this project yourself! It’s suitable for beginners if you know some 3D printing basics like slicing a file, customizing print settings, and setting up a print.

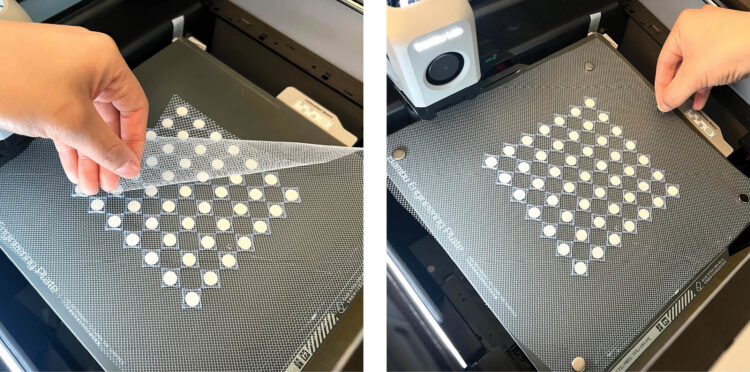
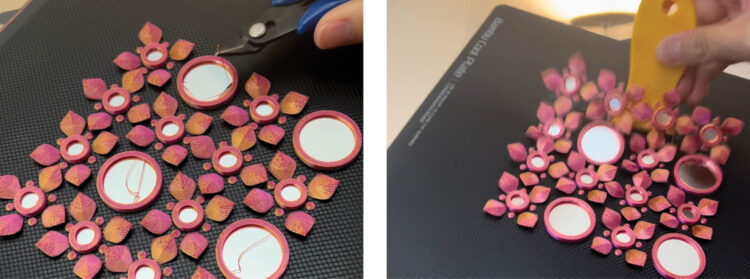
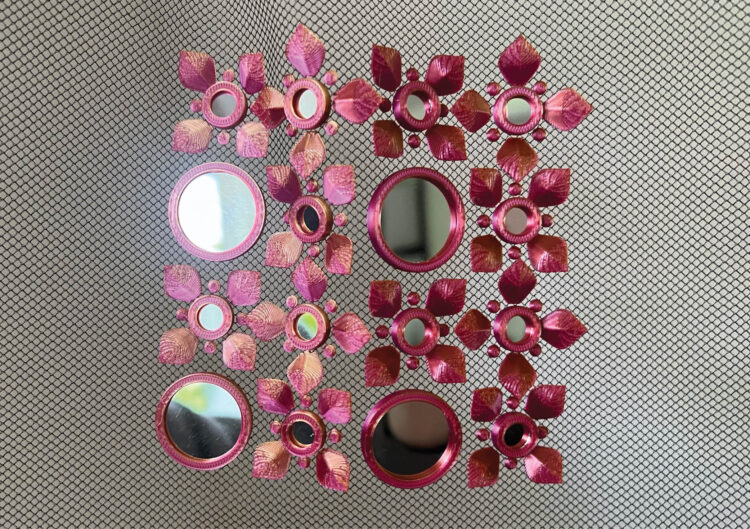
At the end of this make, you will have a sparkly, 3D-printed-on-mesh textile, and you’ll have learned how to embed mirrors and to sandwich fabric in your 3D prints. You can 3D print multiple swatches of these and use them to create your own garment, or you can use them as decoration, or as a fun fidget item. 

Project Steps

Fabric 1 (Single Pause)

This one is the simplest. You’ll pause the print once and place the mirrors facedown and the mesh on top.

1. Start by cutting the mesh fabric into squares roughly the size of your printer bed. I like to use my removable print bed as a reference.

2. Download the free STL file from cults3d.com and bring it into your slicer.

3. Use the recommended print settings for the filament material you’re using.

4. Add a pause at the second-to-last layer.

5. Add any adhesive you typically use to your printer’s bed. I like to use glue stick.

6. Start printing.

7. When the print pauses on its own, set the mirrors into their places with the mirrors face down (facing the print bed).

8. Place the mesh across the print, covering the print bed, and secure it in place with the magnets.

TIP: Make sure to place the magnets out of the path where the nozzle will be traveling. I recommend placing them toward the outside corners of your printer’s bed.

9. Resume the print.

10. Once the print is done, carefully remove it from the printer bed. You might need to gently use a scraper.

You’re done!

Fabric 2 (Two Pauses)

This one is a little different; you’ll pause once for the mesh, and a second time for the mirrors, placing the mirrors face up.

1. Again, start by cutting the mesh fabric into squares roughly the size of your printer bed.

2. Download the free STL file from cults3d.com and bring it into your slicer.

3. Use the recommended print settings for the filament material you’re using.

4. Add two pauses to your print: the first pause at the second layer, and the second pause at the second-to-last layer.

5. Add any adhesive you typically use to your printer bed, such as glue stick.

6. Start printing.

7. When the print pauses on its own for the first time, place the mesh over the print, covering the printer bed, and secure it in place with the magnets.

8. Resume the print.

9. When the print pauses on its own for the second time, set the mirrors into their places with the mirror side up.

10. Resume the print.

11. Once the print is done, carefully remove it from the printer bed, and clean up any stringing or extra filament that may be covering the mirrors.

You’re done!

Conclusion

Using your mirror fabrics

On its own, this project can be used for decoration, but it has the potential to be tiled together to create your own garments, like this mirror skirt. You can see it come together on YouTube.

For this halter top, I had a pile of scrap denim lying around and I thought, “Why not make a project using only waste?” I printed swatches of Fabric 1 using a light blue transparent filament from BASF made of recycled plastic bags. Then I used a trick I learned from Daniel Bettencourt (Kaizen 3D Prints) to tile them together and use UV resin to seamlessly glue them. You can watch my process on YouTube.

Your mirror fabric can also be glued or sewn to an existing garment, and of course you can personalize it by printing it in different colors. This is also a great technique for costumes — I used it to make these wearable fairy wings. You can buy the 3D files for printing them for a few dollars at cults3d.com.

And this may just be my new favorite bag: I created a cool textile with these heart-shaped mirrors I found online and as I was printing it, I saw it was the perfect size for a small handbag. I was expecting it to reflect light in a really pretty way but I didn’t think that it would also reflect light in little heart shapes!

Let me know what you make with your mirror fabrics @sewprinted!

This article appeared in Make: Vol. 91. Subscribe for more maker projects and articles!