By Molly Graber and Chris Merrick

Have you ever dreamed of being really tall? Walking on stilts is a fun and adventurous sport. But where are you going to get a decent-priced pair of stilts to try for your first time?

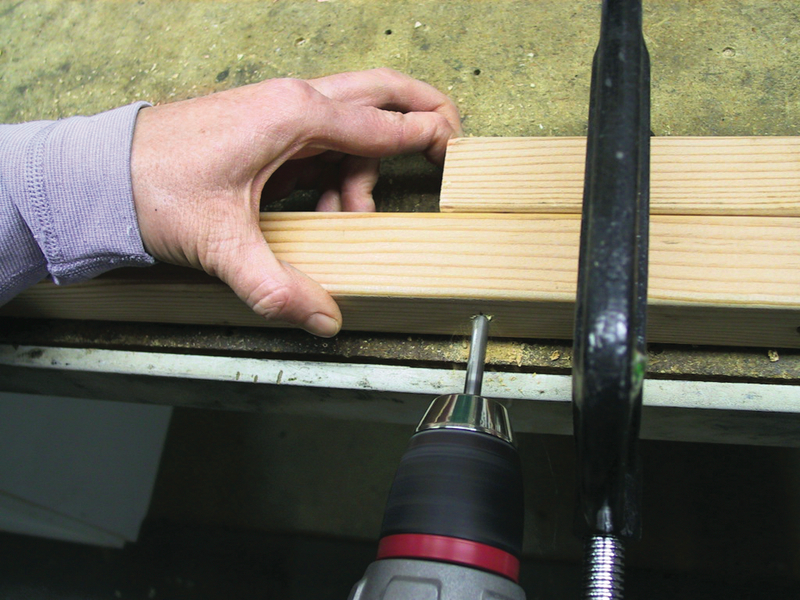
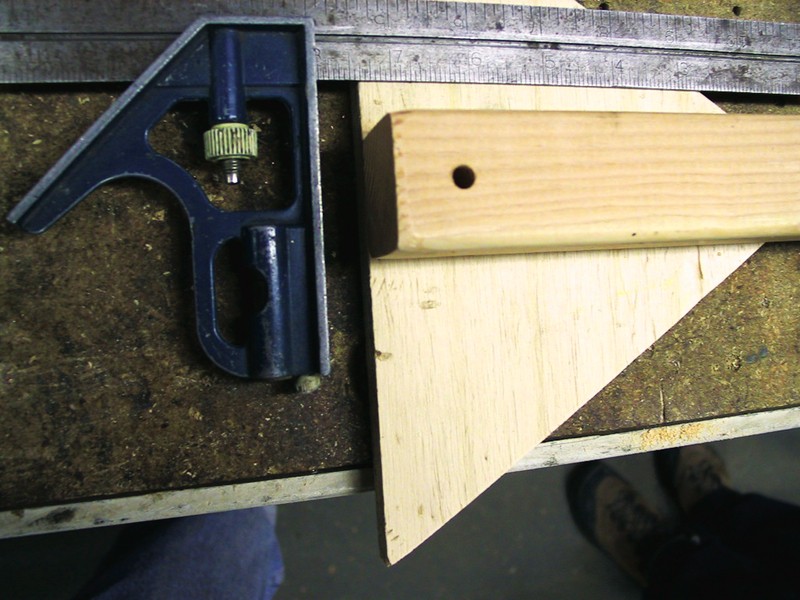
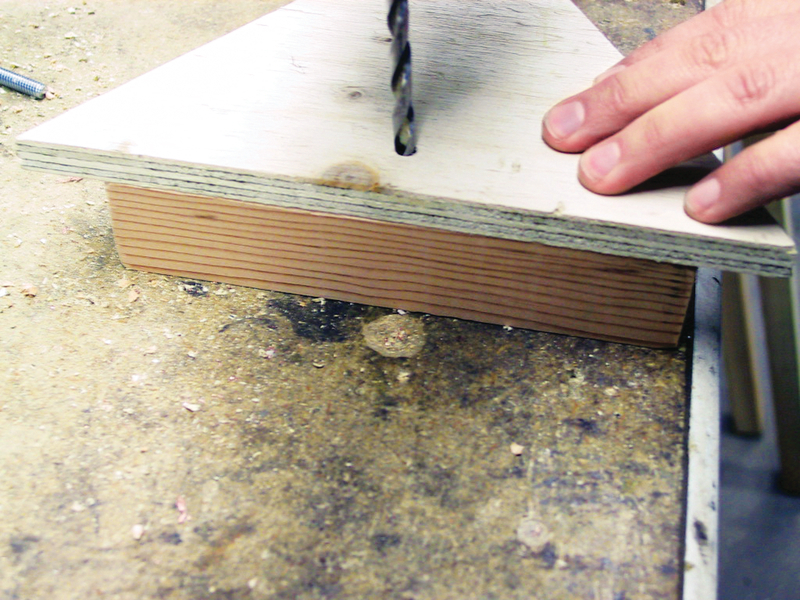
With these instructions, you can add as much height as you want and not hurt your wallet in the meantime. All you need is the know-how to use some simple tools — or a friend who can help!

Building your own pair of stilts ensures that they’re made just for your body, and when you’re done you’ve learned another crafty skill. Then all you’ll need is someone to help you learn to walk tall — and also how to fall. It’s a blast and we highly recommend it. Stilt walking can be as easy as it looks.

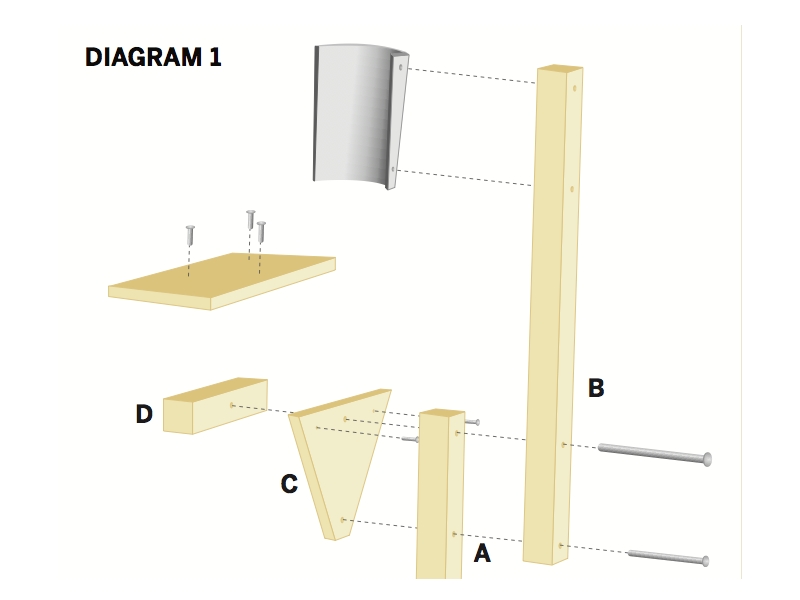
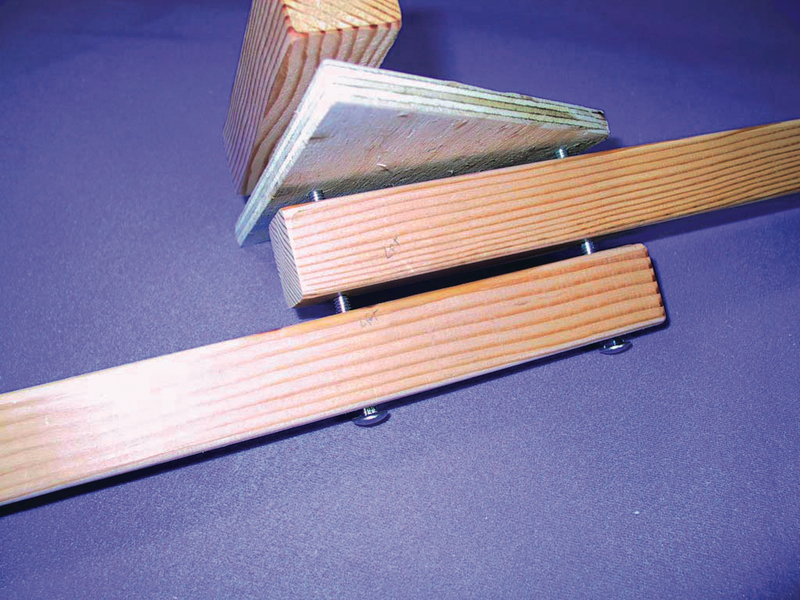
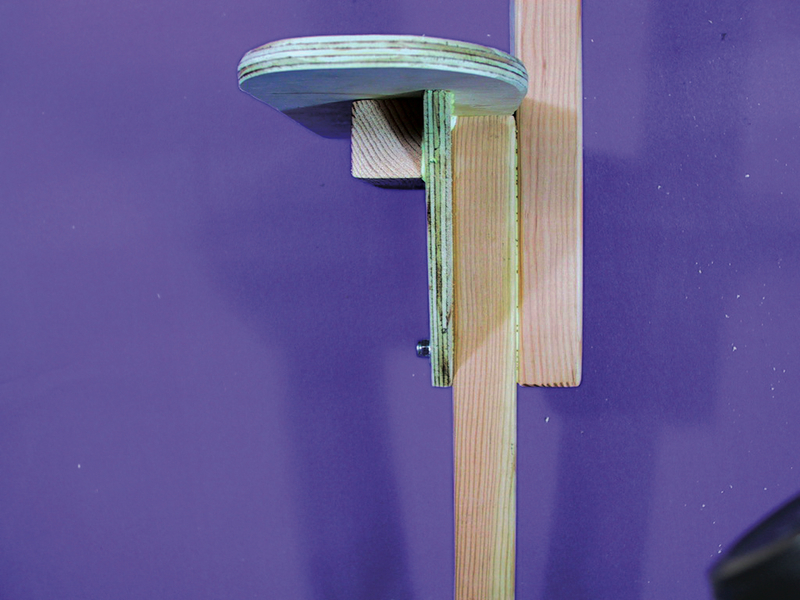
For starters, check out an animated version of how the pieces fit together.

Project Steps

Measure and cut wood pieces.

WARNING: When working with power tools, always take safety precautions. Safety glasses are recommended.

Determine how tall the stilts will be. This will be the length measurement for the pegs (piece A).

Measure from the bottom of your shoe to just below your knee and add 6″. This is the length measurement for the shin supports (piece B).

Using a measuring square, cut 2 pieces of 11⁄2″×11⁄2″ wood to the length of A and 2 pieces to the length of B. Each stilt needs an extra 7″ piece of the 11⁄2″×11⁄2″ wood for the foot platform (piece D).

Cut the 2 support trapezoids (piece C) to size and shape from the 1⁄2″ plywood. Sand all the edges.

Trace the outline of your shoes on 1⁄2″ plywood and leave at least 1⁄2″−3⁄4″ extra space outside of the shoe on all sides. The width should be at least 5″ across at the middle of the footplate. Cut out both footplates and sand all the edges. Don’t trim down the footplate where it will eventually rest against your shin support; this section (the outer edge of each foot) needs to follow a flat, straight line.

Determine footplate position.

Find your balance by balancing on a dowel. Stand up straight with your feet shoulder-width apart, line up your toes, and find your most comfortable balancing point by rolling the dowel back and forth underneath your feet while looking ahead. When you find the balancing point, have someone mark the outside of your shoes where the shoes intersect the dowel. Set the shoes on the footplates and mark each plate to match each shoe.

Drill the wood pieces.

For each stilt, you need pieces A, B, C, and D. Piece A will overlap piece B by 6″. Piece C is the next layer, followed by piece D (Diagram 1, previous page). Two bolts go through each of these sets, as shown in Diagram 1. Use caution when drilling the holes: all pieces should be square on top where the footplate will attach.

NOTE: Always label your pieces so that you line them up exactly as you drilled them.

Drill holes in B, as shown in Diagram 1, with a 1⁄4″ bit.

Line up A to overlap B by 6″, including the drilled holes. On a flat surface, clamp the 2 pieces together. Drill through A using the holes already drilled in B as a guide.

Drill the wood pieces, continued.

Using a T square, line up A with C. Clamp together and use the holes already drilled in A to guide you as you drill the holes in C.

Line up D with C and use a T square for the top edge. Clamp and use C to guide you as you drill the hole in D.

Assemble the wood pieces.

Practice assembling (Diagram 1), with the heads of the 51⁄2″ and 4″ carriage bolts on the outside of the assembly. If the pieces fit and form a flat rest for your footplate, take them apart and reassemble them, gluing each joint as you go. Holding the head of the bolt with pliers, tighten the nuts with an 8″ wrench so the bolts sink into the wood. Pre-drill and screw 2 wood screws through C, attaching it to D.

Pay attention to how the footplate will attach for each stilt. Arrange the pieces for each stilt so that B is on the outside of the shin. Pre-drill and attach the footplate to D and A with wood screws.

Prepare and attach shin guards.

Cut 2 pieces of your ABS pipe to 6″ lengths with a reciprocating saw or handsaw. Cut out a 3″-wide vertical section of each with a jigsaw.

Clamp the ABS pipe in a vise, heat the middle section with a propane torch, and using a glove, gently bend the ABS to flare out to the shape of your shin. Once you think the ABS is bent out enough to fit around your shin with foam padding set inside, let it cool, then hold the ABS and the foam to your shin to make sure they fit. You may have to heat and bend it again so that it fits well.

Drill a hole with the 1⁄4″ bit 1″ from the top of B. Use that hole to guide you in drilling your first hole in the ABS shin plate. Then thread the top hole of B and the ABS with a 2½” carriage bolt (this time with the head facing inward toward your shin), but don’t tighten it. Swing the front of the shin plate toward A so that it shows 1¼” past B. Drill the bottom hole through A and the shin plate. Thread holes with a 2½” carriage bolt. Tighten both bolts. Trim excess ABS and bolt material with a reciprocating saw.

WARNING: If you don’t have much experience using a reciprocating saw, ask someone for help on this step.

Sew straps and attach the foam.

The strap wraps around the back of your calf to the front, through the D-ring, and attaches back to itself with velcro. Sew the strap to the D-ring and the velcro to the strap.

Pre-drill the holes. Use 1⁄2″ wood screws to attach the straps to A on the upper end adjacent to the shin plate with the D-ring facing forward.

Cut a 7″×15″ piece of foam padding. Glue the foam onto your shin plates so that it wraps around the outside and back of your calf. Sew fabric around the foam for comfort, if you like.

Attach shoes and footings.

Arrange each shoe on each footplate so the mark on the outside of the shoe lines up with the line on your footplate and with the middle of A. Stand on your stilts with your shoes on to find the right shoe placement before attaching them.

Loosen laces and remove shoe liners. Pre-drill and screw each shoe onto a footplate with at least 2 wood screws per shoe.

Use zip ties to attach the bike tire footings to the bottom of the stilts.

For more information, check out vigilantiup.org.

Conclusion

This project first appeared in CRAFT Volume 08, pages 113-116.