SKILL BUILDER: Casting Pewter in Laser-Cut Billet Molds

In preparation for Comic-Con cosplay season every year, our makerspace has an enormous amount of fun casting props from my favorite castable metal alloy: pewter. Pewter is a great metal for costume jewelry and props. It is nontoxic, easy to work, attractive, inexpensive, melts at a low temperature, and has a satisfying heft that makes a prop believable.


Pewter is an alloy consisting mostly of tin and a little antimony and copper. You can get pewter from a variety of sources. One of our favorites: dented pewter mugs and pitchers from the thrift store (Figure A). Ingots of pewter (Figure B) can be purchased online for about $20 per pound.

Pewter has a low melting point, 170°–230°C (338°–446°F), depending on the exact mixture of metals. You can melt it with a variety of heat sources. A bunsen burner, stand, and very small cast iron skillet work well. We have also used a hotplate and stainless steel pot for melting larger junk. We recommend that you use a small electric melting pot meant for lead and pewter (Figure C). These cost about $50 new and are worth every penny. Watching solid drinkware melt into a shiny silver puddle before your very eyes is mesmerizing — always a treat if it’s your first time melting and pouring metal.
Making Billet Molds
Once you have pewter, and a way to melt it, you’ll need a mold. We use a process that allows us to make many types of molds for pewter using only our laser cutters and MDF or cardboard. Since paper doesn’t combust below 451° Fahrenheit (thanks Ray Bradbury) then by extension thicker cardstock and MDF board can easily withstand 338°–446°F of molten pewter.

It is relatively easy to create the molds even without a laser cutter, using common hand tools like a scroll saw, scissors, and white glue. The ornament in the very center of Figure D was created in just such a handmade mold.

This process is very easy, inexpensive, forgiving of failure, and can be done safely with a few basic precautions and no special equipment. Our goal is to create an easy-to-assemble mold out of 3 or more layers of MDF and/or cardstock. This is called a billet mold (Figure E).

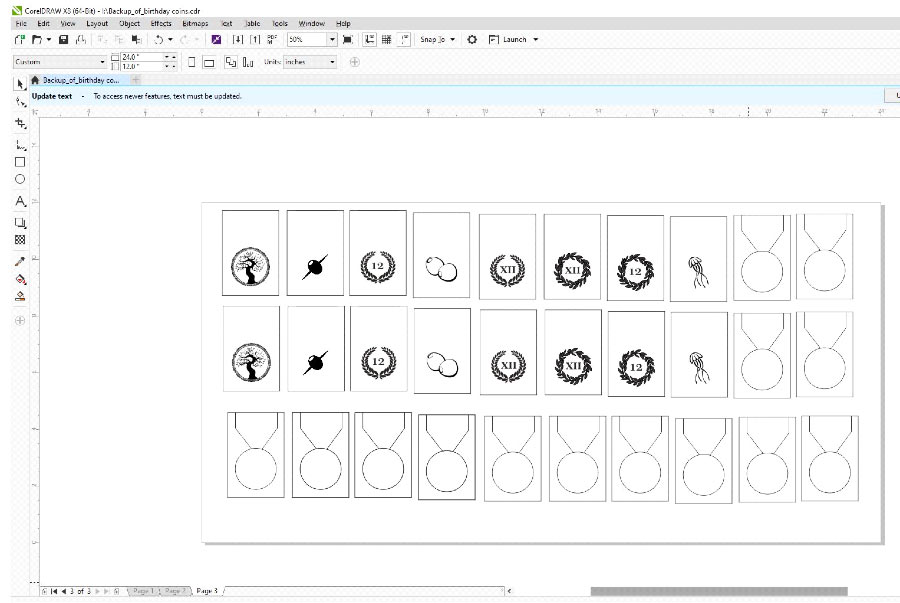
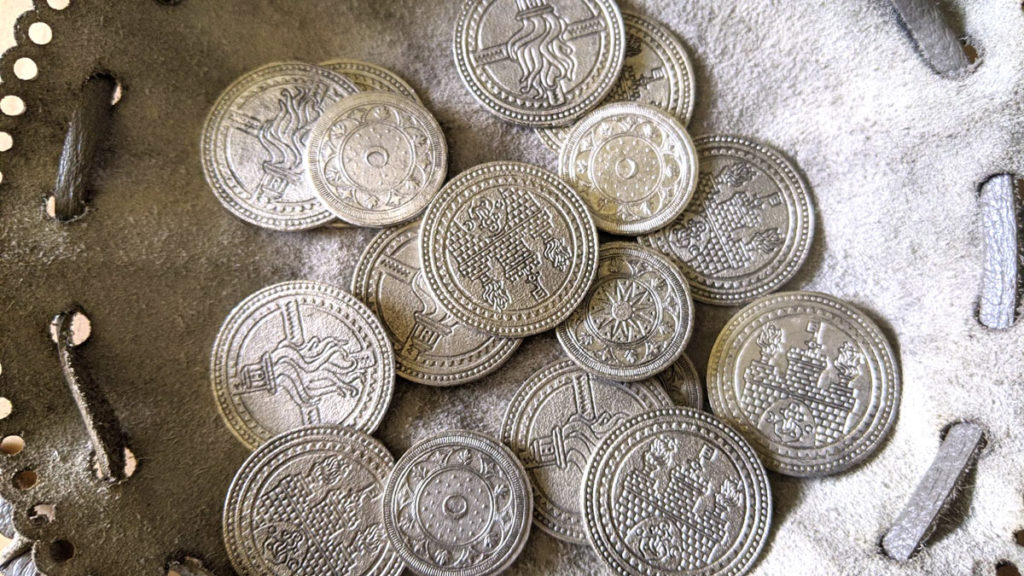
Figure D shows a variety of objects cast from pewter in billet molds. Most of these began as a drawing in software. In Corel Draw, I used vector lines for the profiles, and vector or raster images for raised textures and embossed areas. Some simple coins designs are shown in Figure F.
The fine lines will be cut by the laser, and the solid regions will be etched about 1mm into the surface of the MDF. To understand what these pieces do, let’s skip ahead and look at the finished pieces of a mold.
Casting Witcher Coins

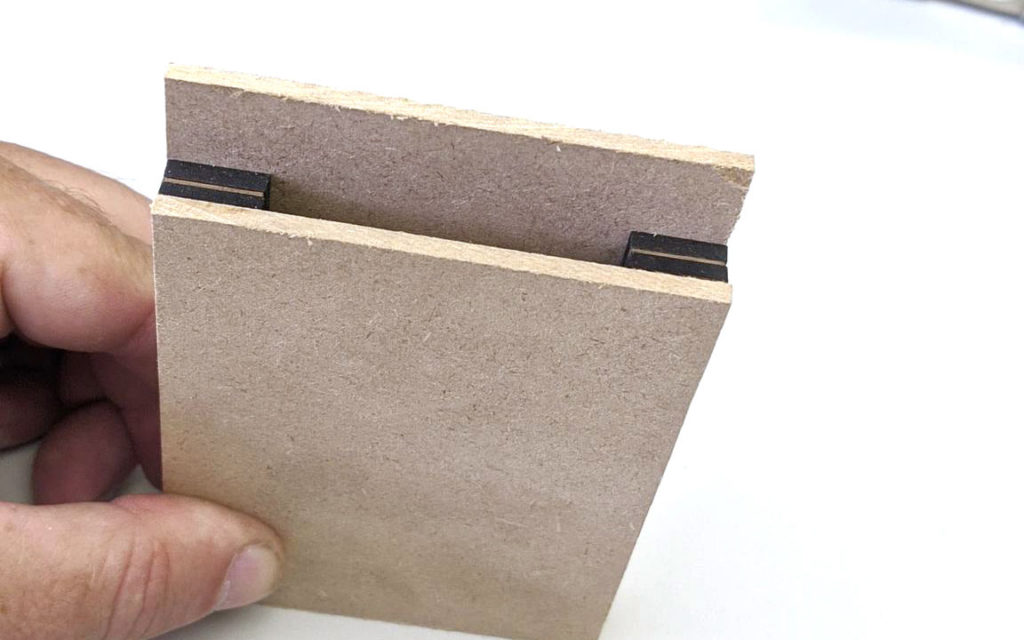
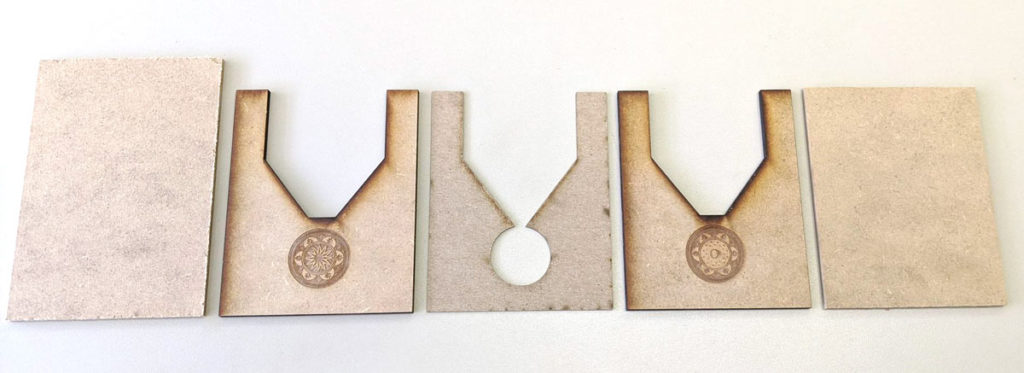
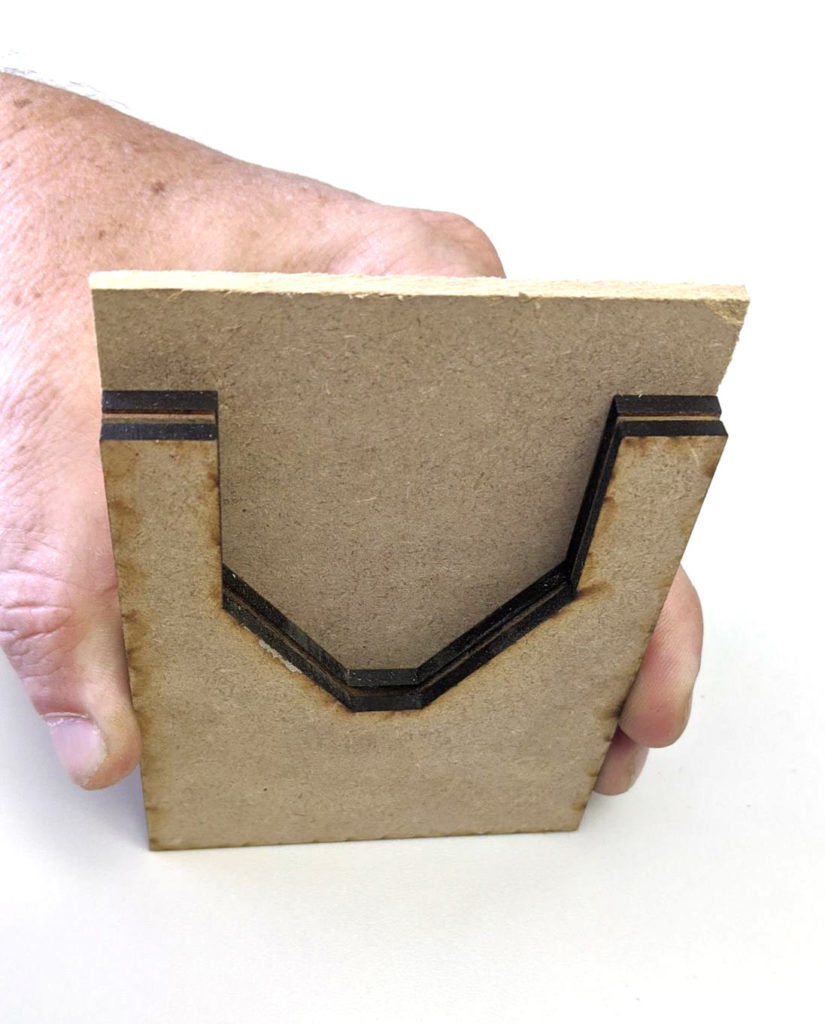
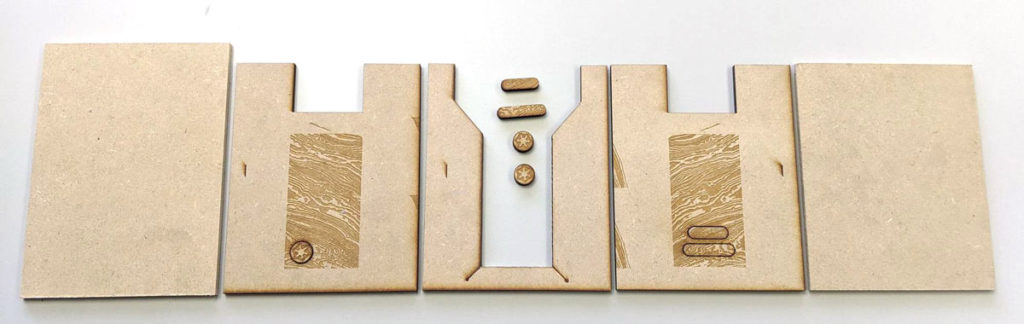
Each mold is made of a sandwich, or billet, of 3 or more layers. Figure G shows a simple coin mold. In this case, 5 layers are used: (from left to right) a blank front plate, the front etched surface plate with a pouring cup, the welting with pouring cup and downsprue, the back etched surface plate with pouring cup, and a blank back plate.

Let’s look at these layers from the inside out. The center layer is called a welting. It provides the profile of the cast piece and also determines its thickness. In this case, we wanted a very thin coin, so we used cardstock (Figure H).

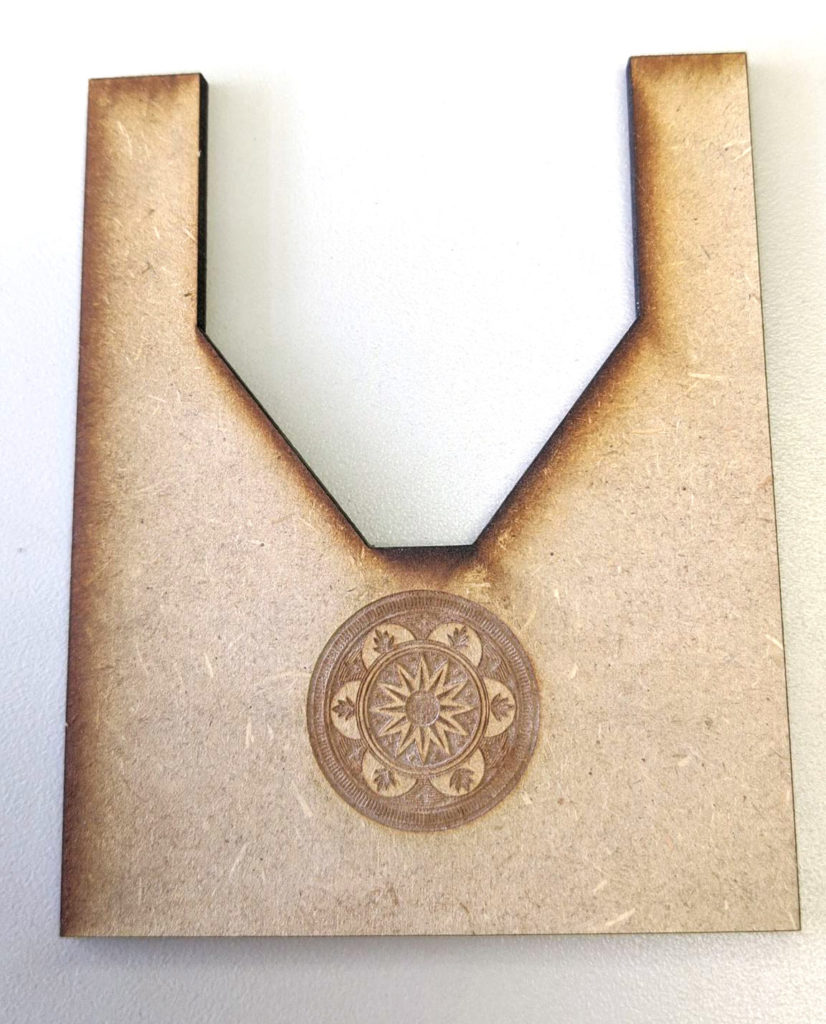
On each side of the welting is an etched plate (Figure I) that has been etched with a design and cut to match the profile of the welting, so that registration between the layers is easy. The dark areas will become raised surfaces on the finished coin. These can have a lot of detail or be simple and bold. Either way, molds with shallow designs survive the casting process well, but the deeper the etch needs to be, the shorter its lifespan becomes, as details may become trapped and be torn from the mold. I recommend dusting these pieces on new molds with baby powder before the first use. This will help trapped air to escape around the flowing metal in the tiny spaces between the powder particles and will vastly improve surface finish.

Figure J shows what the stack will look like once it is assembled between the blank outer plates, with only the top layer removed for viewing. The empty space at the top of this mold is very important and serves several purposes. It acts as a pouring cup to receive the molten pewter and as a downsprue to direct the pewter into the mold and allow air to escape. The relatively large pouring cup provides weight to generate pressure on the pewter below it, forcing it into the small details of the mold. In this case the mass of the pewter in the button (the leftover metal that cools in the pouring cup) is 30 times what is in the finished coin.

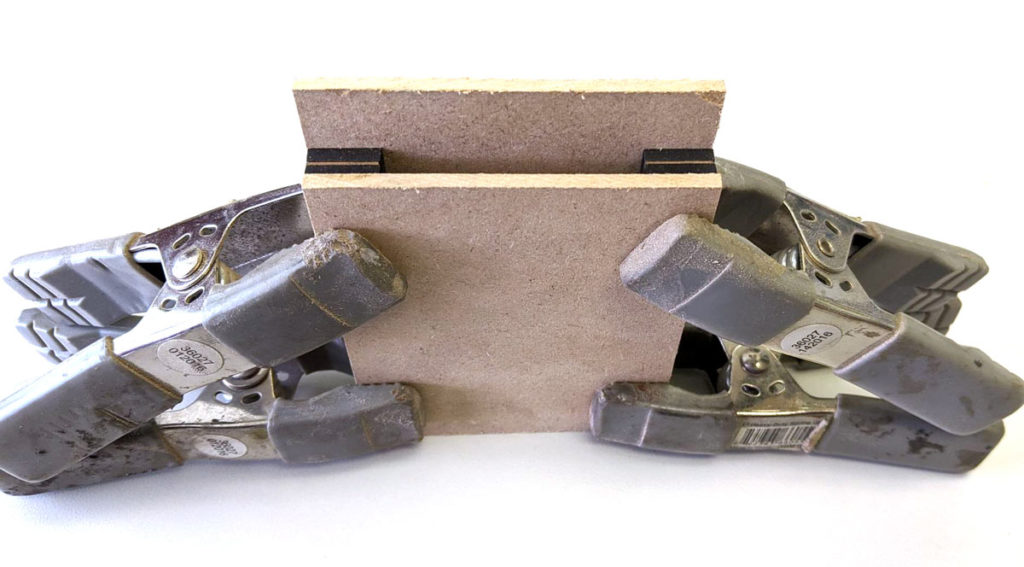
Once the details have been powdered and the billet stacked and aligned, we add spring clamps to hold the billet together and to make it stable and easy to pour into (Figure K). I like to make one of the outer plates taller than the rest of the mold so that I can pour against it as a backsplash.

I fill the molds to the top, in one swift pour (Figure L). This ensures that there’s plenty of weight on the lowest details before they have a chance to cool.
CAUTION: Before pouring the molten pewter, don your work gloves and eye protection. The mold may steam or even smoke a bit the first time you use it. There are all kinds of chemicals that evaporate out of the cardboard and MDF during the first pour. Do this in a well-ventilated area; outdoors is best.
Once it’s full, let your mold sit and cool for at least 15 minutes. There’s no rush. You want the mold to be cool enough to handle, and the pewter inside can burn you if you’re impatient.

Remove the clamps and begin to carefully pop the layers apart. It’s really important to resist the urge to twist them like an Oreo cookie. This will tear the detail from your molds and create a lot of cleanup on the cast part. Just start at the top and gently separate the layers (Figure M). Then you can carefully clip the sprue with a pair of flush cutters, return the button to your melting pot, reassemble the mold, and cast another coin.

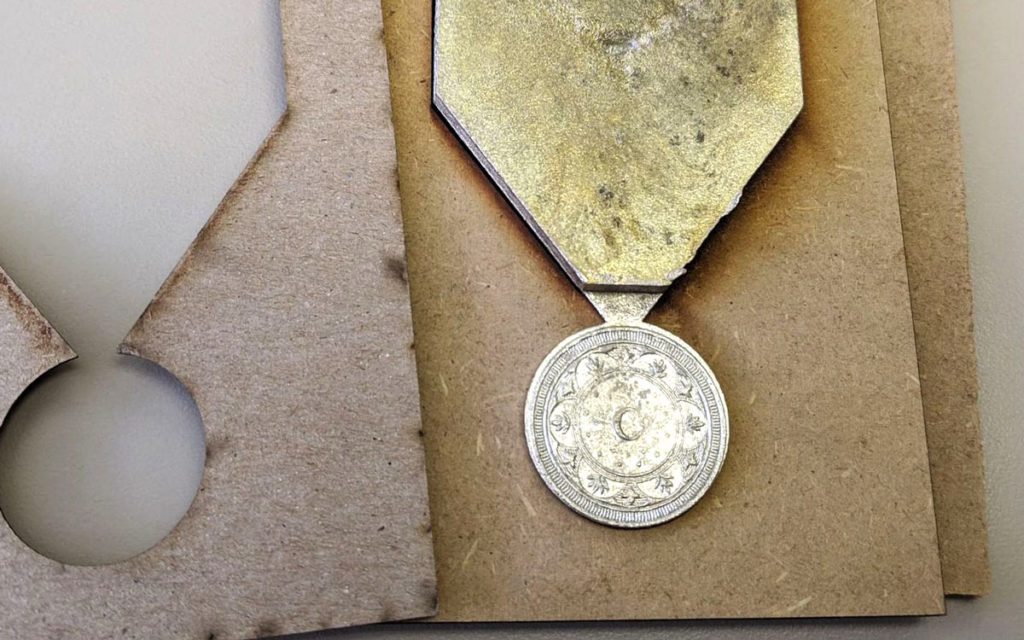
Finishing the pewter is easy. I like an antique look. The easiest way to achieve this is to grab a black dry-erase marker and give the entire coin a coat. Let the marker dry a bit and then give the coin a rubdown with some very fine steel wool. I suggest you use 0000 and stop when the luster and age look right to your eye (Figure N).
Congratulations, you now have coins you can toss to your Witcher or risk in a game of Gwent.
Casting Beskar Ingots
Or perhaps you’re a ruthless bounty hunter with a jetpack who prefers Beskar ingots to crowns and florins? Fear not, we’ve got you covered like IG-11. Here’s how you can fill a camtono with the down payment on your black-market Baby Yoda.

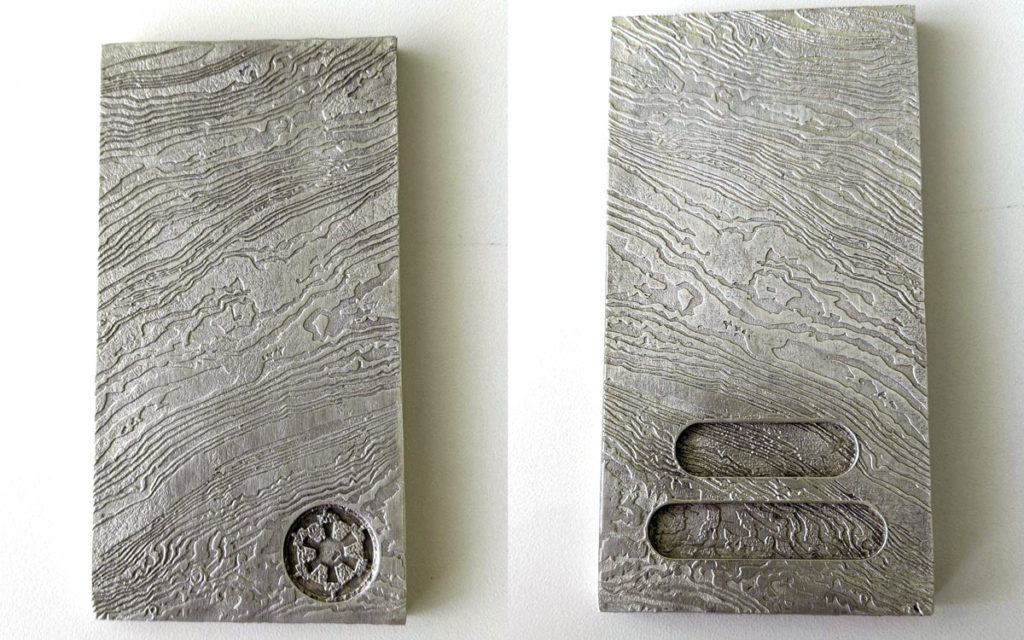
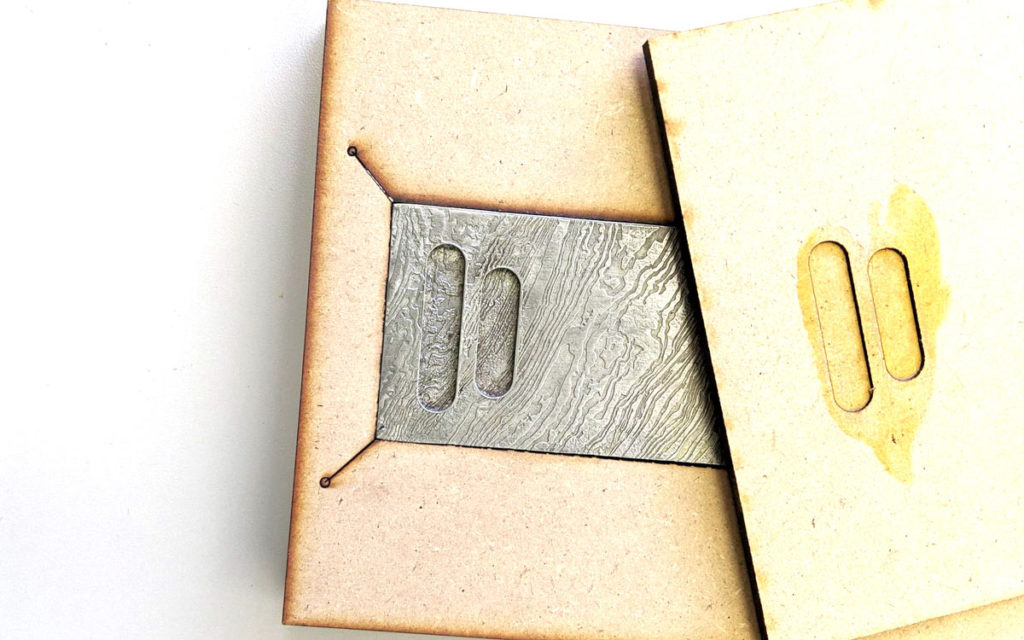
Now, this prop involves a few new concepts, so we’ll be building on what we’ve just learned. Billet molds are great for making flat shapes with a single layer of embossed design on the surface. But what if you need to deboss or indent the surface, like the Imperial stamp and oval detents in the front and back of this Beskar ingot (Figure O)? Those areas must be built up in your mold, rather than etched away. To solve this problem, we used the preferred choice of bounty hunters everywhere: more laser.

Much like our coin mold, we begin with the familiar layers: outer plates, etched plates, and welting (Figure P).


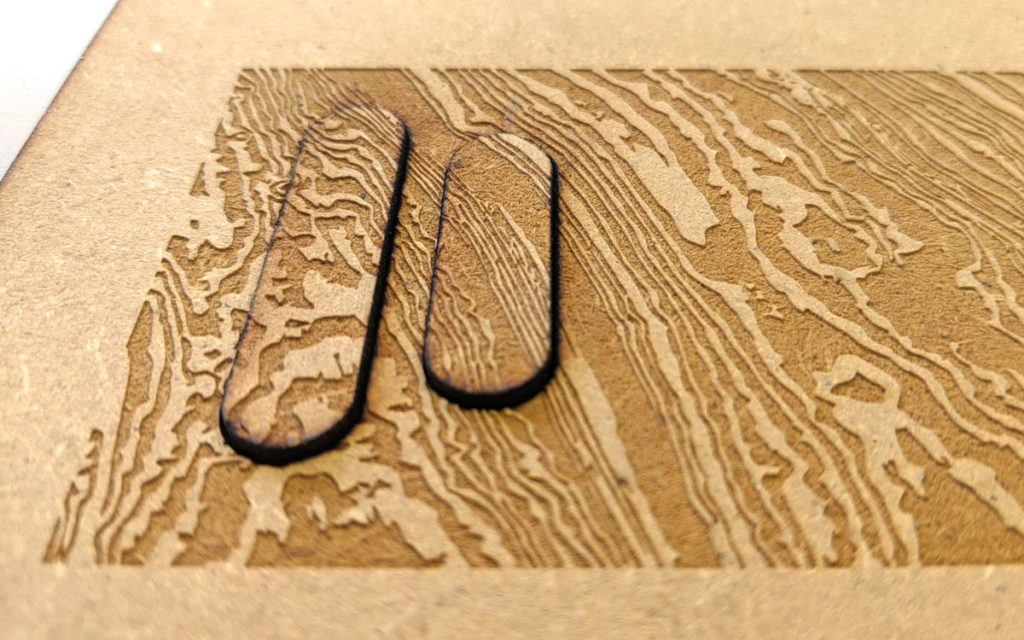
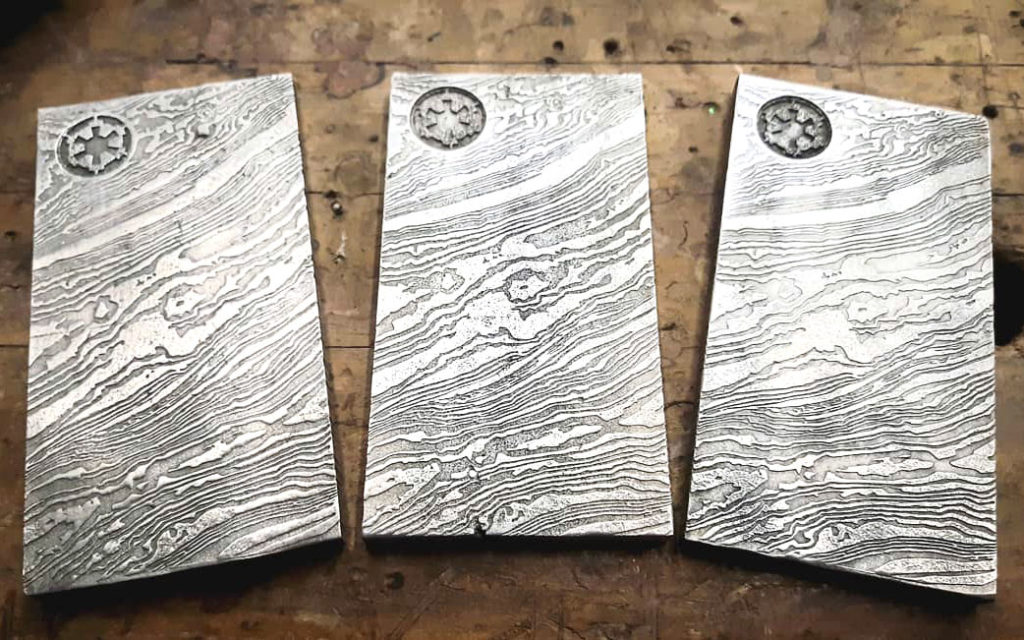
Figure Q is a close-up of the Damascus-like texture of the prop, etched into the MDF across the entire surface. Two ovals are cut from the back and a circle from the front, to allow those areas to be removed. These loose parts can then be adjusted, swapped out, and repaired if they suddenly initiate self-destruct, as is often the case with this challenging mold. Glue the oval parts back into place, at their new raised height, from the backside with wood glue to prevent leaking. Repeat this process to create the Imperial stamp on the front (Figure R).


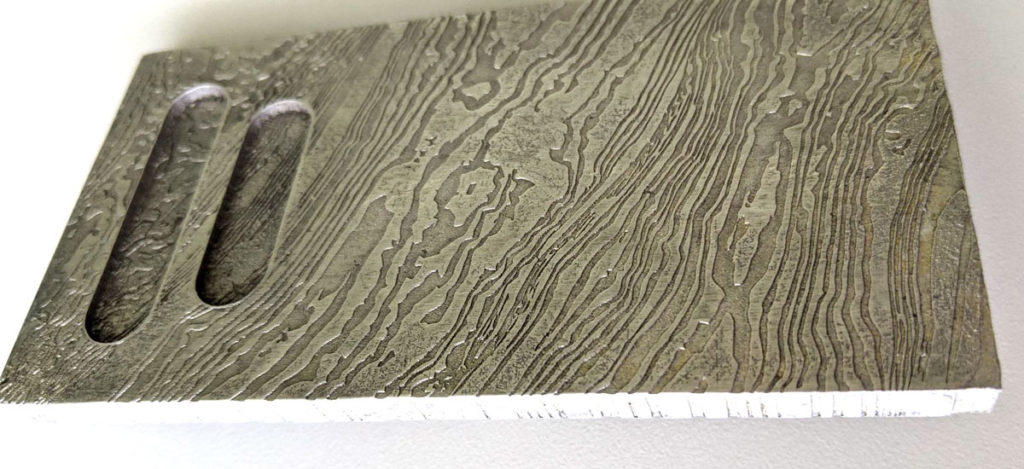
The welting of the Beskar ingot hides its own clever tricks. Naturally, the Damascus-like texture should also be visible at the ingot’s edge (Figure S). In order to achieve this magic trick on a surface we cannot etch on, we instead made precise and tiny convolutions in the outline of the welting (Figure T) to create stripes of high and low that match the mirrored pattern of the faces. This makes it look like the full pattern is visible on 5 of the 6 surfaces of this prop. (If you’re ambitious you can sculpt the top with a needle file after cutting away the sprue and button.)

This trick does not come for free. It makes it important to add some features to the welting that were not important before. First, it’s now possible to flip this welting over and mess up the pattern, so registration lines were added on the left side of each piece. Second, the cast part is often locked into the welting by these irregular notches. This problem can be solved by adding some relief cuts to the welting as shown in Figure U. These let the welting stretch enough to release the ingot.
During demolding, it’s not uncommon to damage one or more of the small debossed pieces. I always cut some extras so I can fix the mold. Other than that, Beskar ingots are just like coin molds, but they use a lot more pewter — at least a full pound of pewter to cast a 12oz ingot.
You Cut, We Cut

We are pleased to share our drawings for free, so you can laser-cut your own Beskar ingot molds (Figure V). Download the files at cdn.makezine.com/make/75/beskar-ingot-v2-hammerspace.pdf, and if you share them, please credit the team at Hammerspace Workshop.
Or, if your local makerspace or library doesn’t have a laser cutter, we are able to cut and ship molds to you from our community makerspace in Kansas City, Missouri. Get in touch at hammerspaceworkshop.com, or submit a job request directly to our armorers at hammerspacehobby.com/forge.
SKILL BUILDER: Casting Pewter in Laser-Cut Billet Molds
In preparation for Comic-Con cosplay season every year, our makerspace has an enormous amount of fun casting props from my favorite castable metal alloy: pewter. Pewter is a great metal for costume jewelry and props. It is nontoxic, easy to work, attractive, inexpensive, melts at a low temperature, and has a satisfying heft that makes a prop believable.
Pewter is an alloy consisting mostly of tin and a little antimony and copper. You can get pewter from a variety of sources. One of our favorites: dented pewter mugs and pitchers from the thrift store (Figure A). Ingots of pewter (Figure B) can be purchased online for about $20 per pound.
Pewter has a low melting point, 170°–230°C (338°–446°F), depending on the exact mixture of metals. You can melt it with a variety of heat sources. A bunsen burner, stand, and very small cast iron skillet work well. We have also used a hotplate and stainless steel pot for melting larger junk. We recommend that you use a small electric melting pot meant for lead and pewter (Figure C). These cost about $50 new and are worth every penny. Watching solid drinkware melt into a shiny silver puddle before your very eyes is mesmerizing — always a treat if it’s your first time melting and pouring metal.