YouTube player

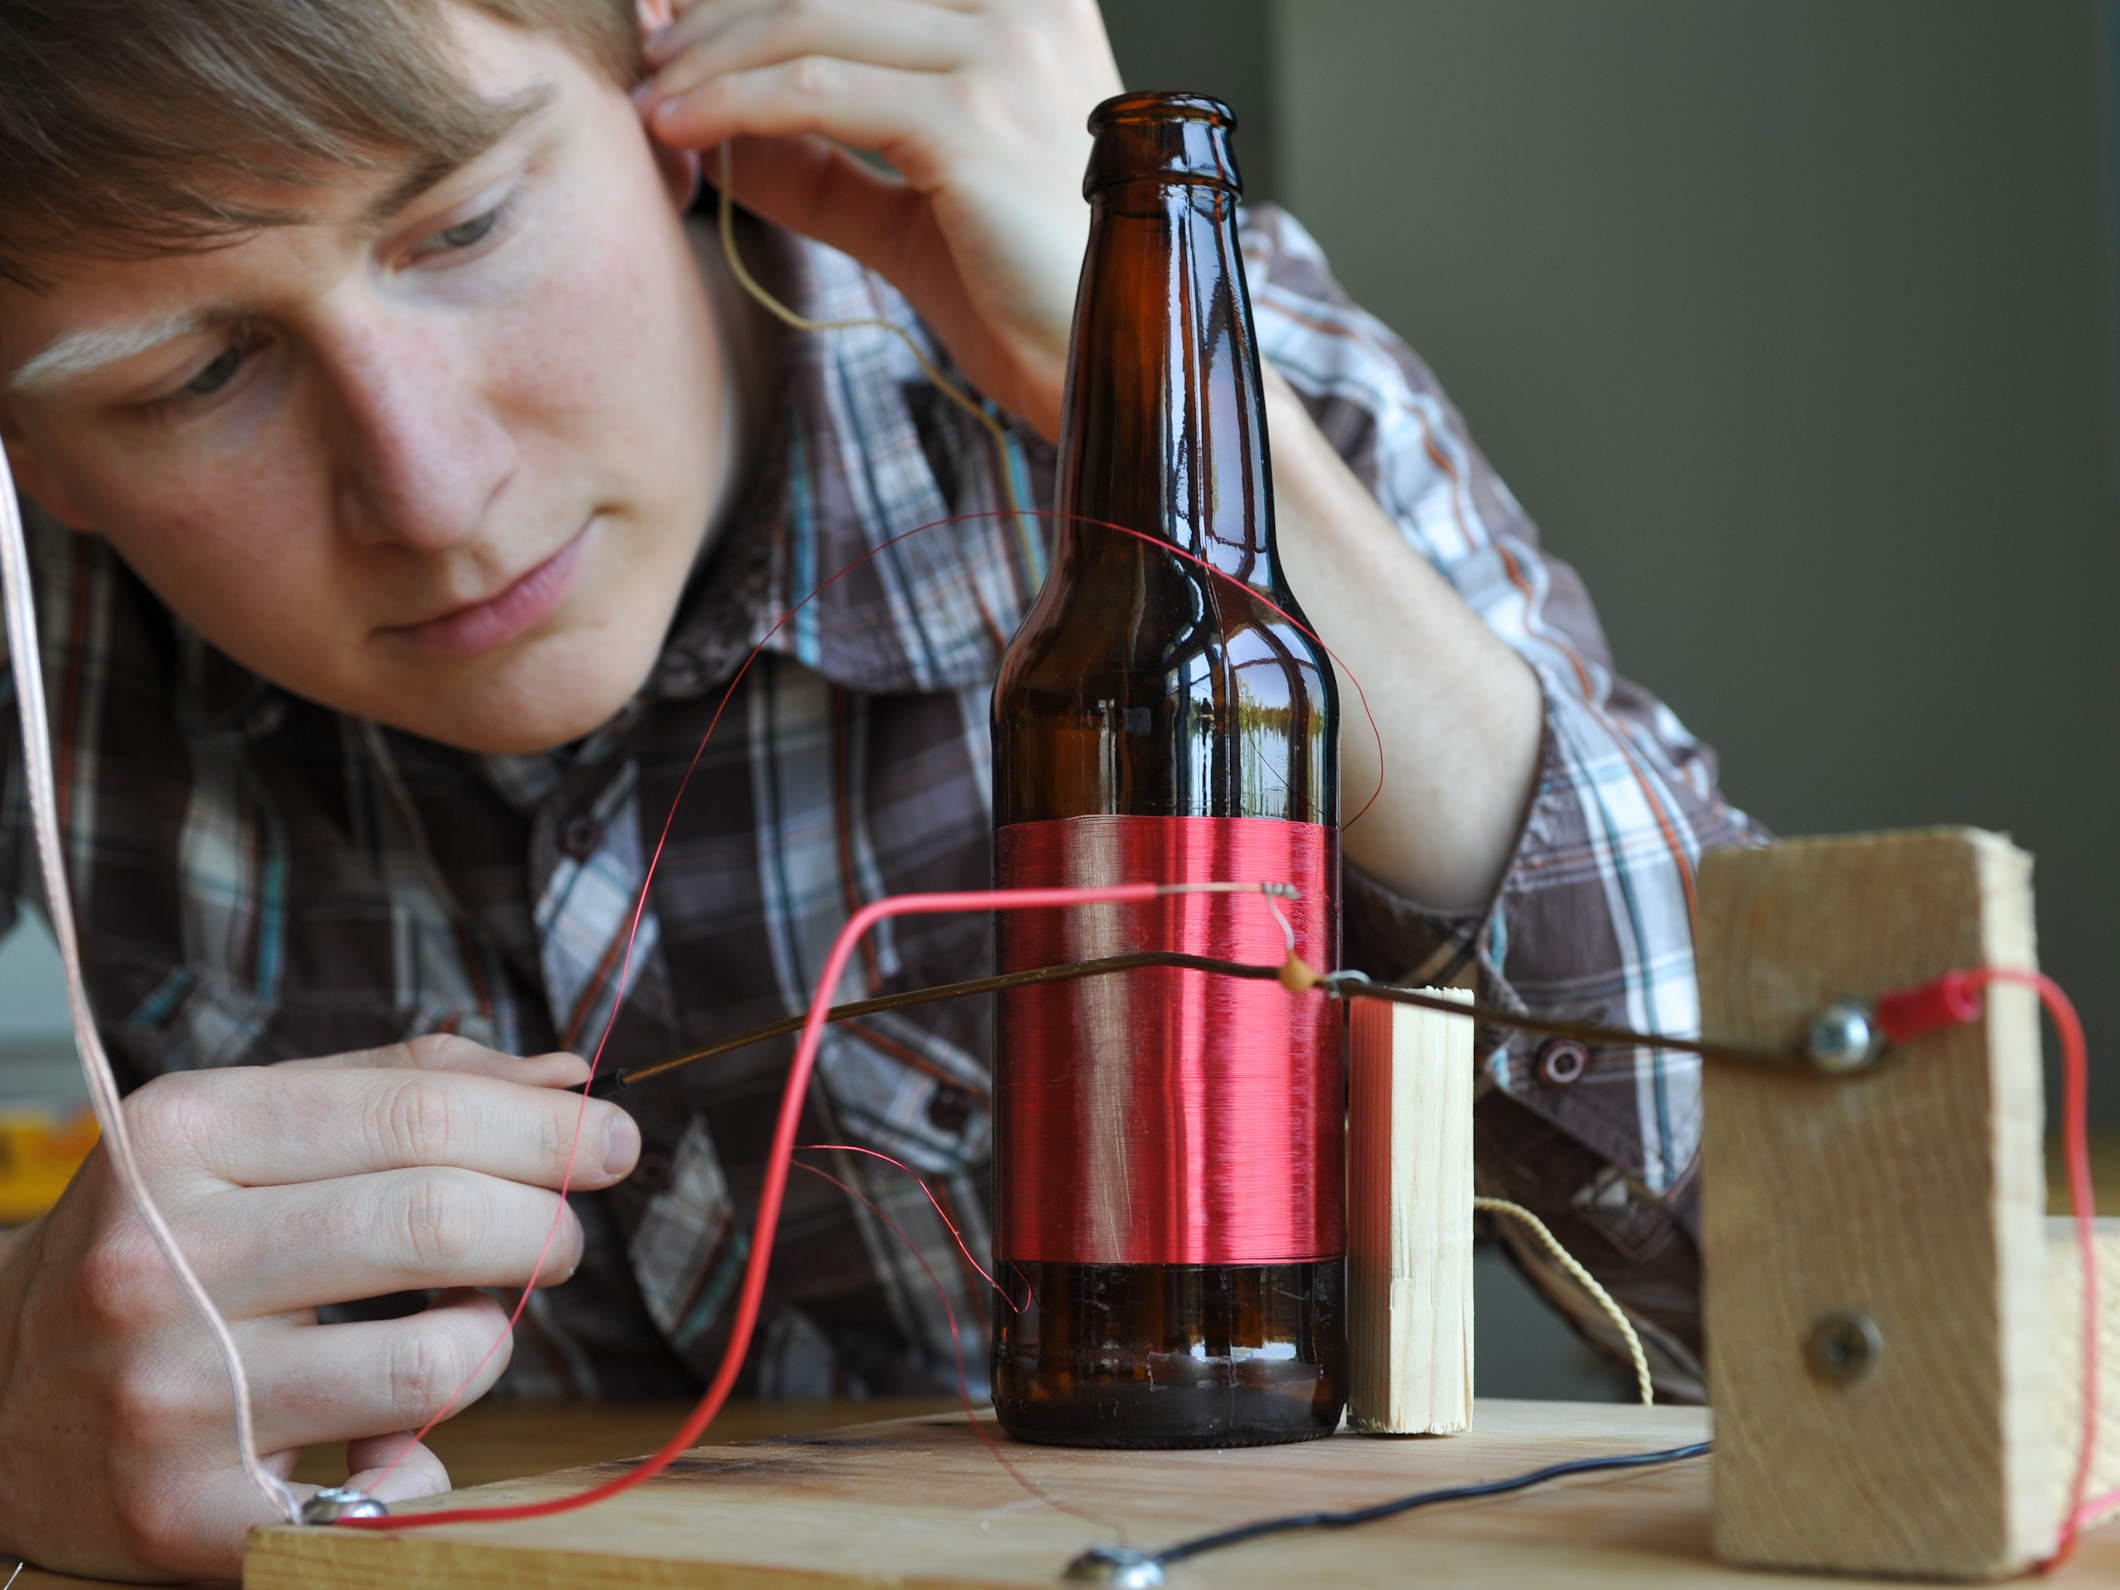
Crystal radio technology has been around for many years. This “bottle radio” take on a crystal radio requires no power source, operates on the power from radio waves, and receives signal from a long wire antenna. As radio stations slowly move away from the AM band, the “window of opportunity” to experience this remarkable technology is dwindling. On that note, the closer you are to an AM station or transmitter, the more likely you are to hear distinct radio waves with this project.

The “crystal” in question is contained inside a germanium diode, and is used to rectify the radio signal so that our ears can hear it. Since this project has no power source, the signal can be quite weak – crystal earphones are a fun way to hear low-amp signal (due to their sensitivity), or, alternatively, you could hook up a 9V mini-amplifier.

For more information on this battery-less technology check out this Wikipedia article.

Project Steps

Winding the coil.

Unsurprisingly, the first thing we’ll need is a bottle. I’m using a brown glass bottle. Remove the label and rinse it clean.

Next, we need one of our three spools of magnet wire. Here we’ll be using the red 30-gauge wire.

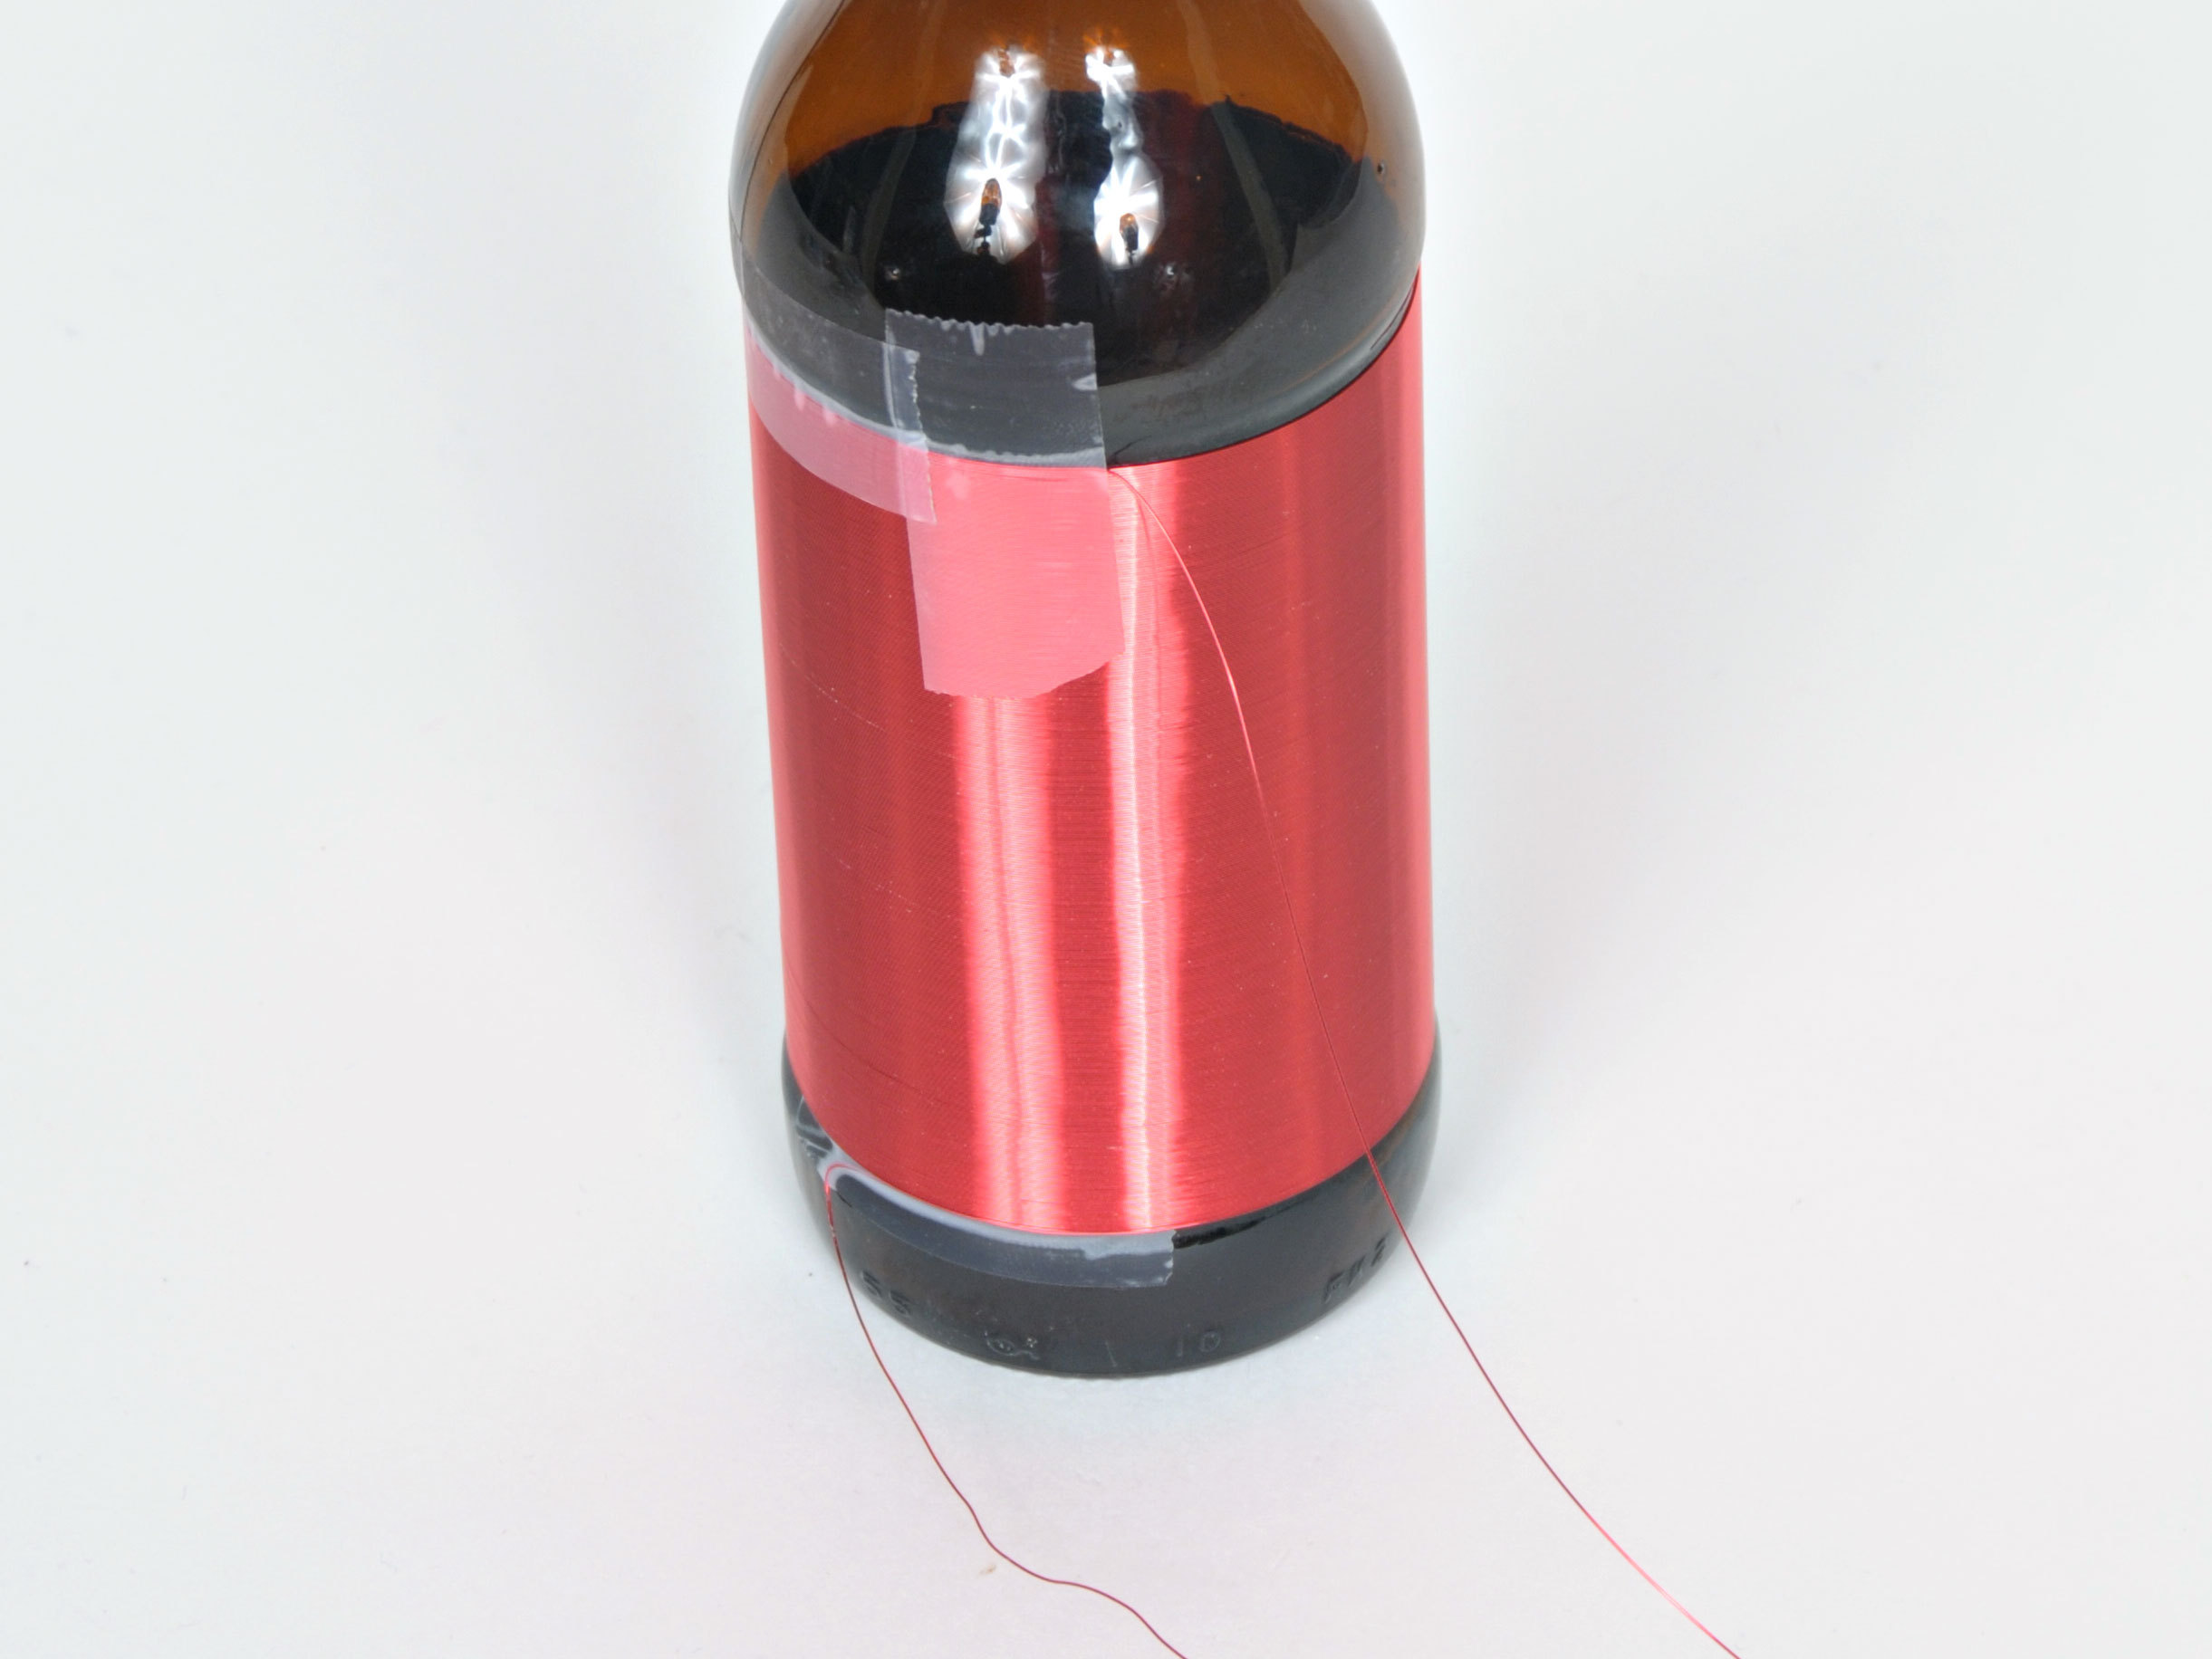
When winding a coil, it’s intuitive to wind “hand over bottle,” but this introduces a twist in the wire, something we don’t want. A better way to wind a twist-less coil is to put the spool of wire on some kind of spindle and rotate the bottle slowly. Start by sticking down the free end with tape (start at the bottom of the bottle, leaving around 6″ of lead wire for connecting later).

Be careful of the wire. You don’t want it to “cross over” itself while winding. Try to keep a constant tension and apply tape as needed to save your position as you wind. You want to make the coils as smooth and closely packed as possible.

Once complete (using the whole spool) you should have something that looks like image 2 (leave about 8-10″ of lead wire at the top, for connecting later). Next we will sandpaper the wire, but before that, apply fast drying sprayable lacquer or shellac (if available) to hold the wire in position. If you don’t, you risk loosening the wire when you sandpaper the wire. The lacquer will hold it all together. Also, don’t use too much, otherwise you risk waiting over an hour for it to dry.

The last step is to take a small piece of 150 grit sandpaper, and carefully sand off the red coating in a vertical line (image 3), then gently sand the ends of the wire to expose the copper.

Building the receiver.

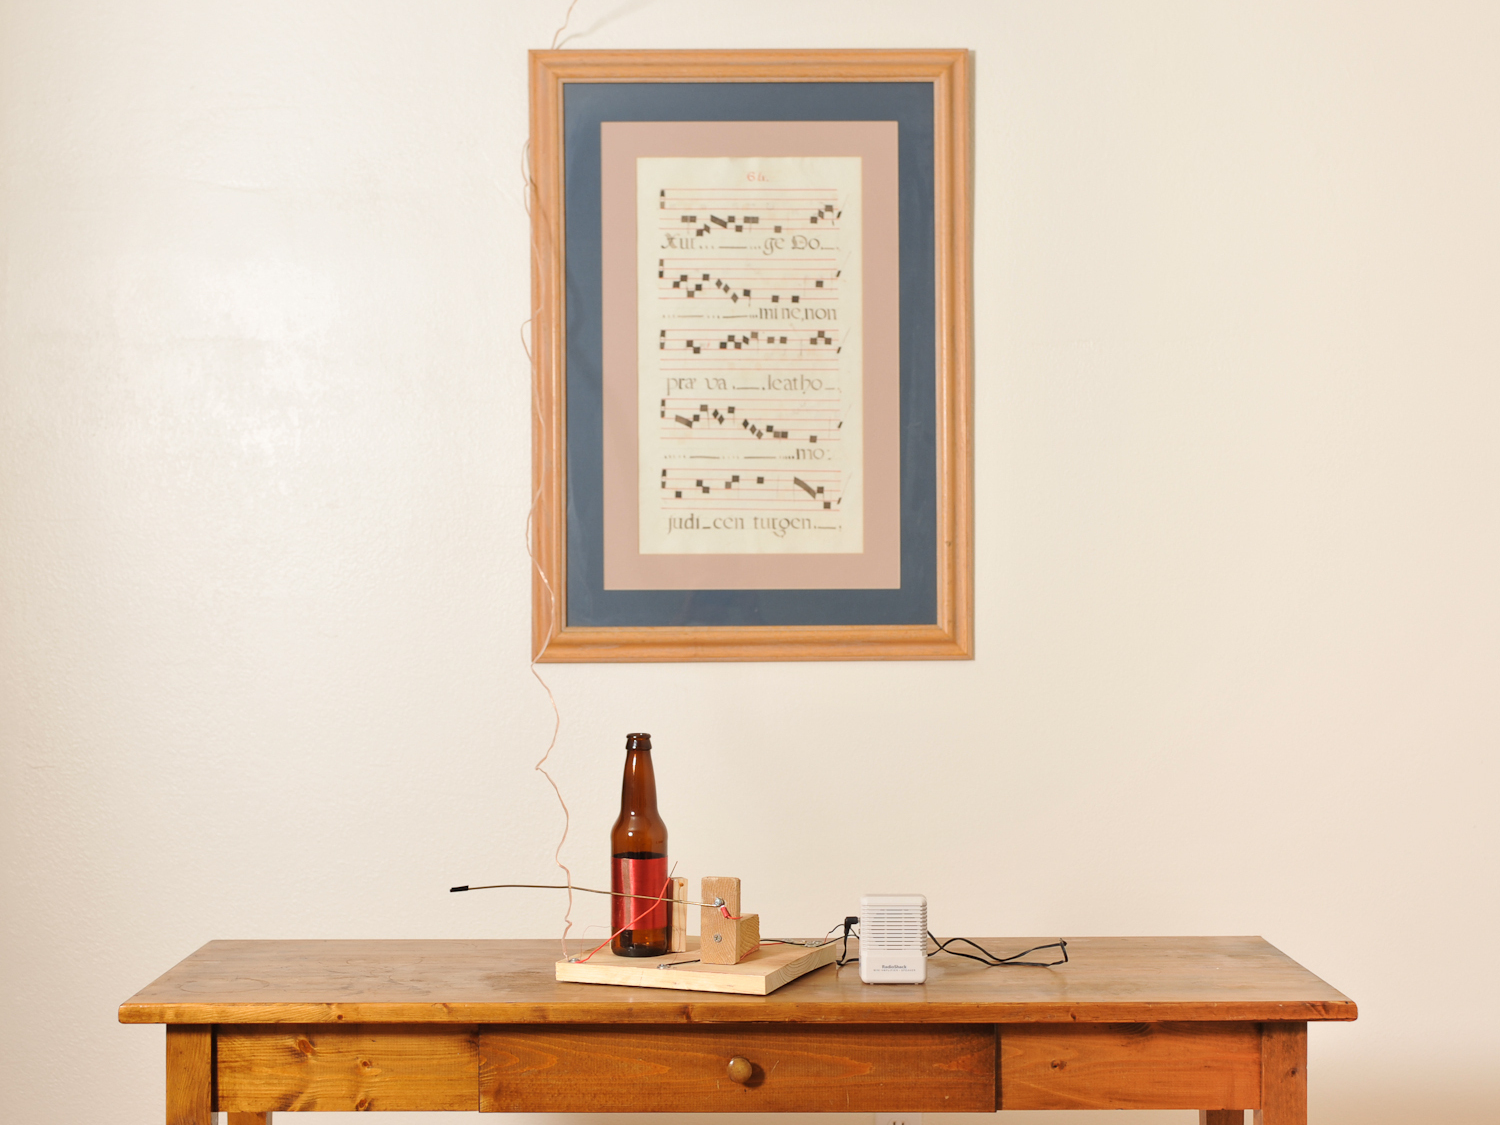
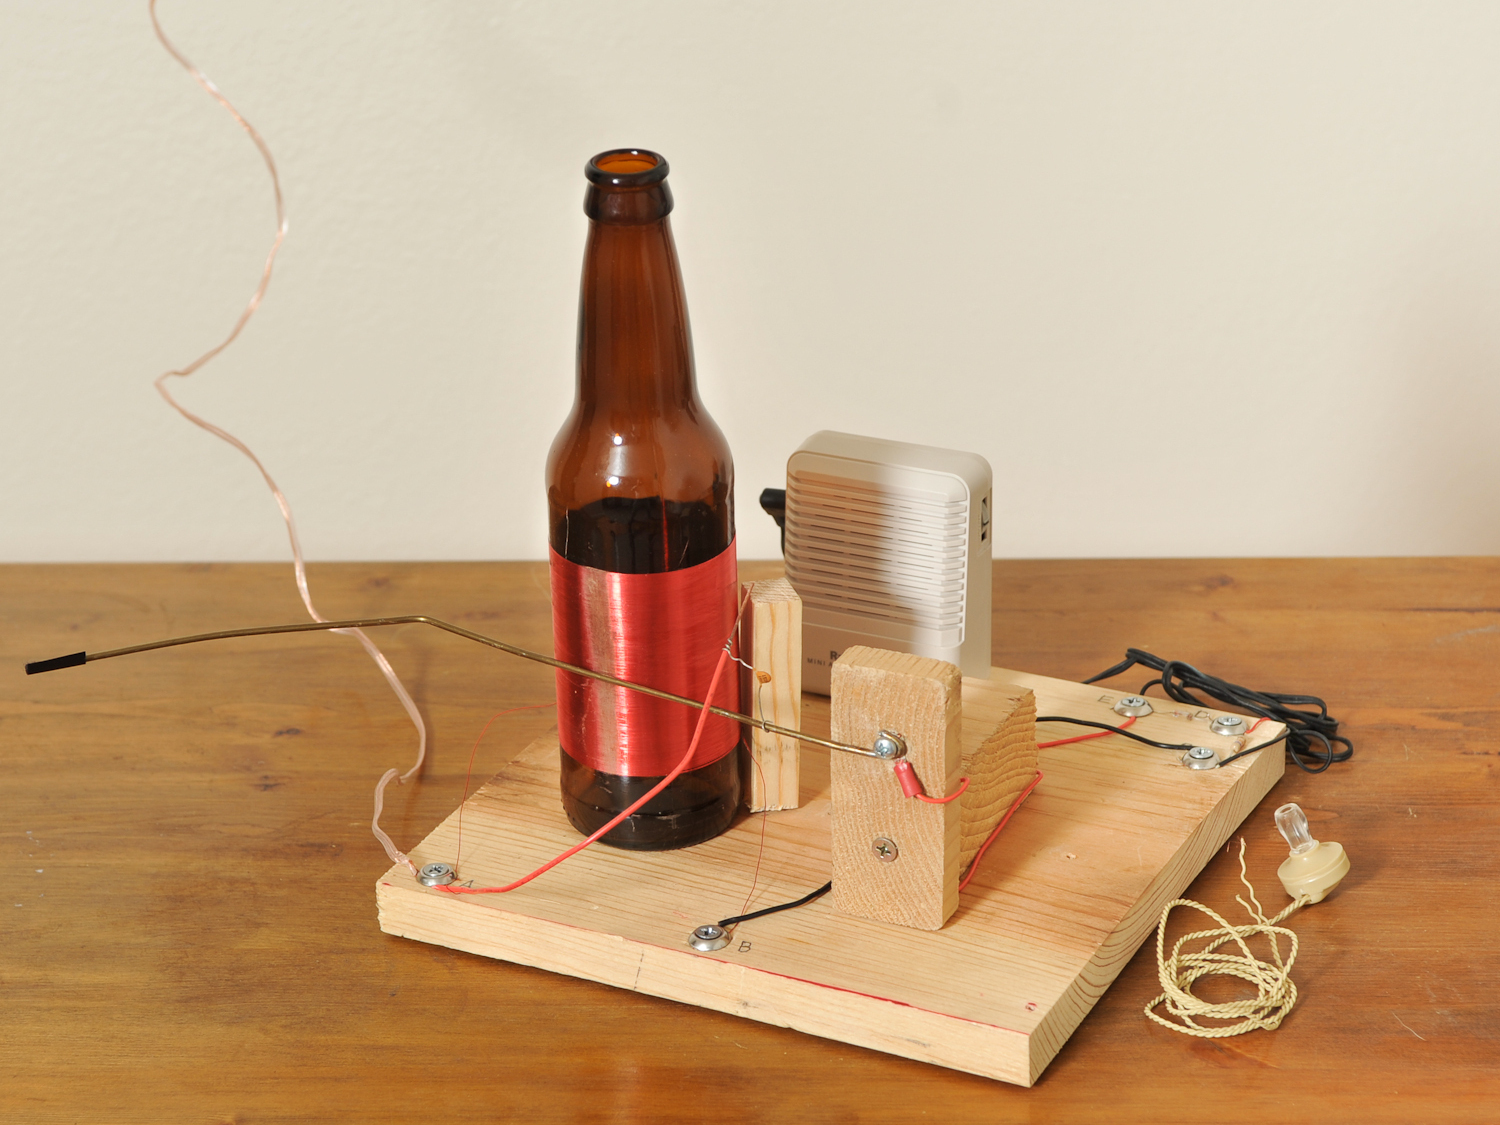
Next we need a simple wooden base to hold our components. Scrap wood works fine for this project – feel free to paint or decorate your base as you please. Position the wooden blocks so that the two diagonal pieces (first photo, right) cradle the bottle and position the wiper stand (see info below) so that the wiper will touch the coil on the bottle when it’s in the cradle. See the final set-up in the second image. Now we’ll start making our connections!

One way to connect the wires is to use Fahnstock clips – if you can’t find any of these then screws and washers will work too.

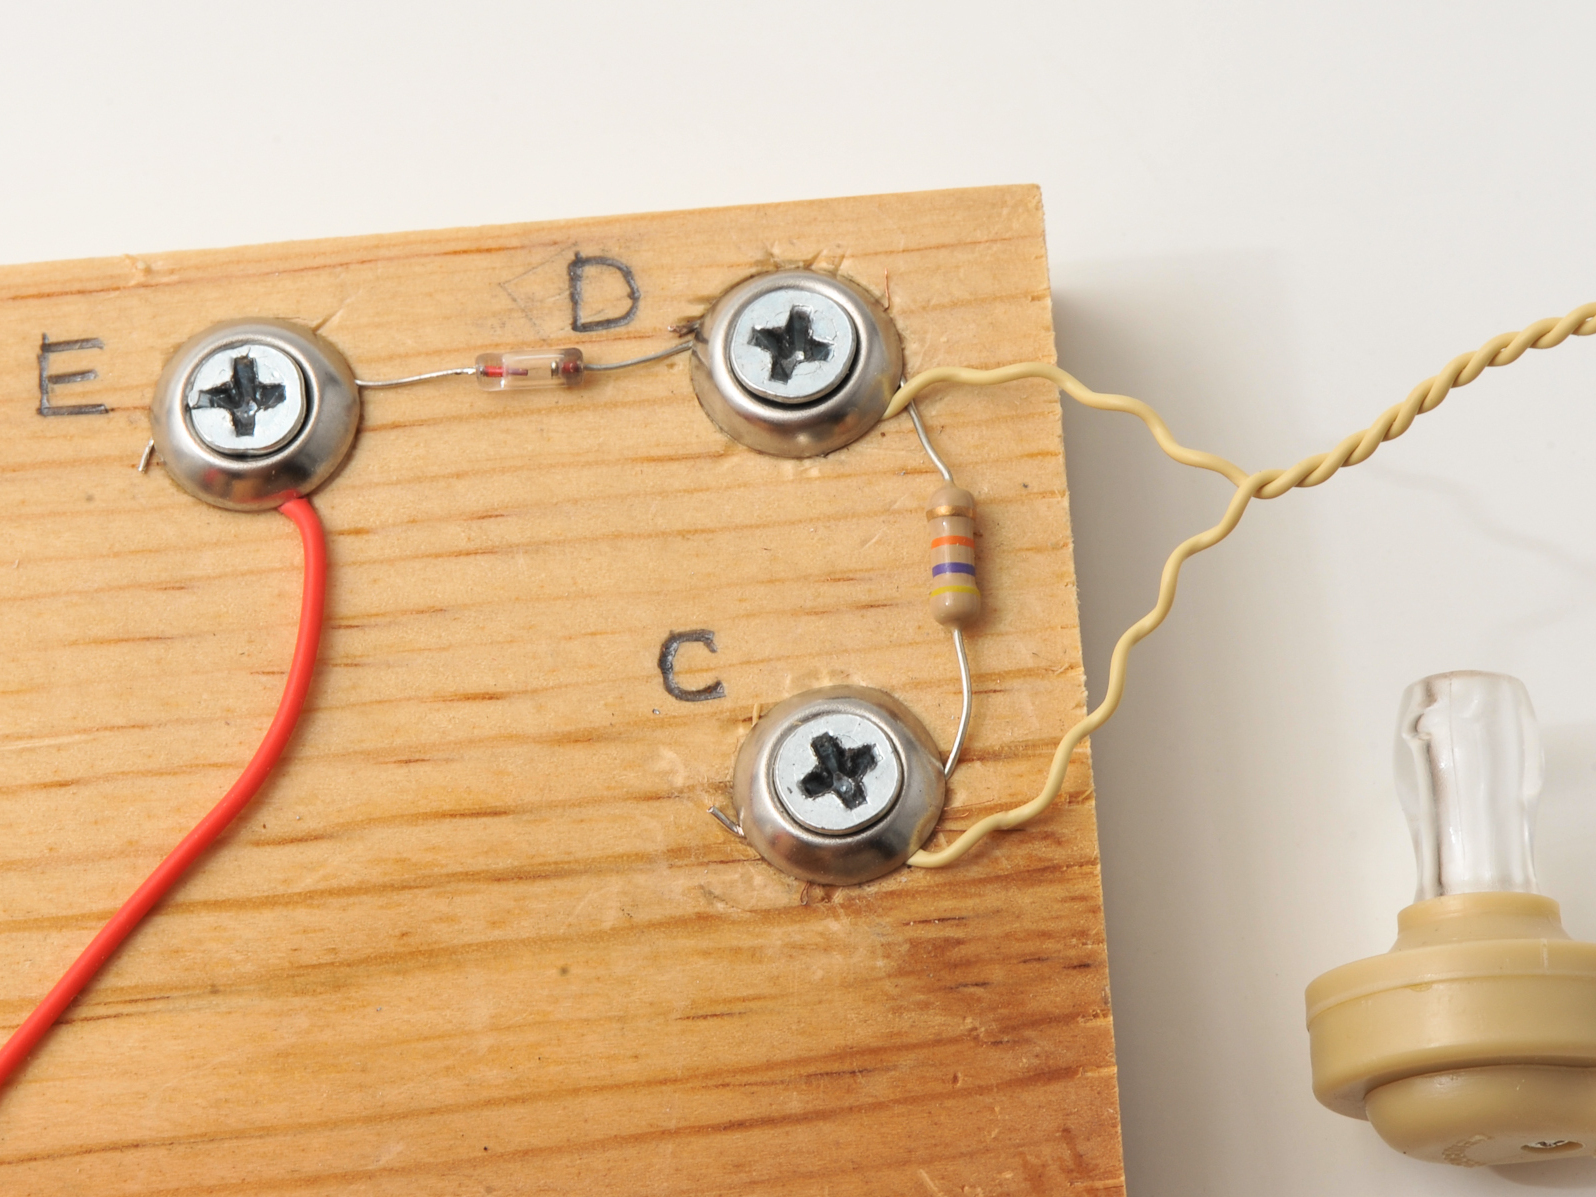
In the picture I’ve placed 5 connection points, labelled A,B,C,D, and E.

In addition, I have created a “wiper” from some coat hanger wire that I cut and bent into shape. Attach some electrical insulating tape to the free end to make tuning a little easier (this is so you can hold and move the wiper without causing interference).

Place the bottle and hook up the top coil lead to A and the bottom coil lead to B. Make sure the wiper is in contact with the sanded-away copper track we created in the first step.

Later, moving the wiper up and down will effect the tuning of the coil.

We will now hook up our diode, capacitor, resistor and earphone as follows: The 150pF cap can either go across A and B, or A and the wiper (I eventually settled on between A and the wiper – see step 3, image 3 for detail). The 47kΩ resistor goes across C and D, as does the earphone. The germanium diode goes acros

Creating an antenna.

You need two things for a crystal radio to work well. One is a good ground connection, and the other is a good antenna (having an AM radio station close by also helps!)

For the ground connection, I’m going to use the copper ground spike I installed for Tesla coiling – you can buy one of these from any hardware store. Alternatively you can use a piece of copper pipe.

Steve’s Top Tip: Connect a hose pipe to one end of the copper pipe, turn on the water, and the pipe will slide into the ground with the minimum of fuss.

For the antenna, connect 24-gauge speaker wire to A. You should put the antenna as high into the air as you can – and try to get it away from any buildings. Additionally, keep it insulated from the ground as much as possible. Here the antenna is run up a wall – but putting it outside will really help.

The antenna will connect to A, and ground to B (I found out you could also simply touch B with your finger to provide ground, once the final two wires are installed).

Finally hook up the following: a single piece of hookup wire (black in my image) from B to C; and if you haven’t already, a wire (red in my image) from the wiper to E.

You’re done! You can now listen to the earphone while tuning the radio by moving the slider (don’t forget to press B with your finger, or have a ground wire installed). The output is quite low, so you’ll have to listen in a quiet room, or hook up the RadioShack mini amplifier for a bigger sound ( if you use the mini-amp, splice a 3.5mm audio cable to connections C & D). This will work, but if it didn’t, do not despair, because next I’ll show a couple of modifications that should help.

Mod #1: Amplified loop antenna

There are two ways to detect a radio signal, either by sensing the electric field with an antenna or by sensing the magnetic field using a loop.

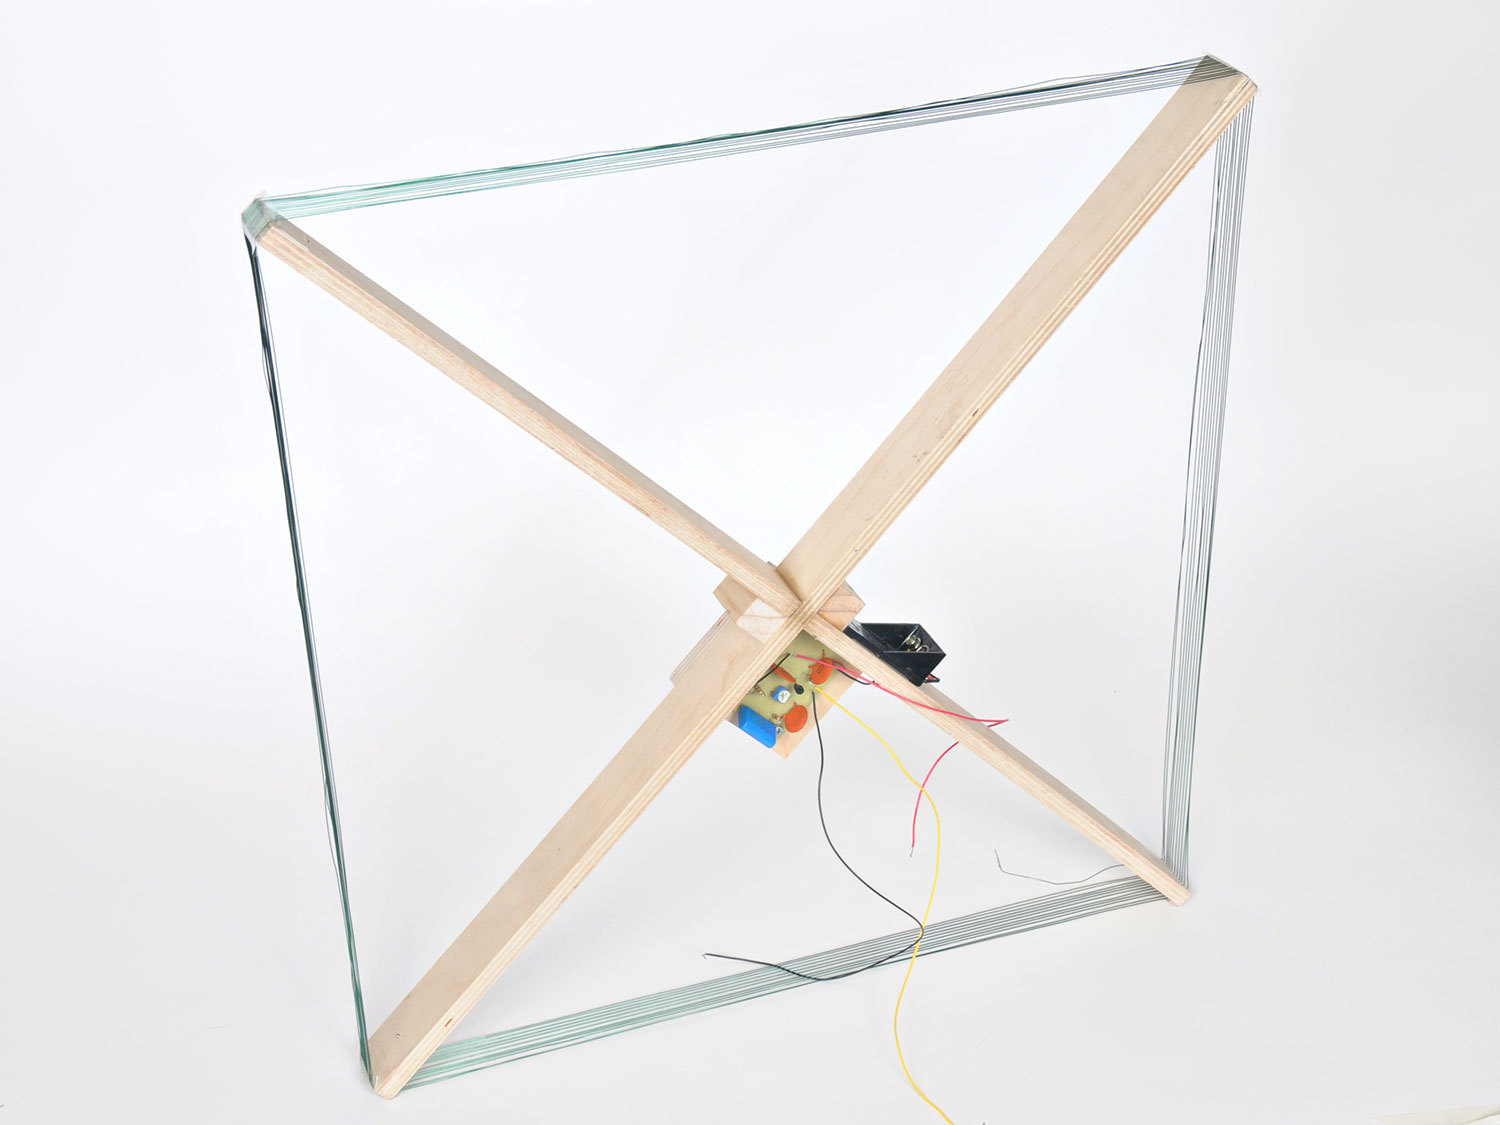
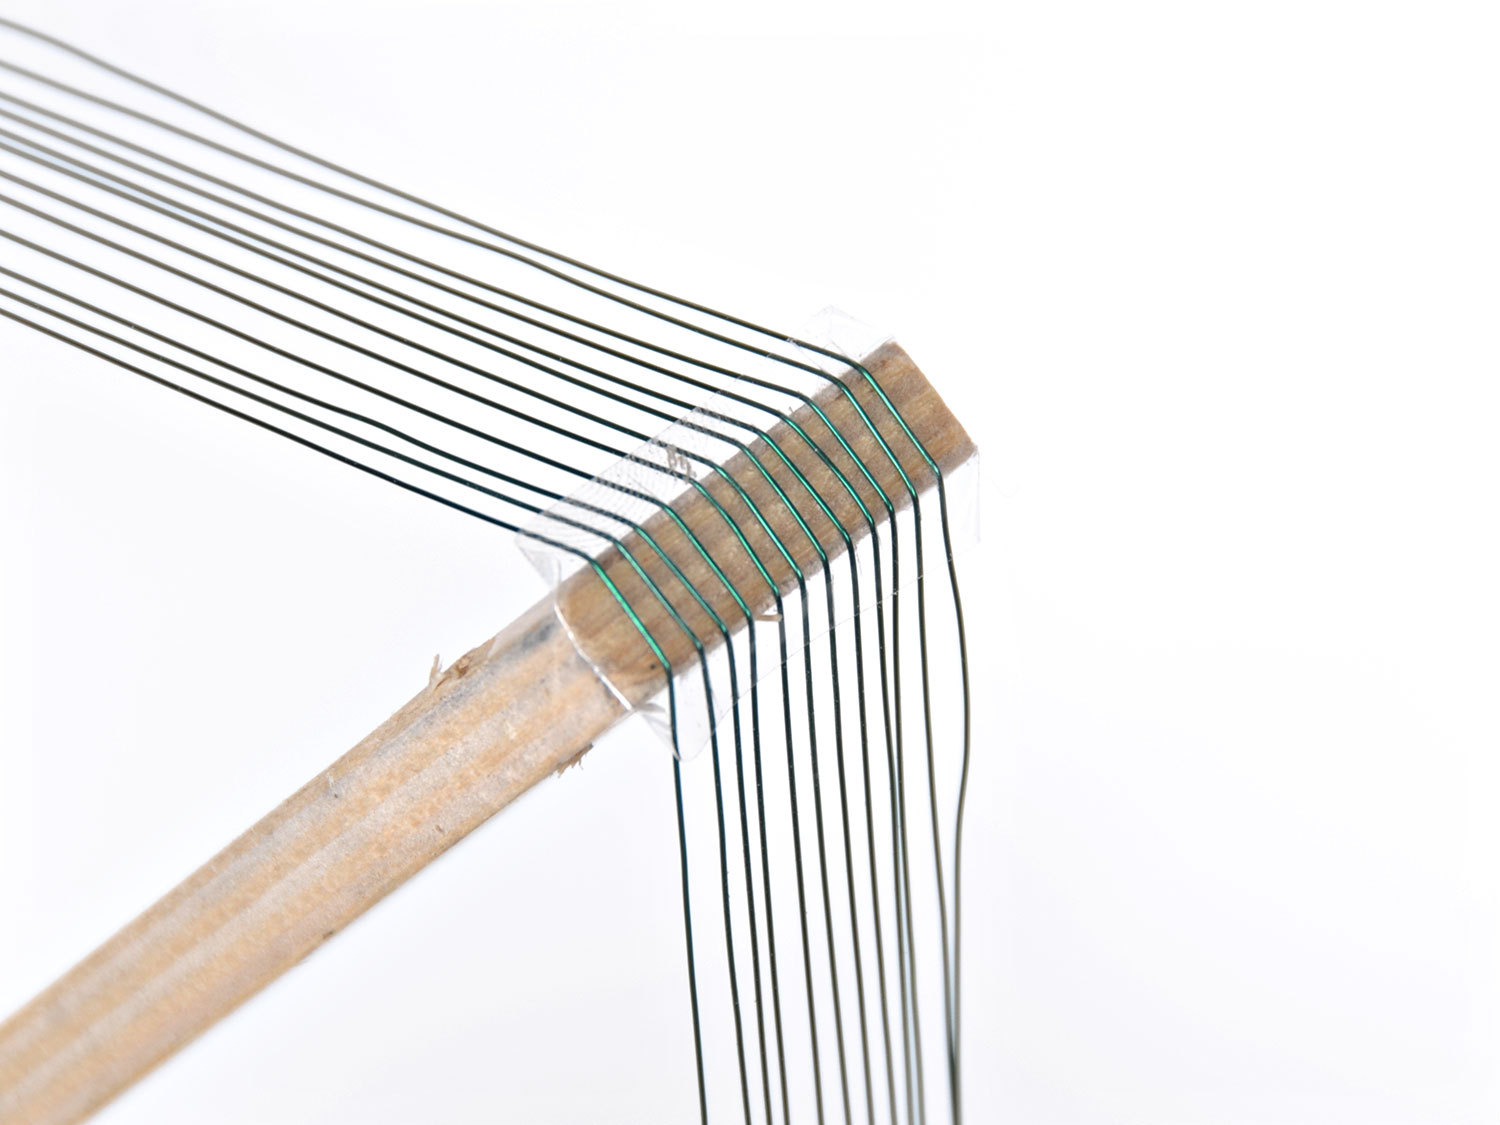
Cut two pieces of plywood and glue them together to make a 2′ X-shape. Then wrap 14-18 turns of wire around the outer corners as shown. This is our loop antenna.

If you can find a variable capacitor from an old radio, or from a radio ham store, even better. This will make a resonant coil. Just wire the capacitor in parallel with the loop antenna you made.

Connect the output of the loop antenna to A and B on our receiver

Still not enough signal? OK, let’s build an amplifier!

Mod #2: RF amplifier.

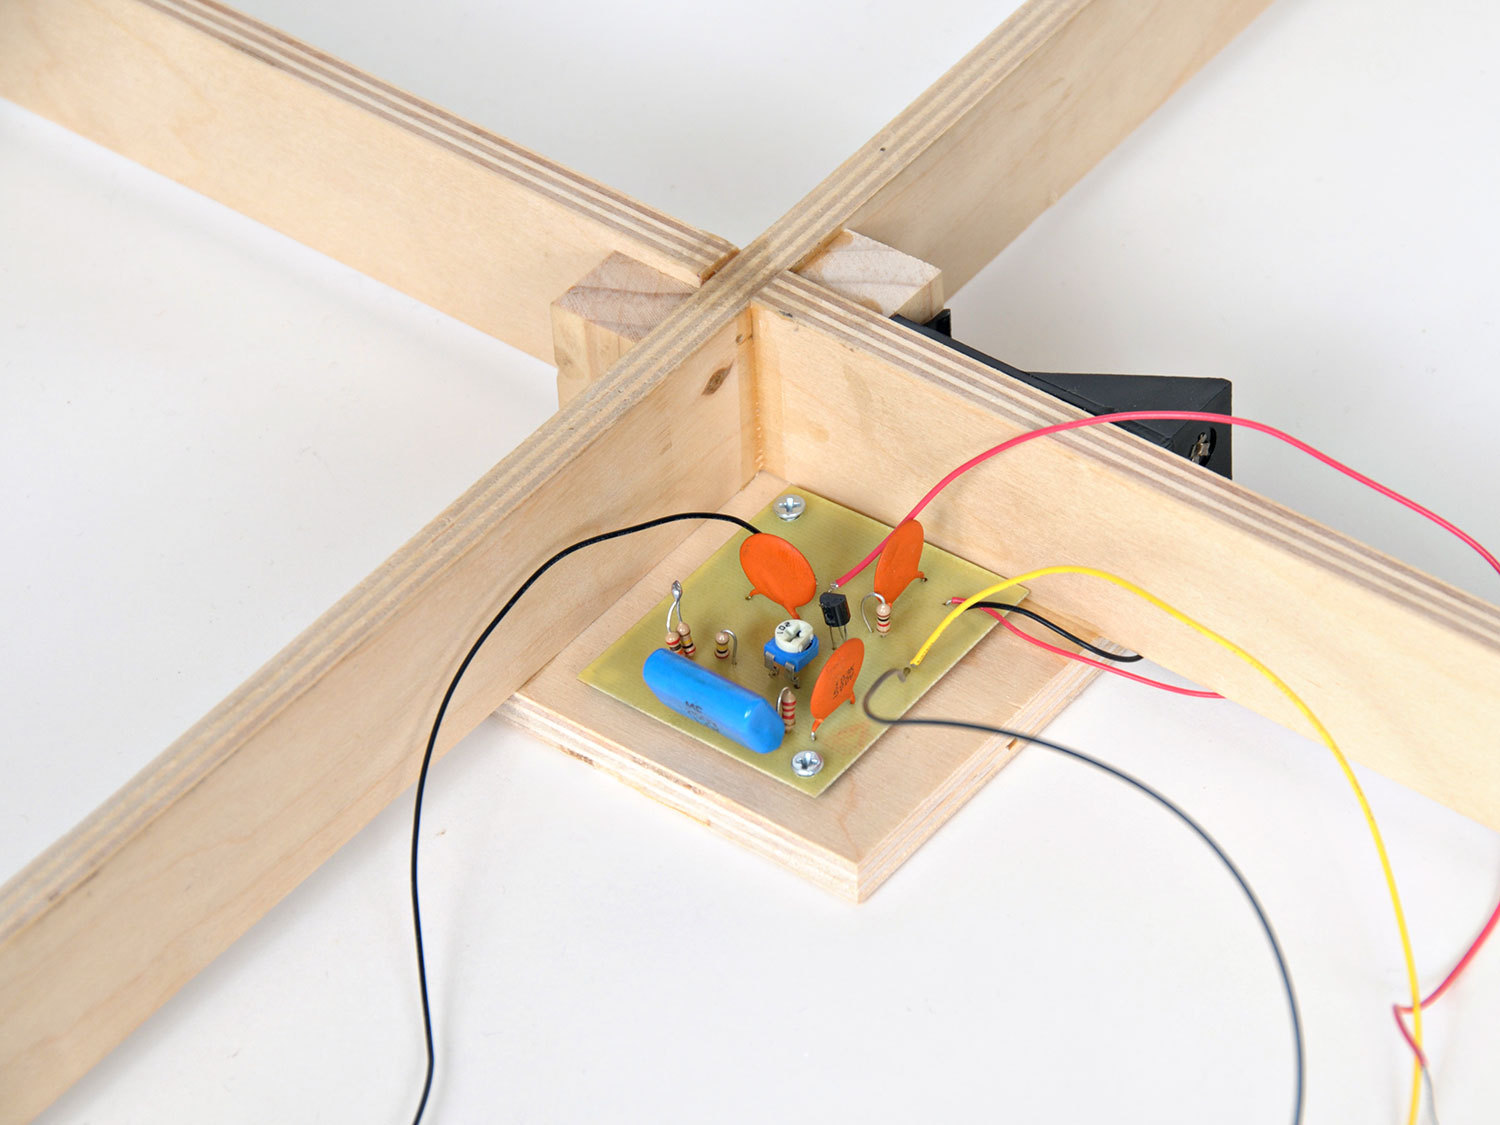
This circuit uses a 9V battery to pull in additional signal for our crystal radio. Unfortunately, it breaks the “no battery” rule, but if you live in an area with low signals, it might be the only option for getting the radio to work.

You can find details on making this amplifier here.

Make up the circuit board using the etch mask as shown and connect the output from our resonant loop antenna to the input, and then connect the output to the A and B terminals on the radio.

Turning the 1KΩ pot will change the bias point of the resistor and help you to amplify just the frequencies we require.

Conclusion

There are actually many ways of making a crystal radio set; this is just one of them. If you can find a 365pF variable capacitor, you can try making a crystal radio like this one, reputed to be an excellent fixed-coil radio.