Isaiah Schroeder and his crew make beautiful and functional cutlery for everyday use by chefs and home cooks who care about quality, working out of a well-outfitted workshop in Madison, Wisconsin. schroederknifeworks.com
Read more about knife making in Make: Vol. 97. Subscribe to Make: for the latest projects.
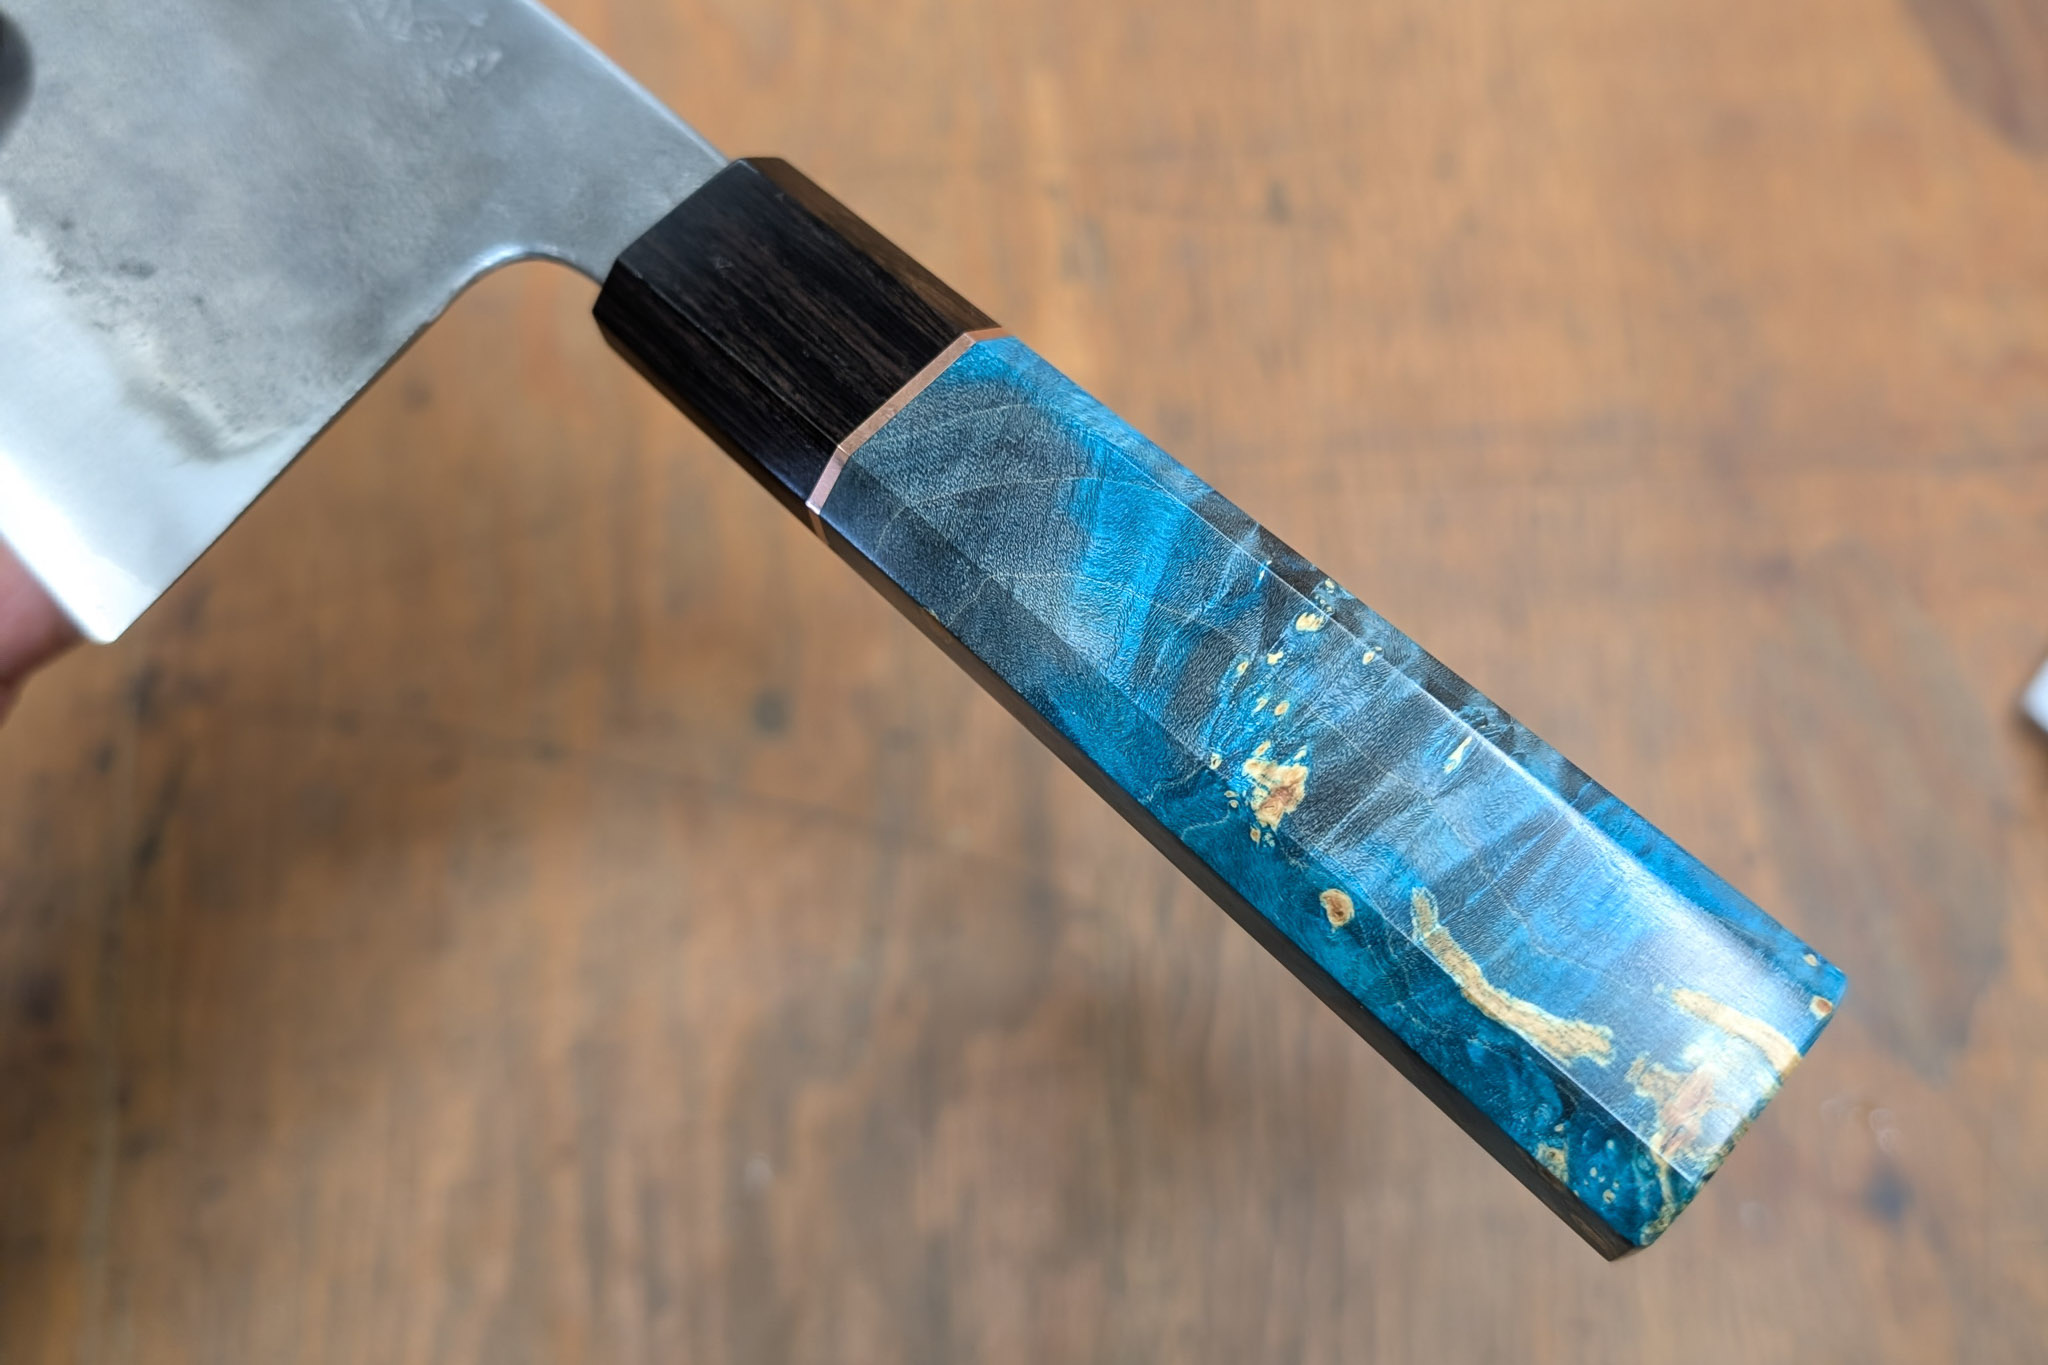
Making a Japanese wa-style octagonal handle as a replacement for an old or worn-out handle, or for a new blade, is a fun project that can change the look and feel of your knife.
This tutorial will show you how to make a three-piece handle with two different woods, but you can use this same construction method and vary the materials and layout for a completely unique result.
I’ve made over a thousand handles this way, some for Japanese blades and some for my own creations, and I’ll share some tips and tricks that can really make a difference.
MaterialsTools
Project Steps
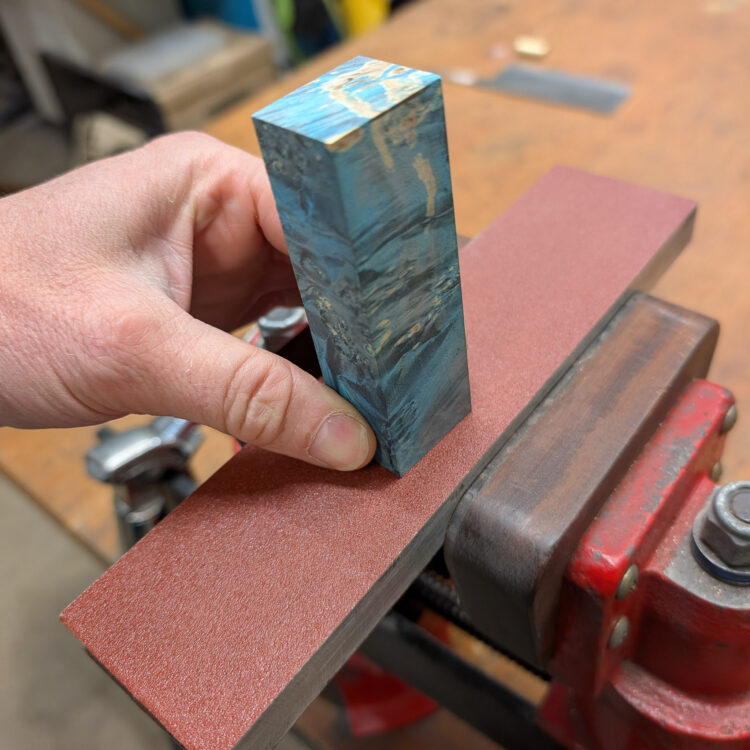
1. Sand Flat Faces
Glue a piece of the 120-grit sandpaper to a flat block, then use that to flatten the faces of the wood blocks that will face each other. Also flatten both sides of the copper spacer. These are your glue joints, so if they’re nice and flat you shouldn’t see any gaps between them in the final product.
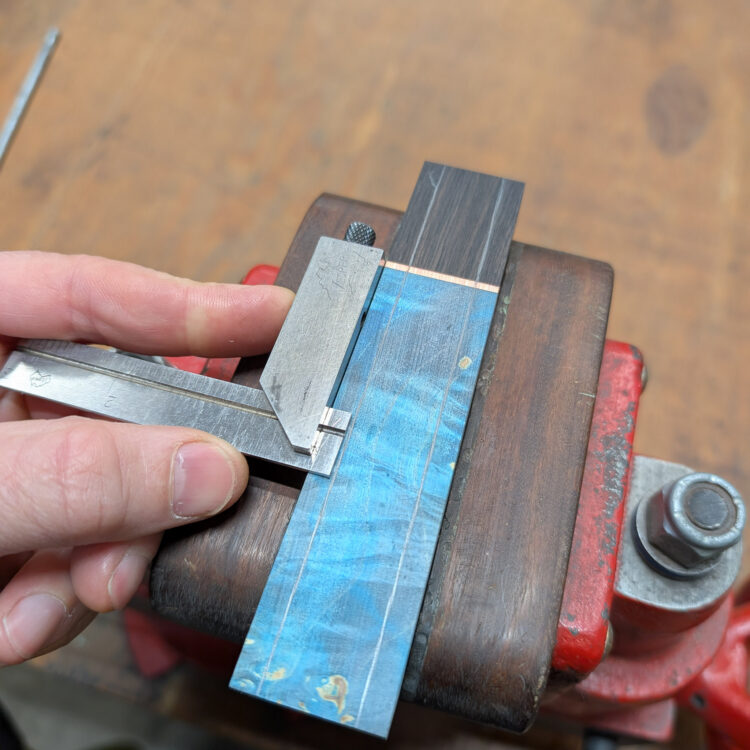
2. Measure and Mark
On all four faces that you just flattened, mark a center point.
3. Drill Holes
Drill the ferrule block all the way through with the ⅛" bit. Then drill partway through the same hole with the ½" bit, leaving 3/16" of material at the bottom of the hole (this will actually be the very top of the handle).
Drill the body block with the ⅛" bit to a depth of about 1". This pilot hole will help the ½" bit remain on center. Now drill the ½" hole to a depth that the tang of your blade will fit when everything is together.
Using the step drill bit, drill the copper spacer up to ½". Don’t press too hard on it, you don’t want to deform the soft copper and have to flatten it again. Deburr the hole after drilling.
This ½" hole is where the brass tube will be glued into place, acting as a tenon to strengthen the handle and hold it together during shaping. It’s also the cavity which will hold the tang of the knife when we mount it to the handle and it will get filled with epoxy during that process.
4. Glue-Up
Test-fit everything together without glue and check it over for gaps or other flaws. If the pieces are a little off center from each other, that’s okay, they’ll get shaped down after the glue cures.
Working quickly, squeeze some of the 5-minute epoxy onto a mixing board and use a stick to mix it up really well according to the package directions. Then spread a liberal amount onto the face and into the hole of the ferrule. Spread some on one half of the brass tube and put that about halfway into the ferrule. Then stack the copper spacer onto the tube.
Next do the same with the body side, and then push everything together.
Put the whole stack into the clamp and lightly tighten it just enough to hold it. Now you can rotate and align the pieces to be as even and centered as possible before tightening the clamp further.
5. Fit Up the Blade
Once the epoxy cures it’s time to fit the blade into the handle. Using your ⅛" pilot hole as the center, mark out a rectangle that is the size of the tang where it meets the handle.
Using the ⅛" drill bit, drill a hole on either side of the pilot hole. By gently moving the bit back and forth while the drill is rotating you can use the side of the bit as a sort of rasp to connect these holes into a slot. Don’t use too much force though, or you can break the bit.
Then using the small rasp, clean up the hole and check the fit on the tang. Take a little time to get a nice tight fit to the tang, so there is as little gap as possible.
6. Shaping
Using either a sanding machine or hand tools, shape the handle so that it’s tapered on four sides and the tang slot is centered. I’m usually only taking off about 1/16” to ⅛” so I mark that around the top and shape it down to that line, leaving the butt end of the handle full size.
After the taper is established, you’re ready to chamfer the corners to create the traditional octagonal wa shape. Mark each corner with parallel lines about 3/16" from the edge. These lines are your guide for cutting in the corners, which can be done with a coarse file or rasp, or with a power sander. If you’re using a power sander I recommend making a jig to hold the handle at a 45° angle to make the shaping easy. The goal is to have all the corners be the same size so everything looks even.
This slideshow requires JavaScript.
7. Sanding and Polishing
To really make the handle look good, you’ll do a careful sanding up to 1000 grit. Starting with 220 grit, go around and sand each face at an angle. Switch to 400 grit and sand again at a perpendicular angle. Finally, use the 1000 grit paper and sand lengthwise, along the length of the handle. When you alternate the scratch pattern like this, it makes it easy to see if you’ve missed any scratches from the previous grit.
Also break the corners on the top and bottom of the handle, and sand them at the same time as everything else.
Now comes the best part! After sanding to 1000 grit, a final buffing using a cloth wheel and fine buffing compound reveals the true color and shine of the beautiful wood.
8. Installation
To install the handle onto the blade you’ll fill the cavity of the handle with epoxy then sink the tang of the blade into it and hold it until it cures. Be sure to do a test fit beforehand and make sure you have everything in place; 5-minute epoxy doesn’t give you a lot of time but it means you don’t have to hold the blade in place for a long time before it sets up.
There will be epoxy that squeezes out from the handle so I apply a liberal coat of paste wax to the handle and the blade beforehand, any squeeze-out or errant epoxy fingerprints will just peel right off once it’s cured.
The mixing nozzle makes things easier to get the epoxy into the handle through the narrow tang slot. I like to use a flashlight to see into the handle so I know it’s getting all the way to the bottom.
Insert the tang all the way and make sure the blade is straight. While the epoxy is curing be sure to keep checking the blade alignment; if it sets up wonky it’s pretty hard to correct later. (If you’re nervous about a 5-minute set time, you can use an epoxy with a longer set time and find a way to secure the blade in position without you having to hold it.)
There is a point at which the epoxy has cured enough to solidify but it’s not rock-solid yet, it’s still a little flexible. That’s when I like to peel off the drips and clean up the squeeze-out on the top of the handle.
The last thing to do is just to wipe off the excess wax with a clean rag.
Conclusion
Now you have a shiny new wa handle for your knife! To keep it looking nice I recommend an occasional application of the paste wax and buffing with a clean cloth.
Photography by Isaiah Schroeder. Read more about knife making in Make: Volume 97
Isaiah Schroeder and his crew make beautiful and functional cutlery for everyday use by chefs and home cooks who care about quality, working out of a well-outfitted workshop in Madison, Wisconsin. schroederknifeworks.com