

Additional Materials Required:
- The Press Feet
- 1/4″ to 1/2″ Bushing (2)
- 1/2″ NPTM to 1/2″ NPTF Elbow (2)
- 1/2″ Hex Nipple (2)
- 1/2″ Quick Coupler Set (1)
- 3/4″ Galvanized Nuts (2)
- 3/4″ Steel Nuts (1)
Prep the main cylinder on your Compressed Earth Brick Press.
Additional Materials Required:
Thread tape is necessary between each connection. Always wrap thread tape clockwise when facing the threaded portion.
You will need to make 2 of these, one with male quick couplers and one with a female.
Put the hex nipple in the vise and tighten the quick coupler onto it. Put the elbow in the vise, male side up, and tighten the bushing onto it.
Rotate the elbow in the vise and tighten the quick coupler/ nipple onto it.
Remove the plugs on the cylinder.
The Prince brand cylinder uses a really large allen wrench for their plugs. If you can’t find one, you can make one like we did.
Make sure the ports are facing up as there might be fluid in the cylinder and you don’t want it to leak.
Tighten the coupler assembly into the holes, so that when the cylinder is lying on its side, niether one will hit the table.
Expand the cylinder so the shaft is fully extended, using a hydraulic pump.
Weld a 3.5″ piece of 1.5″ DOM roundstock inside of the tubing at the end of the shaft
Take care that the top of the shaft doesn’t get hot; there is a rubber seal between that and the cylinder that will melt and cause leaking if you’re not careful. If it starts getting warm, dunk the shaft in water to cool it down.
Stand the cylinder up vertically and prop it up using some sort stand so it is as close to square vertically as possible. Another option is to support it using some sort of rope.
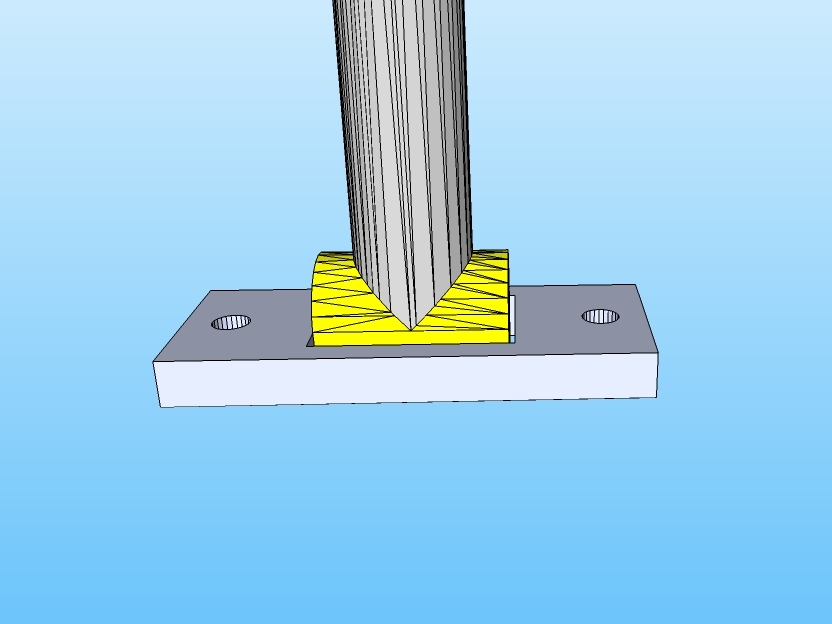
Place the tubing at the end of the shaft inside of the hole in the lower press foot.
Insure the cylinder is square to the plate in all directions. See video.
Since there is a lip on the cylinder, its hard to tell if it’s square unless you use two squares, one on the lip and against the other one which rests on the table.
Tack the lower press foot from all accessible dimensions.
Insure the cylinder is still square with it, if not, remove the tacks and fix it.
Weld the two together on the top. There will need to be at least 2 layers of weld.
Warning: Dunk this frequently, even if the shaft is not getting hot! The plate will warp upwards and cause you lots of woe if you do not.
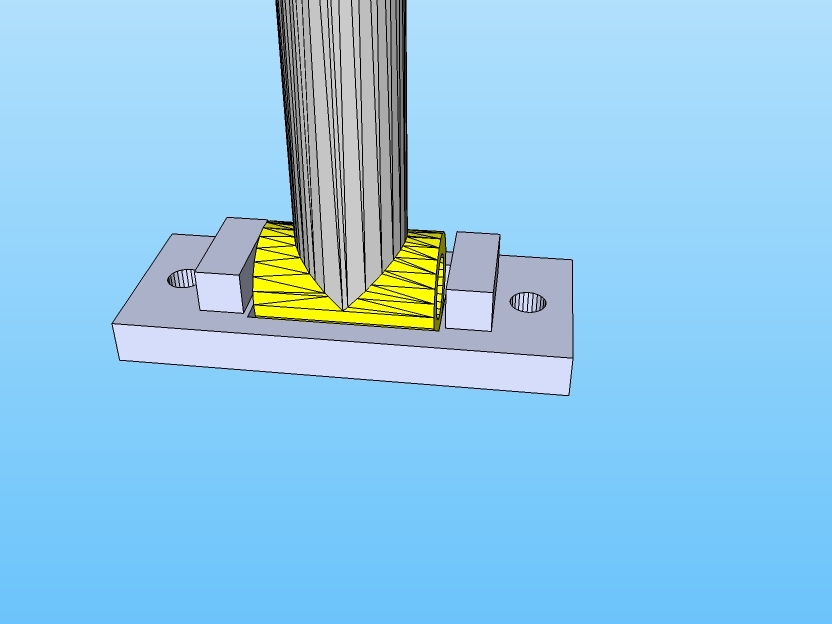
Weld the press foot support pieces as close as you can to the tubing and the press plate.
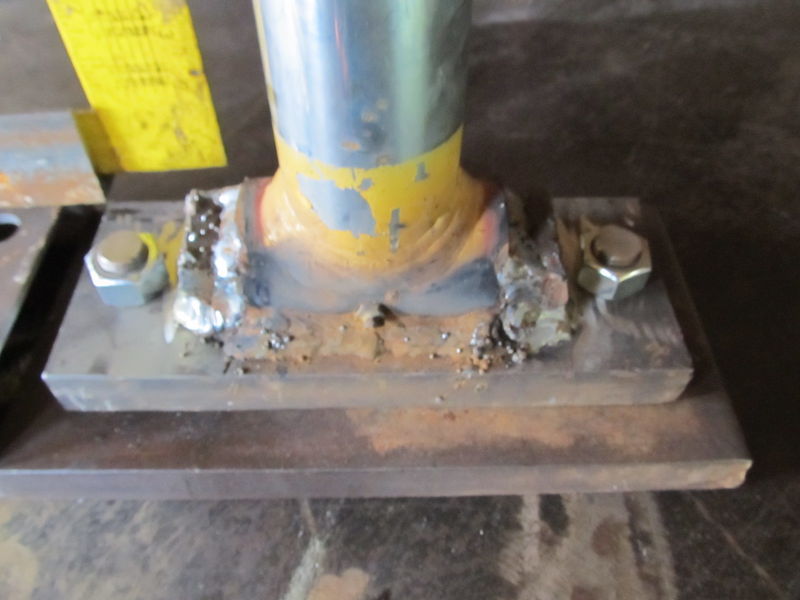
Lower the cylinder and flip it upside down.
Fill in the bottom side of it with welds.
This will require many layers of welds and many dunks to cool it.
Grind it flush with the rest of the plate. A few spots where the welds are below the surface is OK, but the majority of the surface should be level.
Put the upper press foot into the lower one and tighten nuts onto the threaded rod.
Stand the cylinder up again and insure the press plate is still square with the cylinder. See video.
If its not, you’ll need to add shims between the two press plates until they are square with the cylinder.
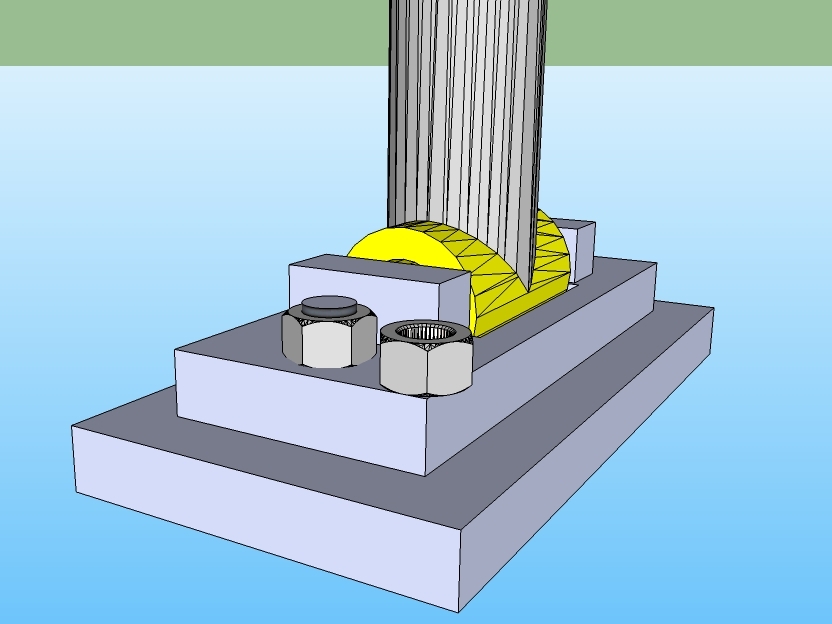
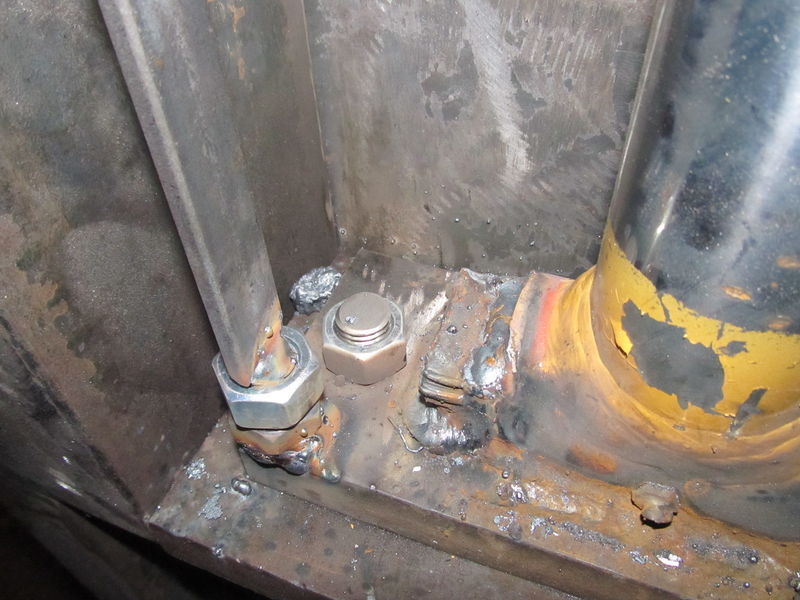
Weld the nut in the corner of the lower press plate, as shown. This should be on the opposite side of the ports of the cylinder, flush with the press foot, and as near to the corner as you can get it. It can even hang off a bit.
Make sure you protect the threads.


