I wanted to make a night light with LEDs encased in resin that required no soldering — I can solder but I don’t really like to. The project turned out to be one of my favorites, and beyond being a little tweaky getting all of the LEDs set, it’s simple. The power comes from 2 coin batteries, so there’s no risk of shock. And the finished product is a glossy, atmospheric light with a soft glow that looks great between my Martian lunch box and little plastic dudes landing on the moon.

Project Steps

Make a template.

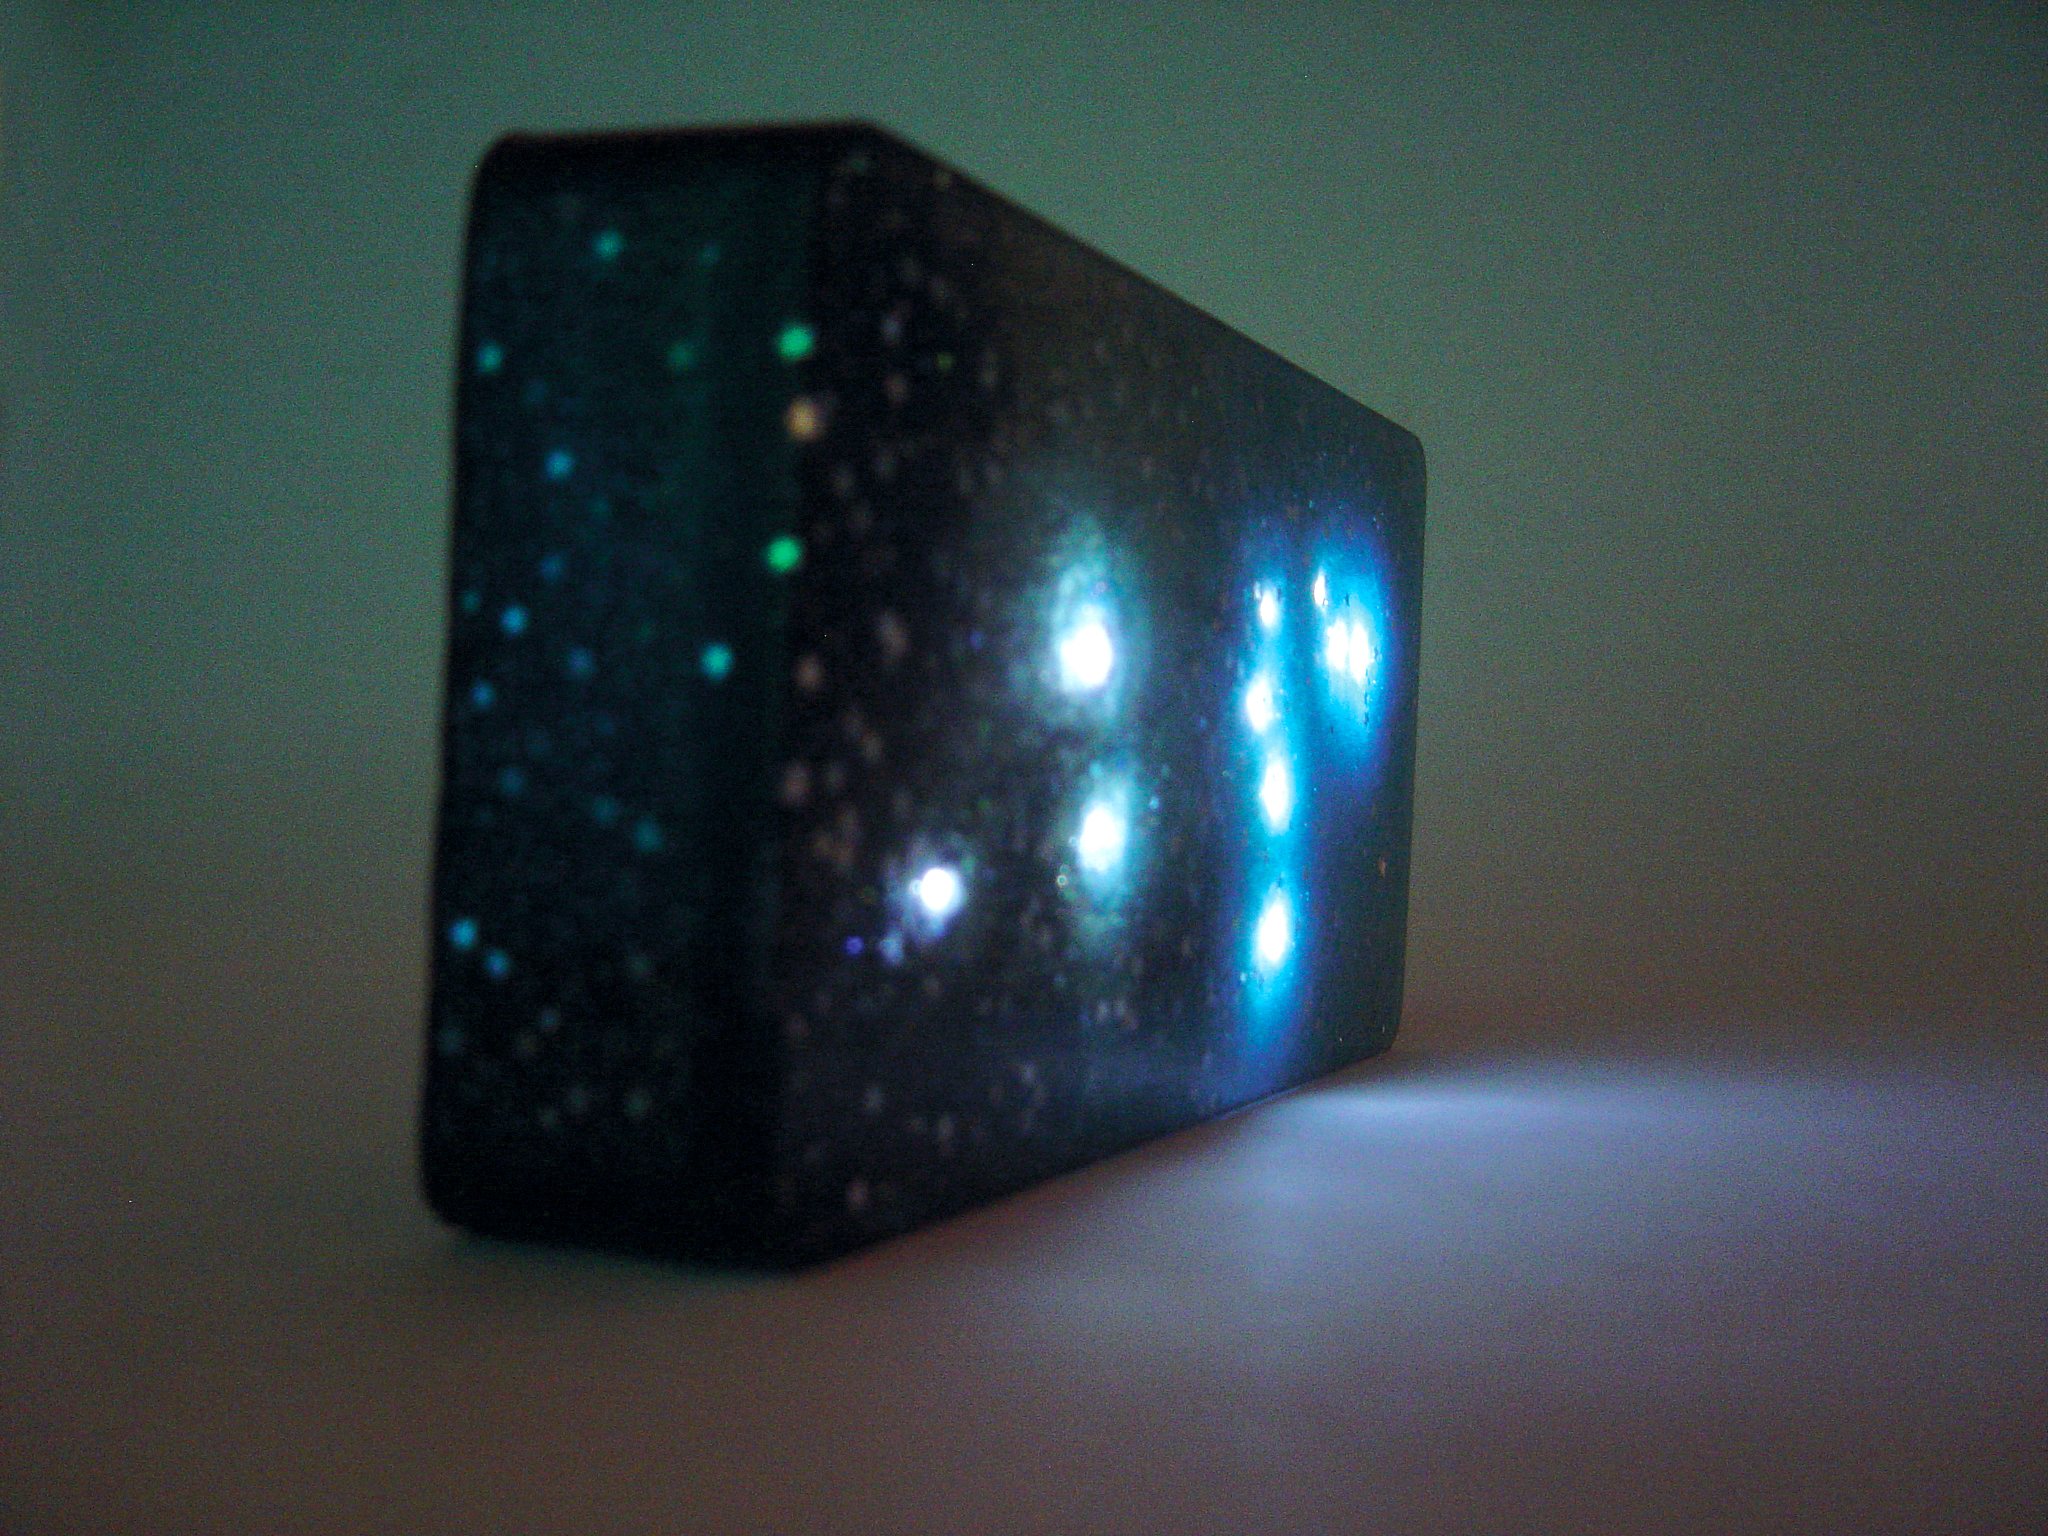
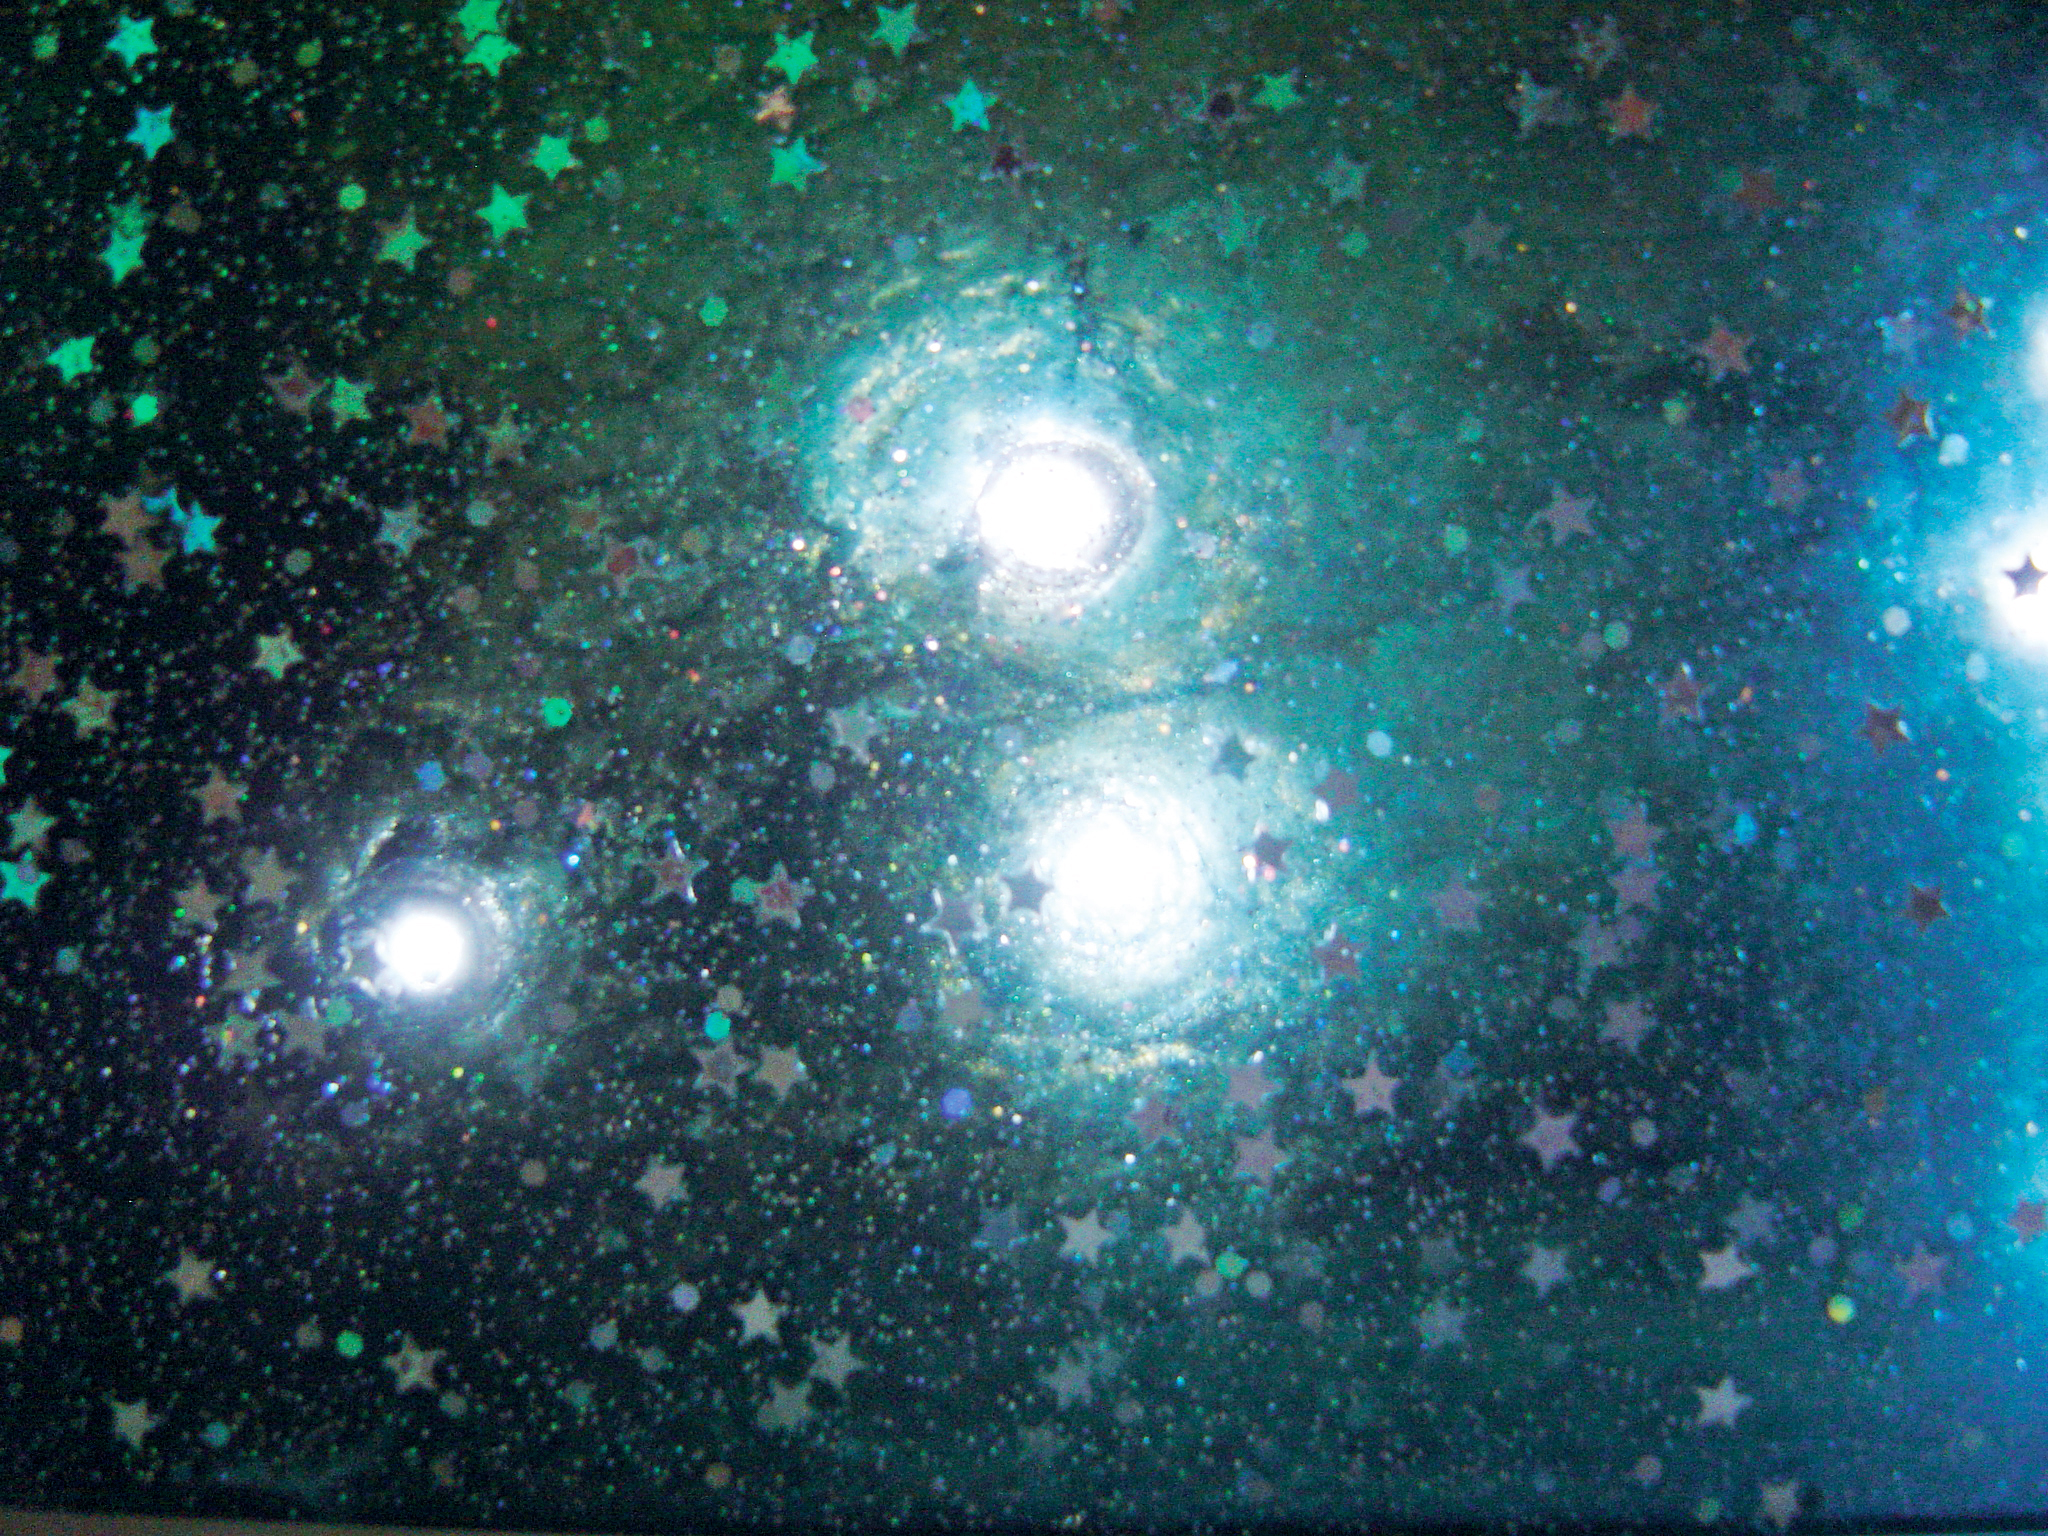
First you’ll need to choose a pattern for the LEDs, like a constellation. Most people would choose the Big or Little Dipper, so I went with Leo — it’s the best, and it nicely fit the dimensions of the mold I had chosen. You can search online for a star chart, use my pattern, or just make one up.

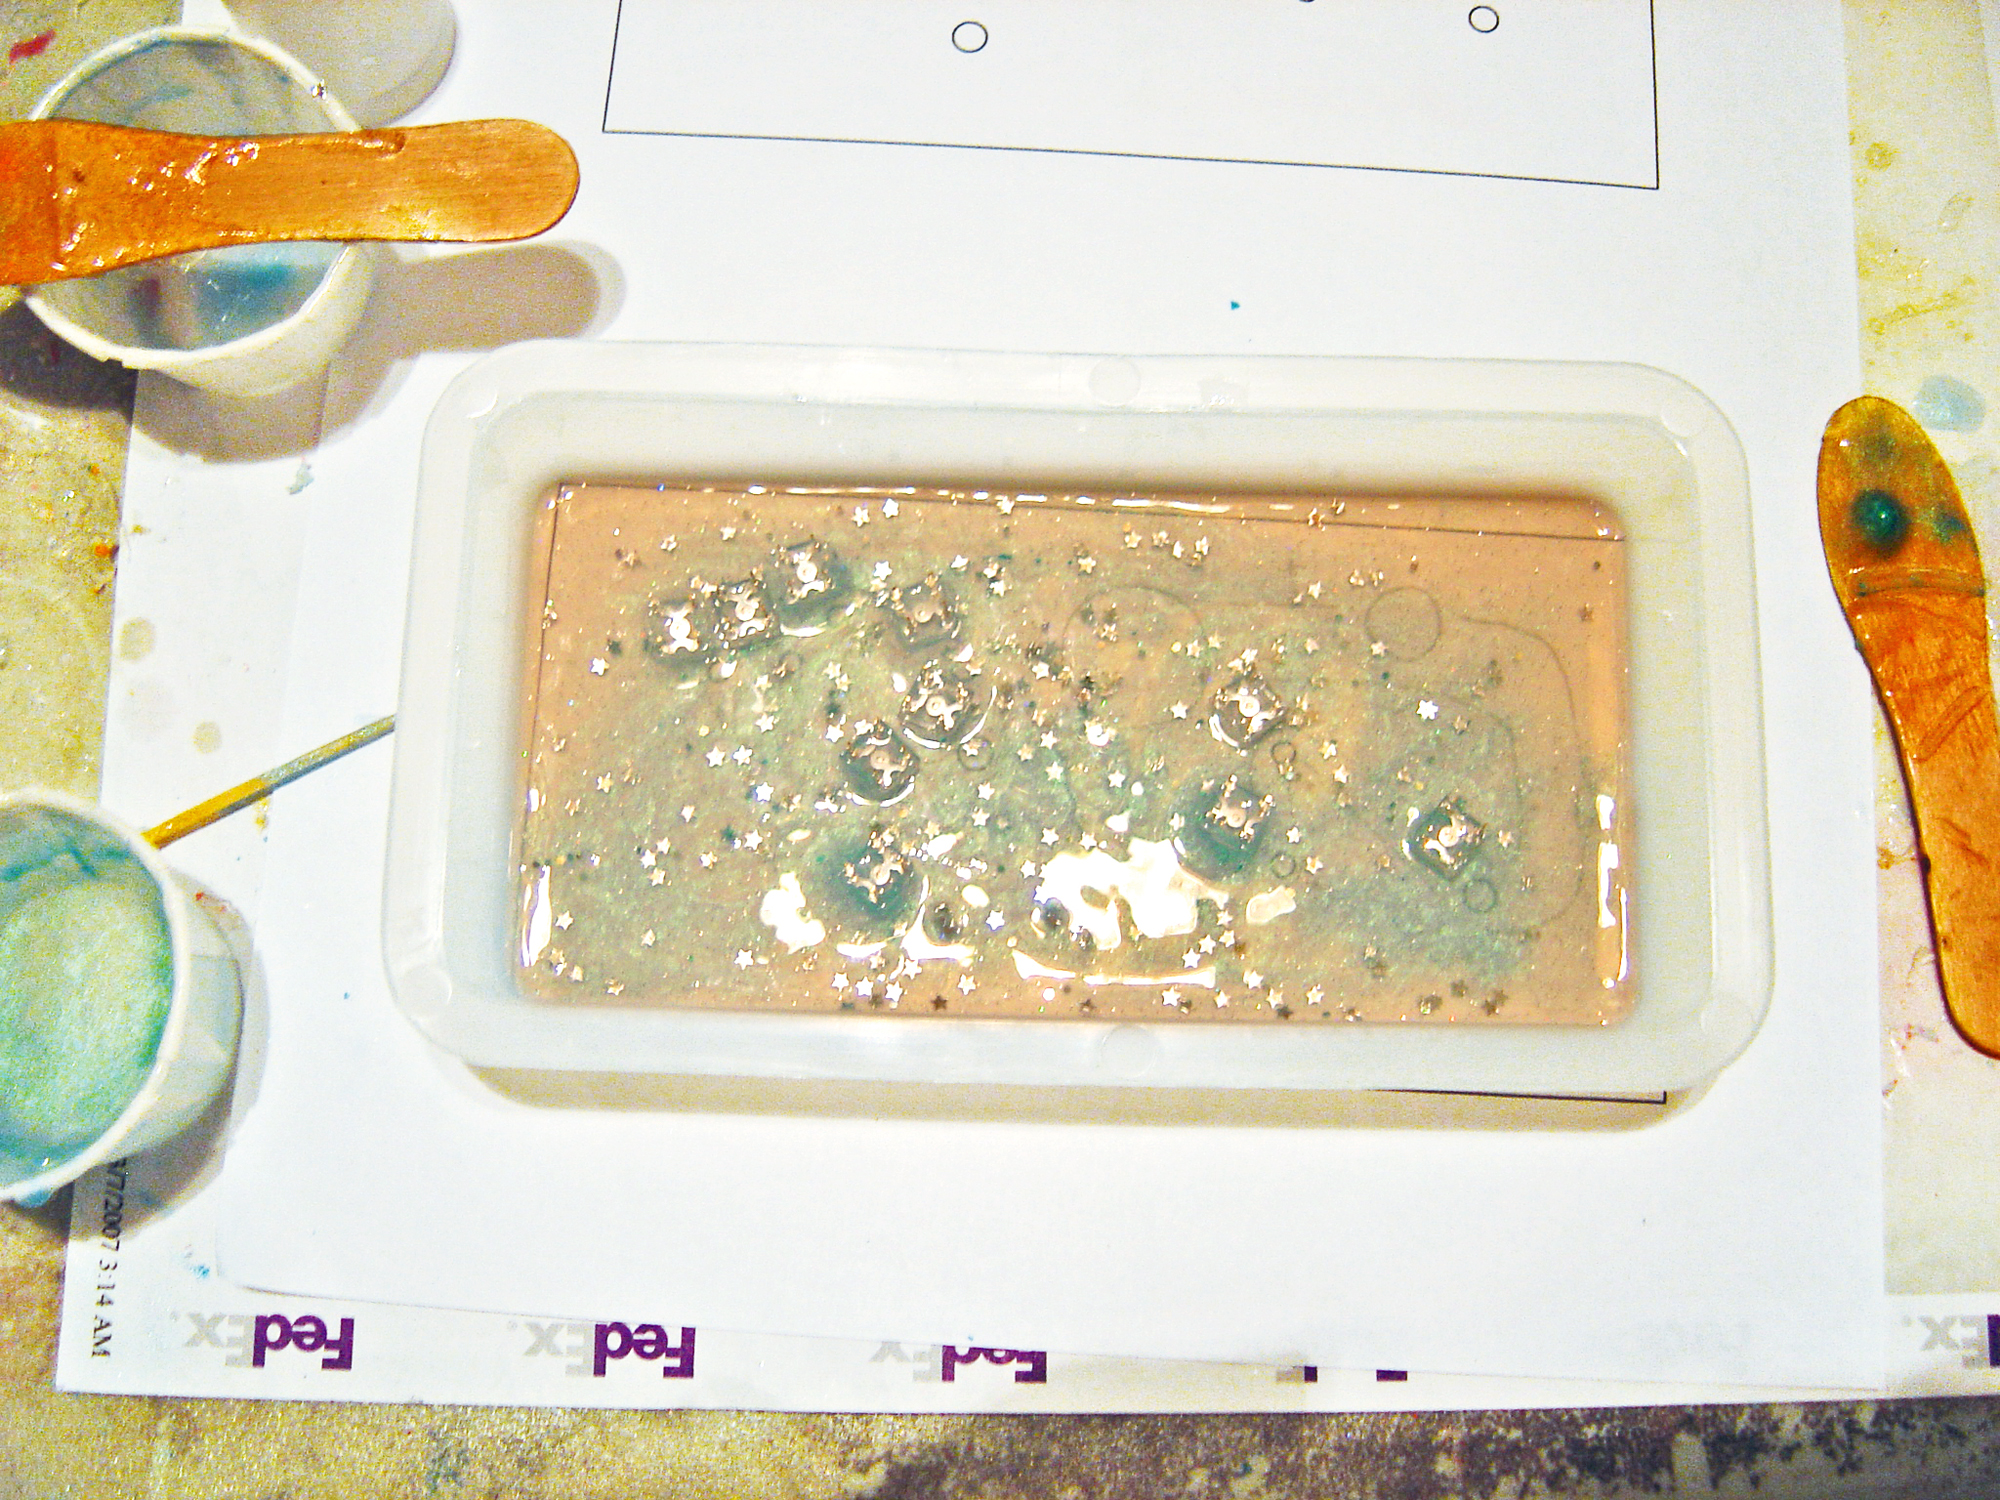
To turn your pattern into a template, import it into a graphics program (I used Illustrator) and resize it to fit your mold, leaving a ¼” margin around the outside. Draw a small circle where each LED will be placed. Then draw 2 connect-the-dots lines that touch each LED on opposite sides, one for positive and the other for negative, making sure the lines never cross.

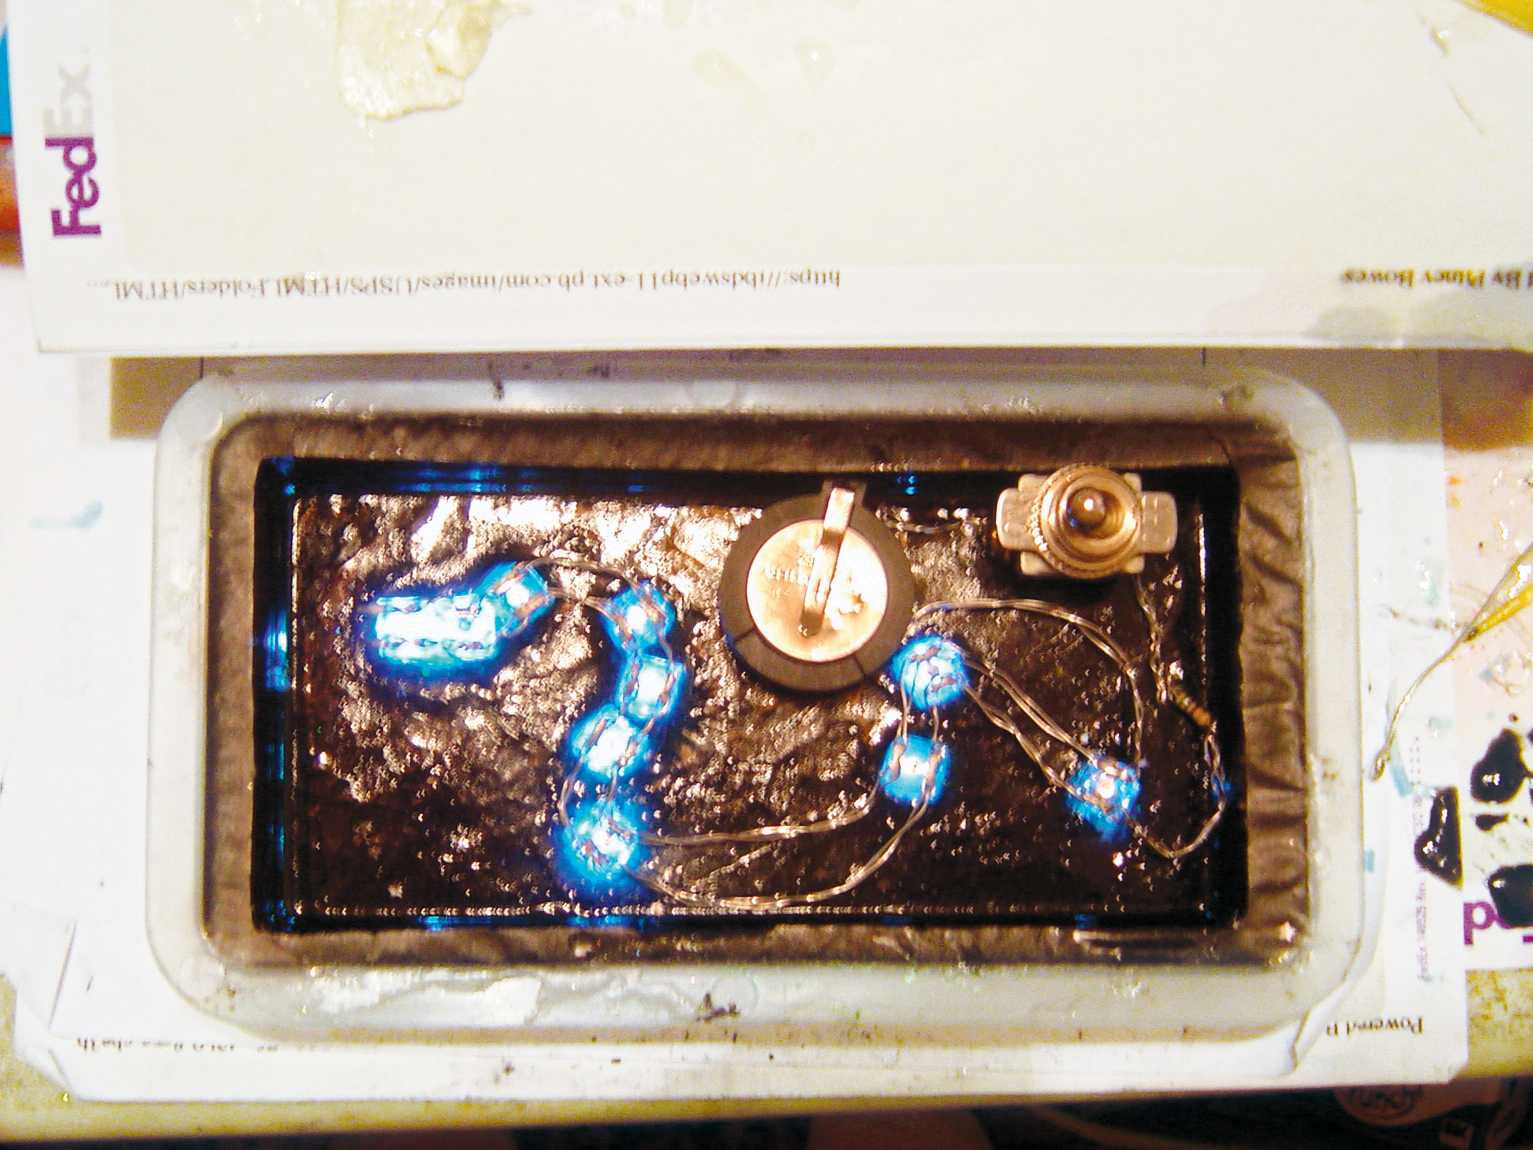
In an empty space, draw a 1″ circle for the battery pack, another circle to fit the switch (mine was ¾”) and a small rectangle for the resistor. Draw more lines and adjust positions to complete the circuit: the positive side connects to the positive battery terminal through the resistor and switch, and the negative side goes directly to the negative battery terminal. Place the switch where it will be easy to reach, and orient the battery holder to make it easy to change batteries. Make all lines thick and dark so they clearly show through your first layers of resin.

Finally, draw your mold’s outline (3″×6″ rectangle) around your pattern, flip the image (since you’ll be using your template from the back), and print it out. I made 2 copies, with an extra one to refer to and make notes on. You can download my template at makezine.com/14/cosmic.

WARNING : Resin and epoxy are toxic, dangerous, and can damage many surfaces. Use only in a well-ventilated area, on a well-protected surface, and away from kids and pets. Read and heed all product safety warnings.

Cast the face layers.

You’ll start at the face of the light and the bottom of the mold. Follow the instructions to mix up about ½oz of clear resin, and add glitter or other cosmic debris if you like. Catalyze it, pour into the mold, and tip the mold so resin covers the bottom and gets up onto the sides a bit. Let it harden completely.

I added a second layer of blue/green/yellow/pearly colored haze — don’t do this if you want the LEDs to appear as sharp points of light. For the haze layer, mix another ¹/³oz–½oz of clear resin, add glitter, and pour to cover the first layer. Add a drop of dye and swirl it with a toothpick. Add drops of different-colored dyes and swirl just until you like how it looks, then leave it alone until it’s hardened. Mixing too much loses the effect. If you mess up, pour it out and try again. The reason you mix colors in this second layer instead of the first is that the toothpick can leave permanent marks on the mold.

Test and attach the LEDs.

Load the batteries into the holder, attach alligator leads, and use them to test the polarity of each LED; it will light when you connect the positive voltage to the LED’s positive side and negative voltage to the negative side. Mark the polarity for each. An LED’s negative side is usually marked, but you should test them all anyway because you’d be bummed to make this project and then have the lights not work.

Now you’ll glue the LEDs, which are round on top, upside down to a flat surface. This takes patience.

Set the mold on top of the template and mix up some clear epoxy adhesive. Put a drop at each LED location and sink an LED into it, top down and oriented for wiring. You’ll want a “cocoon” of epoxy around each bulb to let its light shine through to the front. The LED will probably tip over, so use a toothpick to lift it back upright. You may have to lift LEDs back up about 3 million times before they’re all set, but the epoxy should gel in about 5 minutes. Skipping the glue step and trying to set all the LEDs in a new layer of resin would give you very little time to fix the fallen ones.

Seal the LEDs.

Mix another ½oz of resin and dye it very black — the more opaque, the better. Pour small amounts in between the LEDs and let it spread. Then fill the mold up to a level that’s just even with but not above the plastic backs of the LEDs. This layer hides the wires, switches, and batteries from the front. Again, let this layer harden like you mean it at least overnight, and until it clicks when tapped.

Build up the sides.

Now we’ll build up the walls of the night light by pouring resin into the mold sideways. I’ve been working on this method for a while, and it lets you make a wide range of resin enclosures without having to use a 2-part mold.

Cut 2 strips of cardboard 1½” by 6½”–7″. Stack and tape them together with masking tape, then wrap and tape waxed paper around the cardboard so that 1 side is smooth waxed paper with no tape.

Lay the mold on 1 long side with its rim hanging over the edge of a box or table. Use spring clamps to clip the cardboard strip to the rim, smooth side in, to enclose the low side of the mold. I used 3 clips along the bottom and 1 on each side. The waxed paper should form a seal against the lip of the mold, and resin is viscous, so trust me, it’ll hold.

Set the mold up over newspaper and run tape over the top to keep it from falling over. Mix up ½oz of black resin with optional glitter and pour it over the cardboard into the side of the mold, about ¼” thick. Let it harden, then unclip and peel back the strip, and repeat for the other 3 sides. I used ½oz of resin for each long side and ¼oz for each short side.

Wire it up.

Cut a 3′ piece of 24-gauge wire, fold it in half, and hook it over the positive prong of the LED farthest from the battery (check your template). Wind the wire between the LEDs in overlapping figure-eights until you’ve connected all the positive prongs, then bend the prongs over the wire with pliers, squeezing tight. Repeat this process with the negative prongs. If an LED pops out, push it back in, finish wiring, and reglue it. Make sure the clear epoxy seals all the way around, or else black resin can seep in later and obscure the light.

At the end of the positive line, cut the wires off 1″–2″ beyond the last LED and twist the ends with 1 end of the resistor. Place the switch and battery holder where you want them, and twist-connect the rest of the circuit with more wire: resistor to switch, switch to battery (+), and battery (–) to negative line. Trim any excess wire. You can super-glue loose connections to hold them until the final cast.

Carefully flip the switch on, and make sure all the LEDs light up. Fix any that don’t.

Mix more epoxy adhesive and put a dollop over every LED. Keep the LEDs on and watch them while the epoxy sets; sometimes epoxy will slide between wires and take out a connection, but then you can turn the light back on by pushing with pliers or a toothpick. Again, make sure it’s all really, really dry.

Pour the last layer of resin.

Mix up ½oz or more of dyed black resin and pour it into the mold to cover the LEDs and fill in under the switch and battery holder. Make sure you don’t pour in so much that you disable the switch or make it impossible to remove the batteries. Let it harden.

Unmold, turn on, and admire.

Carefully pull away the sides of the mold and flex it until your light pops out. Handle it gently; even after the resin seems hard, it can take a few days to set completely. You might lightly sand the resin walls in back, but otherwise your light is done. You can also cover the back with felt, secured by glue or velcro. Enjoy your new cosmic night light!

Conclusion

This project first appeared in MAKE Volume 14, page 70.